Adorable Crochet Broccoli Amigurumi Pattern: A Step-by-Step Tutorial
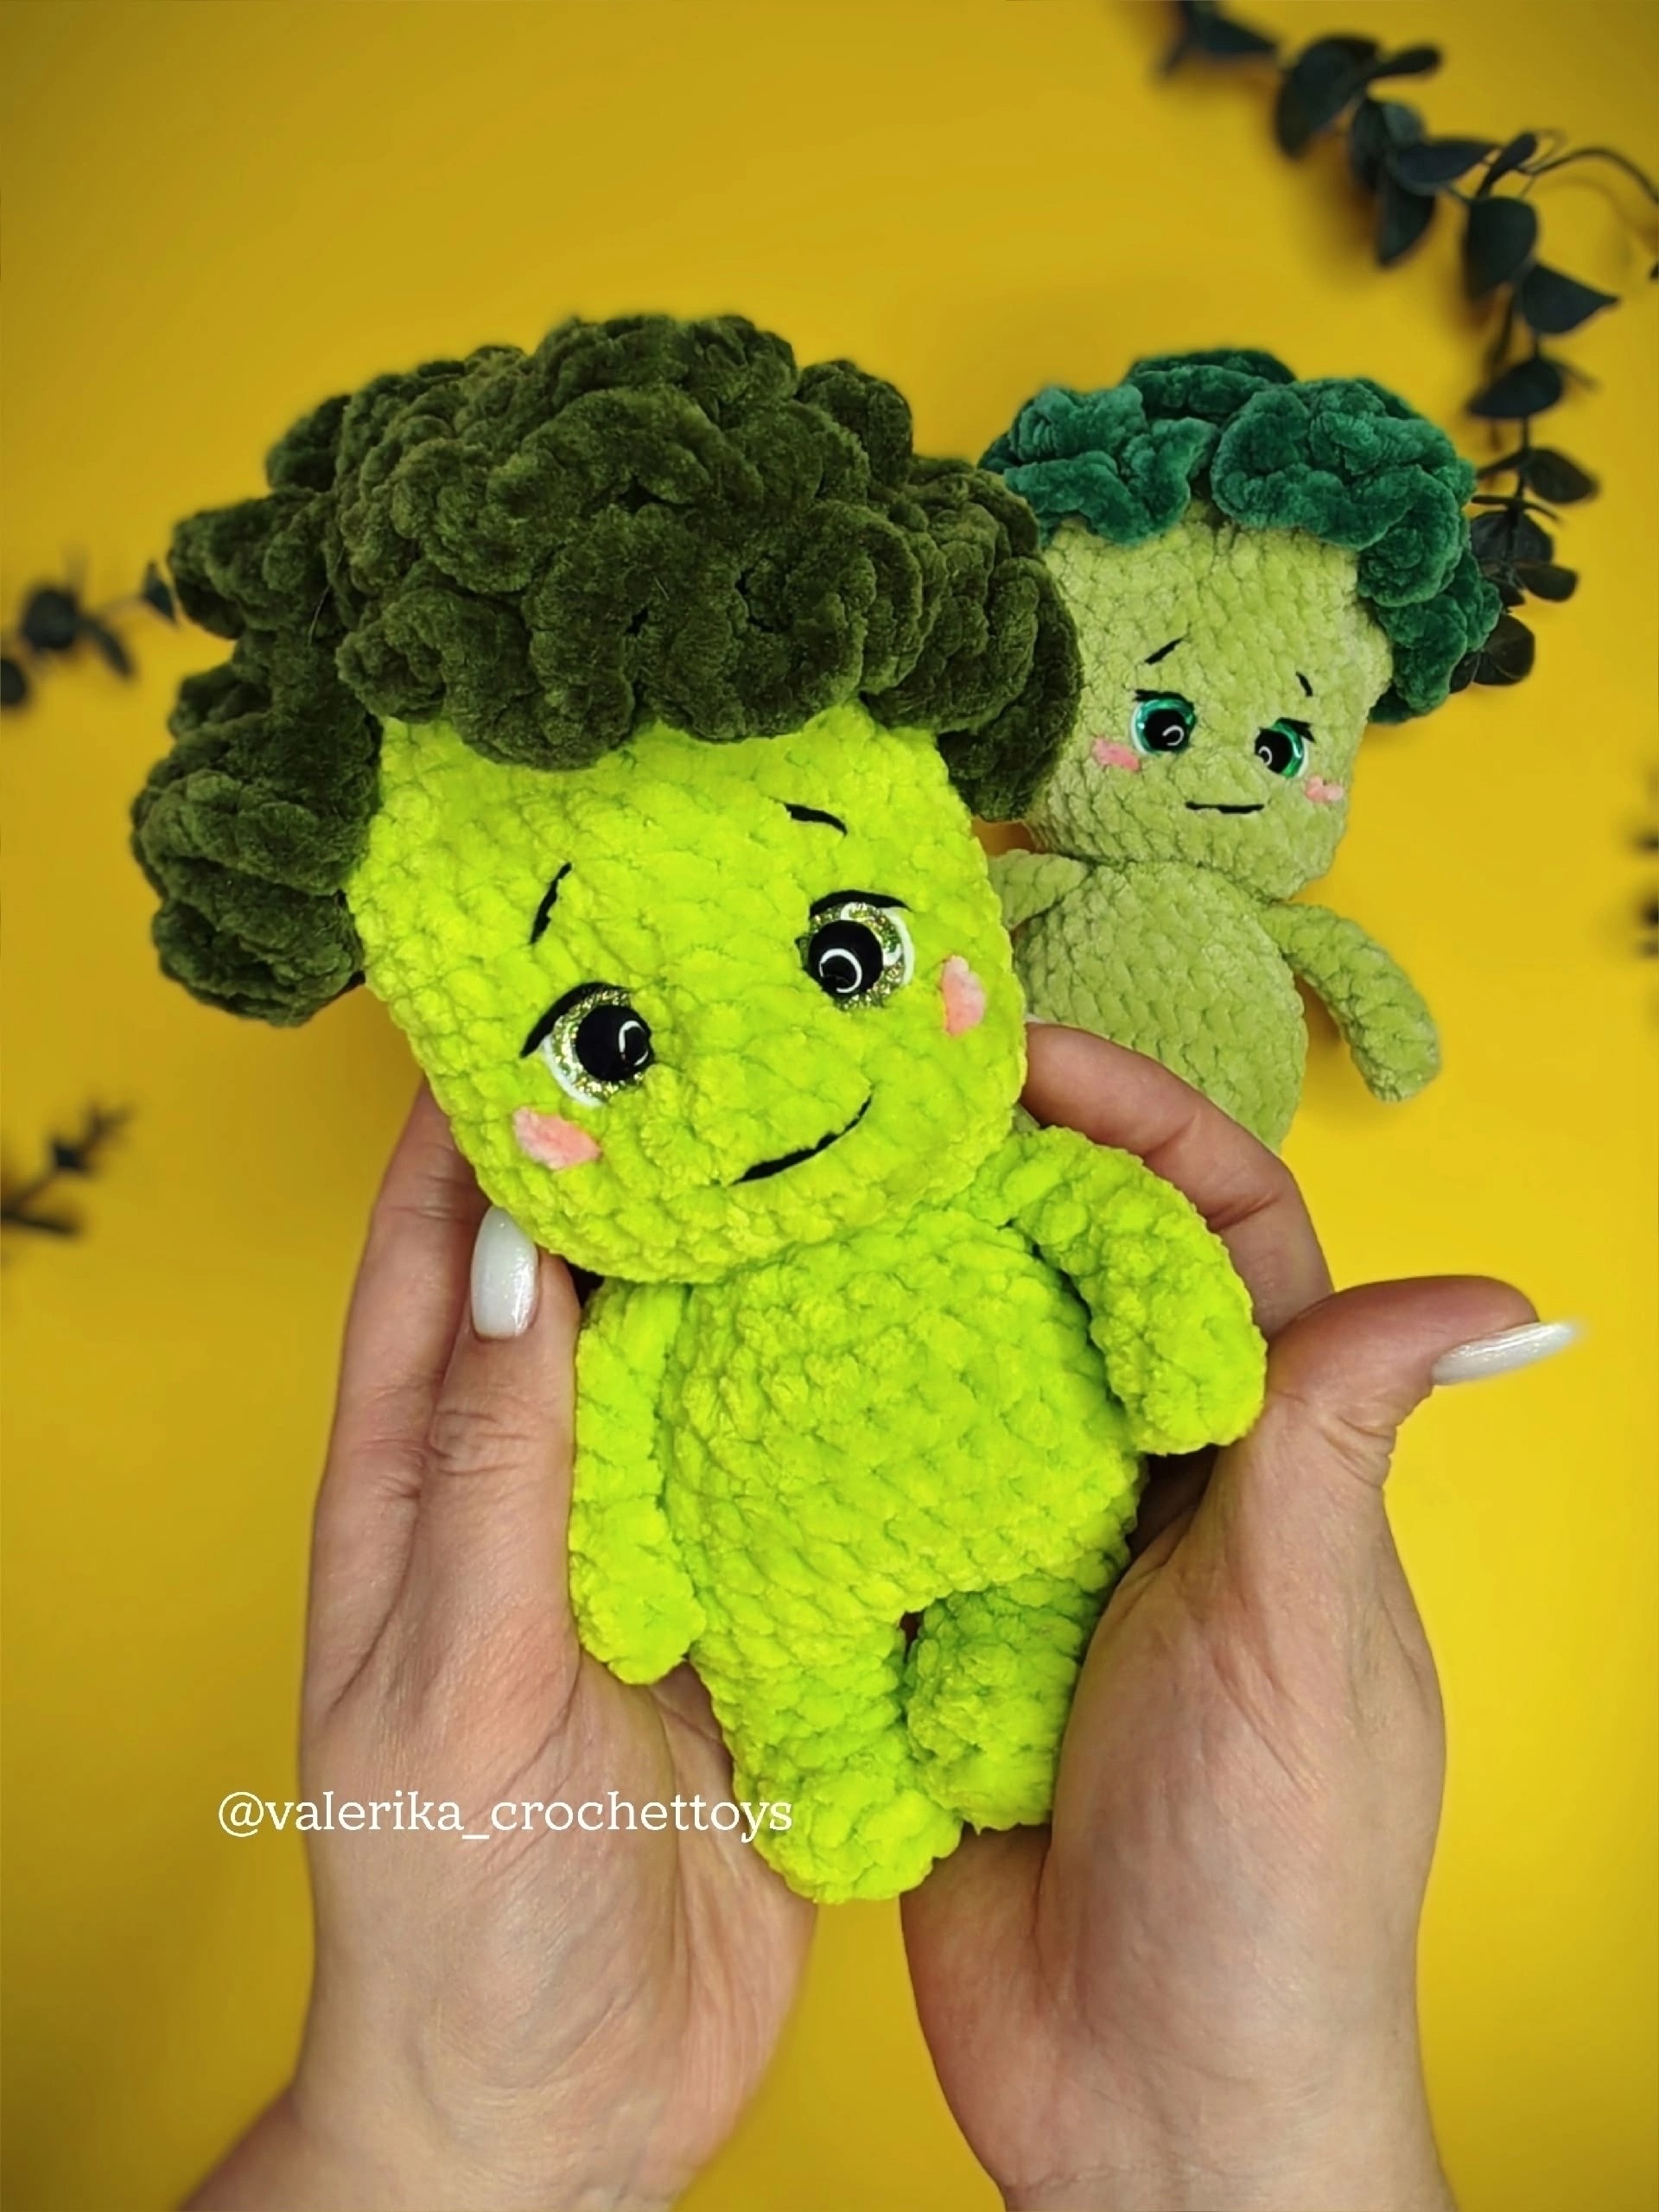
Looking for a unique, cute, and slightly quirky project to add to your crochet collection? This adorable Broccoli Amigurumi is the perfect project! Whether you are looking to create a whimsical desk companion, a healthy-themed nursery decoration, or a fun gift for a plant lover, this little veggie character is sure to bring a smile to anyone’s face. This tutorial is designed to guide you through the process of creating a soft, plushie broccoli character from scratch.
This pattern is perfect for intermediate beginners who are comfortable with basic amigurumi techniques like working in a continuous spiral, increasing, and decreasing. Because we use plush (chenille) yarn, the finished product is incredibly soft and works up relatively quickly!
Materials & Abbreviations
Materials Needed
- Plush Yarn (Chenille style): You will need approximately 120 meters (about 131 yards) of 100g yarn in total.
- Main Color (Green): Approx. 50g
- Secondary Color (Dark Green for the broccoli top): Approx. 25g
- Accent Color (Pink for cheeks): A small amount
- Crochet Hook: 4.0 mm (G/4) is recommended to ensure tight stitches.
- Safety Eyes: 14 mm.
- Stuffing: High-quality polyester fiberfill.
- Embroidery Thread: Black and white for facial details.
- Notions: Yarn needle, stitch markers, pins, and scissors.
Finished Size: Approximately 7.5 inches (19 cm) tall, depending on your tension and yarn choice.
US Crochet Abbreviations
All measurements and terms follow US Crochet standards:
- MR: Magic Ring
- ch: Chain
- sc: Single crochet
- inc: Increase (2 sc in one stitch)
- dec: Decrease (sc two stitches together)
- sl st: Slip stitch
- hdc: Half double crochet
- dc: Double crochet
- BLO: Back loop only
- FLO: Front loop only
- st(s): Stitch(es)
- (Number in parentheses): The total number of stitches at the end of the round.
Step-by-Step Instructions
Making the Arms
Make two arms using the main green color. Do not stuff the arms.
- 1. 5 sc in a MR (5)
- 2. inc, 2 sc, inc, 1 sc (7)
- 3–5. 7 sc (7)
- 6. 2 sc, dec, 3 sc (6)
- 7. 6 sc (6). To close, fold the piece in half and sc through both layers (3 sc). Fasten off, leaving a tail for sewing.
The Legs, Body, and Connection
We will work the left leg, then transition directly into the body without cutting the yarn. Use a stitch marker to keep track of your rounds.
The Left Leg
- 1. 6 sc in a MR (6)
- 2. 6 inc (12)
- 3. 12 sc in BLO (12)
- 4. 4 sc, 2 dec, 4 sc (10)
- 5. 4 sc, dec, 4 sc (9). Note: Place your decreases at the front center of the leg.
- 6–7. 9 sc (9). Stuff only the bottom portion of the leg.
On the left leg, fasten off at the end of round 7. For the right leg, do not fasten off; continue directly into the body.
Connecting the Legs and Starting the Body
- 8. On the right leg: 4 sc, ch 1. Using a sl st, join to the left leg at the 3rd sc from the marker. Then, working on the left leg: 4 sc, inc, 2 sc, inc, inc into the ch-1 space, and inc into the base of the 4th sc you worked on the right leg. Continuing on the right leg: 2 sc, inc, 5 sc, inc, inc into the ch-1 space (27). Place your marker at the back of the piece.
- 9. Skip the initial sl st from the join. 4 sc, inc, (6 sc, inc) * 2, 8 sc (30)
- 10–12. 30 sc (30)
- 13. (4 sc, dec) * 5 (25)
- 14. 25 sc (25)
- 15. (3 sc, dec) * 5 (20)
Attaching the Arms and Closing the Body
- 16. In this round, we will attach the arms. Position them symmetrically on the front of the body. Align the arms so that the decrease from round 6 of the arms sits at the top. 4 sc, 3 sc around the left arm, dec, 3 sc, dec, 3 sc around the right arm, 3 sc (18).
- Stuff the legs and the body halfway with fiberfill.
- 17. 1 sc, dec, 2 sc, dec, 5 sc, dec, 2 sc, dec (14)
The Head
- 18. Start the head: 14 inc (28)
- 19. (3 sc, inc) * 2, 14 sc, inc, 3 sc, inc, 1 sc (32). Note: The increases should be distributed towards the back and sides of the head.
- 20–26. 32 sc (32)
After round 26, insert your safety eyes between rounds 23 and 24. Ensure they are approximately 6 stitches apart and centered on the front of the face.
Creating the Broccoli “Hair” (The Branches)
To create the bushy texture of the broccoli, we will crochet several “branches” or loops using the dark green yarn.
Branch 1
- 14 sc, ch 3. Count back 10 stitches and sc into the 10th stitch. Place marker (13).
- 10 sc, 3 sc through the ch (13).
- Using BLO: (2 sc, dec) * 3, then 2 more dec in BLO (ignore marker). Fasten off, leaving a tail to pull tight.
Branch 2
- Join dark green yarn to the base of the 14th stitch of Branch 1. ch 1, 22 sc, 1 sc in the join, 3 sc through the ch, dec in the join/1st stitch. Place marker.
- 7 sc, ch 4. Count back 10 stitches and sc into the 10th stitch. Place marker (14).
- 2 rounds of 14 sc (14).
- (5 sc, dec) * 2 (12).
- Using BLO: (1 sc, dec) * 4 (8). Add a few more decreases in BLO to close. Fasten off, leaving a tail to pull tight.
Branch 3
- Join to the base of the 7th stitch of Branch 2. ch 1, 17 sc, 1 sc in the join, 4 sc through the ch (22). Place marker.
- Skip the joining ch, 3 sc, ch 2. Count back 14 stitches and sc into the 14th stitch. Place marker (16).
- 16 sc (16).
- Using BLO: 16 sc (16).
- Using BLO: (2 sc, dec) * 4, plus 4 more dec in BLO. Fasten off, leaving a tail to pull tight.
Branch 4
- Join to the base of the 3rd stitch of Branch 3. ch 1, 8 sc, 1 sc in the join, 2 sc through the ch, 1 sc in the same join (12).
- Using BLO: 5 dec. Fasten off, leaving a tail to pull tight.
Finishing the Broccoli Topper
Now, we will add the “bushy” texture to the branches.
- Join the dark green yarn to the back side of the head.
- Work into the visible front loops created by the BLO rounds of the branches.
- Ch 2, then alternate between 5-6 hdc or dc into each available front loop.
- Work in a spiral, moving from the bottom of the branches upward. For best results, work on the fourth and first branches first, then the second, and finally the third.
- Fasten off and hide the yarn tails.
Finishing
To give your broccoli character its cute, expressive face, follow these final steps:
- Face Sculpting (Optional): To create a more defined face, take a needle and thread. Insert the needle between rounds 17 and 18 at a point below the eyes (Point 5). Weave the needle through points 1, 2, 3, and 4 (as shown in the diagram) and pull slightly to tighten the facial area. Secure the thread inside the toy.
- Cheeks and Mouth: Using embroidery thread, stitch a small smile. Use pink yarn or embroidery thread to add small, soft pink circles just below the eyes for adorable cheeks.
Tips
- Tension is Key: When working with plush yarn, try to keep your tension consistent. If your stitches are too loose, the stuffing might show through.
- Stuffing Strategy: When stuffing the head and branches, make sure to distribute the fiberfill evenly so the “hair” doesn’t look lopsided.
- Branch Placement: Don’t worry if your branches aren’t perfectly symmetrical! The organic, slightly chaotic look of the dark green branches is what makes the broccoli look realistic and cute.
- Safety First: If you are making this for a small child, consider embroidering the eyes instead of using plastic safety eyes to prevent any choking hazards.