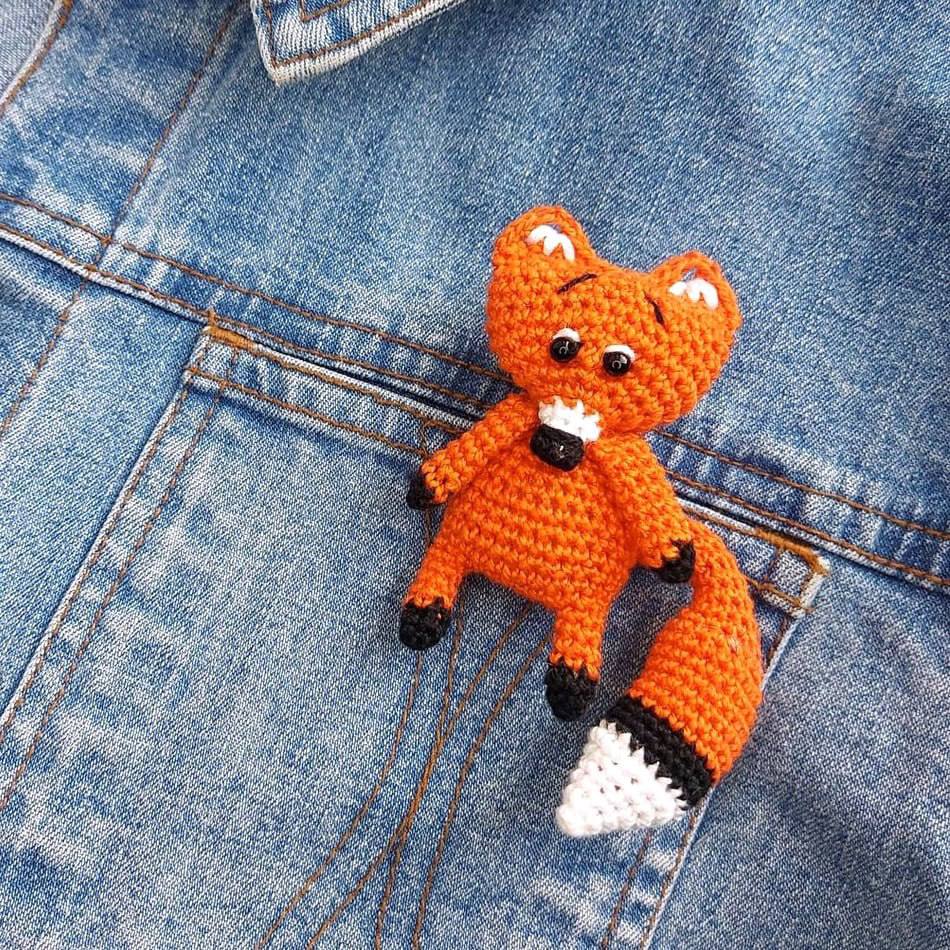
Tiny Fox, Big Charm: How to Crochet Your Own Adorable Brooch
“`html
How to Crochet a Tiny Fox Brooch: Step-by-Step Tutorial
Add a touch of woodland charm to your favorite jacket or bag with this adorable crochet fox brooch. This detailed guide will walk you through creating a miniature fox that is perfectly flat and stylish. Whether you are a seasoned crocheter or looking for a quick project, this pattern is a delightful way to practice your amigurumi skills.
Materials Needed
- Yarn: Thin cotton yarn or embroidery thread in Orange, White, and Black.
- Crochet Hook: 0.7 mm (or a size appropriate for your chosen thin yarn).
- Other Tools: Yarn needle, scissors, safety eyes (or black embroidery thread), and a small piece of pipe cleaner for the tail.
Crochet Abbreviations (US Terms)
- MR: Magic Ring
- sc: Single Crochet
- inc: Increase (2 sc in one stitch)
- dec: Decrease (sc 2 together)
- ch: Chain
- slst: Slip Stitch
- hdc: Half Double Crochet
Step 1: The Head
Using White Yarn:
- Round 1: 4 sc in MR
- Round 2: (inc, 1 sc) x 2 = 6 sc
- Round 3: 6 sc
- Round 4: (inc, 2 sc) x 2 = 8 sc
Change to Orange Yarn:
- Round 5: 8 sc
- Round 6: inc x 8 = 16 sc
- Round 7: (inc, 1 sc) x 8 = 24 sc
- Round 8: (inc, 2 sc) x 8 = 32 sc
- Rounds 9-13: 32 sc
- Round 14: (dec, 2 sc) x 8 = 24 sc
Fold the piece in half and crochet across the edge to close it. Then, create the decorative border:
Round 15: Ch 1, (sc, hdc) in one stitch, (slst, ch 2, slst) in one stitch, (hdc, sc) in one stitch, 6 slst, (sc, hdc) in one stitch, (slst, ch 2, slst) in one stitch, (hdc, sc) in one stitch, finish with a slst.
Finishing the Head: Embroider the nose in black and the inner part of the ears in white. Attach, glue, or embroider the eyes in place.
Step 2: The Legs and Body
Legs (Make 2):
Using Black Yarn:
- Round 1: 4 sc in MR
- Round 2: (inc, 1 sc) x 2 = 6 sc
- Round 3: 6 sc
Change to Orange Yarn:
- Rounds 4-7: 6 sc
Fasten off the first leg. Do NOT fasten off the second leg; you will work into it for the body.
The Body:
- Round 8: Ch 6 and join with a slst to the second leg. Now, crochet 6 sc around the first leg, 6 sc along the chain, 6 sc around the second leg, and 6 sc along the second chain. (Total: 24 sc)
- Rounds 9-16: 24 sc
- Round 17: (2 sc, dec) x 6 = 18 sc
- Round 18: 18 sc
- Round 19: (6 sc, dec) x 2, dec = 15 sc
- Round 20: 15 sc
Fold the body in half and crochet across to close. Ensure the legs are aligned straight and not twisted before closing.
Step 3: The Arms (Make 2)
Using Black Yarn:
- Round 1: 4 sc in MR
- Round 2: (inc, 1 sc) x 2 = 6 sc
Change to Orange Yarn:
- Rounds 3-10: 6 sc
Fasten off, leaving a long tail for sewing.
Step 4: The Tail
Tip: Insert a piece of pipe cleaner inside the tail as you work to make it posable.
Using White Yarn:
- Round 1: 4 sc in MR
- Round 2: (inc, 1 sc) x 2 = 6 sc
- Round 3: (inc, 2 sc) x 2 = 8 sc
- Round 4: (inc, 3 sc) x 2 = 10 sc
- Round 5: (inc, 4 sc) x 2 = 12 sc
- Round 6: (inc, 1 sc) x 6 = 18 sc
Change to Black Yarn:
- Rounds 7-9: 18 sc
Change to Orange Yarn:
- Rounds 10-15: 18 sc
- Round 16: (7 sc, dec) x 2 = 16 sc
- Round 17: (6 sc, dec) x 2 = 14 sc
- Round 18: (5 sc, dec) x 2 = 12 sc
- Round 19: (4 sc, dec) x 2 = 10 sc
- Rounds 20-22: 10 sc
- Round 23: (3 sc, dec) x 2 = 8 sc
- Rounds 24-27: 8 sc
Fold in half and crochet across to close. Leave a tail for sewing.
Step 5: Final Assembly
To keep the brooch looking professional and flat, do not overstuff the pieces. Follow this assembly order:
- Sew the arms onto the body.
- Sew the tail to the back of the body.
- Sew the head last, positioning it so that it slightly overlaps the arms.
Once assembled, attach a brooch pin to the back, and your tiny fox is ready to wear!
“`