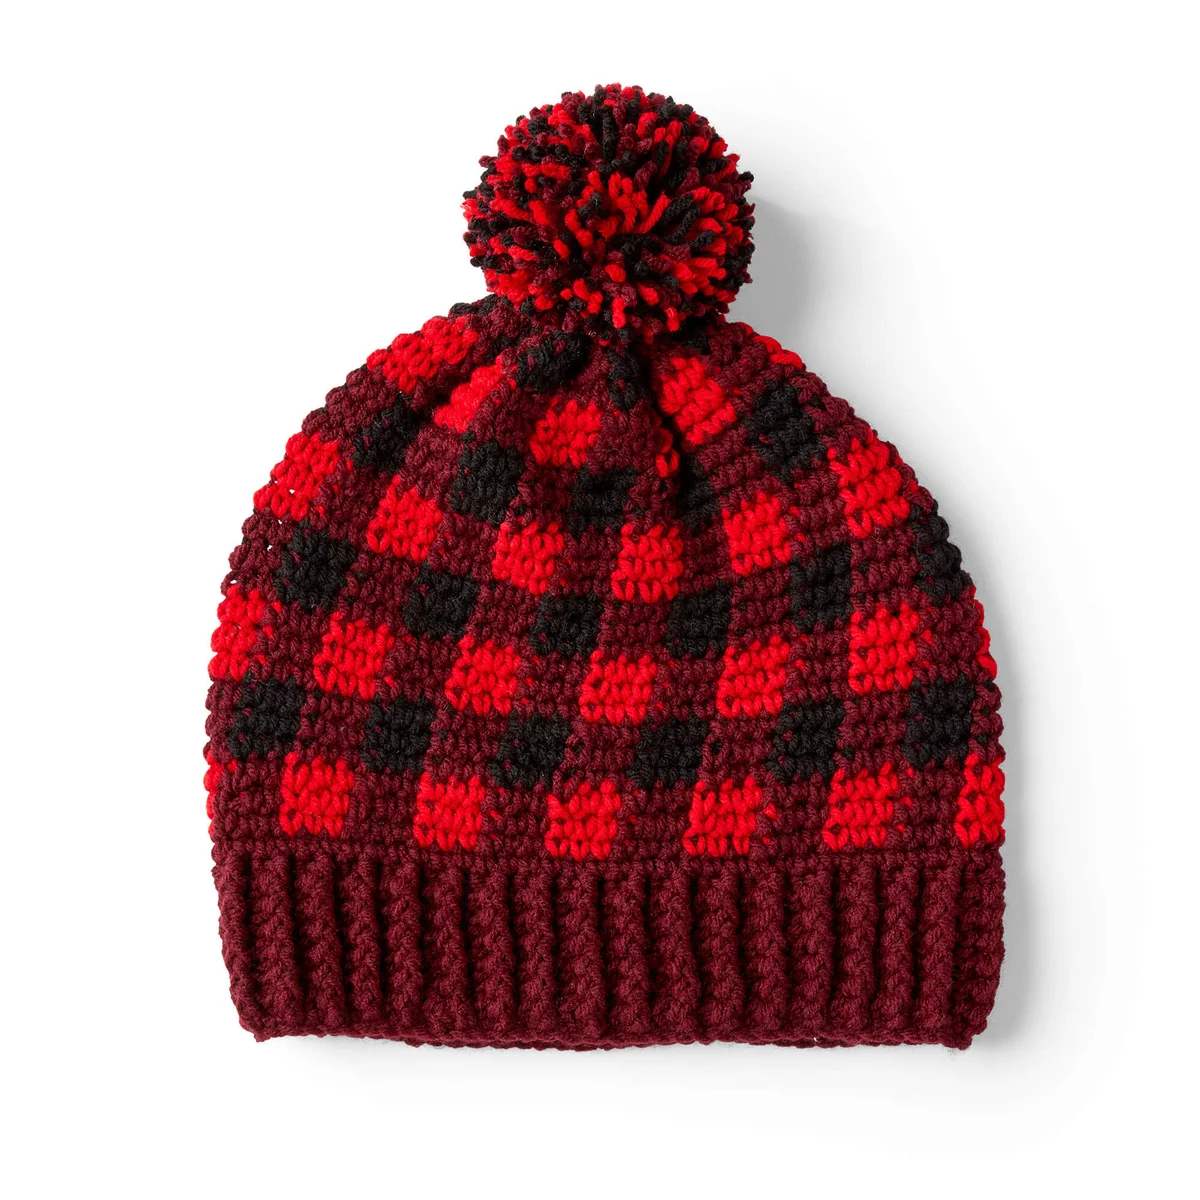
Easy Buffalo Plaid Crochet Hat Pattern for Men
There is nothing quite like the classic lumberjack look to bring cozy, rustic vibes to your winter wardrobe. Whether you are looking for a thoughtful handmade gift for a husband, father, or brother, or you simply want to add a timeless piece to your own collection, this Buffalo Plaid Crochet Hat is the perfect project. This beanie combines a professional-looking ribbed brim with a striking color-block plaid body that looks much more complicated than it actually is!
This pattern is designed to be beginner-friendly, using basic stitches and a simple color-switching technique. By the time you finish, you’ll have a warm, stylish hat that provides plenty of coverage for those chilly winter months. Let’s dive into the details and get hooking!
Materials & Abbreviations
To get started, you will need a few basic supplies. For this project, we recommend a medium-weight yarn to ensure the hat is thick enough to keep the cold out while remaining flexible.
Supplies Needed
- Yarn: Medium Weight (4) yarn. You will need one ball (approximately 198 yards) of each of the following colors:
- Contrast A: Deep Red/Brown (Luggage)
- Contrast B: Bright Red (Red Hot)
- Contrast C: Dark Charcoal/Black (Summer Night)
- Crochet Hook: Size U.S. H/8 (5 mm) or whichever size is necessary to meet the gauge.
- Additional Tools: Yarn needle for weaving in ends, scissors, and a measuring tape.
Gauge
13 single crochet (sc) and 14 rows = 4 inches. If your stitches are too tight, try a larger hook; if they are too loose, try a smaller one to ensure the hat fits correctly.
Abbreviations (US Terms)
- Approx: Approximately
- Beg: Beginning
- Ch: Chain
- Hdc: Half double crochet
- Hdcbp: Half double crochet back post (Yarn over, insert hook from right to left around the post of the next stitch at the back of the work, yarn over and draw through 3 loops).
- Hdcfp: Half double crochet front post (Yarn over, insert hook from right to left around the post of the next stitch at the front of the work, yarn over and draw through 3 loops).
- Rnd: Round
- Sc: Single crochet
- Sl st: Slip stitch
- St(s): Stitch(es)
- Yoh: Yarn over hook
Step-by-Step Instructions
This hat is worked in the round, starting from the brim and moving upward toward the crown. Note: Join all rounds with a slip stitch to the first stitch of the round.
The Ribbed Brim
The brim uses a combination of front and back post stitches to create a stretchy, knit-like texture that hugs the head comfortably.
Starting Chain: Using Color A, chain 72. Join with a slip stitch to the first chain, being careful not to twist the chain into a knot.
Round 1: Chain 2 (this does not count as a stitch). Work 1 hdc in each chain around. Join with a sl st to the first hdc. You should have a total of 72 stitches.
Round 2: Chain 1. *Work 1 hdcfp around the next stitch, then 1 hdcbp around the next stitch.* Repeat from * around. Join with a sl st.
Rounds 3-7: Repeat the instructions for Round 2 five more times. This creates the thick, stretchy ribbing for the bottom of the hat.
Transitioning to the Body
Now we will transition from the ribbing to the main body of the hat where the plaid pattern begins.
Next Round: Chain 1. Work 1 sc in each stitch around. Join with a sl st.
Next Round: Chain 1. Work 1 sc in each stitch around. Join with a sl st.
The Buffalo Plaid Body
The plaid effect is achieved by switching colors every three stitches. To keep your work neat, carry the yarn colors you aren’t currently using along the top of your work (floating them) and change colors by drawing the new color through the last two loops of the previous stitch.
The plaid pattern follows a 6-stitch repeat. You will work this sequence of rounds a total of 4 times:
The Plaid Sequence (Repeat 4 Times)
- Rounds 1 through 4: *Work 3 sc in Color A, then 3 sc in Color B.* Repeat from * around. Join with a sl st.
- Rounds 5 and 6: *Work 3 sc in Color C, then 3 sc in Color B.* Repeat from * around. Join with a sl st.
Once you have completed this 6-round sequence 4 times, fasten off the yarn, leaving a long tail for finishing.
Finishing
Closing the Crown
To close the top of the hat, we will use a technique called the running stitch. Thread the long tail of your yarn onto a yarn needle. Weave the needle in and out of the stitches around the top edge of the hat. Once you have gone all the way around, pull the yarn tail tightly to cinch the hole closed. Tie a secure knot and weave the remaining end into the inside of the hat.
Creating the Pompom
No winter beanie is complete without a fluffy pompom!
- Hold strands of Color A, Color B, and Color C together.
- Wind the combined yarns around four fingers approximately 60 times.
- Carefully slide the bundle off your fingers.
- Tie a separate piece of yarn tightly around the center of the bundle to secure it.
- Cut through the loops on each side of the tie.
- Trim the edges with scissors to create a smooth, round sphere.
- Sew the pompom securely to the top center of the hat.
Tips for Success
Getting Clean Color Changes
To avoid bulky seams when switching colors, always change your yarn on the last pull-through of the stitch. For example, if you are finishing a single crochet in Color A, insert your hook, pull up a loop, and then wrap Color B around your hook to complete the stitch. This ensures a seamless transition.
Managing Your Yarn
Since this pattern involves carrying multiple colors, your work might feel a bit heavier. Be careful not to pull the “carried” yarn too tight, or the hat will pucker and lose its stretch. Keep the floats loose and relaxed.
Customizing Your Colors
While the red and black buffalo plaid is a classic, this pattern works beautifully with any color palette! Try a navy and white combination for a nautical look, or forest green and cream for a woodland aesthetic. The key is to use two contrasting shades for the primary plaid and one neutral or dark shade for the accent squares.