Squeeze the Day: Crochet Your Own Adorable Lemon Bag Charm!
“`html
How to Crochet an Adorable Lemon Bag Charm: Free Step-by-Step Pattern
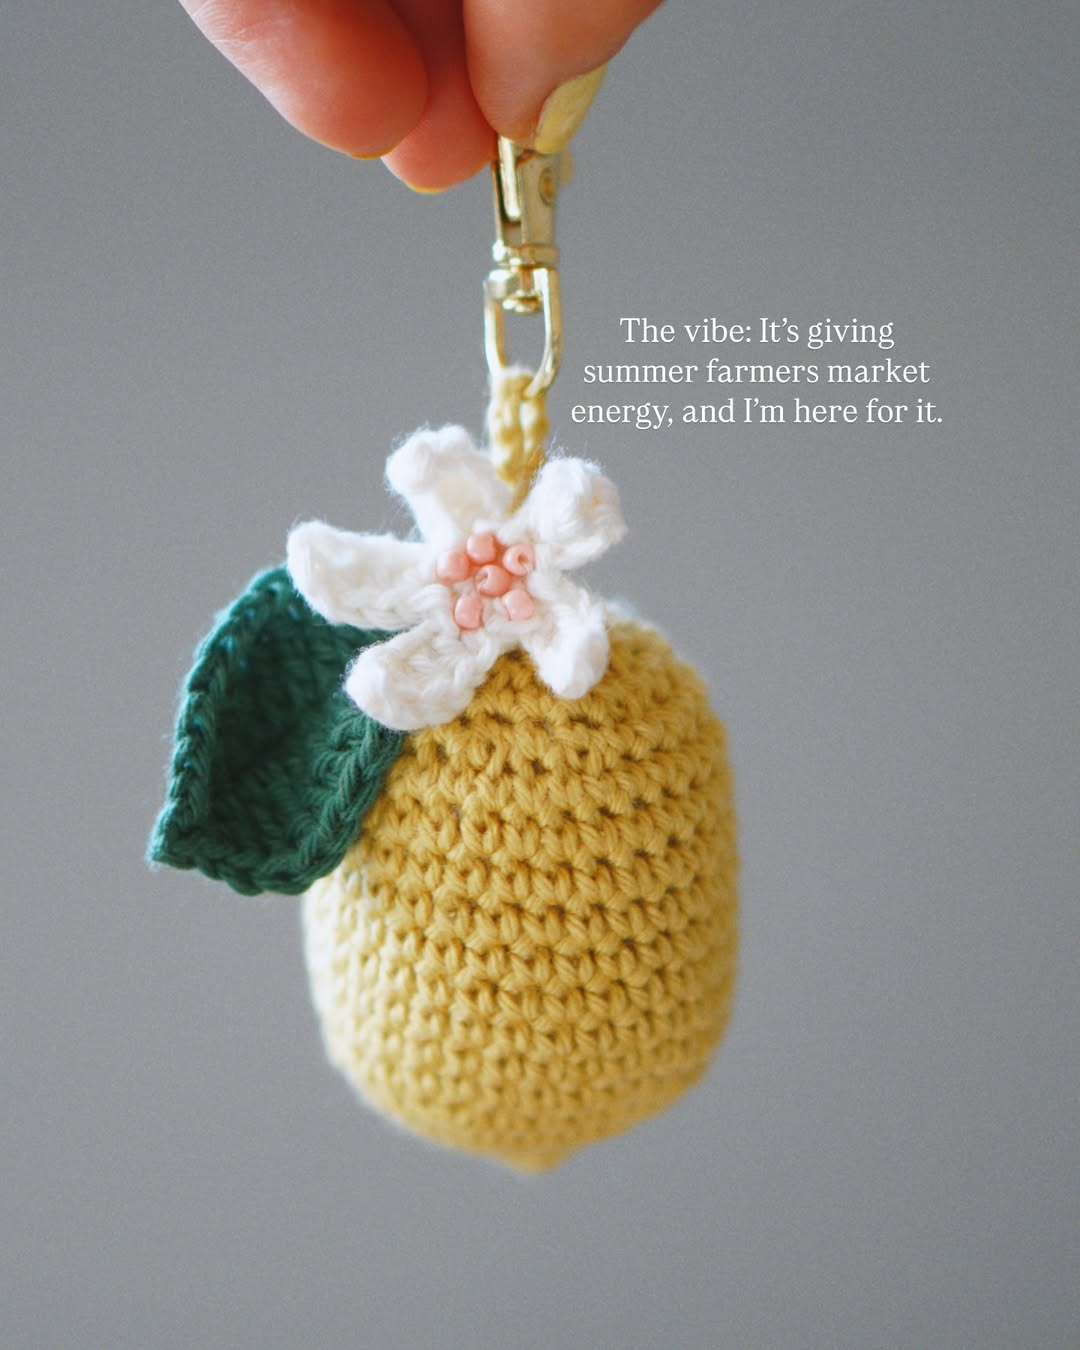
Looking for a quick and cheerful project to brighten up your day? This crochet lemon bag charm is the perfect way to add some summer farmers market energy to your favorite purse, backpack, or keychain. Whether you are a seasoned pro or a complete crochet newbie, this “easy peasy lemon squeezy” pattern is designed for everyone to enjoy.
This tiny accessory is not only cute but makes for a wonderful handmade gift. Let’s dive into the materials and steps needed to create your own miniature citrus charm!
Materials Needed
- Yarn: Small amounts of yellow, green, and white yarn (cotton or acrylic works best).
- Crochet Hook: A size appropriate for your chosen yarn (typically 2.5mm to 3.5mm for amigurumi).
- Filling: Polyester fiberfill stuffing.
- Hardware: One lobster clasp or keyring.
- Embellishments: Small pink or orange beads (for the flower center) or embroidery thread for French knots.
- Tools: Yarn needle and scissors.
Crochet Abbreviations (US Terms)
- MR: Magic Ring
- sc: Single Crochet
- inc: Increase (two sc in one stitch)
- dec: Decrease (sc two stitches together)
- hdc: Half Double Crochet
- dc: Double Crochet
- tr: Treble Crochet
- sl st: Slip Stitch
- ch: Chain
Step-by-Step Pattern Instructions
1. The Lemon Body
The lemon is worked in continuous rounds. Do not join at the end of each round unless specified.
- Round 1: Start with a magic ring and work 6 sc into the ring. (6 stitches)
- Round 2: sc in each stitch around. (6 stitches)
- Round 3: Increase in every stitch. (12 stitches)
- Round 4: (sc 1, inc) repeat 6 times. (18 stitches)
- Round 5: (sc 2, inc) repeat 6 times. (24 stitches)
- Round 6: (sc 3, inc) repeat 6 times. (30 stitches)
- Rounds 7-15: sc in each stitch around. (30 stitches)
- Round 16: (sc 3, dec) repeat 6 times. (24 stitches)
- Round 17: (sc 2, dec) repeat 6 times. (18 stitches)
- Stuffing: Now is the time to stuff your lemon with polyester filling. Ensure it is firm enough to hold its shape but still slightly squishy.
- Round 18: (sc 1, dec) repeat 6 times. (12 stitches)
- Round 19: (dec) repeat 6 times. (6 stitches)
- Round 20: sc in each stitch around. (6 stitches)
- Round 21: Decrease until the hole is closed. Fasten off and weave in the ends.
2. The Leaf
- Chain 15.
- Starting from the second chain from the hook, work the following: 3 sc, 1 hdc, 1 dc, 5 tr, 1 dc, 1 hdc, 1 sc, then work 2 sc in the final stitch.
- Turn the work and crochet back along the opposite side of the chain: 1 sc, 1 hdc, 1 dc, 5 tr, 1 dc, 1 hdc, 3 sc.
- Fasten off, leaving a long tail for sewing the leaf to the lemon.
3. The Flower
- Round 1: Start with a magic ring and work 5 sc into the ring.
- Petals: To create the petals, work the following sequence: (Chain 5, sl st into the next stitch, 3 hdc, sl st into the next stitch). Repeat this sequence in each of the 5 sc from the ring to create 5 petals.
- Center: Fasten off. To finish the flower, sew small beads into the center or use embroidery thread to create tiny French knots for a realistic look.
Final Assembly
Now that you have all your pieces, it’s time to put them together!
- Attach the Hardware: Sew your lobster clasp or keyring to the top of the lemon body.
- Attach the Flower: Sew the white flower directly beneath the clasp, sitting on top of the lemon.
- Attach the Leaf: Sew the green leaf to the side of the lemon, tucked slightly under the flower.
- Final Touches: Trim any remaining yarn tails and ensure all knots are secure.
Your Crochet Lemon Bag Charm is now complete! Attach it to your favorite bag and enjoy a little piece of summer wherever you go.
“`