Stitch the Cutest Holiday Companion: Easy Plush Reindeer Crochet Pattern
How to Crochet a Cute Plush Reindeer: Step-by-Step Pattern
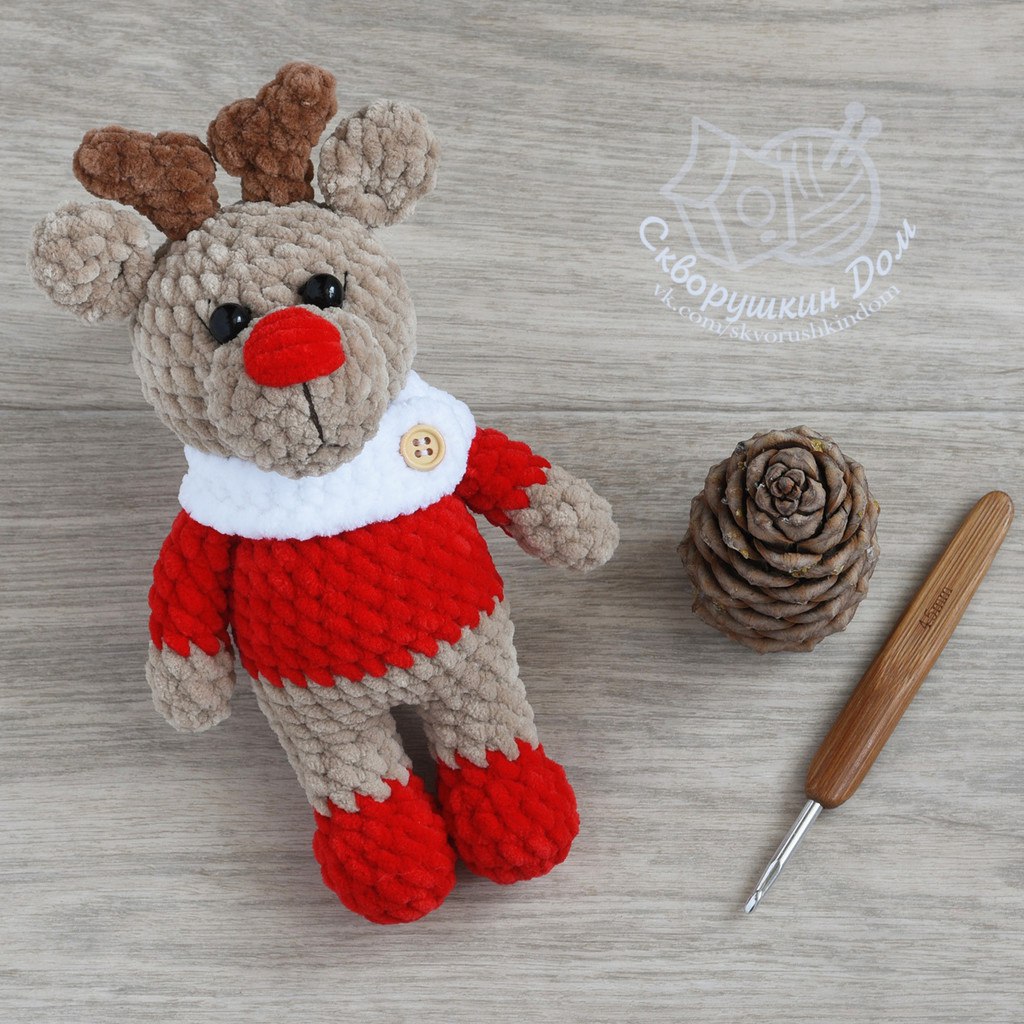
Create your own adorable, cuddly reindeer with this easy-to-follow crochet pattern. This plushie stands approximately 7 inches (18 cm) tall, making it the perfect size for a holiday decoration or a handmade gift. Using soft chenille yarn, you’ll create a cozy companion that is as soft as it is cute.
Materials and Tools
- Yarn: Plush/Chenille yarn (such as YarnArt Dolce or similar) in Beige, Red, and Brown.
- Crochet Hooks: 4.5mm (main body) and 4.0mm (for the horns).
- Eyes: Small beads or safety eyes.
- Other Essentials: Fiberfill stuffing, a yarn needle, and strong sewing thread.
Crochet Abbreviations (US Terms)
- ch: chain
- sc: single crochet
- inc: increase (two single crochet in one stitch)
- dec: decrease (single crochet two stitches together)
- sl st: slip stitch
- dc: double crochet
- (…) * n: repeat the instructions inside the parentheses n times
Step-by-Step Crochet Pattern
Upper Legs (Make 2)
Use beige yarn and a 4.5mm hook.
- ch 2, 6 sc in the second chain from the hook. (6)
- (2 sc, inc) * 2 = 8
- – 4. sc in each stitch for 2 rounds. (8)
- 5 – 8. sc in each stitch for 4 rounds. (8)
- 9. (2 sc, dec) * 2 = 6. Fold the piece and join the two sides with 3 sc. Fasten off and hide the yarn tail.
Lower Legs, Body, and Head
The lower legs, body, and head are worked as one continuous piece. Start with the red boots using a 4.5mm hook.
Left Lower Leg:
- ch 2, 6 sc in the second chain from the hook. (6)
- inc * 6 = 12
- – 4. sc in each stitch for 2 rounds. (12)
- 5. 3 sc, dec * 3, 3 sc = 9
- 6. sc in each stitch for 1 round. (9)
Switch to beige yarn:
- 7 – 9. sc in each stitch for 3 rounds. (9) sl st, fasten off, and secure the end.
Right Lower Leg: Repeat the steps for the Left Lower Leg.
Joining and Body:
- Join the legs: ch 1; work 9 sc around the left leg; 1 sc in the base of the first sc of the left leg; sc in the chain; work 9 sc around the right leg; 1 sc in the base of the first sc of the right leg. Total = 22. (Mark the start of this round).
- 10 sc, inc, sc, inc, 9 sc = 24
- 12 – 13. sc in each stitch for 2 rounds. (24)
Switch to red yarn (for the sweater):
- 14 – 19. sc in each stitch for 6 rounds. (24)
- 20. (2 sc, dec) * 6 = 18
- 21. Attach the upper legs: 5 sc, (3 sc while crocheting around the first upper leg), 6 sc, (3 sc while crocheting around the second upper leg), 1 sc. Note: You may need to shift by 1 stitch depending on your tension. Stuff the legs and lower body now.
- 22. (sc, dec) * 6 = 12
- 23. inc * 12 = 24
- 24. (3 sc, inc) * 6 = 30
- 25 – 29. sc in each stitch for 5 rounds. (30)
- 30. (3 sc, dec) * 6 = 24
- 31. (2 sc, dec) * 6 = 18
- 32. (sc, dec) * 6 = 12. Stuff the body and head firmly.
- 33. dec * 6 = 6. sl st to close the hole, fasten off and hide the tail.
The Muzzle
Use beige yarn and a 4.5mm hook.
- ch 2, 6 sc in the second chain from the hook. (6)
- inc * 6 = 12
- (sc, inc) * 6 = 18
- 4 – 5. sc in each stitch for 2 rounds. (18) sl st, fasten off and secure.
The Ears (Make 2)
Use beige yarn and a 4.5mm hook.
- ch 2, 6 sc in the second chain from the hook. (6)
- (sc, inc) * 3 = 9
- (2 sc, inc) * 3 = 12
- 4 – 5. sc in each stitch for 2 rounds. (12) sl st. Join the two sides with 6 sc, fold in half, and join with 3 sc. Fasten off and hide the tail.
The Horns (Make 2)
Use brown yarn and a 4.0mm hook.
- ch 2, 5 sc in the second chain from the hook. (5)
- 2 – 3. sc in each stitch for 2 rounds. (5)
- 4. sc, 3 dc in one stitch, 3 sc
- 5. sc, 3-dc cluster (all in one stitch), 3 sc
- 6 – 7. sc in each stitch for 2 rounds. (5) sl st, fasten off. Stuff the horns firmly.
Assembly and Finishing Touches
- Muzzle: Sew the muzzle to the head between rows 23 and 28. Add extra stuffing inside the muzzle before closing.
- Face: Embroider the nose using red plush yarn and a small smile using a standard sewing thread. Sew on the bead eyes.
- Ears and Horns: Sew the ears to the top of the head. Sew the horns between the ears, slightly toward the back.
- Final Detail: To complete the look, you can crochet a small colorful scarf to wrap around your reindeer’s neck.