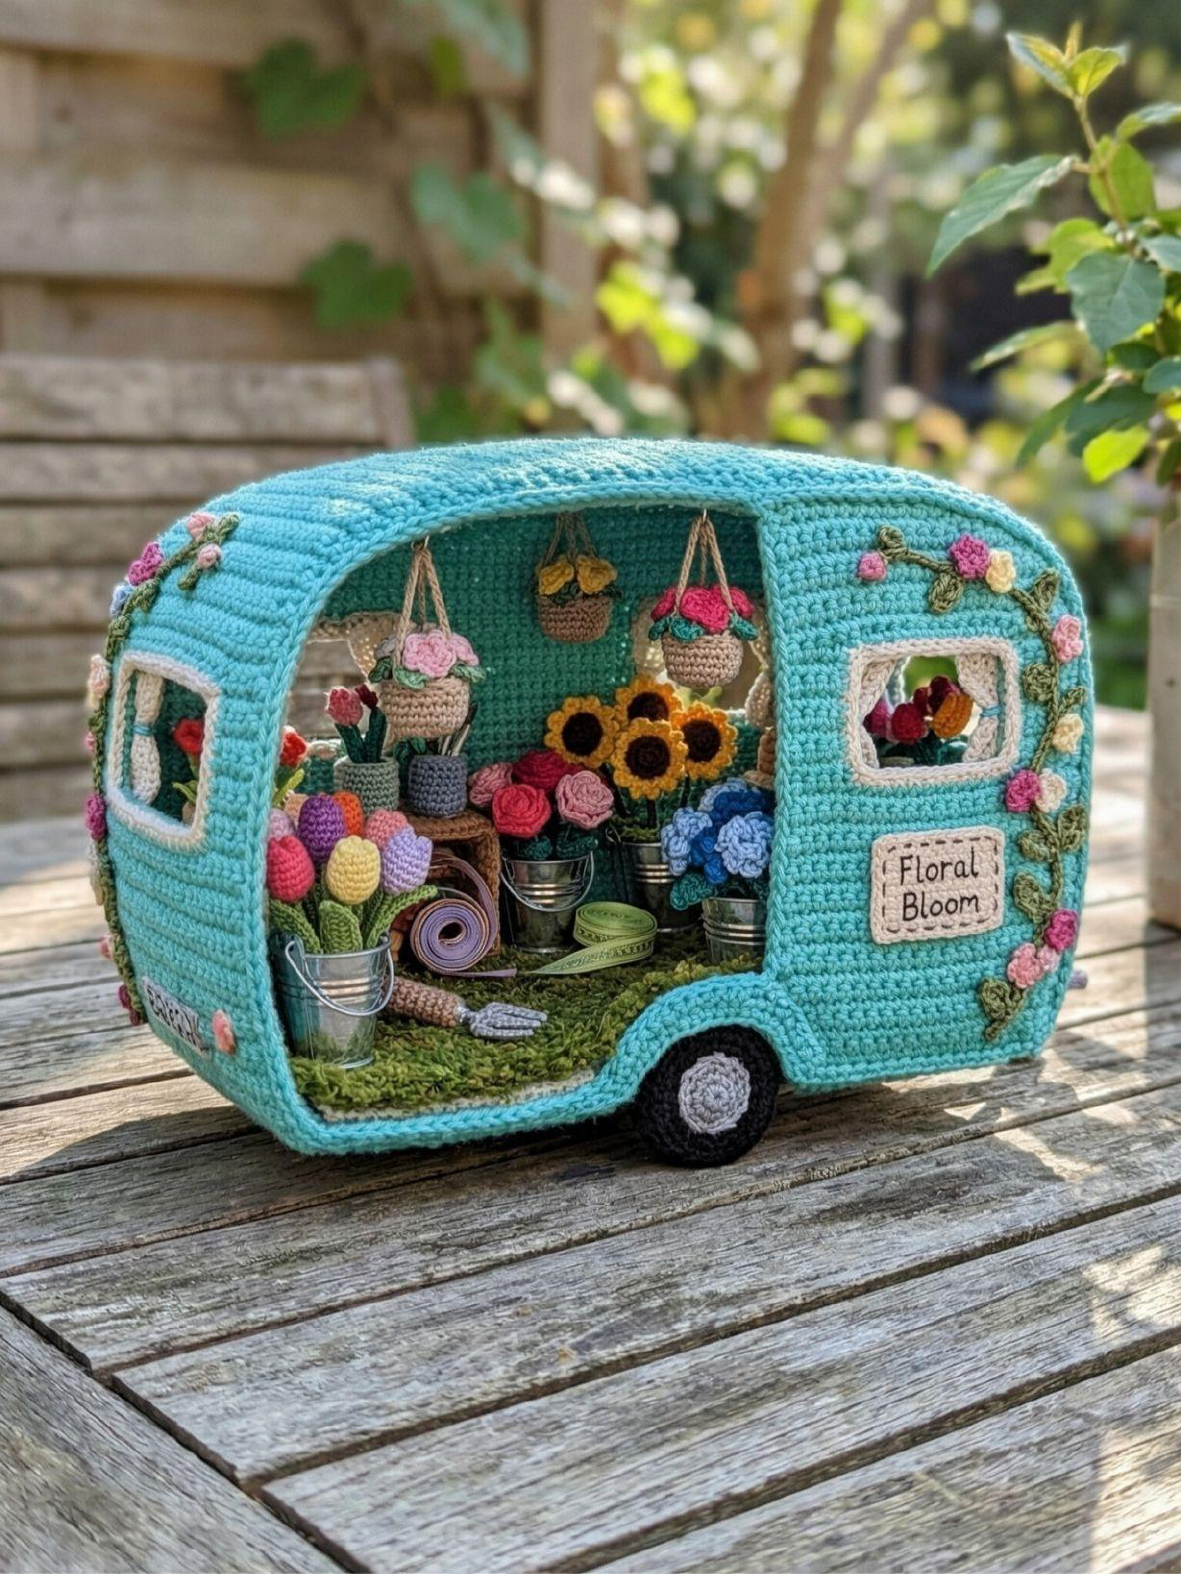
Floral Bloom Florist Caravan Crochet Pattern
Exterior Vines & Decor
Now, add charming details to the caravan’s exterior using your 1.5mm hook for fine work.
- Vines: Using Leaf Green yarn, chain 50 stitches or your desired length for the vines. Single crochet back down the chain, incorporating random *Chain 5, slip stitch* loops along the way to represent delicate leaves.
- Flowers: Crochet tiny roses in Pink and Yellow. For each rose, chain 10 stitches, single crochet across, then carefully roll the strip into a spiral shape to form the rose. Sew these miniature roses onto your green vines.
- Placement: Using fabric glue, carefully attach the crocheted vines so they climb up the corners and elegantly frame the windows of the caravan.
- “Floral Bloom” Sign:
- Board: Using Beige yarn, chain 10 stitches. Work 6 rows of single crochet.
- Frame: Surface slip stitch around the entire edge of the sign board using Wood Brown yarn to create a rustic frame.
- Text: Carefully embroider “Floral Bloom” onto the beige board using black embroidery thread. Glue the completed sign securely to the side wall of your caravan.
Part 2: The Flower Shop Inventory (Maximalism)
This is where the magic of miniature crochet truly shines! For all items in this section, it is CRITICAL to switch to your 1.5mm hook to achieve the tiny, intricate details.
Silver Buckets
Create several buckets to hold your beautiful blooms.
- Bucket Base: Using Silver/Grey yarn, start with a Magic Ring (MR) of 6 single crochet (sc). Increase (Inc) in each stitch in the next round to 12 sc.
- Sides: Work in Back Loop Only (BLO) single crochet for 6-8 rounds to build the height of the bucket.
- Rim: Chain 1, turn, then single crochet around the top edge to create a neat rim.
- Handle: Use thin craft wire or a small chain loop for the handle.
- Variety: Make 4-5 buckets of varying heights to add visual interest to your florist shop.
The Flowers
Craft a vibrant assortment of miniature flowers to fill your buckets. Remember to use craft wire for all flower stems for easy arrangement.
- Tulips (Red, Yellow, Purple): Chain 4, join with a slip stitch to form a ring. Work 3-4 puff or bobble stitches into the ring to create a closed, cup-like tulip shape.
- Sunflowers: Start with a Brown center (Magic Ring of 6 single crochet). For the yellow petals, work a repeating sequence of *Chain 3, 1 Double Crochet (Dc), Chain 3, Slip Stitch (Sl st)* around the brown center.
- Roses: Chain 15 stitches. Work the following sequence: Single Crochet (Sc), Half Double Crochet (Hdc), then 3 Double Crochet (Dc) in each of the next 5 stitches, Half Double Crochet (Hdc), Single Crochet (Sc). Carefully roll this strip into a tight spiral to form a rose.
- Hydrangeas (Blue/Purple): Create a small ball base and lightly stuff it. Then, densely cover the surface of the ball with tiny *Chain 3, Sl st* loops or French knots to mimic the clustered petals of a hydrangea.
Hanging Baskets
Add charming baskets filled with trailing plants to your ceiling.
- Basket: Using Beige/Tan yarn, begin with a Magic Ring (MR) of 6 single crochet (sc). Increase (Inc) to 18 stitches. Work 3 rounds of Back Loop Only (BLO) single crochet to create the basket shape.
- Hangers: Create three short chains that meet at a single point, where a small wire hook can be attached for hanging.
- Plant: Use Leaf Green yarn to create “hair” (multiple short chains) cascading down from the basket to simulate trailing foliage. Add tiny Pink flowers (Chain 2, slip stitch) amongst the green.
Part 3: Florist Accessories
These small details bring your miniature florist shop to life. Continue to use your 1.5mm hook for precision.
Wooden Crate
Create a versatile display piece for your shop.
- Crate Base: Using Wood Brown yarn, chain 10 stitches. Work 8 rows of single crochet.
- Sides: Work in Back Loop Only (BLO) single crochet around the perimeter of the base to build up the walls of the crate.
- Slats: Surface slip stitch lines in a darker brown yarn across the crate sides to mimic wood slats. Position the crate on its side to use it as a miniature shelf.
Ribbon Spools
Add a touch of realism with tiny spools of ribbon.
- Core: Using Wood Brown yarn, create a tight 3-chain tube to form the spool’s core.
- Ribbon: Neatly wind Pink or Lilac yarn around the brown core to represent the ribbon. Glue the end loosely to appear as if it’s ready to be unrolled.
Garden Fork
No florist shop is complete without tools.
- Tines: Using Silver yarn, chain 4 stitches. Slip stitch back down the chain. Repeat this two more times to create three tines, joining them at the base.
- Handle: Using Wood Brown yarn, create an 8-chain tube for the handle. Glue the handle securely to the base of the tines. Place the finished garden fork on the mossy floor.
Part 4: Wheels & Final Touches
The last structural components for your mobile flower shop. Switch back to your 2.5mm hook for these items.
Tires & Hubcaps
Give your caravan its rolling capability.
- Tire: Using Black yarn, start with a Magic Ring (MR) of 6 single crochet (sc). Increase (Inc) to 12 sc in the next round. Then, work (1 sc, Inc) repeatedly around to 18 sc. Work 2 more rounds of single crochet.
- Hubcap: Using Grey yarn, create a Magic Ring (MR) of 6 single crochet (sc).
- Assembly: Sew the grey hubcap to the center of the black tire. Attach the completed wheels securely to the sides of your caravan.
Final Assembly & Finishing Your Crochet Florist Caravan
Bringing all the pieces together for your enchanting “Floral Bloom” Florist Caravan.
- Structural Check: Double-check that the Turquoise shell is firmly U-shaped and stable. The plastic canvas interior is absolutely vital for its rigidity. Ensure all exterior vines are securely glued and positioned as desired.
- Interior Arrangement:
- Glue the Wooden Crate against the back wall of the caravan, providing a display surface.
- Carefully place the Silver Buckets, overflowing with your beautifully crocheted Tulips, Sunflowers, and Roses, both on the mossy floor and atop the wooden crate.
- Attach the Hanging Baskets to the ceiling hooks inside the caravan, letting their green “hair” and tiny flowers cascade downwards.
- Artfully scatter the Ribbon Spools and the Garden Fork on the mossy floor, adding to the bustling florist shop atmosphere.
- Exterior Styling:
- Ensure the “Floral Bloom” sign is straight and prominently displayed on the side wall.
- For an extra touch of realism, you can add a few loose, individual flower heads on the exterior floor, as if they’ve playfully fallen during a busy day of arrangements.
Tips for Beginners: Mastering Miniature Crochet & Structural Integrity
Creating the “Floral Bloom” Florist Caravan is a rewarding project that introduces you to key techniques for miniature crochet and structural amigurumi. Here are some tips to help you succeed:
- Embrace the “3-Layer Sandwich Method”: The integration of plastic canvas between two crocheted panels (Yarn – Plastic Canvas – Yarn) is non-negotiable for this pattern. It provides the essential rigidity for the caravan walls, ensuring they can support decorative elements and interior contents without sagging. Take your time to accurately cut and sandwich the canvas.
- Precision with the Micro-Hook: The 1.5mm steel hook is your best friend for all the tiny floral elements and accessories. Working with such a small hook requires patience and a light hand. It’s what allows for the exquisite detail that makes this project a true “masterclass in miniature floral crochet.” Don’t be discouraged if it feels tricky at first; practice makes perfect!
- Mercerized Cotton is Your Ally: While other yarns might work, mercerized cotton yarn offers superior stitch definition, which is crucial for the delicate petals and leaves of your miniature flowers. Its slight sheen also adds a polished finish.
- Wire for Structure: Don’t skip the craft wire for flower stems and hanging basket hooks. It provides poseability and stability, allowing you to arrange your miniature bouquets exactly as you envision them.
- Customize Your Blooms: This pattern offers “endless opportunities to customize your blooms.” Feel free to experiment with different flower types, color combinations, and arrangements. The joy of this project lies in making it uniquely yours.
- Take Breaks: Working with small hooks and intricate details can be tiring. Take frequent breaks to rest your eyes and hands to avoid strain and maintain focus.
Congratulations! You have cultivated the magnificent “Floral Bloom” Florist Caravan. This charming mobile flower shop is a burst of joy and color, perfectly designed for bringing eternal spring to your cherished collection or gifting to a fellow miniature enthusiast.