Crochet Your Own Pocket-Sized Cuteness: Easy Tiny Bunny Pattern
“`html
How to Crochet a Tiny Adorable Bunny: Step-by-Step Pattern
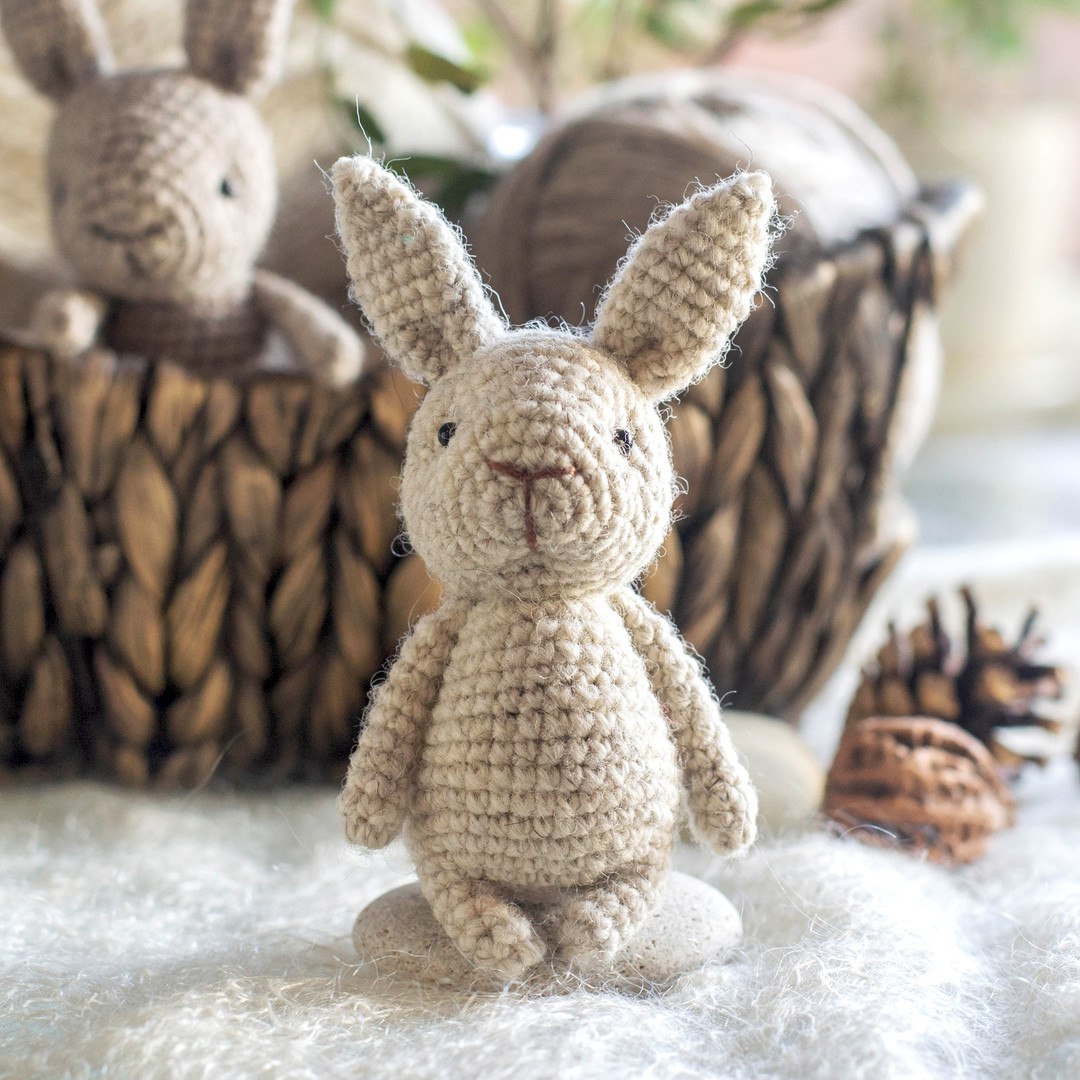
Create your own miniature companion with this easy-to-follow crochet pattern. This tiny bunny is perfect for beginners and makes a wonderful gift or desk accessory. Below is the detailed, step-by-step guide to crafting your own little bunny.
Materials Needed
- Yarn in your choice of color (beige or cream recommended)
- Crochet hook suitable for your yarn size
- Fiberfill stuffing
- Two small beads for eyes
- Contrasting embroidery thread for the nose
- Yarn needle and scissors
Abbreviations (US Terms)
- MR: Magic Ring
- sc: Single crochet
- inc: Increase (2 sc in one stitch)
- dec: Decrease (sc 2 together)
- ch: Chain
- sl st: Slip stitch
Step 1: Legs and Body
First Leg:
- Round 1: 6 sc in MR
- Rounds 2-4: 6 sc
- Fasten off and cut the thread.
Second Leg:
Repeat the steps for the first leg, but in Round 4, add 2 extra sc (total of 8 sc) to ensure the legs are of equal length after joining.
Joining and Body:
- Round 5: From the second leg, ch 6. Join to the first leg with a sl st. Crochet 6 sc around the first leg, 6 sc along one side of the chain, 6 sc around the second leg, and 6 sc along the other side of the chain. (24 sts)
- Round 6: 6 sc, inc, 4 sc, inc, 6 sc, inc, 4 sc, inc (28 sts)
- Round 7: 6 sc, inc, 6 sc, inc, 6 sc, inc, 6 sc, inc (32 sts)
- Round 8: 6 sc, inc, 8 sc, inc, 6 sc, inc, 8 sc, inc (36 sts)
- Rounds 9-13: 36 sc (5 rows)
Stuff the legs now. Continue crocheting until you reach the middle of the belly, then mark the start of the row.
- Round 14: 10 sc, 8 dec, 10 sc (28 sts)
- Rounds 15-16: 28 sc
- Round 17: 10 sc, 4 dec, 10 sc (24 sts)
- Rounds 18-20: 24 sc
- Round 21: (2 sc, dec) * 6 (18 sts)
Stuff the body firmly.
- Round 22: (1 sc, dec) * 6 (12 sts)
- Round 23: 6 dec
Fasten off and weave in the ends.
Step 2: The Head
- Round 1: 6 sc in MR
- Round 2: 6 inc (12 sts)
- Round 3: (1 sc, inc) * 6 (18 sts)
- Round 4: (2 sc, inc) * 6 (24 sts)
- Rounds 5-6: 24 sc
- Round 7: (3 sc, inc) * 6 (30 sts)
- Round 8: (4 sc, inc) * 6 (36 sts)
- Rounds 9-13: 36 sc (5 rows)
- Round 14: (4 sc, dec) * 6 (30 sts)
- Round 15: (3 sc, dec) * 6 (24 sts)
- Round 16: (2 sc, dec) * 6 (18 sts)
Stuff the head.
- Round 17: (1 sc, dec) * 6 (12 sts)
- Round 18: 6 dec
Fasten off, cut the thread, and hide the end. Sew the head securely to the body.
Step 3: Shaping the Face
Facial Sculpting:
Use a long needle and strong thread matching the yarn color. Insert the needle under the chin and bring it out near the right eye. Skip 1 sc, insert the needle, and bring it out near the left eye. Skip 1 sc, insert the needle, and bring it back down to the chin. Pull tight to create the face shape and tie a knot. Hide the ends inside the head.
Eyes:
Thread a bead onto a piece of yarn. Insert the needle where the eye should be and pull the thread through to the base of the neck. Repeat for the second eye. Tighten slightly, tie the ends together, and hide them inside the head.
Nose:
Embroider a small nose using contrasting thread.
Step 4: Arms, Ears, and Tail
Arms (Make 2):
Worked from bottom to top:
- Round 1: 6 sc in MR
- Rounds 2-10: 6 sc per round
- Ending: 3 dec to close the arm.
Ears (Make 2):
- Round 1: 12 sc in MR
- Rounds 2-7: 12 sc (6 rows)
- Round 8: (4 sc, dec) * 2 (10 sts)
- Round 9: (3 sc, dec) * 2 (8 sts)
- Round 10: (2 sc, dec) * 2 (6 sts)
- Round 11: (1 sc, dec) * 2 (4 sts)
Tail:
- Round 1: 5 sc in MR
- Round 2: 5 inc (10 sts)
- Round 3: 10 sc
Final Assembly
Sew the arms, ears, and tail to the bunny’s body. Ensure they are symmetrical and securely attached. Your adorable tiny bunny is now complete!
“`