DIY Crochet Goat Amigurumi Pattern: Cute Lucy the Goat Tutorial
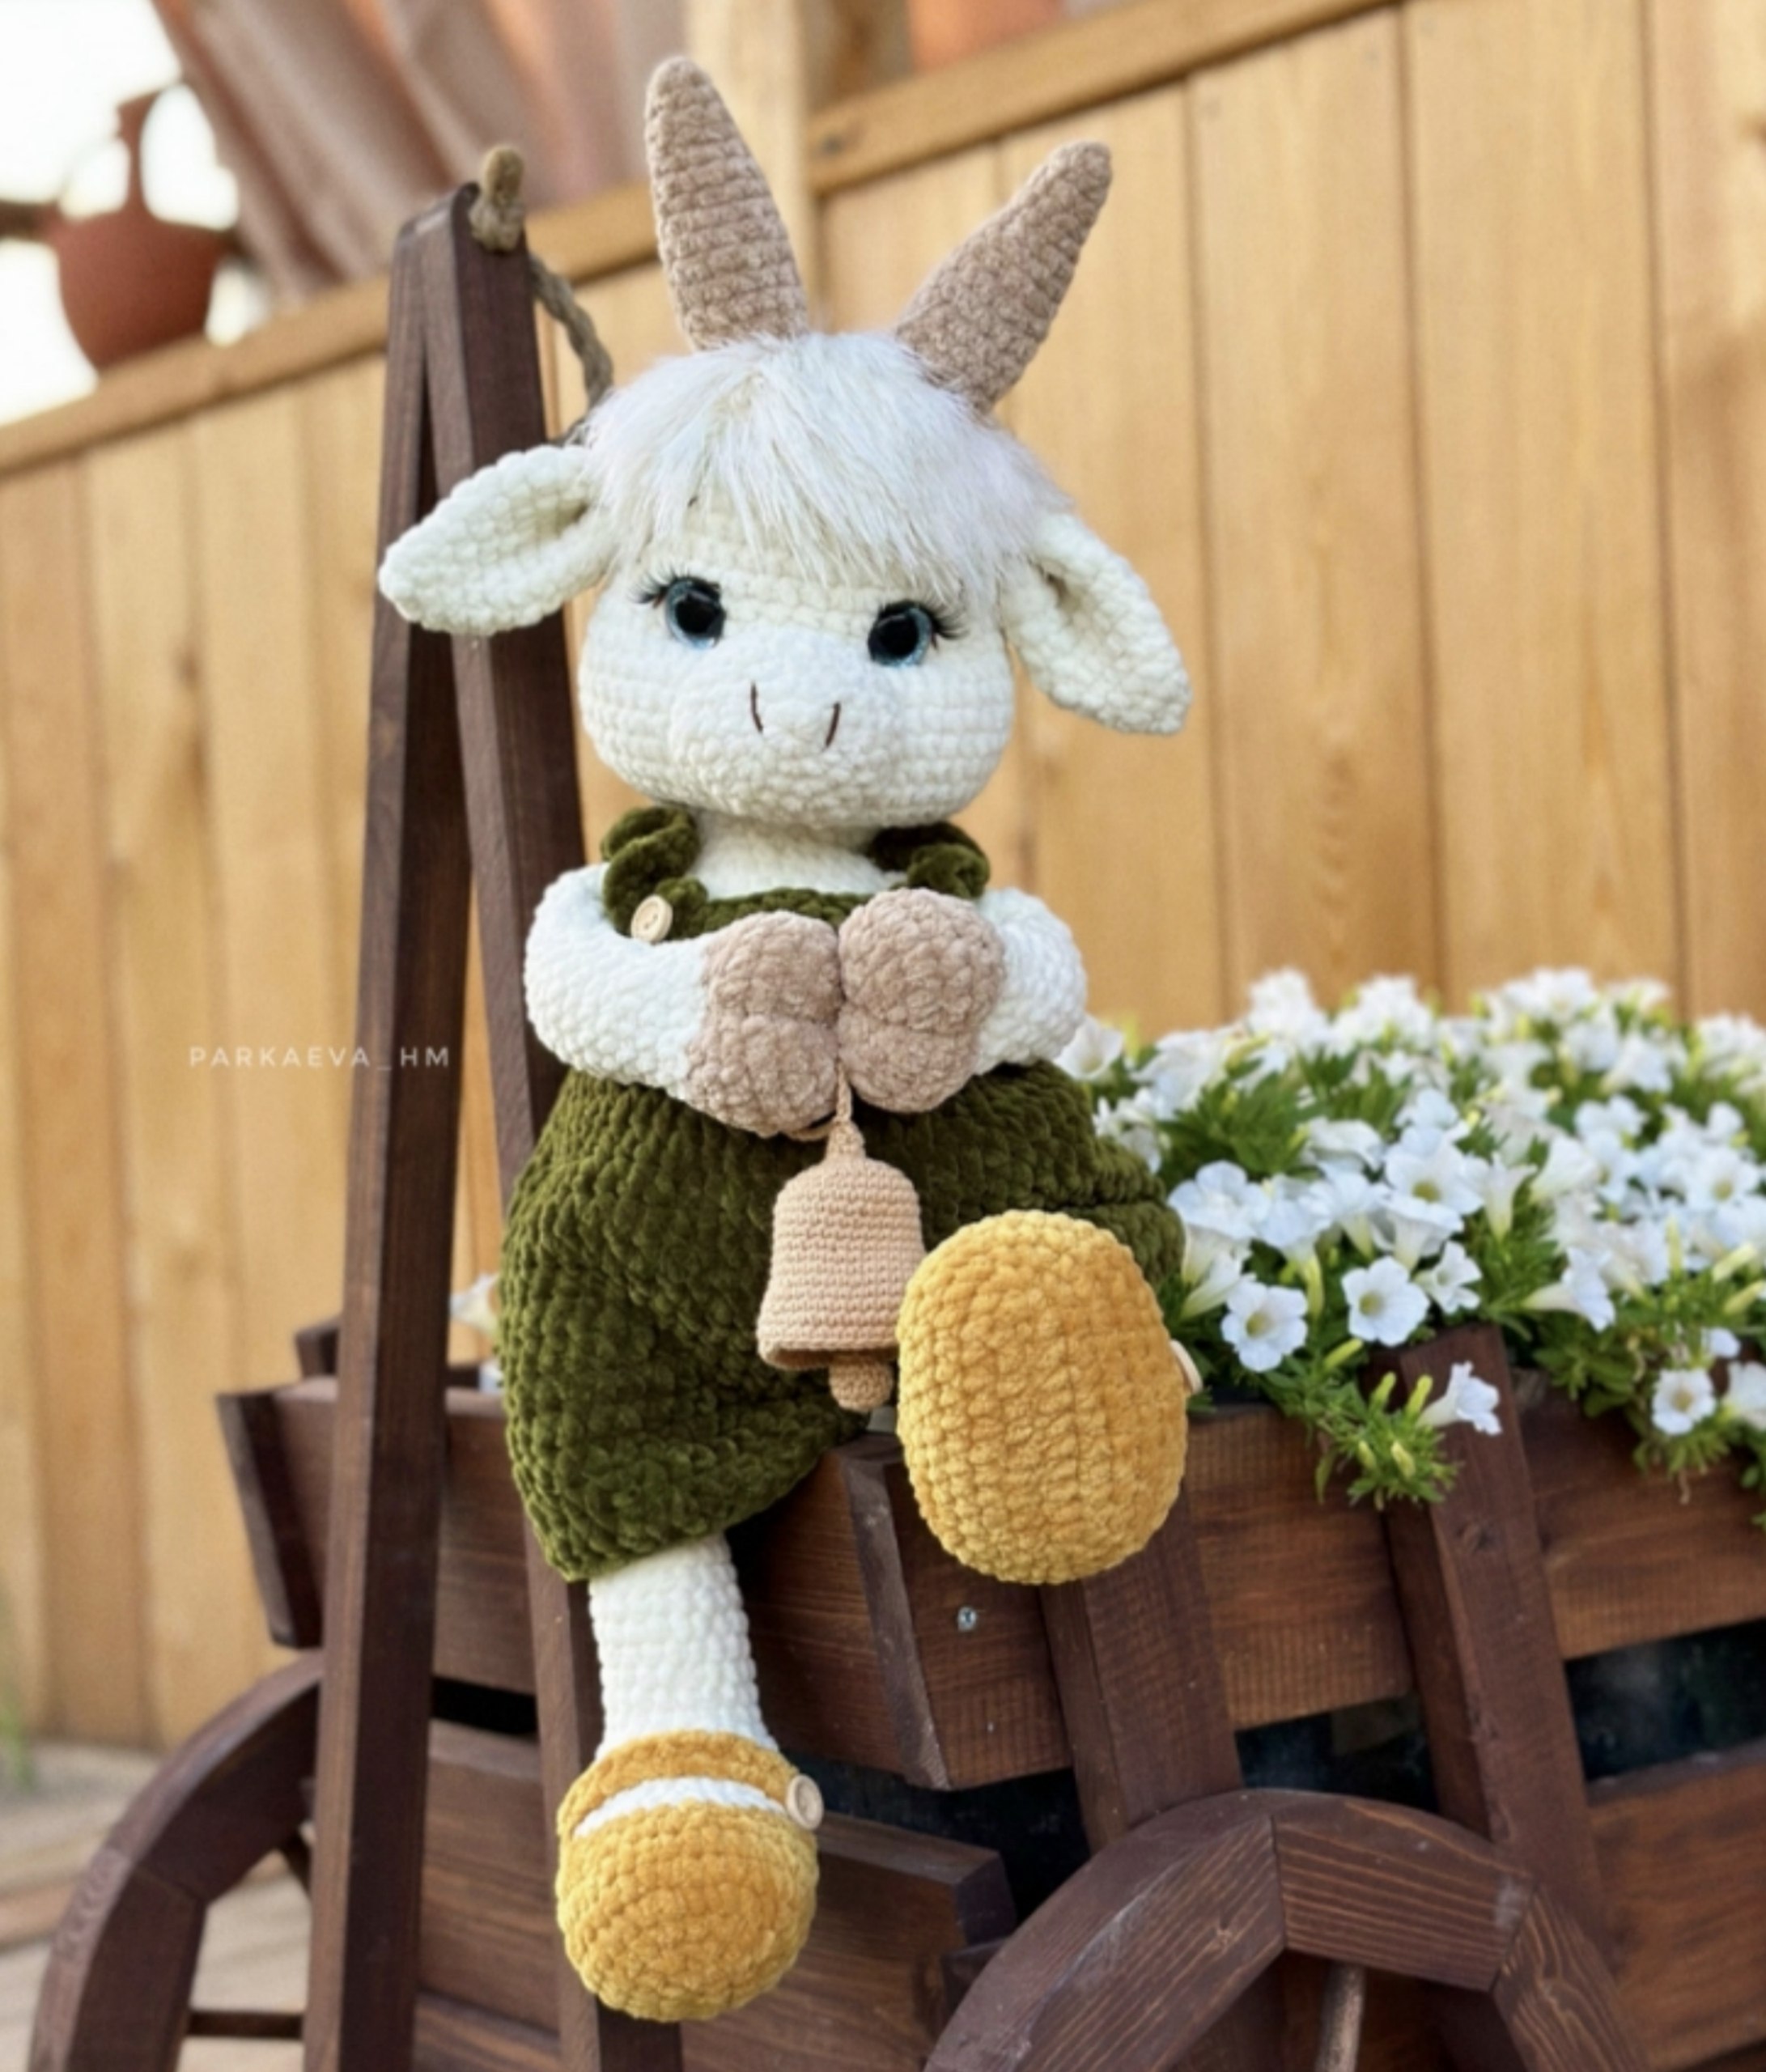
Are you looking for your next adorable amigurumi project? Meet Lucy, the charming little goat! This crochet pattern is perfect for creating a soft, huggable companion that looks just as sweet as it feels. With her cozy green overalls, tiny bell accessory, and adorable fuzzy bangs, Lucy is a standout piece for any nursery decor or a thoughtful handmade gift.
This tutorial is designed to be beginner-friendly, guiding you through the process of working with different yarn textures—from super-soft plush yarn to classic cotton blends. Whether you are a seasoned pro or just starting your crochet journey, you will find this project incredibly rewarding. Let’s dive into the magical world of amigurumi and bring Lucy to life!
Materials & Abbreviations
To ensure your goat turns out exactly like the pictures, I recommend using the specific yarn types mentioned below. Note that the final size of your goat will depend on your yarn weight and hook size.
Required Materials
- Plush Yarn (e.g., Himalaya Dolphin Baby):
- Off-White/Milk (Main body color) – approx. 2.5-3 skeins
- Beige (Hooves and horns)
- Khaki/Olive Green (Overalls)
- Mustard Yellow (Boots)
- Cotton/Blend Yarn (e.g., YarnArt Jeans):
- Brown (Face details)
- Off-White/Milk (Head shaping)
- Dark Beige (Bell)
- Wool/Cotton Yarn (e.g., Lanoso Single):
- Off-White/Milk (Fuzzy bangs)
- Safety Eyes: 3/4 inch (20mm) diameter with a blue sparkle.
- Hooks: 3.75mm (for plush yarn) and 2.0mm (for cotton/blend yarn).
- Stuffing: High-quality fiberfill.
- Extras:
- Eyelashes (faux lashes)
- Clear craft glue (e.g., Moment Crystal)
- 4 small buttons (approx. 0.6 inch / 1.5cm diameter)
- Large-eye tapestry needle
- Stitch markers
- Scissors
Abbreviations (US Terms)
- MR: Magic Ring
- ch: Chain
- sc: Single Crochet
- inc: Increase (2 sc in one stitch)
- dec: Decrease (sc 2 together)
- dc: Double Crochet
- sl st: Slip Stitch
- st(s): Stitch(es)
- rnd: Round
Step-by-Step Instructions
1. The Head
We will begin by crocheting the head using the off-white plush yarn.
Rnd 1: 6 sc in MR (6)
Rnd 2: (inc) * 6 (12)
Rnd 3: (1 sc, inc) * 6 (18)
Rnd 4: (2 sc, inc) * 6 (24)
Rnd 5: (3 sc, inc) * 6 (30)
Rnd 6: (4 sc, inc) * 6 (36)
Rnd 7: (5 sc, inc) * 6 (42)
Rnd 8-13: 42 sc (6 rounds)
Rnd 14: (6 sc, inc) * 6 (48)
Rnd 15: (7 sc, inc) * 6 (54)
Rnd 16-21: 54 sc (6 rounds)
Inserting Eyes: Place the safety eyes between Rounds 13 and 14. They should be spaced 8 sc apart (measured from eye to eye). Secure the eye backs firmly but leave some room if you plan to add lashes later.
Decreasing:
Rnd 22: (7 sc, dec) * 6 (48)
Rnd 23: (6 sc, dec) * 6 (42)
Rnd 24: (5 sc, dec) * 6 (36)
Rnd 25: (4 sc, dec) * 6 (30)
Rnd 26: (3 sc, dec) * 6 (24)
Rnd 27: (2 sc, dec) * 6 (18)
Rnd 28: 18 sc
Tip: Stuff the head firmly as you go. To create “chubby cheeks,” push the stuffing toward the bottom sides of the head using a long needle.
2. Head Shaping & Fuzzy Bangs
To give Lucy her signature look, we need to shape the head and add her hair.
Shaping the Face
Using the off-white cotton yarn, use a long needle to pull the head into shape. Insert the needle from the bottom (between rounds 26 and 27) and pull it through to the top near the eyes. Pull tight to create the cheek indentations, then repeat on the other side. Fasten off and hide the yarn inside.
Crocheting the Bangs
Using the off-white wool/cotton yarn, we will crochet around the top of the head.
Attach yarn to the crown. We will crochet 8 rounds in total. Before starting, mark 8 rounds down from the top so you don’t lose your place. Crochet into every stitch around the head. Once finished, use a fine-tooth comb to brush out the yarn, creating a soft, fuzzy fringe. Lightly dampen the hair with water, comb it, and let it dry.
3. Facial Features: Snout, Horns, and Ears
The Snout
Use off-white plush yarn.
Rnd 1: 6 sc in MR (6)
Rnd 2: (inc) * 6 (12)
Rnd 3: (1 sc, inc) * 6 (18)
Rnd 4: (2 sc, inc) * 6 (24)
Rnd 5: (3 sc, inc) * 6 (30)
Rnd 6: 30 sc
Stuff lightly and sew directly under the eyes. Secure the yarn inside the head.
The Horns
Use beige plush yarn.
Rnd 1: 6 sc in MR (6)
Rnd 2: (1 sc, inc) * 3 (9)
Rnd 3-5: 9 sc (3 rounds)
Rnd 6: (2 sc, inc) * 3 (12)
Rnd 7: 12 sc
Rnd 8: (3 sc, inc) * 3 (15)
Rnd 9: 15 sc
Rnd 10: (4 sc, inc) * 3 (18)
Rnd 11-15: 18 sc (5 rounds)
Rnd 16: (1 sc, dec) * 6 (12)
Stuff and sew to the top of the head.
The Ears
Use off-white plush yarn.
Rnd 1: 6 sc in MR (6)
Rnd 2: (inc) * 6 (12)
Rnd 3-4: 12 sc (2 rounds)
Rnd 5: (1 sc, inc) * 6 (18)
Rnd 6-7: 18 sc (2 rounds)
Rnd 8: (2 sc, inc) * 6 (24)
Rnd 9-10: 24 sc (2 rounds)
Rnd 11: (2 sc, dec) * 6 (18)
Fold the ear in half and crochet through both layers: 9 sc, then fold again and crochet 4 sc. Sew to the sides of the head, two rows below the bangs.
4. The Body & Limbs
The Body
Use off-white plush yarn.
Rnd 1: 6 sc in MR (6)
Rnd 2: (inc) * 6 (12)
Rnd 3: (1 sc, inc) * 6 (18)
Rnd 4: (2 sc, inc) * 6 (24)
Rnd 5: (3 sc, inc) * 6 (30)
Rnd 6: (4 sc, inc) * 6 (36)
Rnd 7: (5 sc, inc) * 6 (42)
Rnd 8-13: 42 sc (6 rounds)
Rnd 14: (6 sc, inc) * 6 (48)
Rnd 15: (7 sc, inc) * 6 (54)
Rnd 16-21: 54 sc (6 rounds)
Joining the Lower Paws: In Round 22, you will begin attaching the legs. From your marker, crochet 9 sc, then crochet the first leg (9 sc), then 18 sc (the space between the legs), then the second leg (9 sc), and finish the round with the remaining 9 sc. (Total 54 sc).
Decreasing the Body:
Rnd 22-27: Follow standard decreases (e.g., Rnd 22: (7 sc, dec) * 6 = 48; Rnd 23: (6 sc, dec) * 6 = 42, etc.) until you reach 18 sc at Round 27. Continue in 18 sc rounds until you reach Round 31. Stuff the body well and leave a long tail for sewing the head on.
Lower Paws (Boots)
Use mustard yellow and off-white plush yarn.
Rnd 1: Chain 12. In the 2nd ch from hook, work 10 sc. In the last ch, work 3 sc. Working down the other side of the chain, work 10 sc, and in the last ch, work 3 sc. (26)
Rnd 2: 10 sc, (inc) * 3, 10 sc, (inc) * 3 (32)
Rnd 3: 10 sc, (inc, 1 sc) * 3, 10 sc, (inc, 1 sc) * 3 (38)
Rnd 4: 10 sc, (2 sc, inc) * 3, 10 sc, (2 sc, inc) * 3 (44)
Rnd 5: Work 44 sc through the BACK LOOPS only.
Rnd 6: Work sc normally but stop at the heel to create the shape. Move your marker to the heel to start the next round.
Rnd 7-8: Work decreases to shape the ankle.
Rnd 9: Change to off-white yarn and work 36 sc.
Rnd 10-13: Continue with decreases until you have 18 sc.
Rnd 14-35: 18 sc.
Stuff the boots halfway, fold them in half lengthwise, and crochet through both sides (9 sc) to close them. Attach buttons for the straps.
Upper Paws (Arms)
Use beige and off-white plush yarn.
Rnd 1: 6 sc in MR (6)
Rnd 2: (inc) * 6 (12)
Rnd 3-4: 12 sc (2 rounds)
Rnd 5: (1 sc, inc) * 6 (18)
Rnd 6-7: 18 sc (2 rounds)
Rnd 8: (2 sc, inc) * 6 (24)
Rnd 9-10: 24 sc (2 rounds)
Rnd 11: (2 sc, dec) * 6 (18)
Stuff the arms only 1/3 of the way. Fold the end in half and crochet through both sides (7 sc) to create the “hoof” effect. Use the beige yarn to pull the hoof tight for a realistic look.
The Overalls
Use khaki plush yarn. This part is worked with Double Crochet (dc).
Rnd 1: Chain 54, join with sl st. 2 ch for height, work 54 dc.
Rnd 2: 54 dc.
Rnd 3: (8 dc, inc) * 6 (60)
Rnd 4-11: 60 dc (8 rounds).
Do not cut the yarn! Turn the piece inside out. Crochet 4 sc through both sides in the middle to split the piece into two legs (26 sc per leg). Turn it right-side out and work 3 rounds of dc up each leg.
Front Panel: Attach yarn to the center of the front. Work 16 dc, then work in rows (turning at the end of each row): R1: 16 dc, R2: 15 dc, R3: 14 dc, R4: 13 dc. Finish with a slip stitch edge and add buttons at the corners.
The Accessory: Tiny Bell
Use dark beige cotton yarn and a 2.0mm hook.
Bell: R1: 6 sc in MR. R2-3: 6 sc. R4: (inc) * 6 (12). R5: (1 sc, inc) * 6 (18). R6: (2 sc, inc) * 6 (24). R7: (3 sc, inc) * 6 (30). R8-13: 30 sc. R14: (5 sc, inc) * 5 (35). R15: 35 sc. R16: (6 sc, inc) * 5 (40). R17-20: 40 sc. Fasten off.
Clapper (Internal part): R1: 6 sc in MR. R2: (inc) * 6 (12). R3-5: 12 sc. R6: (dec) * 6 (6).
Assembly: Stuff the clapper. Attach the bell to a long string (about 2 yards/78 inches). Thread the string through the inside of the bell, through the 15-ch loop attached to the clapper, and out through the bottom of the bell to create a working clapper. Attach the other end of the string to the goat’s neck.
Finishing
The final touches make all the difference!
- Assembly: Fit the head onto the body. Use a large needle to sew through every loop of both the head and body to ensure it is secure and doesn’t wobble.
- Face Details: Use brown yarn to embroider the nostrils (2 stitches high) and the eyebrows. Position the eyebrows about 3 rows above the eyes and 3 stitches to the side for an expressive look.
- Eyelashes: Apply a small amount of clear glue to the base of your faux lashes and carefully press them onto the eye rims.
Tips for Success
- Tension is Key: When working with plush yarn, try not to use a hook that is too large, as this can create visible holes where the stuffing might peek through.
- Use Markers: Always use a stitch marker at the beginning of your rounds, especially when working in spirals.
- Stuffing: Don’t be afraid to use plenty of stuffing, but remember to distribute it evenly to maintain the desired shape (like those cute cheeks!).
- Yarn Management: When working with thin cotton yarn for details, keep your tension consistent to avoid gaps in the snout or facial features.