Easy Origami Crochet Cardigan Pattern: A Cozy DIY Guide
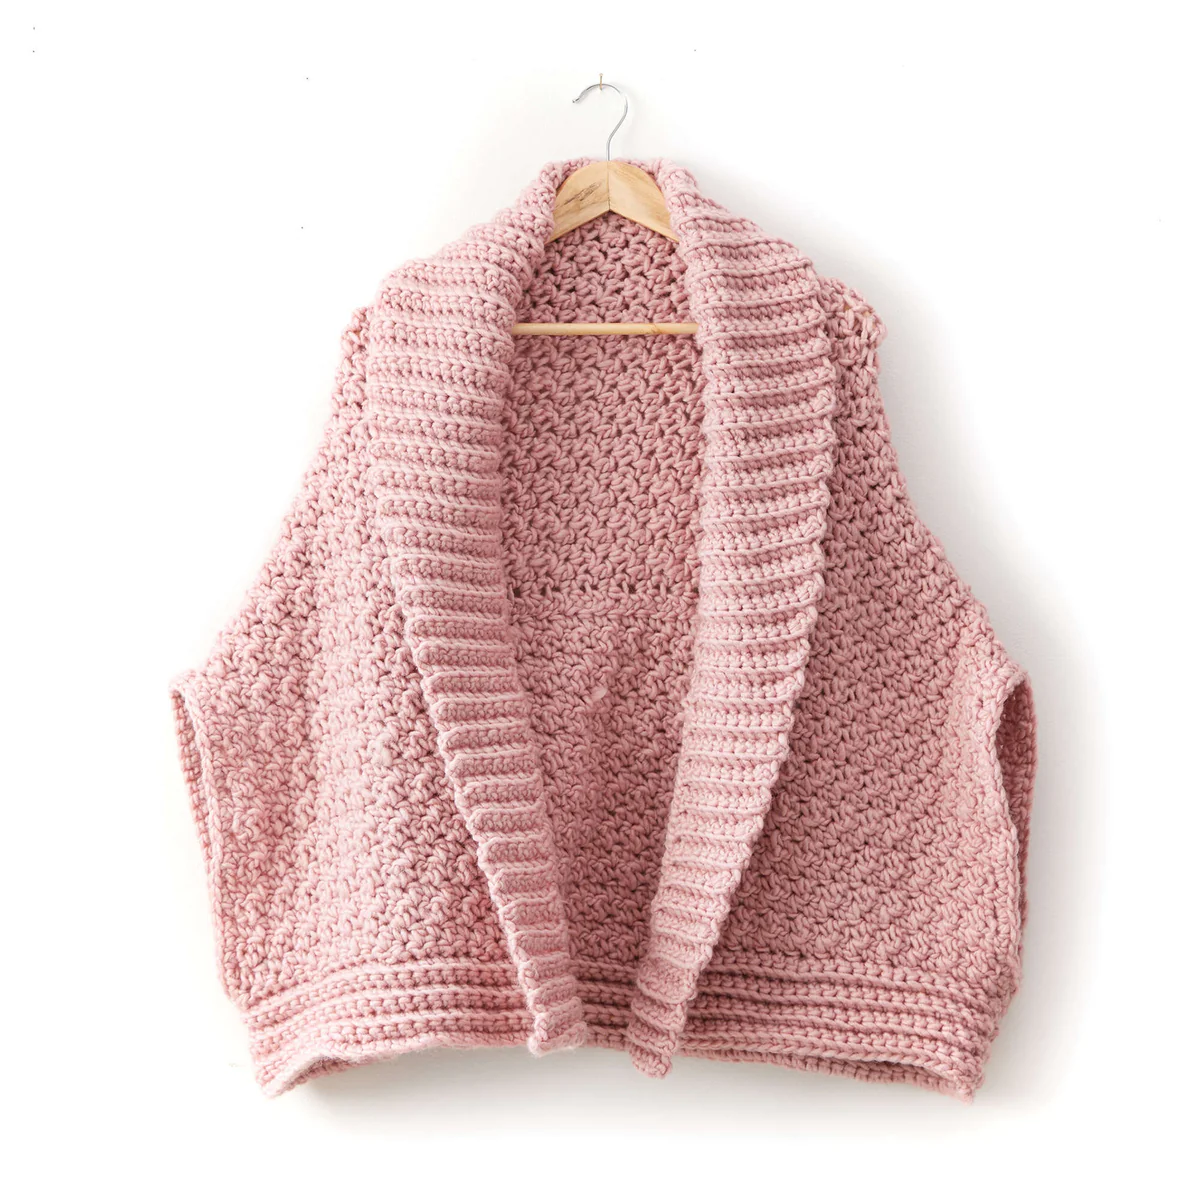
Looking for a cozy, modern layer to add to your wardrobe? This Origami Crochet Cardigan is the perfect project for anyone who loves the look of chunky, architectural knitwear but wants the satisfaction of making it by hand. With its unique textured panels and a dramatic shawl collar, this cardigan looks high-end but is surprisingly beginner-friendly.
The “origami” effect comes from a clever combination of stitch heights and back-loop-only ribbing, which gives the garment a structured yet draped silhouette. Whether you’re crafting this as a chunky autumn vest or a winter layer, it’s a wonderful way to practice your shaping and texture work. Let’s dive into how to create this stunning piece!
Materials & Abbreviations
To get started, you’ll need a chunky, roving-style yarn to achieve that plush, cozy look. This pattern is designed for a heavy-weight yarn that works up quickly.
Materials Needed
- Yarn: Chunky Roving Yarn (approx. 120 yards per 3.5 oz ball).
- XS/S/M: 8 balls
- L/XL/2XL: 10 balls
- 3/4/5 X-Large: 12 balls
- Crochet Hooks: 6.5 mm (K/10.5) and 8 mm (L/11)
- Notions: Stitch markers, tapestry needle for sewing, and scissors.
Gauge
Gauge is important to ensure your cardigan fits correctly. Use the smaller hook for ribbing and the larger hook for the main body.
- Smaller Hook (6.5 mm): 9 sc and 11 rows = 4″ square.
- Larger Hook (8 mm): 8 sc and 10 rows = 4″ square.
Abbreviations (US Terms)
- Beg: Beginning
- Ch: Chain
- Dc: Double crochet
- Dec: Decrease
- Inc: Increase
- Rep: Repeat
- RS: Right side
- WS: Wrong side
- Sc: Single crochet
- Scbl: Single crochet in back loop only
- Sc2togbl: Single crochet 2 together through back loops only (yarn over, insert hook into back loop of next stitch, yarn over and pull up a loop, yarn over, insert hook into back loop of next stitch, yarn over and pull up a loop, yarn over and draw through all loops on hook)
- Sl st: Slip stitch
- St(s): Stitch(es)
- Yoh: Yarn over hook
Step-by-Step Instructions
This cardigan is worked in three main pieces: the Front, the Back, and the Collar. The instructions are written for the smallest size, with larger sizes indicated in parentheses: Smallest (Medium/Large).
The Front Panel
Using the smaller hook, start by chaining 36 (40-44).
Row 1 (RS): Sc in 2nd ch from hook and in each ch across. Turn. (35 (39-43) sc).
Row 2: Ch 1, scbl in each st across. Turn.
Row 3-7: Repeat Row 2 five more times to create the bottom ribbing.
Next Row (WS): Ch 1. *Sc2togbl over the first 2 sts, scbl in next 5 (6-7) sts. Repeat from * until 7 sts remain. Turn. Leave those 7 sts unworked. Place a stitch marker in the last of the unworked stitches. (24 (28-32) sts).
Switch to the larger hook for the textured body:
Next Row (RS): Ch 1, sc in first st, dc in next. *Sc in next, dc in next. Repeat from * across. Turn.
Next Row: Ch 1, sc in first dc, dc in next sc. *Sc in next dc, dc in next sc. Repeat from * across. Turn.
Body Length: Repeat the last two rows until the piece measures approximately 53 (59-63) inches from the beginning, ending on a Right Side row.
Switch back to the smaller hook:
Next Row (WS): Ch 1, 2 scbl in first st, scbl in next 5 (6-7) sts. *2 scbl in next st, scbl in next 5 (6-7) sts. Repeat from * across. Turn. (28 (32-36) sts).
Next Row (RS): Ch 1, scbl in each st across. Turn.
Shaping: Repeat the last row until the section from the marker measures 34 (39.5-42) inches, ending on a Wrong Side row. Fasten off.
The Shawl Collar
With the Right Side facing and using the smaller hook, join your yarn with a slip stitch to the marked first scbl of the 7 unworked stitches on the Front panel.
Initial Section: Ch 1, scbl in each st across (7 sts). Turn. Repeat this row 7 (11-13) times. Turn.
Increasing the Collar:
Row 1 (Inc Row): Ch 1, 2 scbl in first st, scbl in each remaining st. Turn.
Rows 2-4: Ch 1, scbl in each st across. Turn.
Repeat these 4 rows 8 more times (ending with 16 sts).
Collar Length: Ch 1, scbl in each st across. Turn. Repeat this row until the collar measures approximately 34 (39.5-42) inches from the marker, ending on a WS row.
Decreasing the Collar:
Row 1 (Dec Row): Ch 1, sc2togbl, scbl in each remaining st. Turn.
Rows 2-4: Ch 1, scbl in each st across. Turn.
Repeat these 4 rows 8 more times (ending with 7 sts).
Final Finish: Ch 1, scbl in each st across. Turn. Repeat this row 7 (11-13) times. Fasten off.
The Back Panel
Using the smaller hook, chain 69 (77-85).
Row 1 (RS): Sc in 2nd ch from hook and in each ch across. Turn. (68 (76-84) sc).
Switch to the larger hook:
Row 2 (RS): Ch 1, sc in first st, dc in next. *Sc in next, dc in next. Repeat from * across. Turn.
Row 3: Ch 1, sc in first dc, dc in next sc. *Sc in next dc, dc in next sc. Repeat from * across. Turn.
Back Length: Repeat the last two rows until the piece measures approximately 13 (14-14) inches, ending on a WS row. Fasten off.
Finishing
Now it’s time to assemble your garment!
Assembly
- Join the Back: Center the top edge of the Back panel along the bottom edge of the Front panel. Using a whipstitch, sew them securely in place.
- Create Armholes: Sew the sides of the Front ribbing to the sides of the Back ribbing to form the armholes. Repeat on the other side.
- Attach the Collar: Sew the last row of the Collar to the bottom of the extended scbl section at the top of the Front panel using a whipstitch. Then, sew the straight edge of the Collar to the side edge of the Front panel.
Armhole Edging
With the Right Side facing and using the smaller hook, join yarn with a slip stitch to the armhole at the bottom seam. Ch 1. Work single crochet evenly around the entire armhole opening. Join with a slip stitch to the first sc. Fasten off and weave in all ends.
Tips for Success
- Maintain Consistent Tension: Because this pattern uses two different hook sizes to create texture, be careful not to pull your stitches too tight when switching back to the smaller hook.
- Blocking: Chunky roving yarn can sometimes “stretch” or look uneven. We highly recommend steam blocking your finished panels before sewing them together to ensure the edges are straight and the garment hangs correctly.
- Customizing Length: The beauty of this pattern is its simplicity. If you prefer a longer cardigan or a shorter vest, simply add or subtract rows in the larger-hook textured section of the Front and Back panels.
- Yarn Choice: If you don’t have roving yarn, any “super bulky” weight yarn will work, though the drape may vary slightly.