Adorable Crochet Goose Amigurumi Pattern: Step-by-Step Tutorial
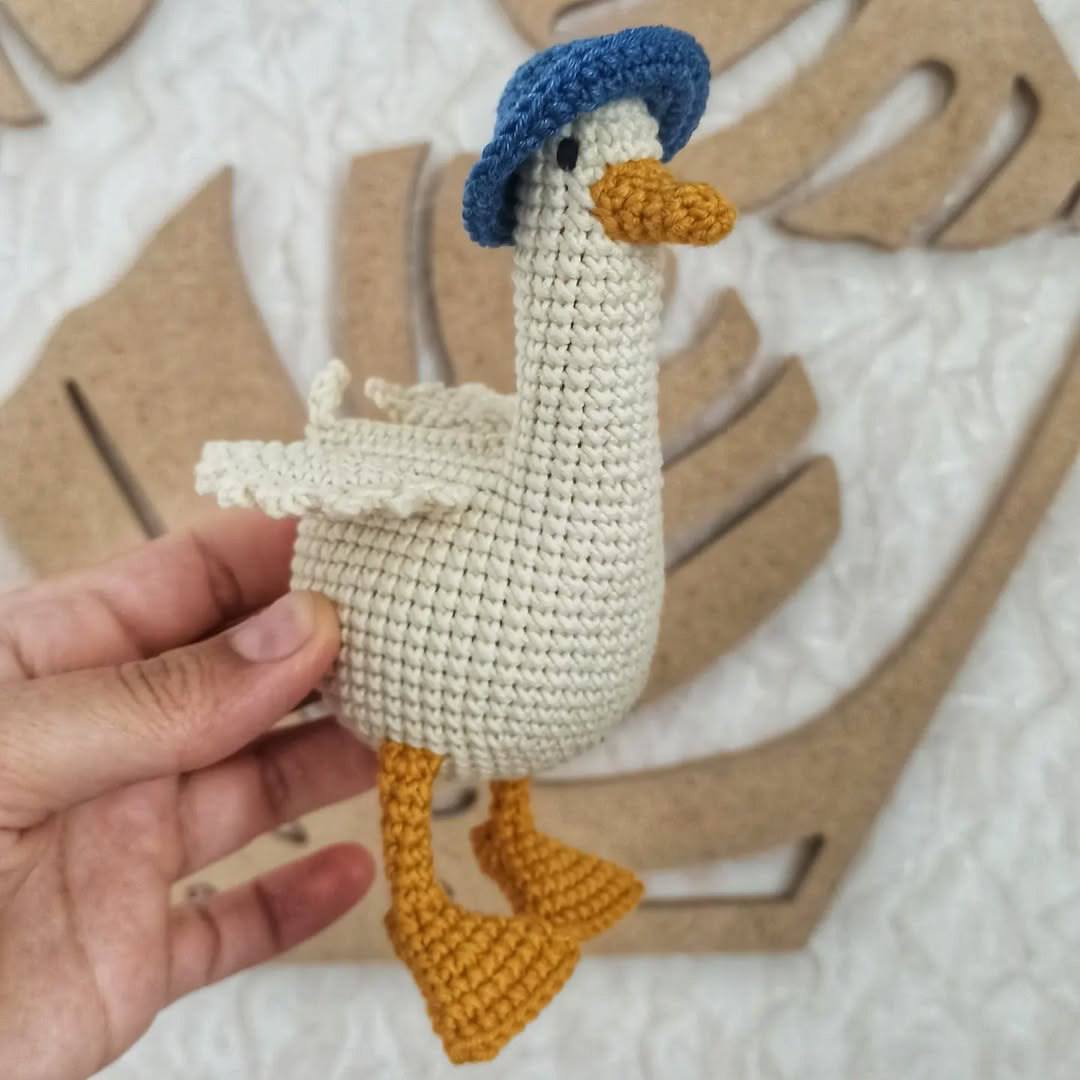
There is something absolutely charming about a little goose waddling into your home decor. Whether you are looking for a cute gift for a baby shower, a whimsical addition to your desk, or a fun project to practice your amigurumi skills, this crochet goose is the perfect project. With its long neck and sweet expression, this little bird is sure to bring a smile to anyone’s face.
This pattern is designed to be beginner-friendly, using basic stitches to create a professional-looking plushie. The finished goose stands approximately 5 inches tall, making it a great “pocket-sized” companion. Let’s dive into the details and start crafting your own little feathered friend!
Materials & Abbreviations
To get started, gather your supplies. We recommend using a cotton or cotton-blend yarn to give the goose a clean, defined stitch and a sturdy shape.
Supplies Needed
- Yarn: Medium weight (4) cotton or cotton-blend yarn. You will need two colors:
- White or Cream (for the body and wings)
- Mustard Yellow (for the beak and feet)
- Crochet Hook: 2.0mm or 2.5mm (to ensure tight stitches so the stuffing doesn’t show through).
- Stuffing: Polyester fiberfill.
- Tools: Yarn needle, scissors, and a stitch marker.
- Eyes: Small black safety eyes or black embroidery thread.
Abbreviations (US Terms)
- MR: Magic Ring
- sc: Single Crochet
- inc: Increase (2 sc in one stitch)
- dec: Decrease (sc 2 stitches together)
- ch: Chain
- sl st: Slip Stitch
- hdc: Half Double Crochet
- dc: Double Crochet
- (…) x 6: Repeat the instructions inside the parentheses 6 times.
- (number): Total stitch count at the end of the round.
Step-by-Step Instructions
The Wings (Make 2)
Use your white or cream yarn for the wings. These are worked as flat circles and then folded to create a 3D effect.
- Round 1: 6 sc in MR (6)
- Round 2: inc in each stitch around (12)
- Round 3: (1 sc, inc) x 6 (18)
- Round 4: (2 sc, inc) x 6 (24)
- Round 5: 24 sc
- Round 6: Fold the piece in half. Ch 1, then work 11 sc and 1 inc across the edge, joining both sides of the wing together.
To create the ruffled edge: Turn your work, ch 3 and work 1 sc in the first stitch. Then repeat (1 sl st, (1 sl st, 3 ch, 1 sl st)) x 6. Fasten off, leaving a long tail for sewing.
The Beak
Switch to your mustard yellow yarn.
- Round 1: 5 sc in MR (5)
- Round 2: (1 sc, inc) x 2, 1 sc (7)
- Round 3: 7 sc
- Round 4: (1 sc, inc) x 3, 1 sc (10)
- Round 5: 10 sc
Finish with a sl st. Fasten off and leave a tail for sewing.
The Body and Head
Using white or cream yarn, we will create the body and the long neck in one continuous piece.
- Round 1: 5 sc in MR (5)
- Round 2: inc in each stitch around (10)
- Round 3: (1 sc, inc) x 5 (15)
- Round 4: (2 sc, inc) x 5 (20)
- Round 5: (3 sc, inc) x 5 (25)
- Round 6: (4 sc, inc) x 5 (30)
- Round 7: (5 sc, inc) x 5 (35)
- Round 8: (6 sc, inc) x 5 (40)
- Round 9: (7 sc, inc) x 5 (45)
- Rounds 10-23: sc in each stitch around for 14 rounds (45)
- Round 24: Fold the piece in half. Without chaining, work 14 sc across to join the two sides together. Then, continue crocheting 16 sc in a circle. In the following round, close these 16 stitches into a tight circle to form the base of the neck.
Stuffing: Firmly stuff the body with fiberfill before the neck becomes too narrow.
- Rounds 25-40: 16 sc in each round for 16 rounds (16)
- Round 41: (2 sc, dec) x 4 (12)
- Round 42: (1 sc, dec) x 4 (8)
- Round 43: 2 dec.
Fasten off and use your yarn needle to weave the tail through the remaining stitches and pull tight to close the head.
The Feet (Make 2)
Use mustard yellow yarn. We start with the foot base and then work the leg upwards.
Foot Base:
- Round 1: 5 sc in MR (5)
- Round 2: (inc, 1 sc) x 2, inc (8)
- Round 3: 8 sc
- Round 4: (1 sc, inc) x 4 (12)
- Round 5: 12 sc
- Round 6: (2 sc, inc) x 4 (16)
- Rounds 7-8: 16 sc (2 rounds)
- Round 9: Fold the piece in half. Ch 1, and joining the two sides stitch-by-stitch, work 8 sc.
Fasten off, leaving a 4-inch tail.
The Leg:
Starting from the top of the foot base, work 5 chain stitches. Then work 6 rows of 5 sc (working back and forth). Fold the leg in half and work 2 sc to join the edges together. Fasten off, leaving a tail for sewing.
Finishing Your Goose
Now it is time to put all the pieces together! Assembly is where your goose really comes to life.
Creating the Tail
Go back to the first stitch of Round 24 on the body. Attach your white yarn and ch 4. In the second chain from the hook, work 1 sc, 1 hdc, and 1 dc. Sl st back into the first stitch of Round 24. Fasten off and hide the ends inside the body.
Final Assembly
- Wings: Sew the wings to the sides of the body, centered between the neck and the tail.
- Beak: Sew the beak to the end of the head. Make sure it is centered and slightly angled for a cute look.
- Feet: Sew the legs to the bottom of the body. Ensure they are spaced evenly so the goose can stand upright.
- Eyes: Use black embroidery thread to sew two small eyes just above the beak, or insert safety eyes if you have them.
Tips for Success
Getting the Perfect Shape
When stuffing your goose, use a chopstick or a crochet hook to push the fiberfill into the narrow neck. If the neck is too soft, the head may flop over. Stuff it firmly but avoid overstuffing to the point where the stitches stretch and gaps appear.
Tension Control
Amigurumi requires tight tension. If you find your stitches are too loose, try dropping down a hook size (for example, from 2.5mm to 2.0mm). This prevents the stuffing from leaking out.
Seamless Finishes
To hide your yarn tails, use a yarn needle to pull the end of the thread back through the body of the goose for about an inch before clipping it close to the fabric. This ensures your goose won’t unravel over time.