Amigurumi Bunny Keychain Pattern
Materials
To create your adorable crochet bunny keychain, gather the following materials and tools:
- Yarn: Half cotton, approximately 25g / 160m. The designer used YarnArt Jeans (divided into two strands) but suggests Alize Cotton Gold Fine or YarnArt Cotton Soft as alternatives.
- Crochet Hook: Suitable for your chosen yarn, the designer used 1.25 mm.
- Eyes: Small safety eyes or beads for embroidery.
- Embroidery Yarn: A small amount of yarn for embroidering the spout (nose).
- Needle: For sewing parts together and weaving in ends.
- Filler: Polyester fiberfill or similar stuffing for soft toys.
Abbreviations
This amigurumi pattern uses standard crochet abbreviations:
- MR: Magic Ring
- sc: Single Crochet
- inc: Increase (2 single crochet stitches in one stitch)
- dec: Decrease (single crochet 2 stitches together)
Finished Size
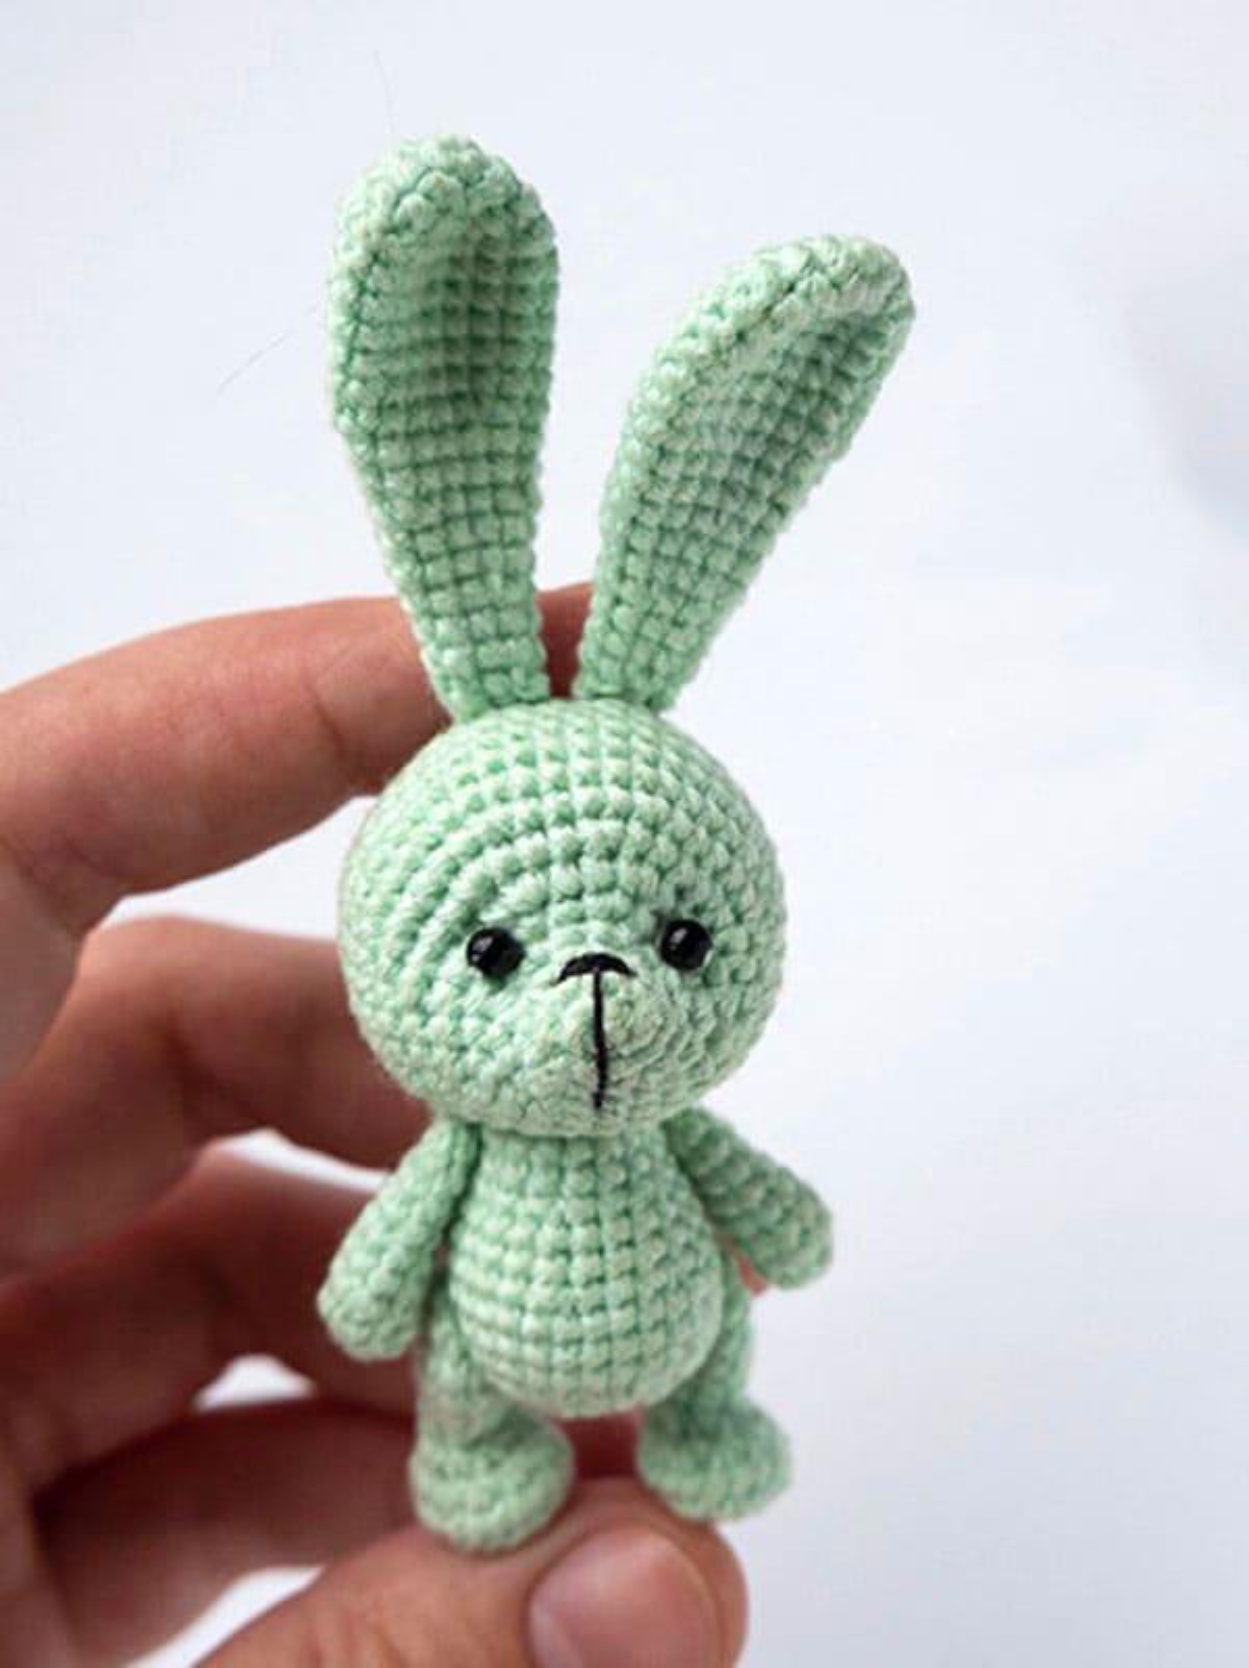
This pattern is designed to create a cute crochet bunny keychain. As such, it will result in a smaller, compact amigurumi piece, perfect for attaching to keys or bags, and not intended as a large toy.
Get Started: Cute Keychain Bunny Amigurumi
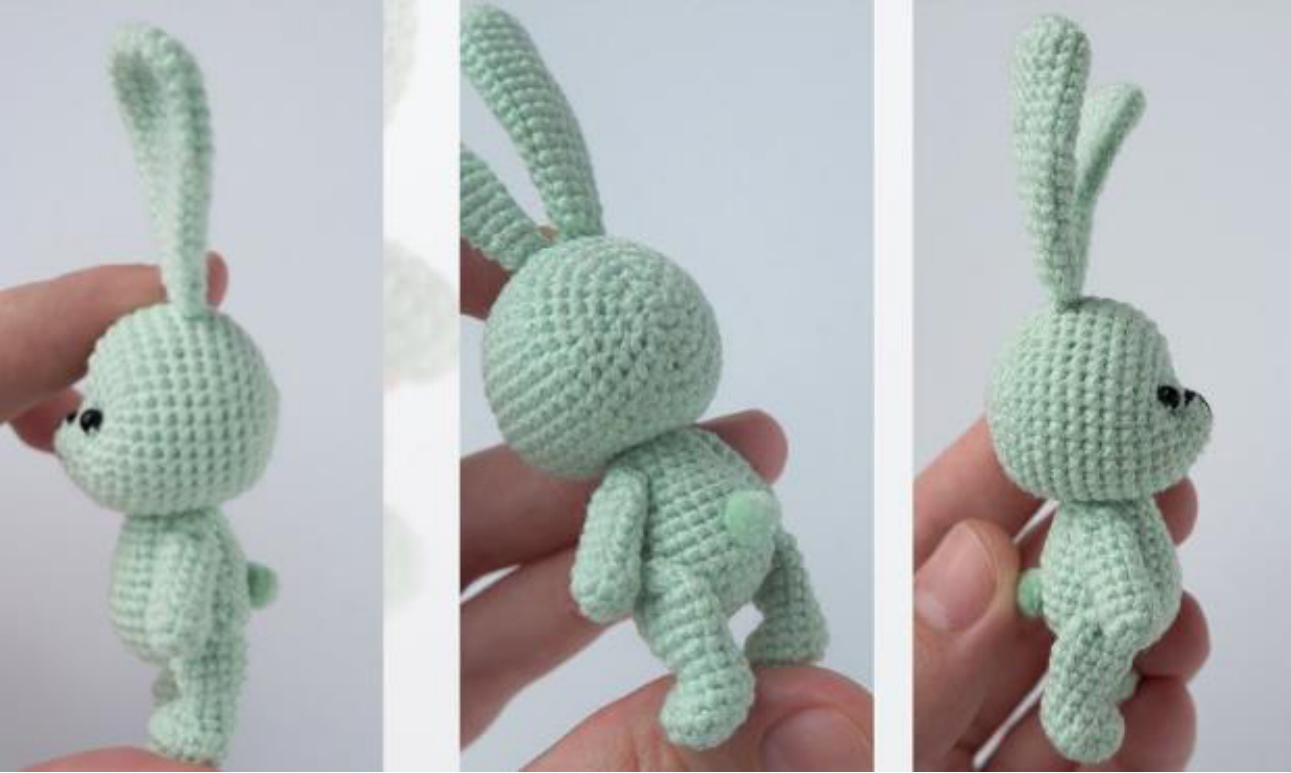
Embark on a delightful crochet journey to create your very own charming bunny keychain. This free amigurumi pattern, translated from Russian, uses simple materials and a lovely shade of green yarn, making it accessible for many crocheters. Pay special attention to the ears, which give this little bunny its unique character. Let’s begin crocheting!
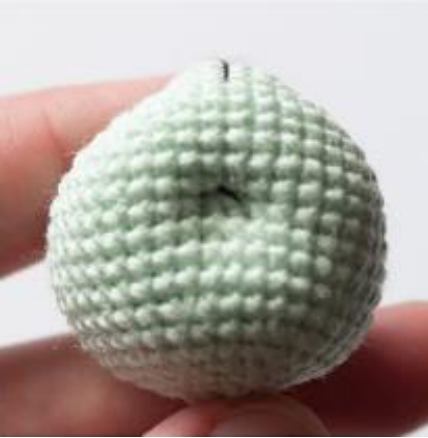
Head
We’ll start by knitting the head from the muzzle up, creating a sweet facial structure for our amigurumi bunny.
- Rnd 1: 6 sc in MR (6)
- Rnd 2: inc * 6 (12)
- Rnd 3: sc * 12 (12)
- Rnd 4: (sc, inc) * 6 (18)
- Rnd 5: 3 sc, (sc, inc) * 6, 3 sc (24)
- Rnd 6: 4 sc, inc, (2 sc, inc) * 5, 4 sc (30)
- Rnd 7: 3 sc, (3 sc, inc) * 6, 3 sc (36)
- Rnd 8: 5 sc, inc, (4 sc, inc) * 5, 5 sc (42)
- Rnd 9-14: sc * 42 (42)
- Rnd 15: (5 sc, dec) * 6 (36)
- Rnd 16: sc * 36 (36)
- Rnd 17: (4 sc, dec) * 6 (30)
- Rnd 18: (3 sc, dec) * 6 (24)
- Rnd 19: (2 sc, dec) * 6 (18)
- Rnd 20: (sc, dec) * 6 (12)
- Rnd 21: dec * 6 (6)
Cut off the yarn, carefully tighten the remaining hole, and hide the tip inside the head. You’ve completed the head for your crochet bunny keychain!
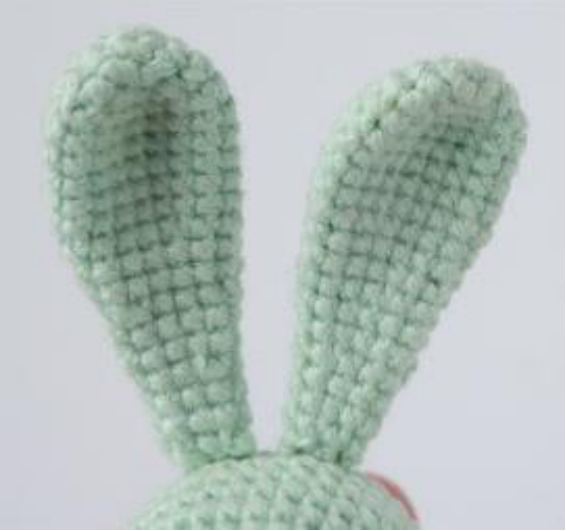
Ears (Make 2)
Next, we’ll crochet the distinctive ears that give this amigurumi bunny its adorable charm. Make two identical pieces.
- Rnd 1: 6 sc in MR (6)
- Rnd 2: inc * 6 (12)
- Rnd 3: (sc, inc) * 6 (18)
- Rnd 4-9: sc * 18 (18)
- Rnd 10: (4 sc, dec) * 3 (15)
- Rnd 11-12: sc * 15 (15)
- Rnd 13: (3 sc, dec) * 3 (12)
- Rnd 14-15: sc * 12 (12)
- Rnd 16: (2 sc, dec) * 3 (9)
- Rnd 17-18: sc * 9 (9)
- Rnd 19: (sc, dec) * 3 (6)
Cut off the thread, leaving a long end for sewing the ears onto the head.
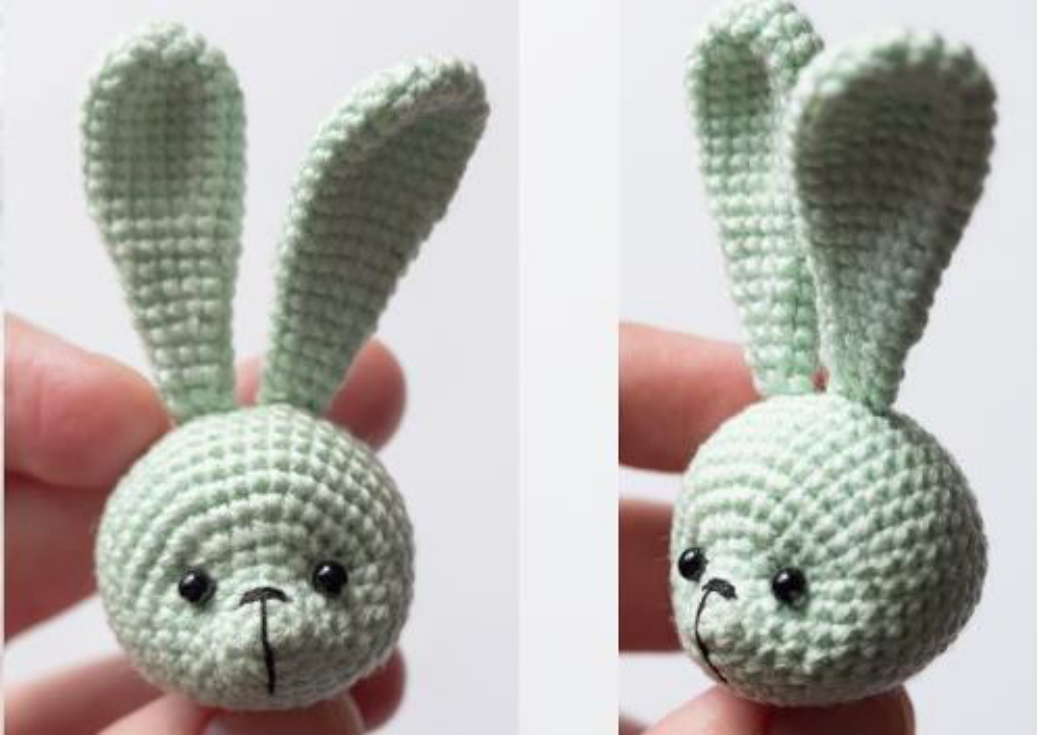
Designing the Head
Now it’s time to bring your bunny’s face to life! All yarn ends should be fixed in the lower part of the head, where the body will eventually be attached.
- Tightening & Eyes: Make gentle tightening if desired for facial shaping. Sew on the eyes, placing them between the 5th and 6th rows of the head. Leave approximately 7 single crochet stitches between the eyes from the 5th row for proper spacing.
- Nose: Using your embroidery yarn, carefully embroider a small nose onto the muzzle.
- Ears: Sew on the crocheted ears you just made. Position them approximately between rows 11 and 12 of the head.
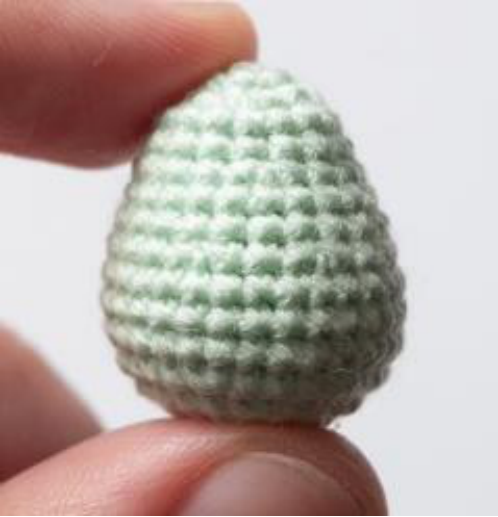
Body
After finishing the head and ears, let’s crochet the main body part of your amigurumi bunny.
- Rnd 1: 6 sc in MR (6)
- Rnd 2: inc * 6 (12)
- Rnd 3: (sc, inc) * 6 (18)
- Rnd 4: (2 sc, inc) * 6 (24)
- Rnd 5: (3 sc, inc) * 6 (30)
- Rnd 6-8: sc * 30 (30)
- Rnd 9: 4 sc, (dec, 2 sc) * 5, dec, 4 sc (24)
- Rnd 10-11: sc * 24 (24)
- Rnd 12: (2 sc, dec) * 6 (18)
- Rnd 13-14: sc * 18 (18)
- Rnd 15: (sc, dec) * 6 (12)
- Rnd 16: dec * 6 (6)
Cut the yarn, and using a needle, pull off the remaining hole to close it. Hide the yarn end neatly. Fill the body firmly with toy filler as you crochet or once closed.
Legs (Make 2)
Crochet two legs for your bunny. Remember to stuff them as you go.
- Rnd 1: 6 sc in MR (6)
- Rnd 2: inc * 6 (12)
- Rnd 3: (sc, inc) * 6 (18)
- Rnd 4: sc * 18 (18)
- Rnd 5: 3 sc, dec * 6, 3 sc (12)
- Rnd 6: 3 sc, dec * 3, 3 sc (9)
- Rnd 7: sc * 9 (9)
- Rnd 8: (2 sc, inc) * 3 (12)
- Rnd 9-11: sc * 12 (12)
- Rnd 12: dec * 6 (6)
Cut the yarn, close the hole with a needle, and hide the end. Ensure the legs are stuffed sufficiently.
Arms (Make 2)
Now, create two arms for your cute bunny.
- Rnd 1: 6 sc in MR (6)
- Rnd 2: inc * 6 (12)
- Rnd 3: (2 sc, dec) * 3 (9)
- Rnd 4-8: sc * 9 (9)
- Rnd 9: (sc, dec) * 3 (9)
Cut the yarn, pull off the hole with a needle, and hide the end. Stuff lightly.
Tail (Optional Pompom)
You can either crochet a small tail or attach a fluffy pompom for an extra cute touch.
- Rnd 1: 6 sc in MR (6)
- Rnd 2: sc * 6 (6)
Cut the yarn, leaving a long end to be sewn onto the body. If using a pompom, simply prepare it for attachment.
Assembly & Finishing
With all the individual pieces crocheted, it’s time to assemble your adorable bunny keychain!
- Attach Head to Body: Sew the body to the head using a strong yarn for secure fastening. Ensure the stuffing is evenly distributed.
- Attach Legs and Arms: Sew the legs and arms to the body, again using strong yarn for firm attachment. Position them symmetrically for the best look.
- Attach Tail: Sew the crocheted tail (or pompom) to the back of the body.
Important Tip: For any thread fastening or sewing where pieces will bear weight or be handled frequently (like a keychain), it is essential to use a strong, durable yarn to ensure your bunny stays intact.
Your Cute Keychain Bunny is now ready!