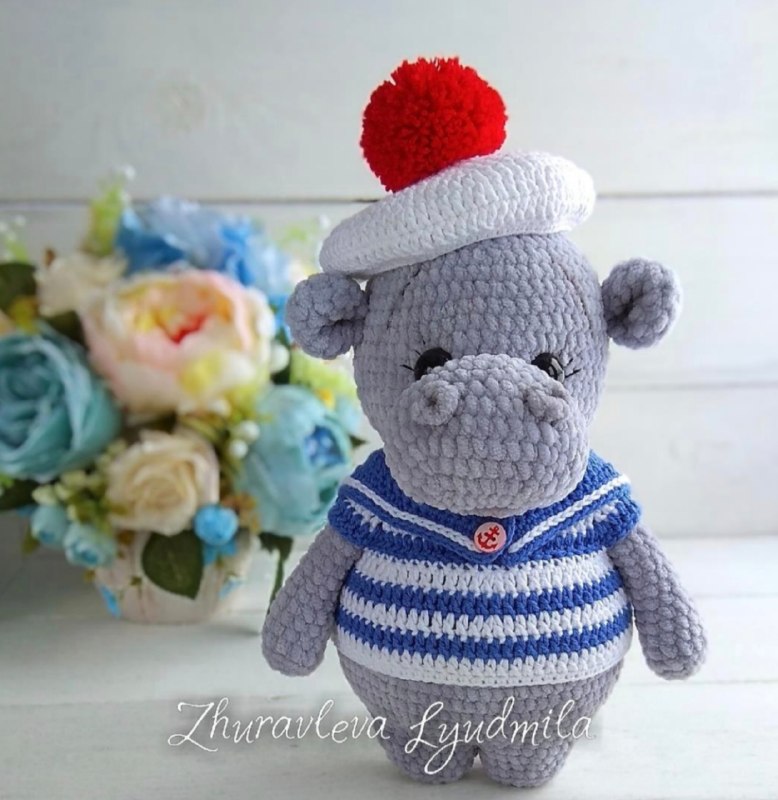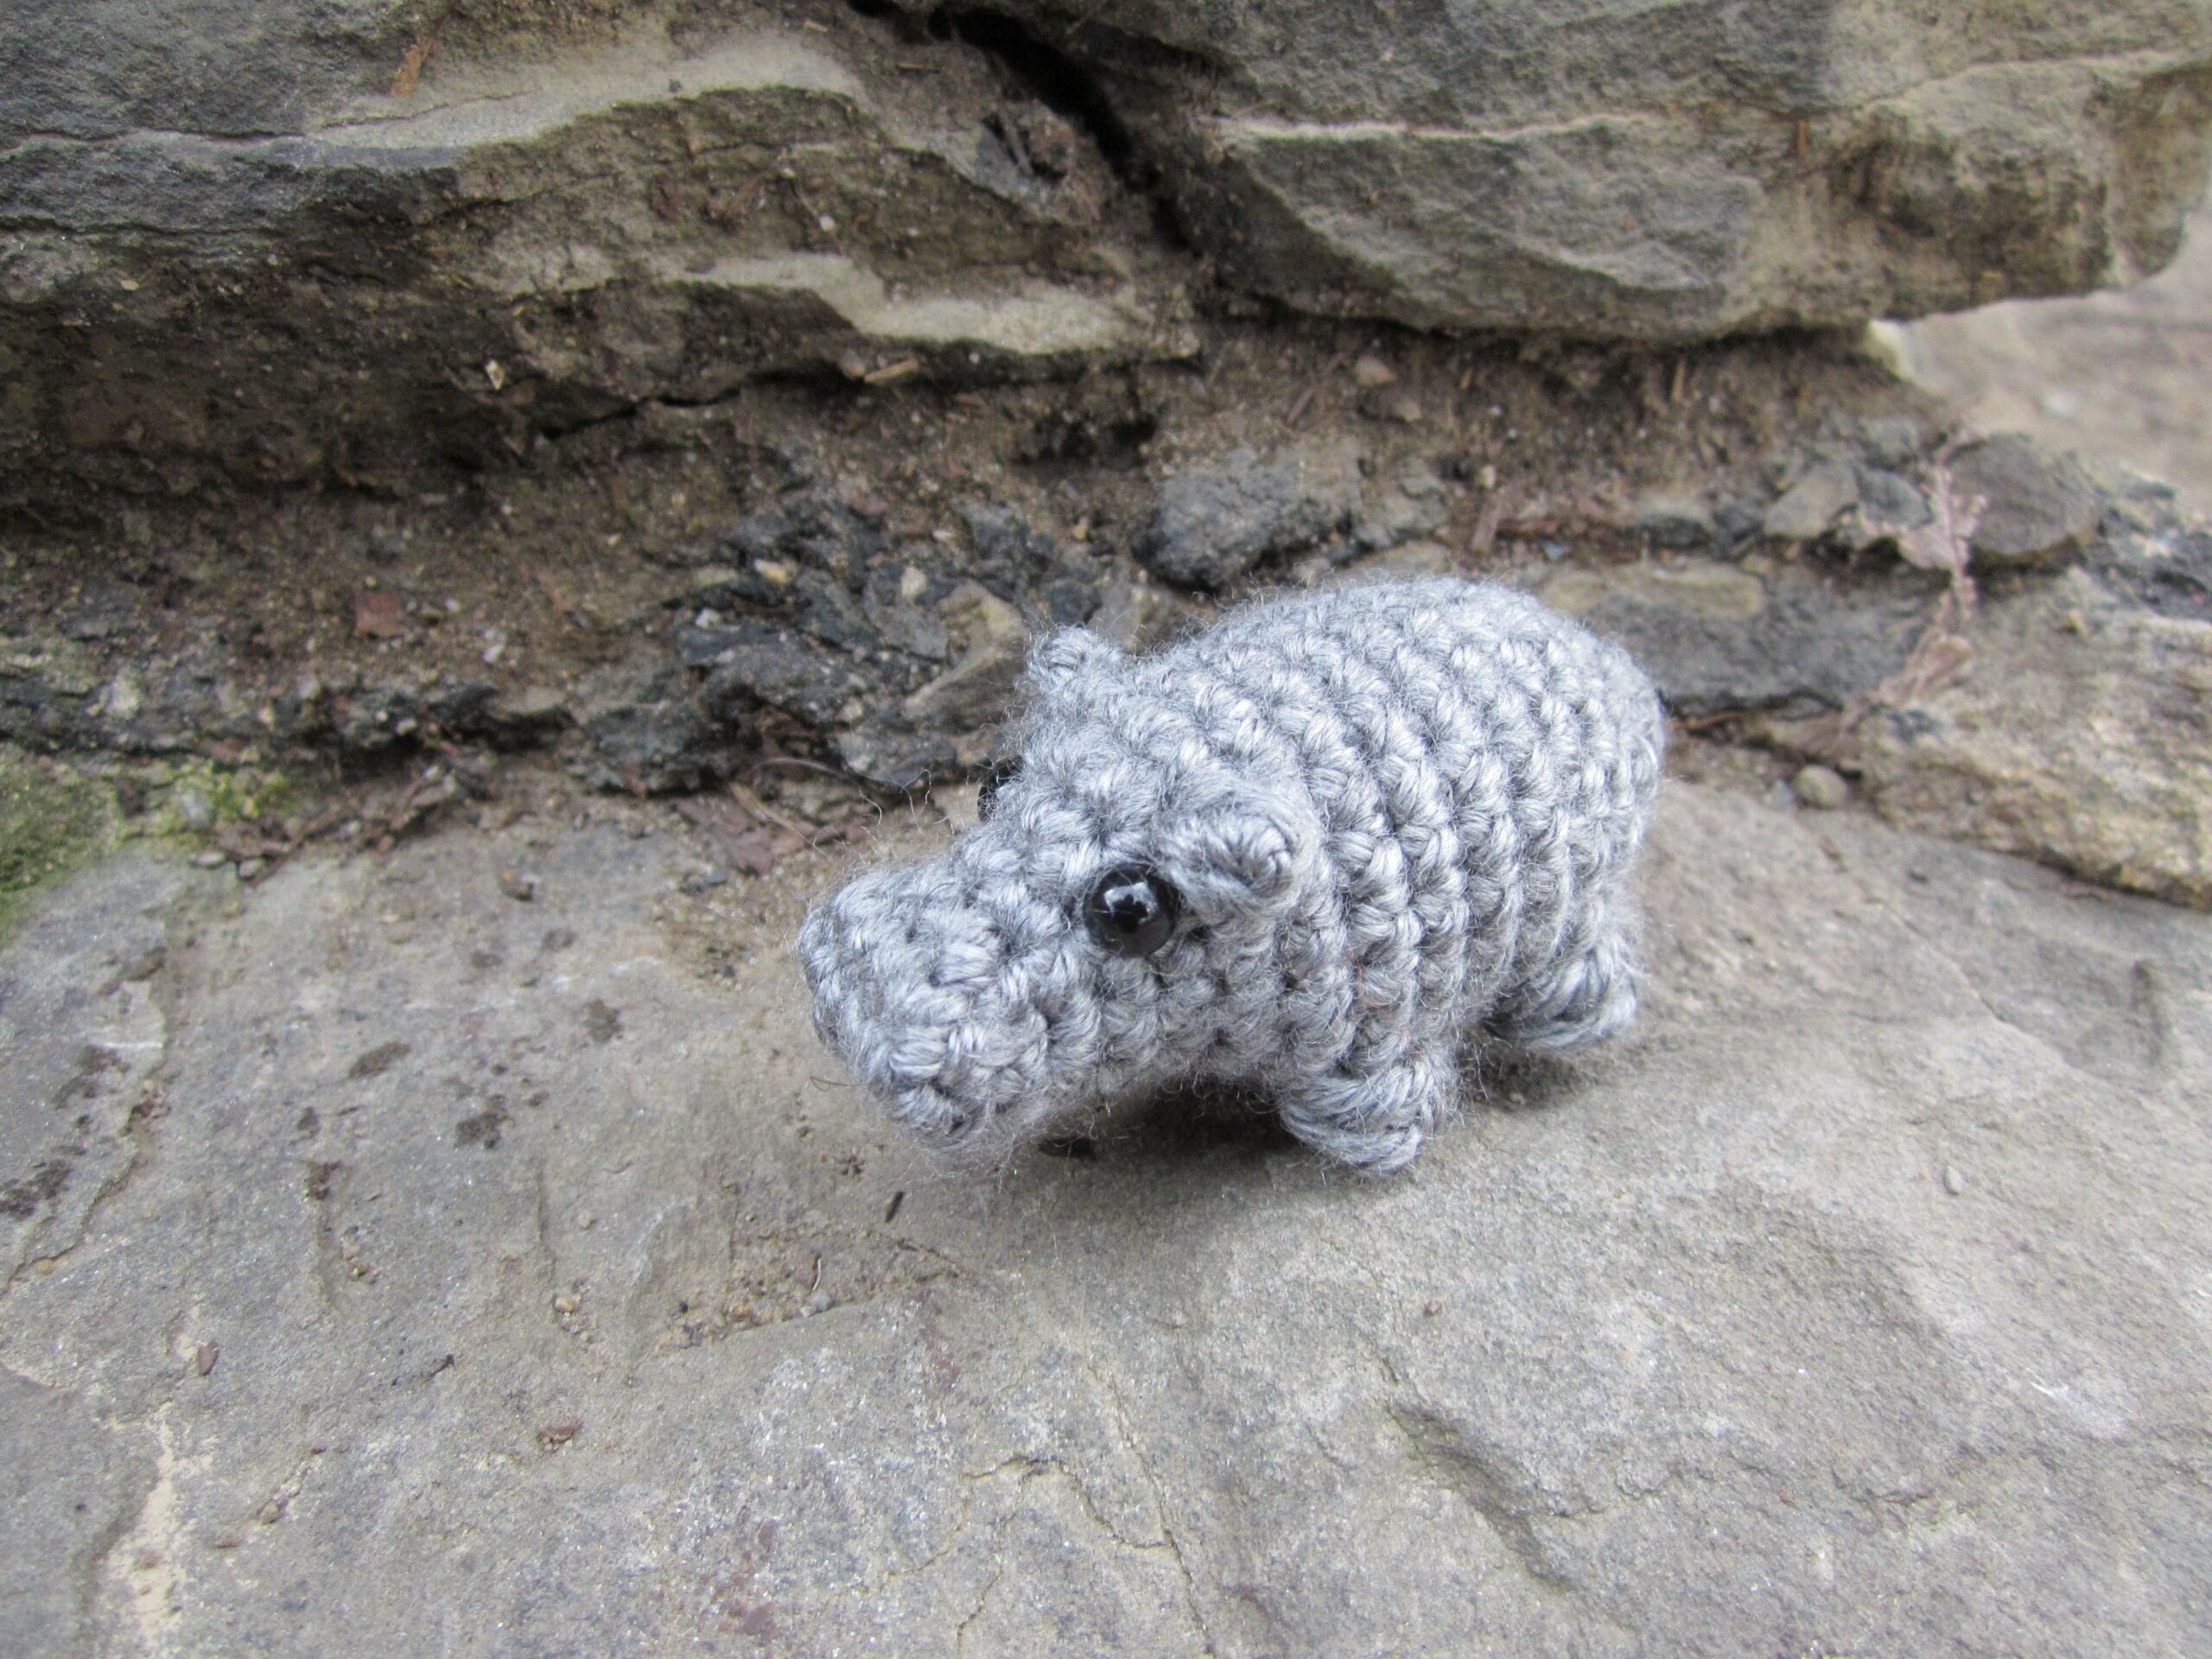
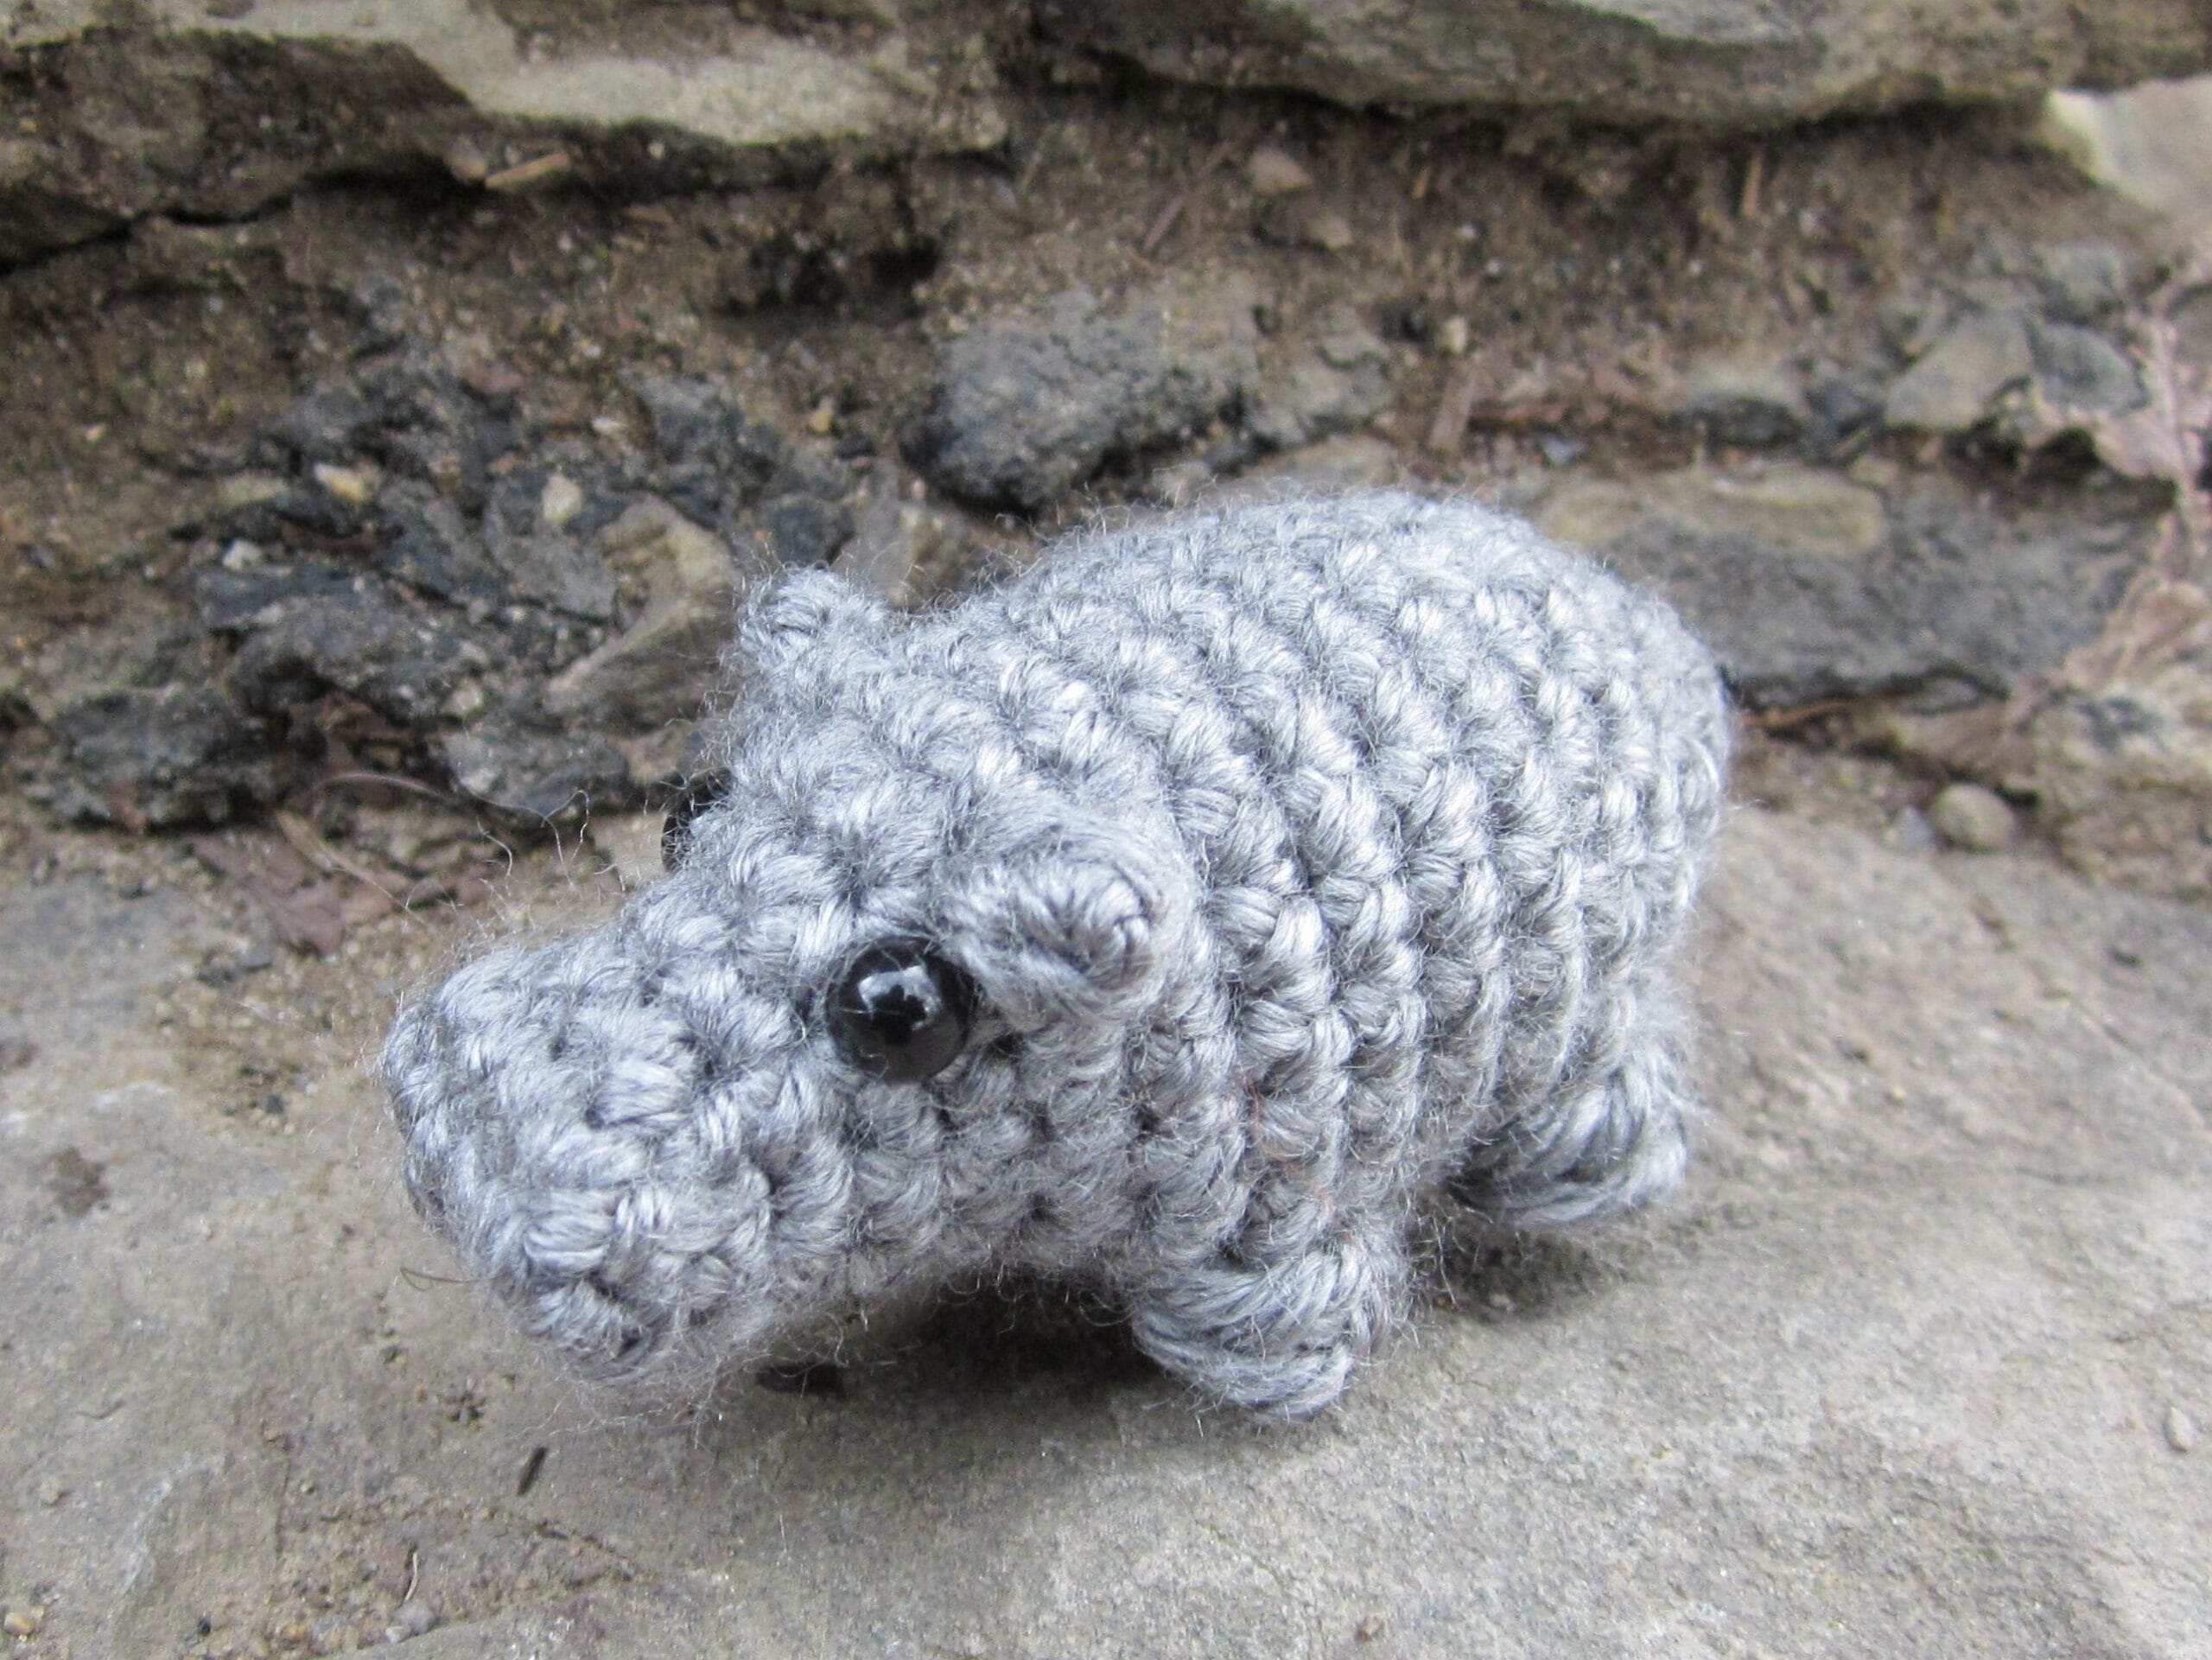
No-Sew Hippopotamus: An Adorable Beginner-Friendly Amigurumi Pattern
Meet Your New Tiny Hippo Friend
Isn’t there something magical about miniature crochet creatures? This No-Sew Hippopotamus might be small (just 3 inches long!), but it’s bursting with personality. What makes it extra special? No sewing required! All those adorable features – ears, legs, even the curly tail – are crocheted directly onto the body.
This pattern is perfect for beginners wanting to dip their toes into amigurumi. You’ll practice:
✔ Working in continuous rounds
✔ Simple increases and decreases
✔ Attaching parts without sewing
✔ Creating cute textured details
Finished in under an hour, these pocket-sized hippos make wonderful:
• Keychain charms
• Bag accessories
• Desk buddies
• Baby-safe toys (just embroider eyes instead of using safety eyes)
The best part? You only need 15 yards of yarn – it’s the ultimate stash-buster project
🧶 Materials You’ll Need
- Yarn: 15 yards worsted weight gray yarn
- Hook: 3.5mm (Size E)
- Safety eyes: 6mm black pair (optional – can embroider eyes)
- Polyfill stuffing
- Scissors
- Yarn needle (for weaving ends)
📏 Finished Size
Approximately 3 inches (7.5 cm) long
📝 Stitch Glossary (US Terms)
- ch: chain
- sc: single crochet
- sl st: slip stitch
- inc: increase (2 sc in same stitch)
- dec: decrease (sc two together)
- Special Stitches:
- Ear: ch 2, 2 sc in 2nd ch from hook
- Leg: Work 5 dc in same st, omitting final yo/pull-through on each, then yo and draw through all 6 loops
🧵 Step-by-Step Crochet Instructions
Starting the Hippo Body (Worked from Nose)
- Round 1:
- Chain 5
- 2 sc in 2nd chain from hook
- 1 sc in next 2 chains
- 4 sc in last chain
- Working on opposite side of chain: 1 sc in next 2 chains, 2 sc in first chain
- (12 sc total)
- Rounds 2-5:
- Follow increase/decrease pattern to shape the head (see detailed rounds in original pattern)