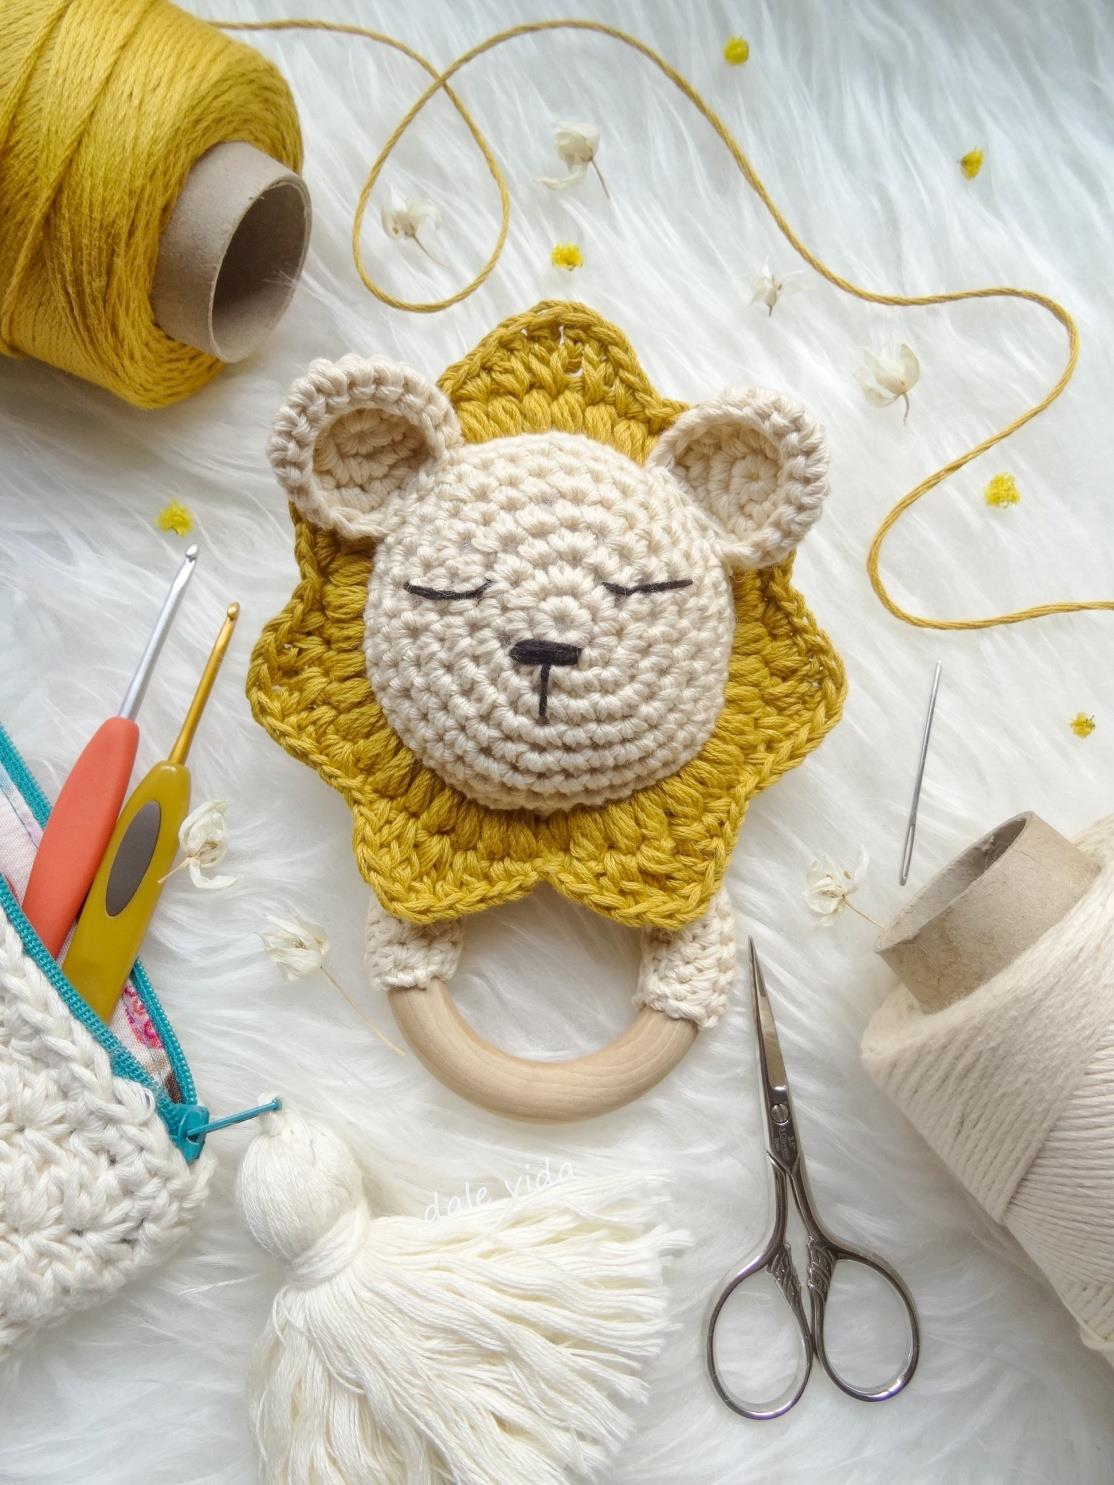
Meet Bali the Lion Rattle: A Roaringly Cute Crochet Pattern for Baby
Let’s Begin! Bali the Lion Rattle Pattern
Head and Mane (Worked Together)
We’ll start with the face and then create the fluffy mane using bobble stitches.
With the main color (cream/beige) for the face base:
- R1: 6 sc in a magic ring. (6)
- R2: inc in each stitch around. (12)
- R3: (1 sc, inc) x 6. (18)
- R4: (2 sc, inc) x 6. (24)
- R5: (3 sc, inc) x 6. (30)
- R6: (4 sc, inc) x 6. (36)
- R7: (5 sc, inc) x 6. (42)
- R8: (6 sc, inc) x 6. (48)
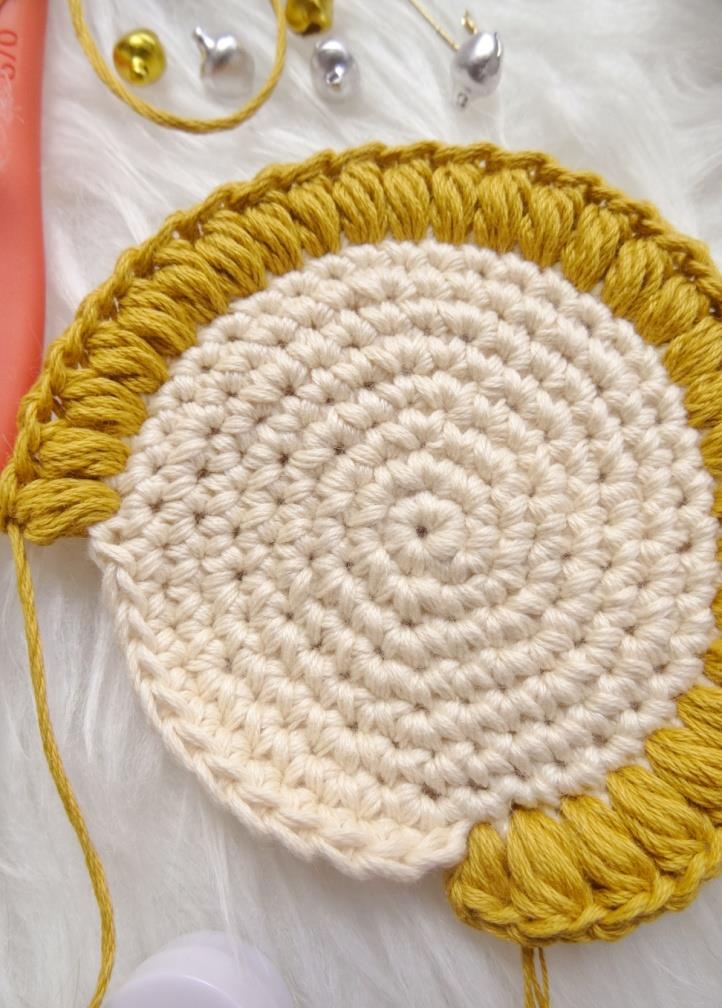
Now we will work the bobble stitch mane!
Important: At the point where the two parts join, we begin working bobble stitches. The bobble stitch is worked with 4 loops (lazadas) and is always closed with a chain stitch.
- Row 1 of Mane (R9 overall): Ch 2 to start (these 2 chains count as the first loop of the first bobble). Work bobble stitches in each stitch around WITHOUT making separation chains between bobbles. Make a total of 42 bobble stitches (each with 4 loops).
As you approach the end of the round, before closing, evenly stuff the head with fiberfill and insert the rattle inside.
- Close the round with a sl st into the first stitch of the round.
Now for the second and final mane round—the waves that form the lion’s hair!
Important: The stitches in this sequence are worked TWO TIMES in each space BETWEEN bobble stitches (not in the loops of the stitches themselves). The only stitch worked just once in each space is the slip stitch.
- Begin with a sl st (this corresponds to the closure of the first round).
- In the next space, work the following sequence:
- 2 sc (in the same space)
- 2 dc (in the same space)
- 2 treble (in the same space)
- 2 dc (in the same space)
- 2 sc (in the same space)
- Sl st (to move to the next space)
Repeat this sequence around the entire circle. The only sl st that is repeated twice in the whole round is the very first one where we started.
When you reach the end, close with a sl st, cut the yarn, and hide the end.
Ears (Make 2)
With the main color (cream/beige):
- R1: 6 sc in a magic ring. (6)
- R2: inc in each stitch around. (12)
- R3: (1 sc, inc) x 6. (18)
- R4: 18 sc.
Close with a sl st, leaving a long tail for sewing. Cut the yarn.
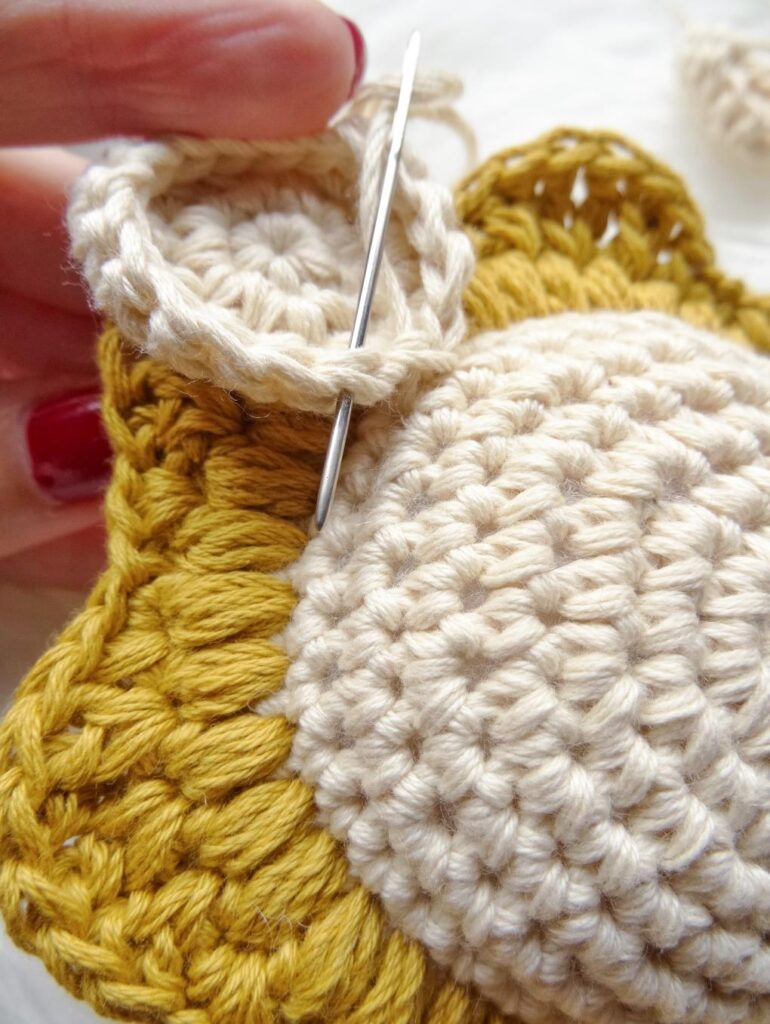
Tip for closing ears neatly without an uneven look: Pass the thread through the back part of the stitch as shown in the photos, then pass the thread backward through the next stitch.
Attaching the Ears: You can sew the ears on whenever it’s most convenient for you—either right after crocheting them or after the lion is attached to the ring so you can better visualize their placement. Sew them on both the front and back sides for security.
The Wooden Ring Cover
Before crocheting the ring cover, keep in mind that you may need to crochet one stitch more or less in your initial chain row—it all depends on your tension. To figure this out, place your chain row over the ring to see how much it will cover.
Once you’ve crocheted the chain row, work rows by turning your work until you reach the number of rows needed to close the piece around the ring. You’ll need to test this as you go, placing the piece over the ring—you might need one row more or less.
Here are the stitches and rows I used for a 7 cm diameter wooden ring:
- Row 1: Ch 25.
- Row 2: Starting from the second chain from the hook, work 24 sc in each stitch. Turn your work.
- Rows 3 – 8: 24 sc in each row. Turn after each row. (6 rows)
After finishing the last row, leave a long tail for joining the piece to the ring and then sewing the lion to the ring. To calculate how much yarn to leave, wrap the yarn around the finished piece twice and cut.
Attaching the Cover to the Ring:
- Wrap the crocheted piece around the wooden ring.
- Use the long tail to sew the edges together, enclosing the ring completely.
- The cover should fit snugly around the ring.