Free Capybara Amigurumi Pattern
Materials
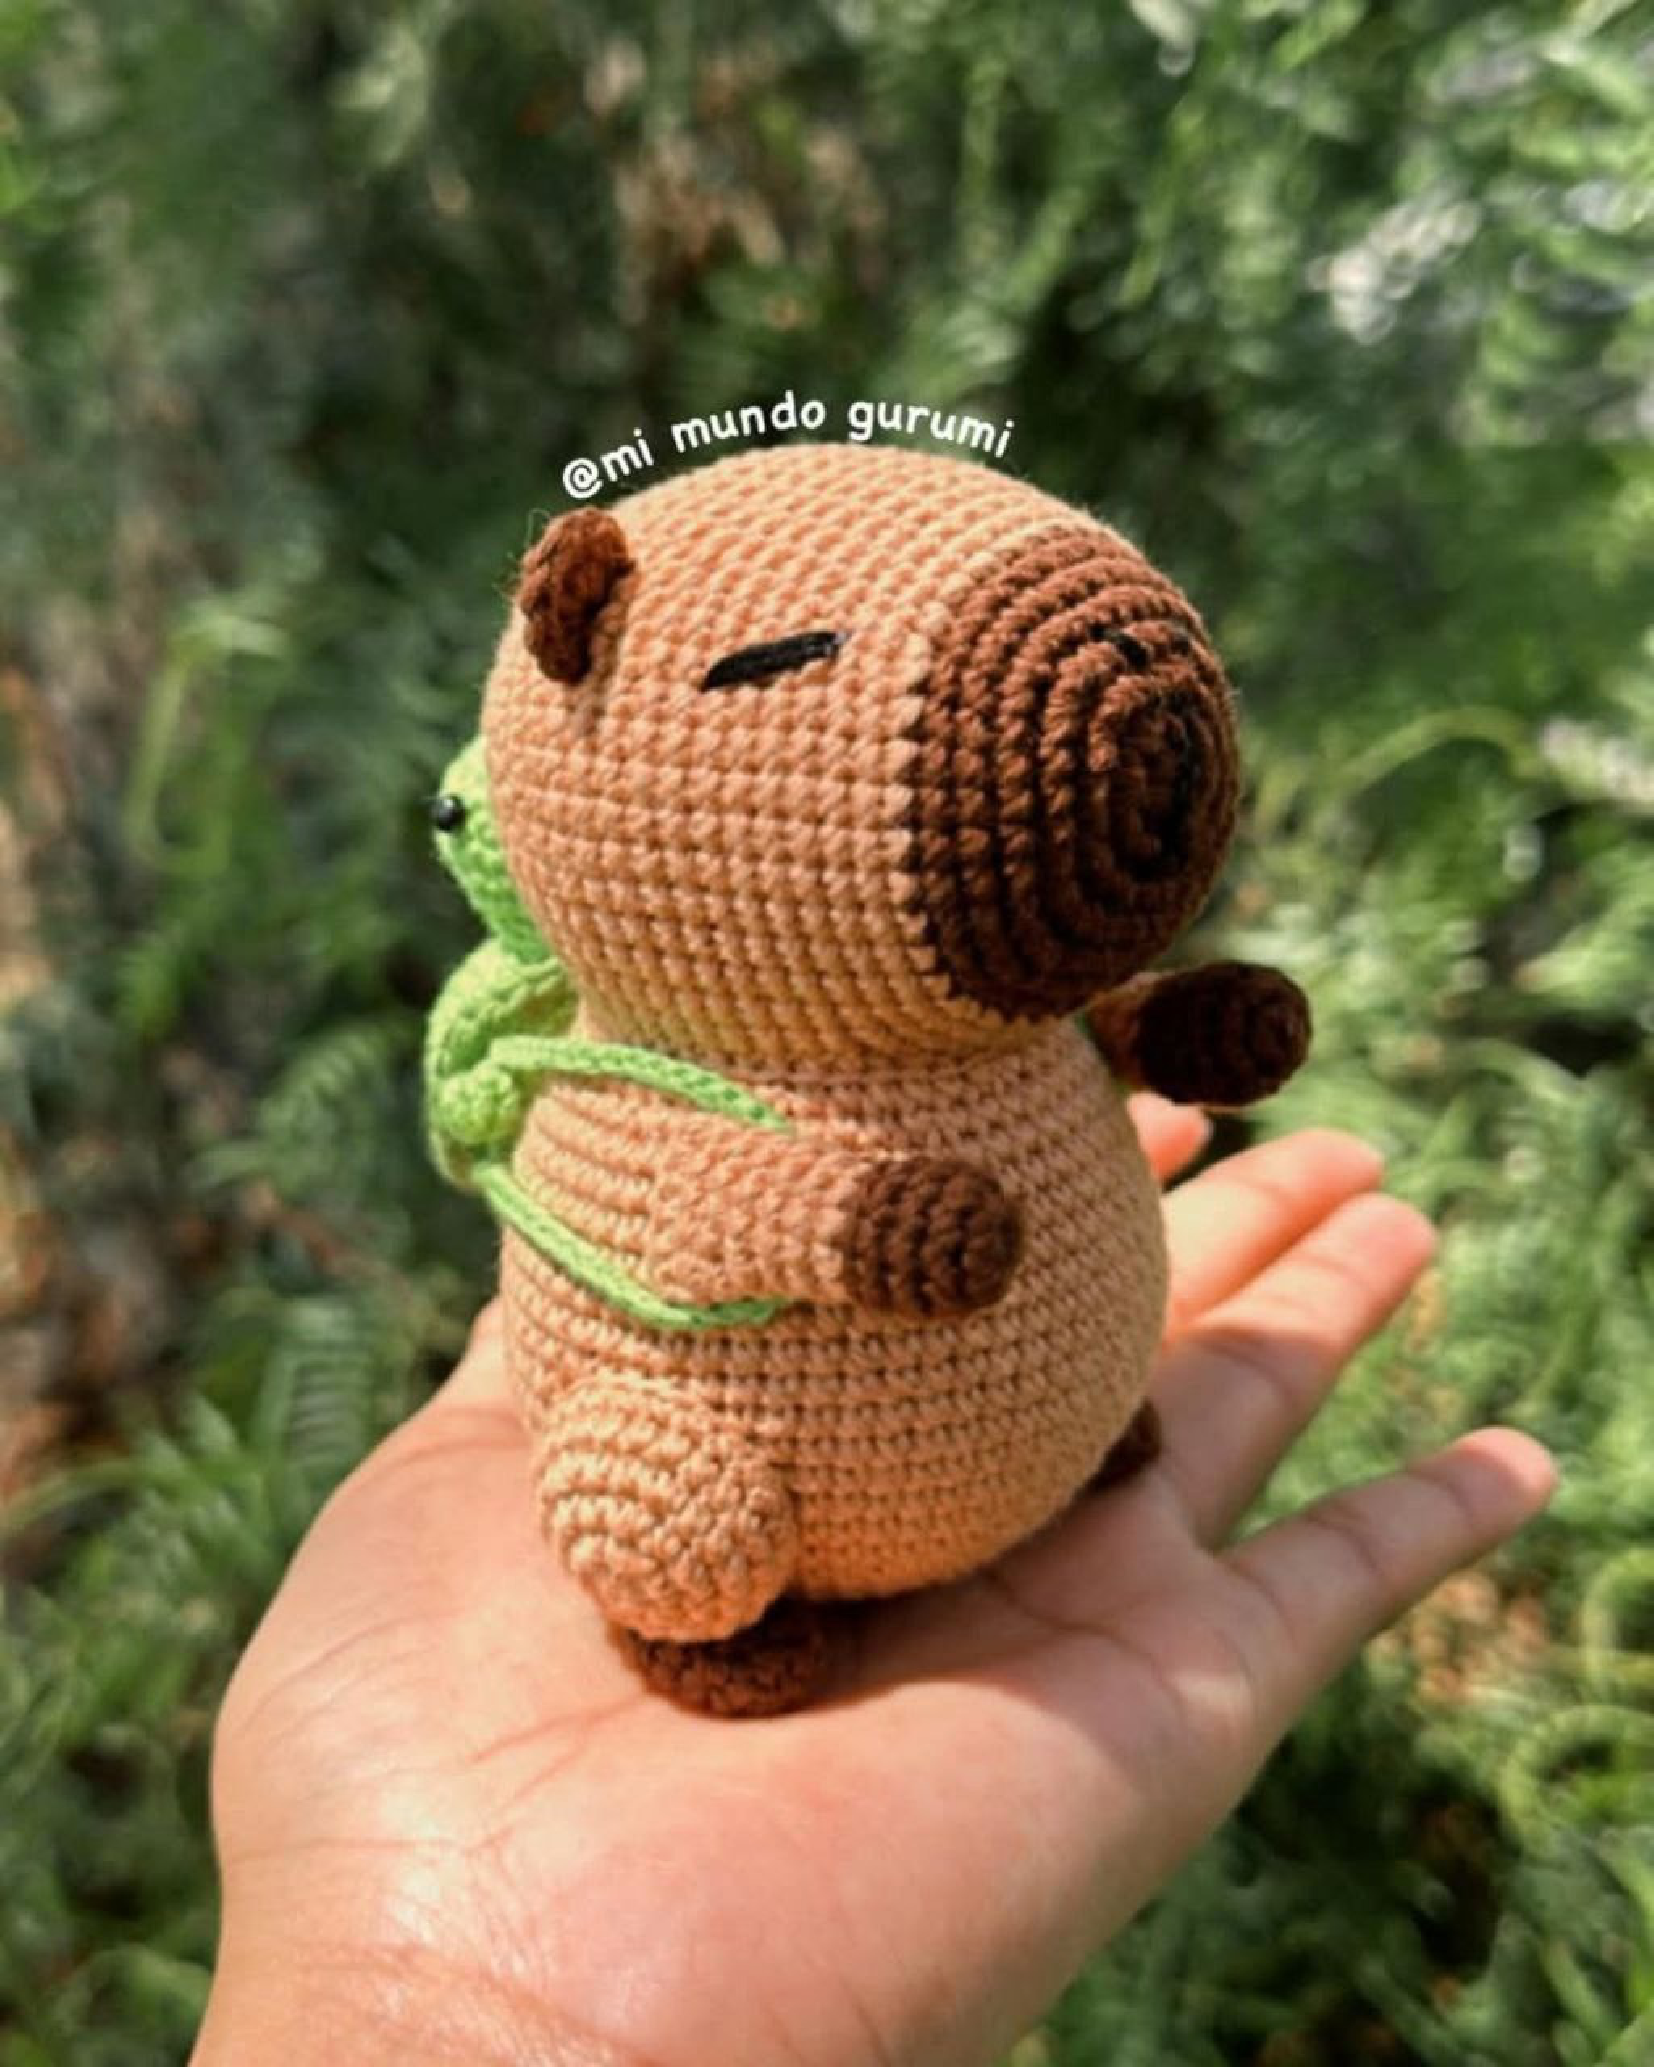
To create your own adorable amigurumi capybara, you will need the following materials. This pattern is perfect for using up scrap yarn for the main body and the cute little backpack accessory.
- Yarn: Worsted or DK weight yarn in light brown for the body, a small amount of dark brown for the nose, and your choice of colors for the backpack.
- Crochet Hook: 2.0mm or 2.2mm crochet hook.
- Scissors: For cutting yarn.
- Yarn Needle: To sew the pieces together and weave in ends.
- Stuffing: Polyester fiberfill or any plush filling for stuffing your amigurumi.
Abbreviations
This pattern uses standard US crochet terminology. Here are the abbreviations you’ll need to know:
- MR: Magic Ring
- sc: Single Crochet
- inc: Increase (work 2 single crochet stitches in the same stitch)
- dec: Decrease (single crochet two stitches together)
- Blo: Back Loop Only
Finished Size
When using the recommended yarn and hook size, your finished capybara will be approximately 7cm tall.
Crochet Capybara Pattern Instructions
Follow these step-by-step instructions to crochet each piece of your capybara. Work in continuous rounds unless otherwise specified.
Head
Start with dark brown yarn for the nose.
R1: Start with an MR and work 8sc into the ring. (8)
R2: Work 8 increases. (16)
R3: sc, inc, inc, (2sc, inc, inc) 3 times, sc. (24)
Change to light brown yarn.
R4-7: 24sc around. (24)
R8: 4sc, 6inc, 13sc. (30)
R9-14: 30sc around. (30)
R15: (3sc, dec) 6 times. (24)
R16: (2sc, dec) 6 times. (18)
R17: (sc, dec) 6 times. (12)
Begin to stuff the head firmly.
R18: (sc, dec) 4 times. (8)
Fasten off, leaving a tail if needed to close the remaining hole. Add more stuffing if necessary before closing completely.
Body
Use light brown yarn.
R1: Start with an MR and work 6sc into the ring. (6)
R2: Work 6 increases. (12)
R3: (sc, inc) 6 times. (18)
R4: (2sc, inc) 6 times. (24)
R5-11: 24sc around. (24)
R12: (2sc, dec) 6 times. (18)
Stuff the body firmly. Fasten off, leaving a long tail for sewing.
Arms (Make 2)
Use light brown yarn.
R1: Start with an MR and work 7sc into the ring. (7)
R2-4: 7sc around. (7)
Fasten off, leaving a long tail for sewing. Do not stuff the arms.
Feet (Make 2)
Use light brown yarn.
R1: Start with an MR and work 8sc into the ring. (8)
R2-5: 8sc around. (8)
Fasten off, leaving a long tail for sewing. Do not stuff the feet.
Ears (Make 2)
Use light brown yarn.
R1: Start with an MR and work 6sc into the ring. (6)
R2-3: 6sc around. (6)
Fasten off, leaving a long tail for sewing. Do not stuff the ears. Pinch flat when sewing.
Backpack Accessory
This cute accessory is a tiny amigurumi that sits on the capybara’s back.
Backpack Body
Use your desired backpack color.
R1: Start with an MR and work 6sc into the ring. (6)
R2: Work 6 increases. (12)
R3: (sc, inc) 6 times. (18)
R4-5: 18sc around. (18)
R6: Work 18sc in the back loops only (Blo). (18)
R7: 18sc around. (18)
R8: (sc, dec) 6 times. (12)
Lightly stuff the backpack body.
R9: (sc, dec) 4 times. (8)
Fasten off.
Backpack Head
Use your desired backpack color.
R1: Start with an MR and work 6sc into the ring. (6)
R2: Work 6 increases. (12)
R3-4: 12sc around. (12)
R5: (sc, dec) 4 times. (8)
Lightly stuff and fasten off, leaving a tail for sewing.
Backpack Legs (Make 2)
Use your desired backpack color.
R1: Start with an MR and work 6sc into the ring. (6)
R2-3: 6sc around. (6)
Fasten off, leaving a long tail for sewing.
Assembly and Finishing
Now it’s time to bring your capybara to life! Use your yarn needle and the long tails you left to sew all the pieces together.
- Head to Body: Sew the head securely onto the body. The open end of the body (R12) should attach to the base of the head.
- Attach Feet: Sew the two feet to the bottom front of the body, positioning them so the capybara can sit upright.
- Attach Arms: Sew the arms to the sides of the body, just below the head.
- Attach Ears: Position the ears on the top of the head, slightly to the sides. Pinch them flat before sewing them in place.
- Assemble Backpack: Sew the backpack’s head and two legs onto the backpack’s body to create the mini creature.
- Attach Backpack: Sew the completed backpack onto the capybara’s back. You can also create simple straps by making a chain and sewing it around the arms.
- Final Touches: Weave in any remaining yarn ends to give your project a clean, finished look.


