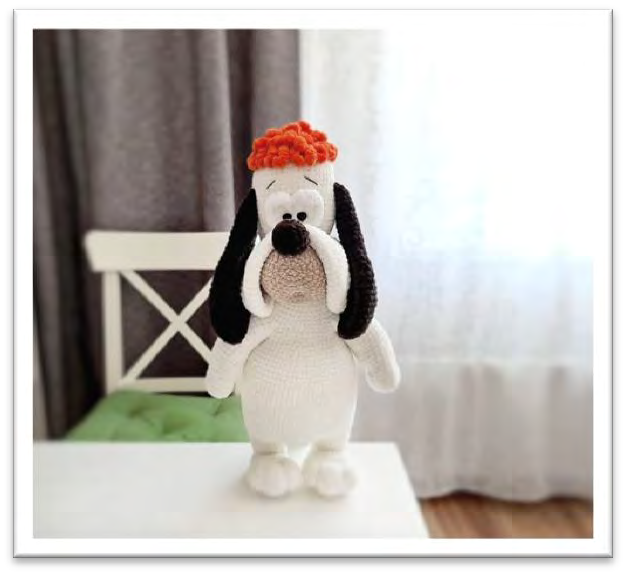
Droopy Amigurumi Master Class
Muzzle
Use a contrasting color (e.g., white or a lighter shade) for the muzzle. Work in a continuous spiral.
- Row 1: 6 sc in amigurumi ring (6 sc)
- Row 2: (inc) x 6 times (12 sc)
- Row 3: (1 sc, inc) x 6 times (18 sc)
- Row 4: (2 sc, inc) x 6 times (24 sc)
- Row 5: (3 sc, inc) x 6 times (30 sc)
- Row 6: (4 sc, inc) x 6 times (36 sc)
- Row 7: (5 sc, inc) x 6 times (42 sc)
- Rows 8-15: 42 sc
Secure the loop, cut the thread, leaving a long tail for sewing to the head.
Tail
Use your main body color for the tail. Work in a continuous spiral.
- Row 1: 6 sc in amigurumi ring (6 sc)
- Row 2: (inc) x 6 times (12 sc)
- Rows 3-22: 12 sc
Fold the tail in half and single crochet across the row to the end, closing the opening. Secure the loop, cut the thread, leaving a long tail for future sewing to the body.
Arms (Make 2)
Use your main body color for the arms.
- Row 1: Chain 10, starting from the second stitch from the hook, crochet inc, 7 sc, then in one stitch crochet 4 sc. Turn the work and on the opposite side crochet 7 sc, in the last stitch make an increase (22 sc)
- Row 2: 2 inc, 6 sc, 4 inc, 8 sc, 2 inc (30 sc)
- Rows 3-17: 30 sc
Stuff the arm with hollowfiber, but not too tightly. Cut the thread, secure the loop. You’ll make a tightening on the arms later for shaping (example, count 7 rows from the bottom). For a visual guide on arm tightening, you can refer to this video: https://youtu.be/hA11dtNifJg.
Here’s an arm piece stuffed and ready for shaping.
Notice the slight compression in this photo, indicating where a tightening might be applied to create definition.
The completed arm piece should have a gentle curve and texture.
Another view of the arm’s form.
Foot (Make 2)
Use your main body color for the feet.
- Row 1: Chain 7, increase in the 2nd stitch from hook, 4 sc, 4 sc in the last chain stitch. Continue on the opposite side of the chain — 4 sc, inc in the last stitch (16 sc)
- Row 2: inc, 6 sc, (inc) x 2 times, 6 sc, inc (20 sc)
- Rows 3-4: 20 sc
- Row 5: inc, 9 sc, inc, 9 sc (22 sc)
- Row 6: inc, 10 sc, inc, 10 sc (24 sc)
- Row 7: (3 sc, inc) x 6 times (30 sc)
- Rows 8-11: 30 sc
- Row 12: (3 sc, dec) x 6 times (24 sc)
- Row 13: (2 sc, dec) x 6 times (18 sc)
Stuff with hollowfiber, but not too tightly, allowing for later tightening.
A closer look at the foot’s shape, including the bottom indentation.
- Row 14: (1 sc, dec) x 6 times (12 sc)
- Row 15: (dec) x 6 times (6 sc)
Close the remaining stitches, adding more hollowfiber if necessary for firmness. You will also make a tightening on the foot (example, count 5 rows from the bottom). For a visual guide on foot tightening, you can refer to this video: https://youtu.be/k7Hri2v7K7Q.
Legs (Make 2)
Continue directly from the finished foot pieces, using your main body color.
- Row 1: Pick up 20 sc on the foot (20 sc)
- Row 2: 11 sc, inc, 8 sc (21 sc)
- Row 3: 11 sc, inc, 9 sc (22 sc)
- Row 4: 11 sc, inc, 10 sc (23 sc)
- Row 5: 11 sc, inc, 11 sc (24 sc)
- Row 6: 24 sc
Cut the thread, secure the loop. This completes one leg. Repeat for the second leg.
Here you can see the leg being attached to the foot piece.