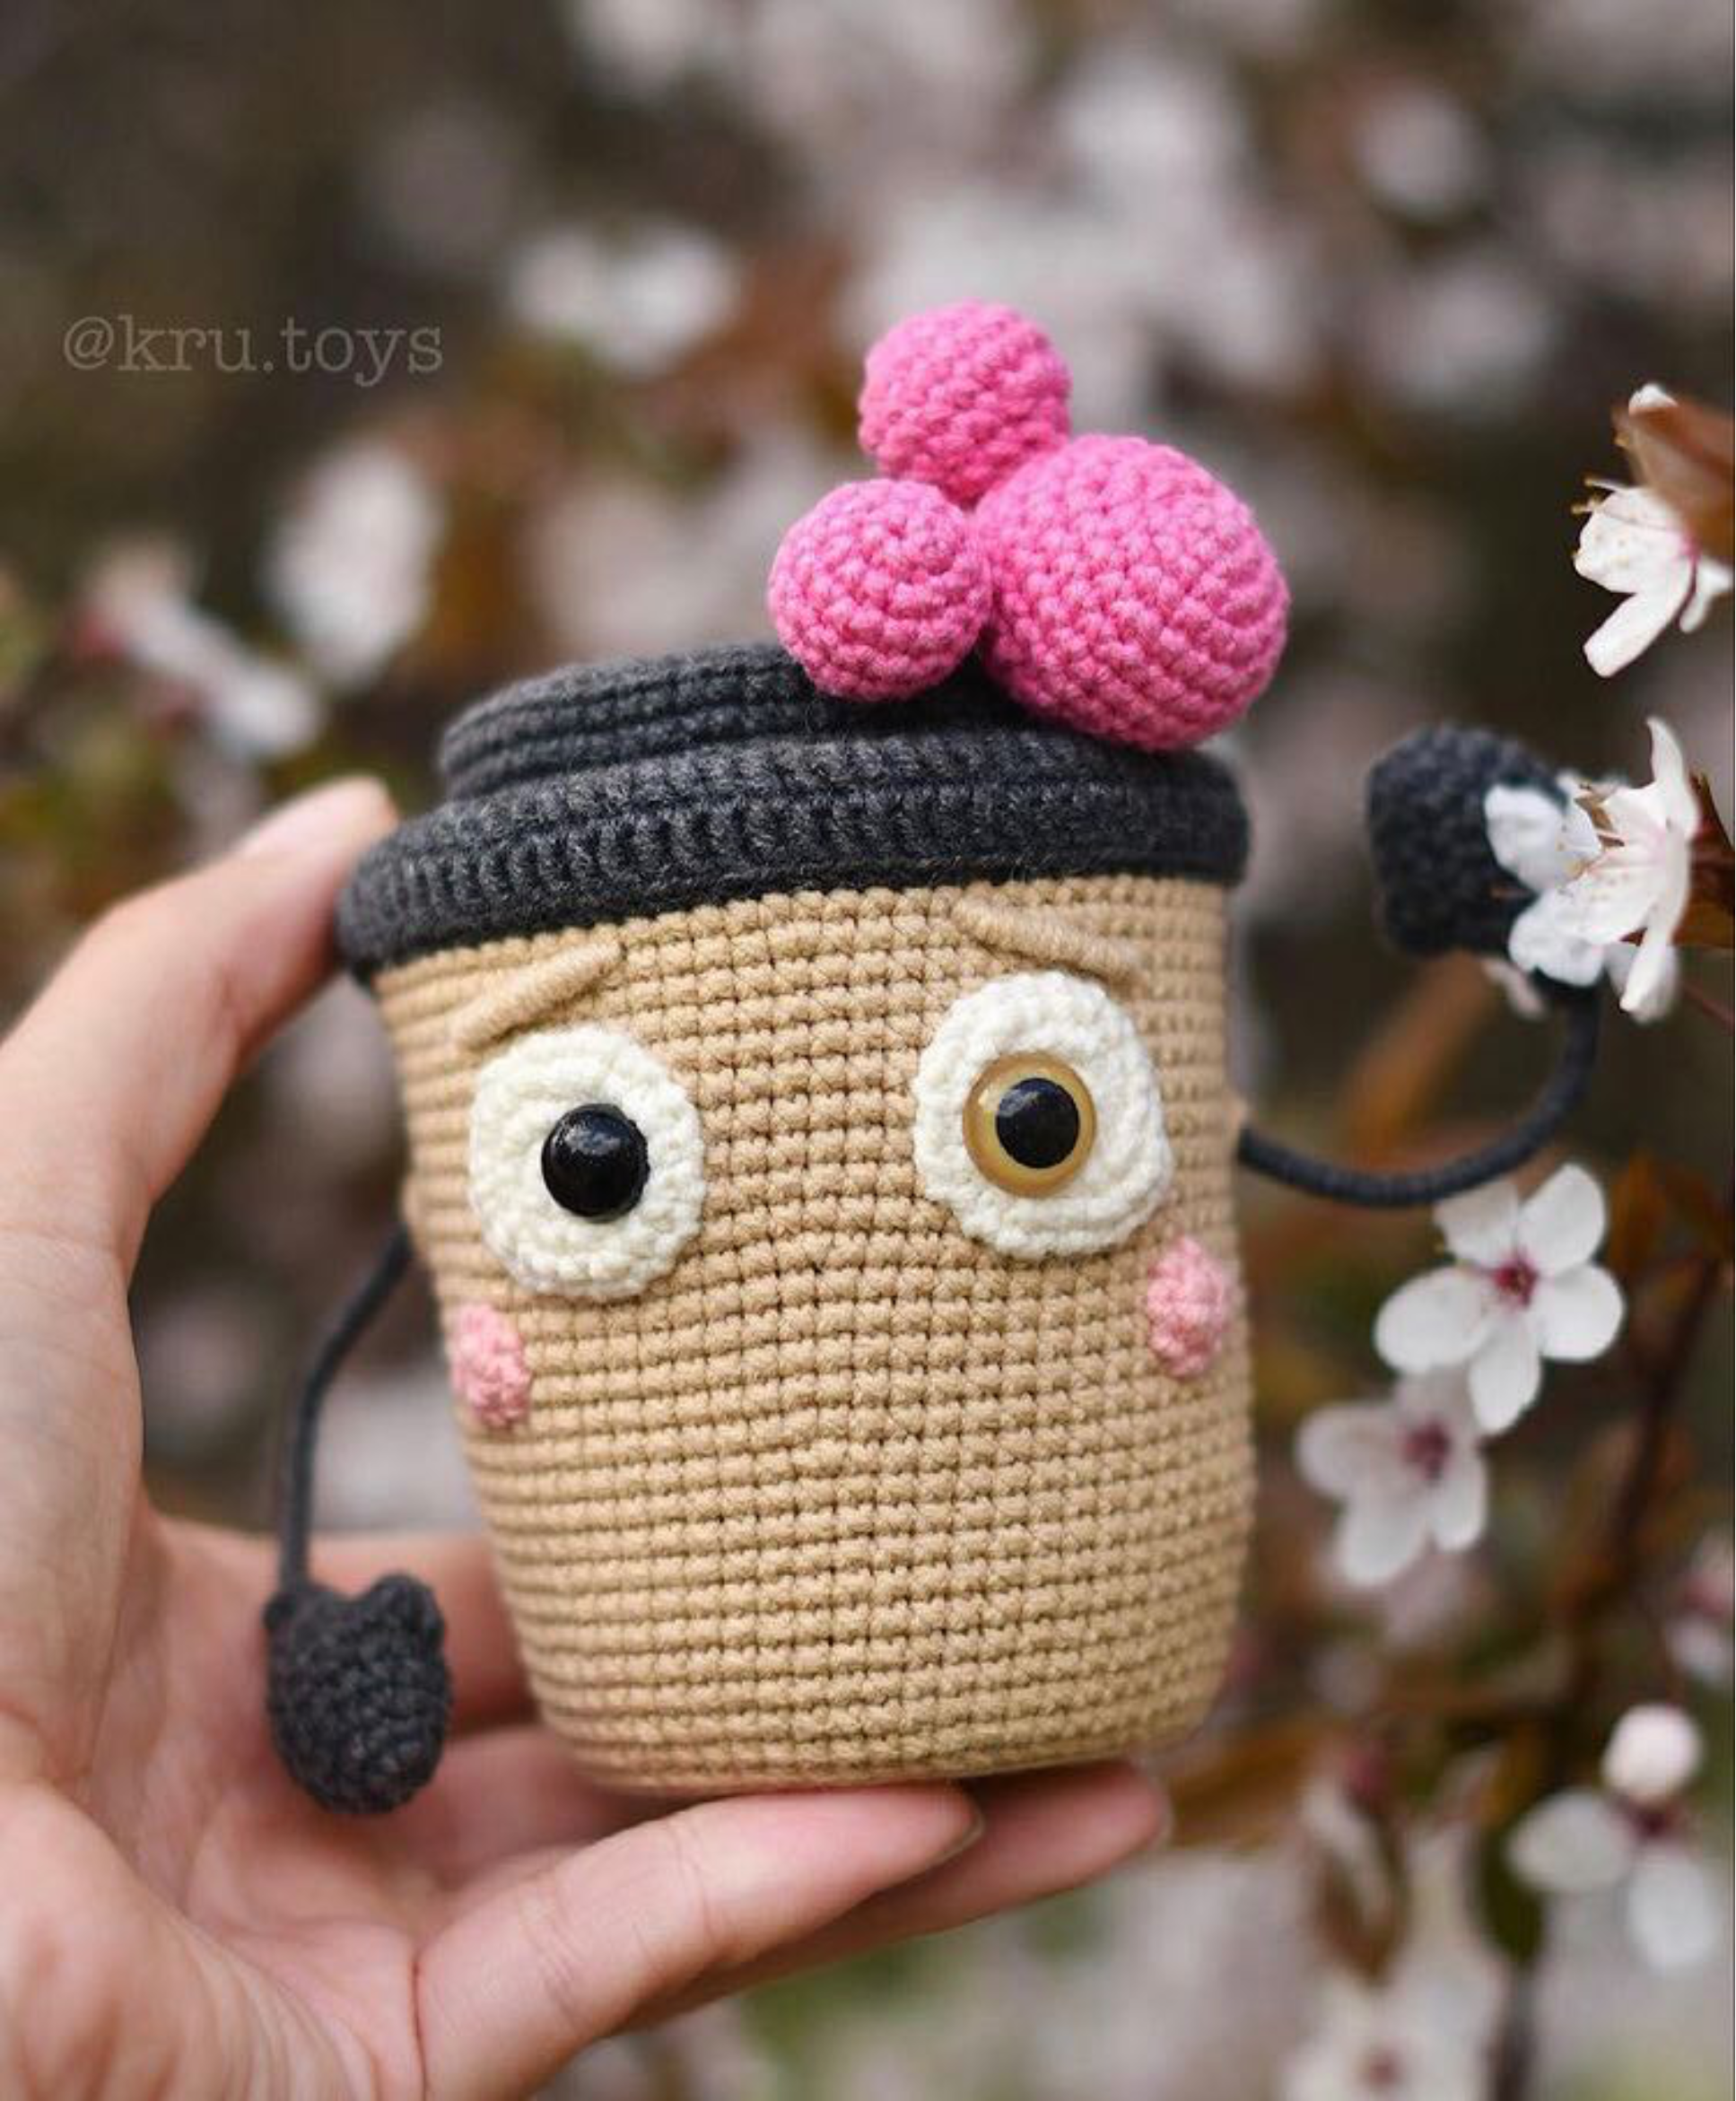
Crochet Bubble Raff Amigurumi Pattern
Lid Trim:
Attach black yarn to the front loop of row 39 of the body (where you crocheted BLO).
- 78 sc (78)
- Make a sl st in the 1st stitch, 2 ch, 78 sc (78)
Cut the yarn, leaving a very long tail for sewing. This trim will be sewn to the cup body, forming the lower edge of the lid.
Bubbles
Large Bubble (Make 1)
Using pink yarn, create one large bubble.
- 6 sc in MR (6)
- 6 inc (12)
- (sc, inc)*6 (18)
- (2 sc, inc)*6 (24)
- (3 sc, inc)*6 (30)
- Rows 6-9: 30 sc (30) – 4 rows
- (3 sc, dec)*6 (24)
- (2 sc, dec)*6 (18)
- (sc, dec)*6 (12)
Stuff the bubble, cut the yarn, and leave a long tail for sewing.
Small Bubbles (Make 2)
Using pink yarn, create two small bubbles.
- 6 sc in MR (6)
- 6 inc (12)
- (sc, inc)*6 (18)
- Rows 4-5: 18 sc (18) – 2 rows
- (sc, dec)*6 (12)
- 6 dec (6)
Stuff the bubbles, cut the yarn, and leave a long tail for sewing.
Cheeks (Make 2)
Using light pink yarn, make two small cheek pieces.
- 8 sc in MR (8)
Cut the yarn, leaving a long tail for sewing.
Assembly and Finishing
This is the exciting part where your coffee cup toy comes to life! Take your time with these steps for a polished finish.
-
- **Attach Lid Trim:** Using the long black yarn tail from the lid trim (from row 2 of the Lid Trim section), sew the edge of the lid to the body of the cup. Ensure it’s neatly attached all the way around.
- **Make Handle Cuffs:** At the point where each handle meets the body of the cup, attach a strand of black yarn. Pull up a loop and single crochet around the base, creating a small “cuff.” Pull up loops between stitches for a neat look. Cut the yarn and hide it inside the body of the cup.
- **Sew White Eye Parts:** Carefully position the white parts of the eyes around the safety eyes. Straighten them and use tailor’s pins to fix them in place. Using your tapestry needle and the long white yarn tail, sew them securely to the body of the cup through both half-loops with invisible stitches.
- **Secure Cheeks:** Position the two light pink cheek pieces on the face, below the eyes. Use pins to hold them in place. Sew them onto the body through both half-loops using invisible stitches.
- **Embroider Eyebrows:** Mark the desired eyebrow positions above the eyes with pins. Using black yarn, make 2-3 longitudinal stitches from one pin to another to form the base of the eyebrow. Then, “wrap” these stitches with transverse stitches to create a textured and neat eyebrow line. For reliability, ensure a couple of stitches catch the main fabric of the body. Pay attention to yarn tension; too loose, and the eyebrow might sag.
-
- **Attach Bubbles:** Use pins to try out different placements for the bubbles until you are completely satisfied with their arrangement from all angles. Start by sewing on the large pink bubble using strong, small, invisible stitches. Then, sew the two small pink bubbles next to it.
Your charming Bubble Raff coffee cup is now complete