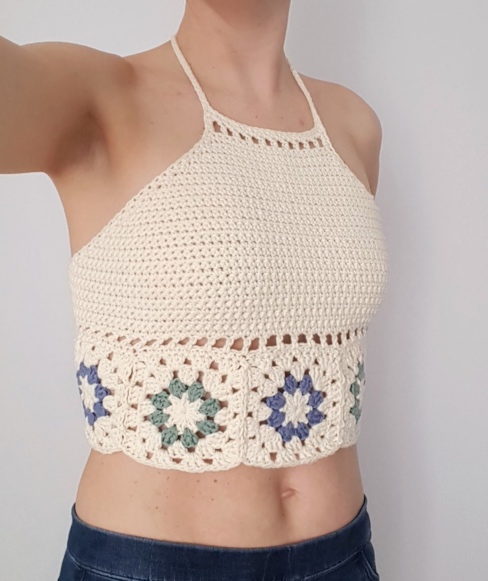
Crochet a Blooming Summer Top: Free Hepatica Granny Top Pattern
Part 2: The Solid Top (Bodice)
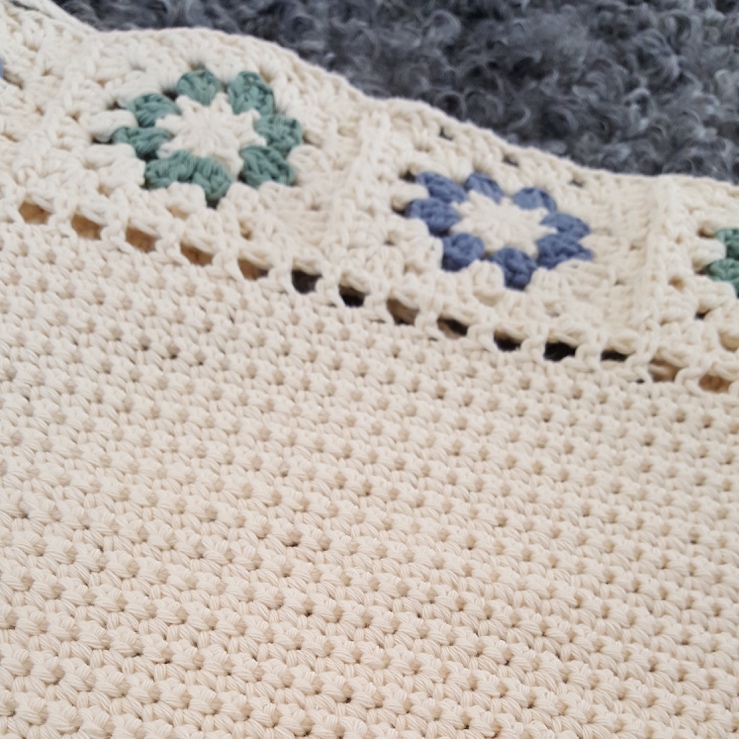
Place your granny strip horizontally, right side up. You will work upwards from the top edge of the strip.
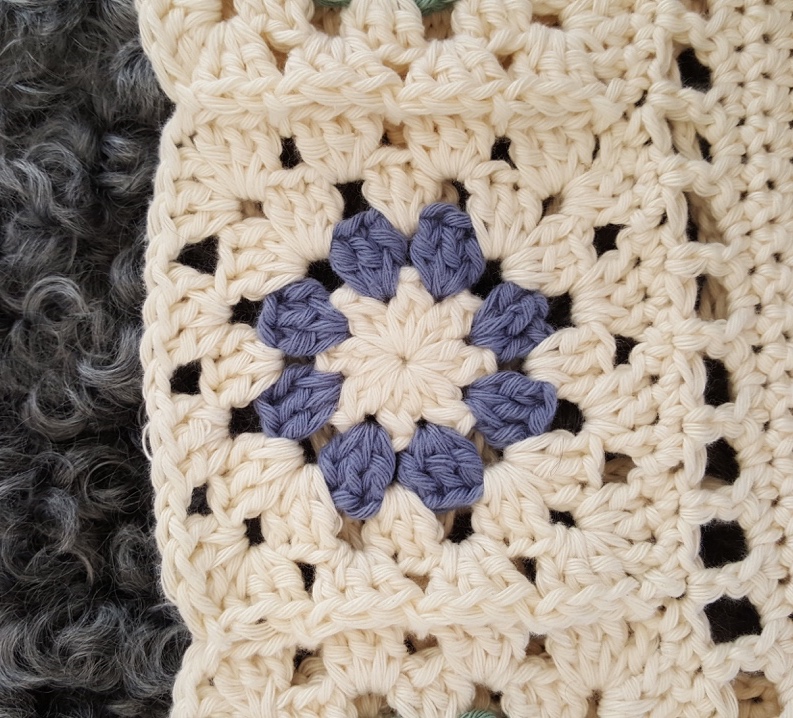
Row 1 (Foundation): Join yarn in the top right corner ch-sp. Ch 1 (does not count as a stitch). Work 2 sc in the same corner space.
- Now work 1 sc in each dc across the top edge of the strip.
- Also work 1 sc in each seam between squares.
- Skip the ch-1 spaces between dc groups on the squares.
- In the final top left corner, work 1 sc (for 7 squares) or 2 sc (for 8 squares). Turn.
- You should have an odd number of stitches (approx. 93 for 7 squares, 107 for 8 squares).
Row 2 (Eyelet Row): Ch 4 (counts as dc + ch1). Sk next st. [Dc in next st, ch 1, sk next st] repeat across to the last stitch. Dc in the last stitch. Turn.
Row 3 (Solid Row): Ch 1 (does not count as a stitch). Sc in every stitch and chain space across. Turn.
Row 4 (First Decrease Row): Ch 1 (does not count). Sk the first st. Sc in each st across until the last 2 stitches. Work a sc decrease (2sc tog) over these last 2 stitches. Turn.
Shaping the Bodice: Repeat Row 4 approximately 35 times, or until your work measures about 12-15 cm / 5-6 inches wide. It is crucial to finish with an odd number of stitches.
Finishing Row 1 (Final Eyelet Row): Work exactly as Row 2.
Finishing Row 2 (Final Solid Row): Work exactly as Row 3. Fasten off.
Part 3: Edging & Ties (Creating the Halter Neck and Back Ties)
This creates the neck strap and the long back ties in one continuous, clever piece. Refer to the diagram in the pattern.
- Starting at the bottom left edge of the solid bodice (the last stitch of Row 4), chain 90 cm / 35 inches. Attach this chain to that stitch with a sc.
- Now, work sc up the left side edge of the solid bodice, placing 1 sc in the side of each row, until you reach the top left corner.
- At the top corner, chain 45 cm / 18 inches. Turn. Work sl st into each chain back to the corner.
- Now, work sl st into each stitch across the entire top edge (Finishing Row 2) until you reach the top right corner.
- At the top right corner, chain 45 cm / 18 inches. Turn. Work sl st into each chain back to the corner.
- Now, work sc down the right side edge of the solid bodice, placing 1 sc in the side of each row, until you reach the starting point (the first stitch of Row 4).
- From here, chain 90 cm / 35 inches for the second back tie. Fasten off. Weave in all ends.
Final Step: Thread the two long 90cm chains through the eyelet holes in the back (Row 2 and Finishing Row 1) to lace up the back of the top. Tie in a bow to adjust fit!
Finishing & Tips
- Blocking: Gently wash and block your finished top. This will even out the granny squares and give the garment a professional, polished drape.
- Customization: Want a different size? Experiment! Fewer squares make a smaller top; more squares make a larger, longer one. Just remember to start with an odd number of stitches on Row 1.
- Yarn Choice: A soft, unmercerized cotton like the one used gives a lovely matte finish and great drape. Avoid stiff or overly bulky yarns.
- Joining Squares: If you’re new to joining, search for “join granny squares as you go” tutorials—it’s a huge time-saver!
- Wear it Well: The back-tie design means you can adjust the tightness for the perfect, comfortable fit every time you wear it.
Congratulations! Your gorgeous, blooming Hepatica Granny Top is complete