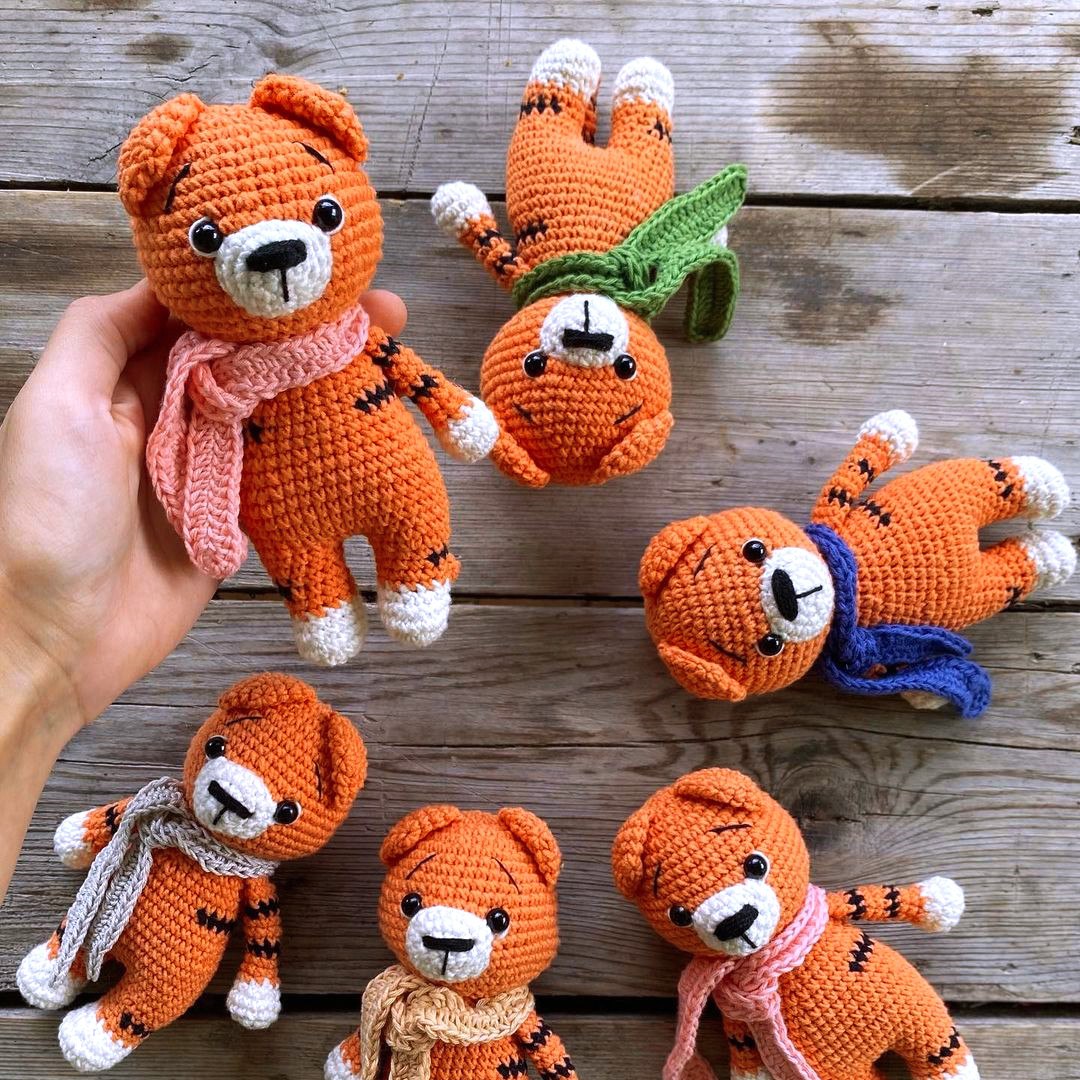
Crochet the Cutest Baby Tiger: A Step-by-Step Amigurumi Guide
“`html
Adorable Crochet Baby Tiger Pattern: Step-by-Step Guide
Create your own cuddly companion with this detailed crochet baby tiger pattern. This project is perfect for intermediate crocheters looking to make a sweet gift or a cute nursery addition. Using basic amigurumi techniques, you can bring this little tiger to life.
Materials Needed
To make a tiger approximately 7 inches (17-18 cm) tall, you will need the following materials:
- Yarn: Medium weight yarn in three colors: Orange, Black, and White.
- Crochet Hook: 2.0mm
- Safety Eyes: 8mm
- Stuffing: Polyester fiberfill
- Tools: Scissors and a yarn needle for assembly
Pattern Abbreviations (US Terms)
- MR: Magic Ring
- sc: Single crochet
- inc: Increase (2 sc in one stitch)
- dec: Decrease (sc 2 together)
- ch: Chain
- st: Stitch
1. The Ears (Make 2)
Using Orange yarn:
- Round 1: 6 sc in MR (6)
- Round 2: inc in each st around (12)
- Round 3: (1 sc, inc) * 6 (18)
- Round 4: 18 sc
Fold the piece in half and crochet 9 sc through both layers to close the top. Leave a long tail for sewing.
2. The Muzzle
Using White yarn:
- Round 1: 6 sc in MR (6)
- Round 2: inc in each st around (12)
- Round 3: (3 sc, 3 inc) * 2 (18)
- Round 4: (8 sc, inc) * 2 (20)
Fasten off, leaving a long tail for sewing.
3. The Head
Using Orange yarn:
- Round 1: 6 sc in MR (6)
- Round 2: inc in each st around (12)
- Round 3: (1 sc, inc) * 6 (18)
- Round 4: (2 sc, inc) * 6 (24)
- Round 5: (3 sc, inc) * 6 (30)
- Round 6: (2 sc, inc) * 10 (40)
- Rounds 7-10: 40 sc
- Round 11: (4 sc, inc) * 8 (48)
- Rounds 12-16: 48 sc
- Round 17: (6 sc, dec) * 6 (42)
- Round 18: (5 sc, dec) * 6 (36)
- Round 19: (4 sc, dec) * 6 (30)
- Round 20: (1 sc, dec) * 10 (20)
- Round 21: (8 sc, dec) * 2 (18)
Placement: Insert safety eyes between rows 12 and 13, spaced 8 sc apart. Stuff the head firmly and fasten off, leaving a tail for sewing.
4. The Arms (Make 2)
Start with White yarn:
- Round 1: 6 sc in MR (6)
- Round 2: inc in each st around (12)
- Round 3: (3 sc, inc) * 3 (15)
- Round 4: 15 sc
- Round 5: (1 sc, dec) * 5 (10)
Switch to Orange yarn:
- Round 6: (3 sc, dec) * 2 (8)
- Rounds 7-8: 8 sc
- Round 9: 2 sc (Orange), 4 sc (Black), 2 sc (Orange)
- Rounds 10-12: 8 sc
- Round 13: 2 sc (Orange), 5 sc (Black), 1 sc (Orange)
- Rounds 14-15: 8 sc
Work 2 additional sc, fold the arm in half, and sc across 4 stitches to flatten. Fasten off, leaving a tail for sewing.
5. The Legs (Make 2)
Start with White yarn:
- Round 1: 6 sc in MR (6)
- Round 2: inc in each st around (12)
- Round 3: (1 sc, inc) * 6 (18)
- Round 4: 18 sc
- Round 5: 6 sc, 3 dec, 6 sc (15)
- Round 6: 5 sc, 3 dec, 4 sc (12)
Switch to Orange yarn:
- Rounds 7-8: 12 sc
- Round 9 (Leg 1): 1 sc (Orange), 5 sc (Black), 6 sc (Orange)
- Round 9 (Leg 2): 7 sc (Orange), 5 sc (Black)
- Round 10: 12 sc (Orange)
- Round 11: (3 sc, inc) * 3 (15)
Important: Fasten off the first leg. For the second leg, work an additional 5-6 sc to ensure both legs are aligned in the same direction before starting the body.
6. The Body
Using Orange yarn:
Join the two legs by chaining 2 stitches.
- Round 1: (15 sc around first leg, 2 sc in the chain) * 2 (34)
- Round 2: 15 sc, 2 inc, 17 sc (36)
- Rounds 3-7: 36 sc
- Round 8: (10 sc, dec) * 3 (33)
- Round 9: 33 sc
- Round 10: (9 sc, dec) * 3 (30)
- Round 11 (Stripes): 6 sc (Orange), 7 sc (Black), 8 sc (Orange), 7 sc (Black), 2 sc (Orange). Note: Adjust marker if needed to keep stripes on the sides. (30)
- Round 12: (8 sc, dec) * 3 (27)
- Round 13: 27 sc
- Round 14: (7 sc, dec) * 3 (24)
- Rounds 15-16: 24 sc
- Round 17: (2 sc, dec) * 6 (18)
Stuff the body firmly and fasten off.
7. The Tail
Using Orange yarn:
- Round 1: 6 sc in MR (6)
- Rounds 2-3: 6 sc
Switch to Black yarn:
- Round 4: 6 sc
Switch to Orange yarn:
- Rounds 5-7: 6 sc
Switch to Black yarn:
- Round 8: 6 sc
Switch to Orange yarn:
- Rounds 9-11: 6 sc
Switch to Black yarn:
- Round 12: 6 sc
Switch to Orange yarn:
- Rounds 13-14: 6 sc
Fold the tail in half and crochet 3 sc through both layers. Fasten off and leave a tail for sewing.
Assembly and Finishing
- Muzzle: Sew the white muzzle to the front of the head.
- Facial Details: Using black yarn, embroider the nose on the muzzle and create small eyebrows above the eyes to give the tiger expression.
- Ears: Sew the ears to the top of the head.
- Arms: Sew the arms to the sides of the body.
- Tail: Sew the tail to the back of the body.
- Head: Sew the head securely to the body.
Your adorable baby tiger is now complete!
“`