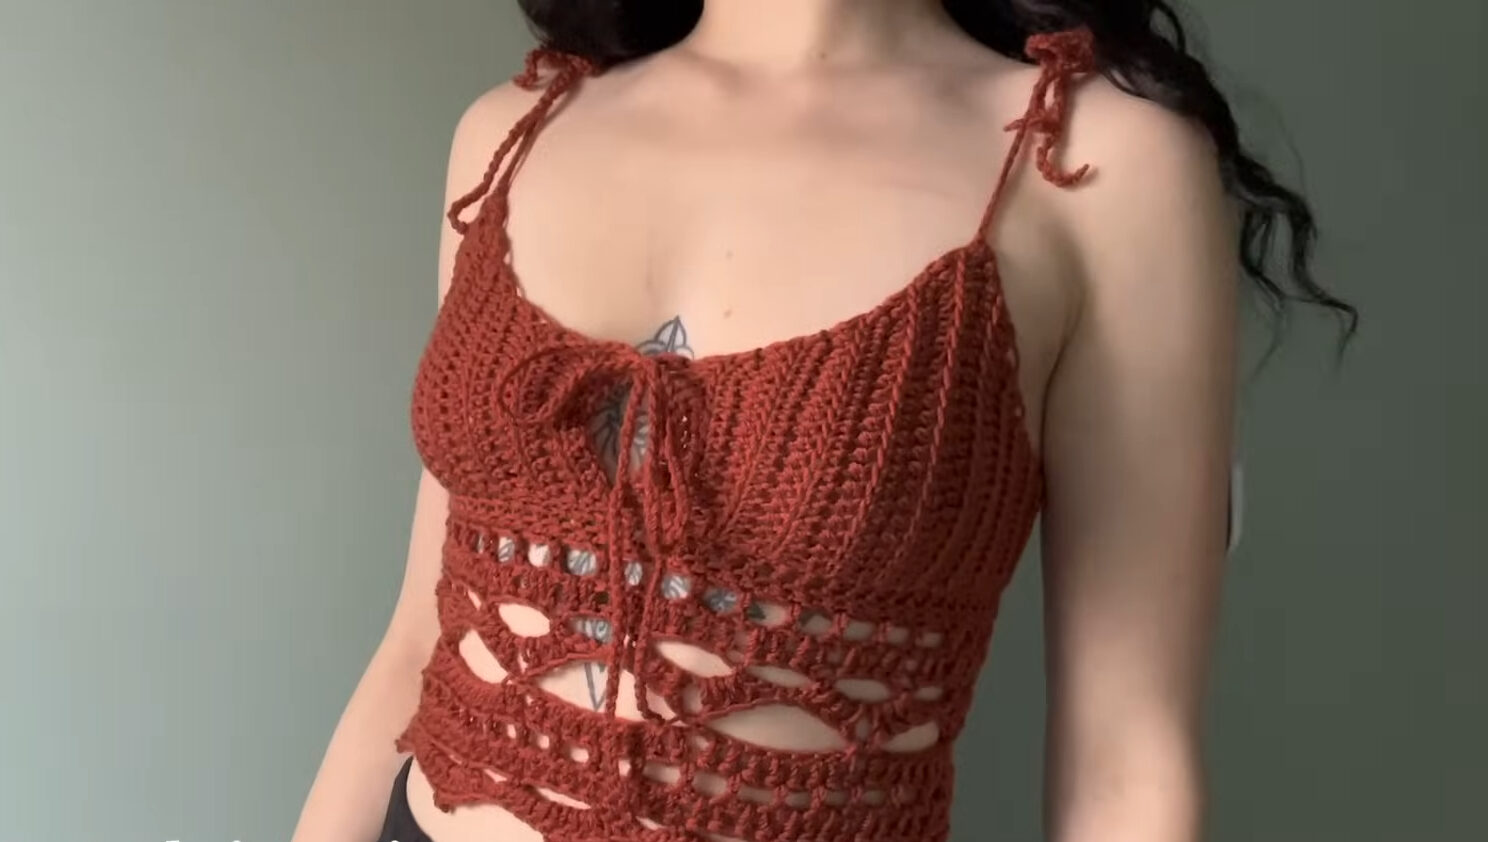
The Lilith Top: A Romantic Crochet Corset Tutorial for All Sizes
Reattach Yarn & Close the Slit
- Reattach your yarn near the slit from earlier (using a magic knot or your preferred method)
- Insert your hook lower in that stitch to make it tighter
- Pull the yarn through and sl st the ends of the rows together to close the slit
- Ch 1, turn your work
- Sc all the way around – maintain your original stitch count!
- Sl st into the very first sc to finish the row
Placing Your Stitch Markers
We have 80 stitches total (or whatever your number is). Let’s mark key points!
- Center Back: Where you just slip stitched – this is the direct center of your back
- Center Front: Count half your stitches (80 ÷ 2 = 40) – place a yellow marker at the 40th stitch
- Sides: Half of 40 is 20 – count 20 stitches left from center front, place a yellow marker. Count 20 stitches right, place another yellow marker
- Bust High Points: Between your side markers, find the center (half of 20 = 10) – count 10 stitches and place your other color markers. These will be the highest points of your bust!
Your math: Whatever your stitch count is, just keep dividing by 2 – everything is half, half, half!
Finding Your Ribbing Height
Your Bust Height Number (from earlier) tells you how many stitches tall your ribbing will be in the back.
Count down from your Bust Height Number until you reach your yellow side marker. This tells you how many stitches to chain for your ribbing.
For the tutorial example: 22 chains down to the marker = 12 stitches tall
Part 5: Crocheting the Ribbing Panels
Back Ribbing (First Section)
- Reinsert your hook where you left off
- Ch your Bust Height Number + 1 (example: 12 + 1 = 13 chains)
- Turn your work, sc into each chain all the way down (12 stitches total)
- To end a row: Sl st into the very next stitch on the body
- To begin a new row: Sl st one more time, turn your work
- Important: The two braids you just made are the slip stitches – do NOT work into them. Work into the back loop only of the first single crochet
- Continue sc in BLO all the way down, maintaining your stitch count
- At the end, sl st into the next stitch on the body
- Repeat these rows (sc in BLO up, sl st to connect, turn) until you reach your first yellow side marker
Switching to Half Double Crochets
Once you reach the side marker, switch from sc to hdc:
- Ch 1, turn your work
- Yarn over, insert hook into BLO, pull up a loop, pull through all three – that’s your hdc!
- Continue hdc in BLO all the way down
- Connect with sl st to the body
Increasing (Shaping the Bust)
Now we increase on one side only (the side facing the bust) until we reach the orange high-point marker:
- Ch 1, turn your work
- Increase: Work 2 hdc in BLO in the very first stitch
- Continue hdc in BLO all the way down
- Your stitch count goes up by 1 each row
- Repeat until you reach your orange marker
For the tutorial example: Increasing from 12 to 22 stitches total
Decreasing (Shaping the Other Side)
Once you reach the orange marker, we decrease on the same side to angle back down:
- Ch 1, turn your work
- Decrease: Work an hdc decrease over the first two stitches (start an hdc in first stitch, don’t finish; start another hdc in second stitch, then pull through all loops)
- Continue hdc in BLO all the way down
- Your stitch count goes down by 1 each row
- Repeat until you’re back to your original stitch count (12)
The Second Bust Panel
When you reach your next stitch marker:
- Remove the marker and sl st into that stitch
- Stop here – don’t sl st anymore
- Ch your Bust Height Number + 1 (example: 13 chains)
- Hdc into the 2nd chain from the hook and all the way down
- Connect with sl st to the body
- Repeat the same process: increase rows to the orange marker, then decrease rows back down
Connecting Both Panels
Once both bust panels are complete:
- Make sure the inside of your work is facing out (this hides the seam)
- With 12 stitches on both panels, sl st through all 12 stitches on both sides
- After your last sl st, ch 1 and pull up a long tail
- Cut your yarn
- Turn the top right-side out – the seam is tucked away
Part 6: Adding the Straps
Back Straps
- Find your center back seam
- Count 4 ribbing rows to the left – attach your yarn with a knot
- Ch 70 (or your desired strap length)
- Pull up a loop and cut – tie off the ends with knots and trim excess
- Repeat on the other side (count 4 ribbing rows to the right from center back)
Front Straps
- Find the highest point of your bust section (your orange marker spots)
- Attach your yarn with a knot
- Ch 60 (these are slightly shorter since they sit higher on the body)
- Repeat for the other side
The Front Keyhole Strap (Optional – Two Ways)
Make an individual strap of 100 chains.
Option 1 – Keyhole Look:
- Insert the strap into the corners of the slit in the front
- Pull the yarn through from the back of the stitches
- Make sure both sides are even
- Tie a little bow in the front
Option 2 – Cinched Bust Look:
- Insert the strap at the bottom of the slit, coming in from the back side on both sides
- Make sure both sides are even
- Weave the strap in and out of every 2 stitches all the way up
- Cinch closed and tie a cute bow
Final Steps: Try It On & Adjust
- Weave in all your tails
- Tie your shoulder straps into bows – try to make them as even as possible (if one is longer, you’ll definitely feel it!)
- Adjust the front keyhole/cinch strap to your liking
- Admire your gorgeous handmade Lilith top
Congratulations, You Gorgeous Creature
You did it! Your Lilith top is complete, and I hope you feel like the romantic forest fairy or mysterious vampire queen you were meant to be. This design is so close to my heart, and I cannot wait to see what colors and variations you come up with.
Thank you so much for watching, for crocheting along with me, and for bringing a little more handmade beauty into the world.
Love you. Have a great day. Happy crocheting