My Crochet Teacher Sea Star Tote
Materials
To crochet your beautiful Sea Star Tote bag, gather the following essential materials:
- Yarn:
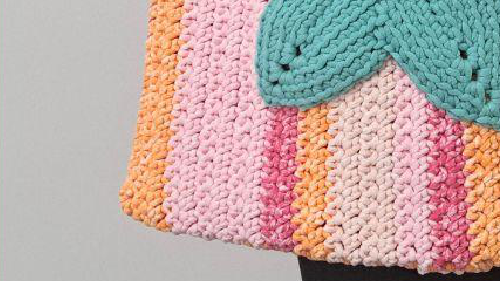
- Bernat Maker Splash “Fruity Pop” (Colour A) – 250g
- Bernat Maker (Colour B) – 100g
- Hook: 6.0 mm crochet hook
- Yarn needle (for assembly)
- Pins (for positioning sea star)
- Strap or handles of your choice (for finishing)
Abbreviations
Familiarize yourself with these common crochet abbreviations, which are used throughout this beginner-friendly tote bag pattern:
- Ch or ch: Chain
- Sl st: Slip stitch
- Sc: Single crochet
- Esc: Extended single crochet
- Sc2tog: Single crochet two together
- Sc3tog: Single crochet three together
- Rep: Repeat
- BLO: Back loop only
Gauge
Achieving the correct crochet gauge is important for your Sea Star Tote to turn out the intended size. Our pattern gauge is:
- 11 esc and 10 rows = 4” (10 cm)
Finished Size
Once completed, your stylish Sea Star Tote will measure approximately:
- 13″ (33 cm) wide
- 14″ (36 cm) tall
Instructions
This crochet pattern is designed for beginners (Difficulty Level 1). Follow these clear, step-by-step instructions to create your unique Sea Star Tote bag.
Pattern Note: Turn after each row for the tote body construction.
Tote Body
We’ll begin by crocheting the main piece of the tote using Colour A. This section utilizes the extended single crochet (esc) stitch to create a sturdy fabric for your bag.
- Using Colour A yarn, chain 42.
- Row 1: Work 1 extended single crochet (esc) into the 3rd chain from the hook and then into each chain across the row. You should have a total of 40 stitches.
- Row 2: Chain 1. Work 1 esc into each stitch across the row.
- Repeat Row 2 until your crocheted piece measures 26 inches in length. Do not cut the yarn at this point, as you will continue directly from this piece later for the bag’s top edge.
Sea Star Embellishment
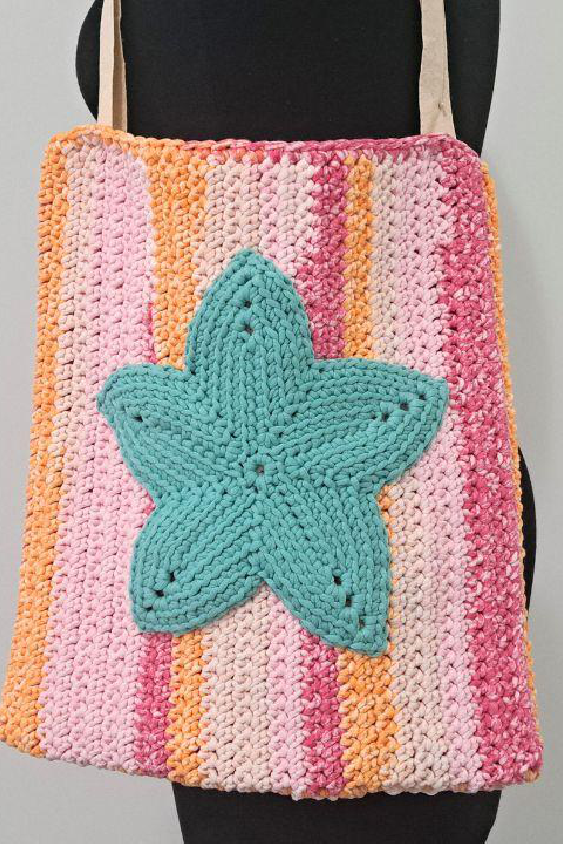
Next, let’s create the charming sea star motif that gives this tote its unique character. You can choose to make one or two, depending on whether you want an embellishment on one or both faces of your tote bag.
Using Colour B yarn for the sea star:
- Chain 4, then slip stitch to the very first chain to form a ring.
- Round 1:
- *Chain 9. Beginning in the second chain from the hook, work 8 single crochets (sc) down the chain.**
- Work 1 sc into the ring.
- Repeat the sequence from * 3 additional times.
- Then, repeat from * to ** one final time.
- Draw up a loop in the ring, and then draw up another loop in the first chain of the next arm of the sea star. Work a sc2tog (single crochet two together) over these two loops to join.
- Round 2:
- *Work 1 sc in each of the next 6 chains going up the side of the arm.
- In the next chain, work (2 sc, chain 2).
- Work 2 sc in the back loop only (BLO) of the first sc going down the other side of the arm.
- Work 1 sc BLO in each of the next 6 stitches going down the arm.
- Work a sc3tog (single crochet three together) over the next three stitches to decrease.
- Repeat from * 4 times around the sea star.
- Round 3:
- *Work 1 sc in each of the next 7 stitches going up the side of the arm.
- In the chain-2 space, work (2 sc, chain 2, 2 sc).
- Work 1 sc BLO in each of the next 7 stitches going down the arm.
- Work a sc3tog over the next three stitches.
- Repeat from * 4 times.
- Round 4:
- *Work 1 sc in each of the next 8 stitches going up the side of the arm.
- In the chain-2 space, work (2 sc, chain 2, 2 sc).
- Work 1 sc BLO in each of the next 8 stitches going down the arm.
- Work a sc3tog over the next three stitches.
- Repeat from * 4 times.
- Round 5:
- *Work 1 sc in each of the next 9 stitches going up the side of the arm.
- In the chain-2 space, work (2 sc, chain 2, 2 sc).
- Work 1 sc BLO in each of the next 9 stitches going down the arm.**
- Work a sc3tog over the next three stitches.
- Repeat from * 3 times.
- Then, repeat from * to ** once.
- Slip stitch into the next stitch and bind off, leaving a long enough tail of yarn to sew the sea star onto the bag later.
Assembly & Finishing
Putting your Sea Star Tote together is simple with these final steps. Your unique crochet bag is almost ready!
- Return to the tote body piece where you left off after completing the main panel. Turn the piece 90 degrees. Work one single crochet (sc) into the end of each row along this new edge. This will form the top opening of your bag.
- Carefully position your completed sea star(s) on one or both of the outside faces of the tote. Secure them firmly in place with pins to prevent shifting.
- Using a yarn needle and the long tail you left on the sea star, carefully sew the sea star(s) onto the bag. Stitch neatly to ensure it is securely attached.
- Fold the tote bag in half so that the outside faces are together, ensuring all edges align perfectly.
- Using single crochet, seam along the side and bottom edges of the bag to fasten it together securely. This will form the structure of your tote.
- Add the straps or handles of your choice to the top edge of your tote bag.
- Finally, turn your finished Sea Star Tote right side out and admire your beautiful handmade creation


