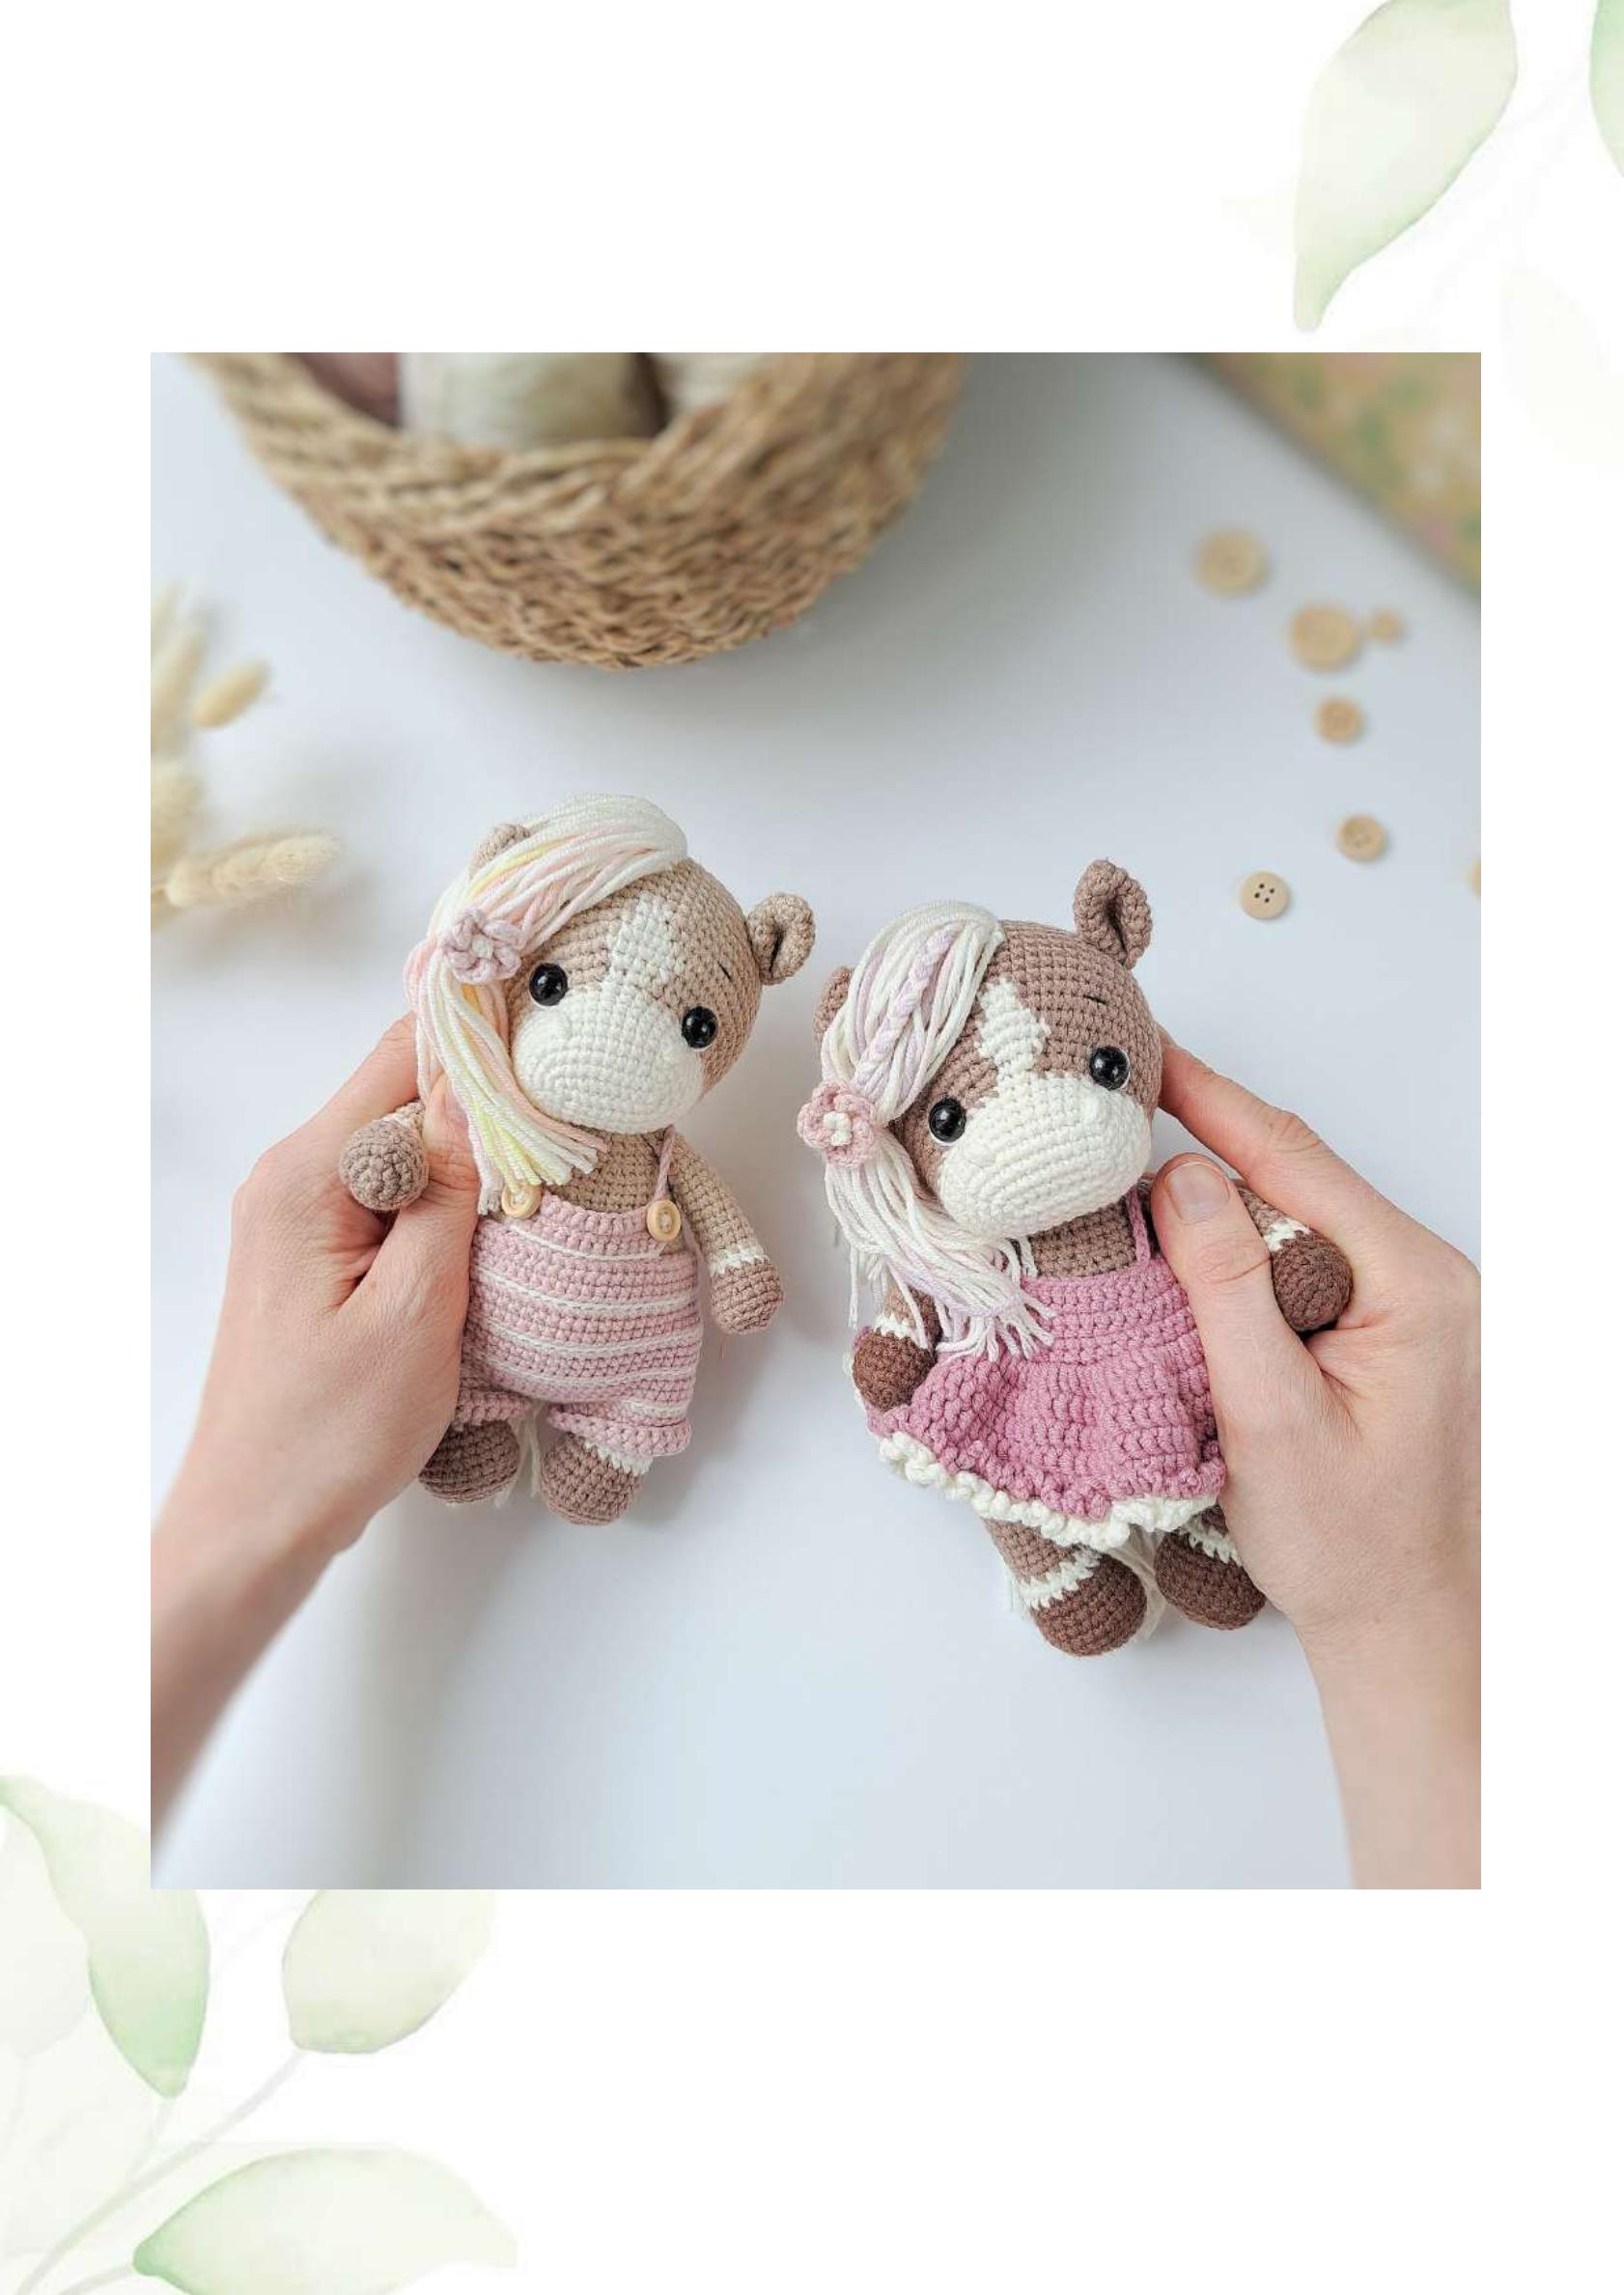
Meet Amelie’s Horse: A Magical Crochet Pattern for Your Dream Companion
Outfit 1: The Cozy Overalls
Start with soft pink yarn:
Ch 62, join into a circle with a sl st. Try it on your horse to ensure a good fit.
- R1: 62 sc.
Create an opening for the tail:
- R2: 44 sc, ch 4, skip 4 sc of the previous row, 14 sc. (62)
- R3: 62 sc.
Change to milky yarn when knitting the last stitch. Do not cut the soft pink thread. (I changed color on the side.)
With milky yarn:
- R4: BLO: 62 sl st.
When knitting the last stitch, change back to soft pink. Do not cut the milky thread.
With soft pink:
- R5: BLO: 62 sc.
- R6 – R7: 62 sc. (2 rows)
Repeat Rounds 4-7 three times total.
Fasten off milky thread and cut.
Now knit the legs:
The knitting is divided as follows: 27 sc (leg), 4 sc, 27 sc (leg), 4 sc.
Position the legs so the tail opening is exactly in the middle. You may need to unravel 17 sc from the last row to achieve this. Count 27 sc in the opposite direction and join into a circle with a sl st. Continue knitting on these 27 loops.
With soft pink:
- R1 – R4: 27 sc. (4 rows)
Finish with a sl st, fasten off, and cut.
Return to the beginning of the legs, count 4 sc from the first leg (this is the space between them). Attach the thread, leaving a 15 cm tail. Count 27 sc, join into a circle with a sl st, and knit another 4 rows of 27 sc. Finish with a sl st, fasten off, and cut. Use the remaining tail to sew the gap between the legs closed.
Now for the bib:
Mark 14 sc in the middle of the front of the overalls. Use a thread to mark these 14 sc and check that the bib is centered. Similarly, mark two points on the back of the overalls, 14 sc apart (where the straps will attach).
Return to the bib, attach milky yarn, and work in turning rows. Start each row with ch 1.
- R1: 14 sl st.
Change to soft pink when knitting the last loop. Fasten off milky and cut.
- R2: FLO: 14 sc.
- R3 – R4: 14 sc. (2 rows)
After finishing the bib, don’t cut the thread. Try the overalls on the horse and start the straps. They should cross at the back.
From where you finished the bib, ch 25 (or adjust to your horse’s size). Attach to the right back point on the overalls. Work 14 sl st to the left back point. Ch 25, attach to the front of the bib. Fasten off and cut. Hide all ends. Sew on two buttons. The overalls are ready!
Outfit 2: The Beautiful Sundress
With pink-violet yarn, start each row with ch 2 lift and end with sl st:
Ch 56. Starting from the 7th loop from the hook (adjust for your button):
- R1: 50 sc. (Worked flat)
- R2: (9 sc, inc) x 5. (55)
- R3 – R5: 55 sc. (3 rows)
- R6: 3 sc, (6 sc, inc) x 7, 3 sc. (62)
Join the knitting in a circle with a sl st.
- R7: 62 inc dc. (124)
- R8 – R11: 124 dc. (4 rows)
Try the sundress on your horse. You can adjust the length by knitting more or fewer rows.
- R12: FLO: (3 ch, sl st) x 124. (496)
Fasten off pink-violet thread and cut.
Attach milky thread to the end of Row 11:
- R12: (alternate) Ch 1, BLO: 124 hdc, sl st.
- R13: (3 ch, sl st) x 124. (496)
Fasten off milky thread and cut.
Straps for the Sundress:
Attach pink-violet thread to the initial chain and knit along the top of the sundress:
- 7 sl st, ch 15 (strap), skip 11 stitches, 14 sl st, ch 15 (strap), skip 11 stitches, 7 sl st.
Fasten off, leaving an end for sewing on the button. Hide all ends. Sew on one button. The sundress is ready!
The Flower
With soft pink yarn:
Make a magic ring, leaving a long tail before starting (don’t tighten yet). Into the ring, work:
- (2 ch, 3 dc, 2 ch, sl st) x 5 times to create 5 petals.
Tighten the magic ring. Sew the remaining hole closed so the petals fit tightly together. Fasten off, leaving a tail to attach the flower to the mane later.
Center of the Flower:
Using milky thread, embroider the center using the French knot technique. I made 3 knots.
Attach the flower to your horse’s mane as a sweet decoration
Your Amelie Horse Is Complete!
Give yourself a huge round of applause! You’ve just created something truly special—a heirloom-quality toy that will be cherished for years to come. Every stitch, every color change, every embroidered detail has come together to create a friend with real personality and charm.
I hope you’ve enjoyed every moment of this magical crochet journey. From shaping that sweet spotted face to braiding the mane and dressing her in her adorable outfits, this project is a labor of love that rewards you with the most enchanting result.
When you share photos of your finished Amelie Horse, please tag @handmade_kids_world as the pattern designer—she would be so happy to see your beautiful work! And of course, I’d love to see her too!
Thank you for spending this time creating with me. Now go ahead—give your new friend a hug, find her a special place to live, and smile every time you see her sweet face.
All the best to you, and see you soon
Tips for Success
- Color Changes: Cutting and tying threads for each color change gives crisp, clean lines. If you prefer jacquard, watch your tension carefully.
- Stuffing Matters: Stuff the light part of the muzzle less firmly than the rest of the head to maintain the soft, gentle expression.
- Eye Placement: Take your time with the eyes—they make the face! Use pins to check positioning before inserting them permanently.
- Try As You Go: When making the outfits, try them on your horse frequently to ensure a good fit.
- Be Patient with the Mane: Attaching all those strands takes time, but the result is so worth it! Play with different hairstyles.
- Hide Those Ends: With so many color changes, take extra care to hide all ends securely for a professional finish.