How to Crochet a Beautiful Margarita Daisy Granny Square | A Step-by-Step Tutorial
Hello, my cozy-making friends! Welcome to the blog. There’s something so joyful about combining a classic granny square with a sweet, cheerful flower, don’t you think? Today, I’m absolutely thrilled to guide you through creating this gorgeous Margarita Daisy granny square.
This project is bursting with springtime charm and is perfect for using up those little bits of colorful yarn we all have tucked away. Whether you’re a complete beginner looking for a fun challenge or an experienced crocheter wanting a quick and satisfying make, this daisy square is for you!
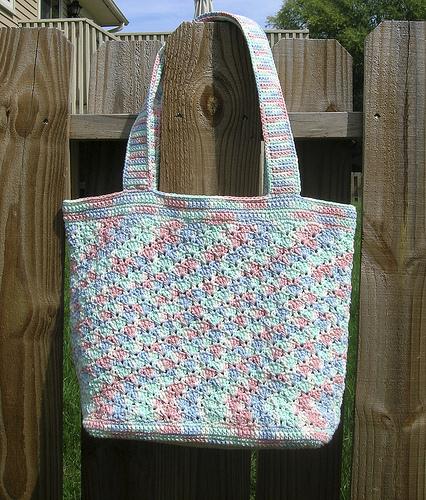
Imagine a whole blanket made of these sunny flowers—a true heirloom in the making. Or perhaps a delightful springtime bag to carry your projects? They also make wonderful appliques for hats, sweaters, or heartfelt handmade cards. The possibilities are truly endless!
The best part? This tutorial breaks everything down into simple, manageable steps. We’ll start by crafting the delicate daisy center and then build the classic granny square around it. So, grab your favorite hook, pick two colors that make your heart happy, and let’s create some floral magic together!
Materials You’ll Need
- Yarn: Worsted weight (Category 4) yarn in two colors.
- Color A (Flower Center): Yellow
- Color B (Petals & Square): Ecru or White (The tutorial uses Ecru)
- Color C (Square Border): Blue (or a color of your choice!)
- Crochet Hook: Size appropriate for your yarn (e.g., 5.0 mm / H-8 hook).
- Scissors
- Yarn Needle (for weaving in ends)
Crochet Abbreviations (US Terms)
- ch – chain
- sl st – slip stitch
- dc – double crochet
- tr – treble (or triple) crochet
- st(s) – stitch(es)
Finished Size
The finished size will depend on your yarn, hook, and tension. This square is designed to be a classic granny square motif, perfect for joining into larger projects
Step-by-Step Crochet Instructions
Part 1: Making the Daisy Center & Petals
We begin by creating the magical little flower at the center of our square.
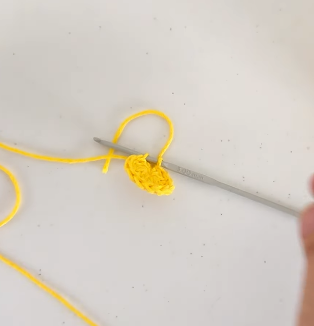
1. The Magic Ring & Center:
- With your Yellow yarn (Color A), create a magic ring.
- ch 3 (this counts as your first dc).
- Work 11 dc into the center of the ring. You will have 12 stitches total, including the starting chain-3.
- Pull the magic ring tight to close the circle. Sl st into the top of the beginning ch-3 to join the round.
2. Changing Color for the Petals:
- At this point, you can cut the yellow yarn, leaving a tail to weave in later.
- To seamlessly change color, prepare your Ecru/White yarn (Color B). Insert your hook into the same stitch where you made the sl st, grab the new ecru yarn, and pull it through to complete the slip stitch and secure the new color.
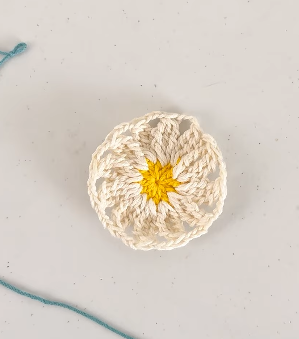
3. Weaving the Petals:
- ch 4.
- In the same stitch (the same hole as the join), you will work your first petal, which is made of 3 tr.
- To make a treble (tr): Yarn over your hook three times, insert your hook into the stitch, yarn over and pull up a loop (you will have 5 loops on the hook). [Yo, pull through 2 loops] four times until only one loop remains.
- After completing the 3 tr in the same stitch, yarn over and pull through all remaining loops on your hook, then make a sl st to close the petal.
- ch 2.
- Move to the next stitch (the next hole of the magic ring) and repeat the process: work 3 tr, close with a sl st, and ch 2.
- Continue this pattern all the way around the magic ring. You will create 12 petals in total, each separated by ch-2.
- Once you have 12 petals, sl st into the base of the first petal to join the round. Cut the ecru yarn and weave in the end with your yarn needle.
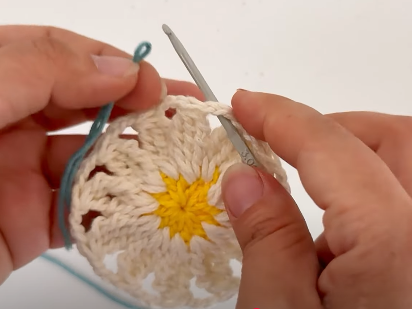
Part 2: Building the Granny Square Border
Now, let’s frame our beautiful daisy with a classic granny square border in Blue (Color C).
1. Starting the Square:
- Attach your Blue yarn into any of the ch-2 spaces between the petals.
- ch 2 (this counts as your first dc).
- In the same ch-2 space, work 2 dc. You now have a cluster of 3 dc (including the ch-2).
2. Forming the First Corner:
- In the next ch-2 space, work 3 dc.
- In the following ch-2 space, we will create our first corner:
- Work 3 dc, ch 3, then another 3 dc all into the same ch-2 space.
3. Completing the Square:
- Continue working around the flower. For the next two petals:
- In each of the next two ch-2 spaces, work a cluster of 3 dc.
- In the next ch-2 space, create your second corner: work [3 dc, ch 3, 3 dc].
- Repeat this pattern all the way around: work 3 dc in each of the next two spaces, then create a corner in the third. You will have four corners total.
- When you reach the beginning, sl st into the top of the initial ch-2 to join the round.
4. Finishing:
- Cut the blue yarn, leaving a tail. Pull the tail through the loop on your hook to secure it. Use your yarn needle to weave in all remaining ends on the back of your work.


Tips for Beginners
- Magic Ring: If you’re new to the magic ring, don’t worry! It can take a little practice. There are many great video tutorials online that can help you master it. It’s the best technique for a perfectly closed center.
- Treble Crochet: The tr stitch is tall but simple. Just remember to yarn over three times at the start. If you lose count of your loops, go slow and pull through two loops at a time.
- Counting Petals: After making your first few petals, stop and count them. It’s much easier to fix a missing petal now than at the very end!
- Tension: Keep your tension relaxed, especially when working the petals and the blue border. This will help your square lie flat and look beautiful.
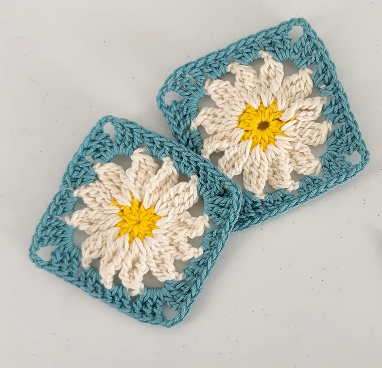
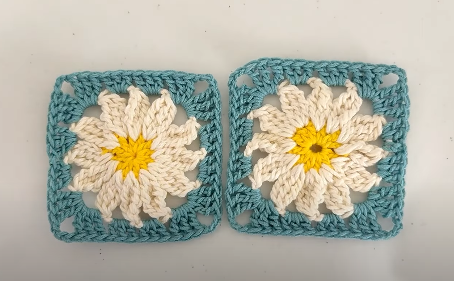
And there you have it! Your very own lovely Margarita Daisy granny square. I hope you enjoyed this soothing and creative process. What will you make with yours? A whole garden of them? I can’t wait to see!
Thank you so much for crocheting along with me. Happy making! 🌼