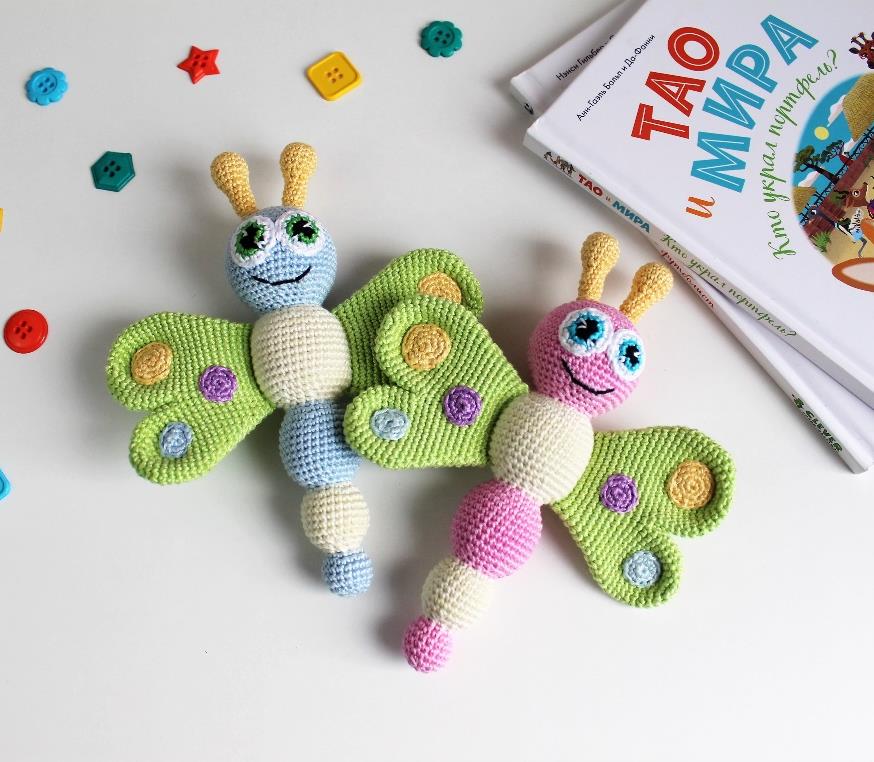
Flutter into Spring: The Adorable Butterfly Rattle Crochet Pattern
Joining the Wings
- Rnd 12: Work 13 sc on the second piece. Now, you’ll make a decrease that joins the two pieces: insert hook into the next stitch of the second piece, then into the first stitch of the first piece, yarn over and draw through all loops on hook (a joined decrease). Work 10 sc on the first piece. Make another decrease (joining the side of the first piece to the second piece). Work 9 sc on the second piece. Make another joining decrease. Work 12 sc on the second piece.
You should now have 49 sc worked + 2 unworked stitches (one from each original piece) left between the joined sections.
- Rnd 13: Dec, 23 sc, dec, 21 sc. (47 sc + the 2 unworked stitches remain between)
Now, take the yarn tail from the first wing piece and use it to sew those two unworked stitches together, closing the gap. Tie securely and trim the yarn.
Adding Spots
Before continuing, it’s much easier to attach the decorative spots now!
Small Spots (Make 4—I used blue and purple):
- Rnd 1: Ch 2, work 6 sc in the second ch from the hook. (6)
- Rnd 2: 6 inc. (12)
Fasten off, leaving a long tail for sewing.
Large Spots (Make 2—I used yellow):
- Rnd 1: Ch 2, work 6 sc in the second ch from the hook. (6)
- Rnd 2: 6 inc. (12)
- Rnd 3: (1 sc, inc) repeat 6 times. (18)
Fasten off, leaving a long tail for sewing.
Arrange and sew one large and two small spots onto each wing piece, placing them decoratively. Sew through each spot twice to ensure they’re secure!
Shaping the Wings
Now we’ll continue shaping the joined wing with decreases on each side.
- Rnds 14-23: Continue working in rounds, decreasing once on each side of the wing (one decrease at the beginning of the round and one at the end, or as evenly spaced as possible to maintain shape) until you have approximately 27 stitches remaining. The pattern works 10 rounds of decreases to achieve this shape.
Fasten off, leaving a long tail for sewing.
Make the Second Wing
Repeat the entire wing section to create a second wing. Remember to attach the spots to the opposite side so that when you sew the wings to the body, the spotted sides face outward!
Final Assembly: Bringing Your Butterfly to Life
You’ve done the hard work—now for the magical moment of assembly!
- Attach the Wings: Position the wings on either side of the butterfly’s body, just behind the head. Using the long tails, sew them on securely. Sew around the entire base of each wing, attaching it firmly to the body segments.
- Optional Shhhh… Sound! If you want your butterfly’s wings to have a gentle crinkle sound (babies love this!), cut small squares from a candy wrapper or cellophane flower wrapping. Slip a few pieces inside each wing before you finish sewing them shut. Just make sure they’re securely inside and won’t work their way out!
Tips for Success
- Count Your Stitches: With all the color changes and shaping, it’s easy to lose track. Use a stitch marker and count your rounds regularly.
- Safety First: If giving this to a baby, ensure all parts are sewn on extremely securely. Embroidered features are safer than plastic safety eyes for the youngest babies. The juniper beads in the antennae should be attached firmly, and the rattle capsule should be sealed so no small parts can escape.
- Get Creative with Color: This pattern is a wonderful canvas for your yarn stash! Try pastels for a soft, dreamy butterfly, or bright primaries for a bold, playful friend.
- Take Photos as You Go: The pattern includes many helpful photos—refer to them when you’re unsure about placement or shaping.