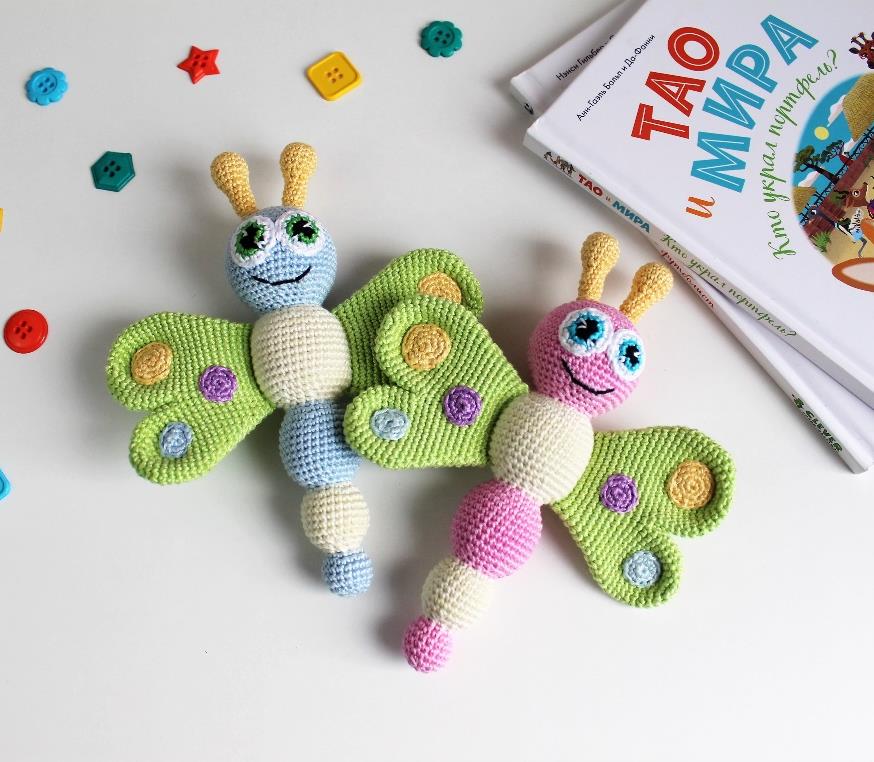
Flutter into Spring: The Adorable Butterfly Rattle Crochet Pattern
Hello, lovely crocheters! Today, I am absolutely buzzing with excitement to share a pattern that has stolen my heart—the most charming Butterfly Rattle you’ve ever seen. With her colorful wings, sweet embroidered smile, and gentle rattle inside, this little friend is designed to be cherished by the tiniest hands in your life.
There’s something so magical about creating toys for babies. Every stitch is woven with love and hope for their happiness and safety. This butterfly isn’t just adorable to look at; she’s a complete sensory experience! The gentle rattle sound stimulates hearing, the variety of colors delights the eyes, and those soft, squeezable wings are perfect for little fingers to explore. Plus, with wooden beads in the antennae (or safely stuffed alternatives), she’s as safe as she is beautiful.
This pattern is perfect for the confident beginner or intermediate crocheter. We’ll be working in continuous spirals, shaping spheres for the body, creating colorful wings, and assembling all the pieces into one delightful creature. The pattern comes from the talented Katerina Arkhipova, who kindly allows us to sell the finished toys we make (just be sure to give her credit!). So, brew yourself a cup of tea, gather your brightest cotton yarns, and let’s create some magic together!
A Note Before We Begin
This pattern is written in US crochet terms and assumes you have basic knowledge of working in the round, increasing, decreasing, and sewing pieces together. The butterfly is worked in a continuous spiral—do not join your rounds unless instructed otherwise. Just use a stitch marker to keep track of your place!
The finished butterfly, made with the recommended yarn, stands approximately 16 cm (about 6.3 inches) tall—the perfect size for baby hands to hold and hug.
Your Supply Garden: Materials & Tools
Gather these materials before you start your crochet journey:
Yarn: Begonia by Yarn Art (100% mercerized cotton, 170 m per 50 g). This is a lovely, smooth cotton that shows stitch definition beautifully and is safe for babies. You’ll need:
- Six colors for the butterfly’s body segments and wings
- Three colors for the eyes (black, a middle color like blue or green, and white)
- Choose whatever colors make your heart happy—this is where you can get creative!
Hook: 1.75 mm crochet hook (a 2.0 mm hook will also work if that’s what you have).
Rattle Insert: A plastic rattle capsule, 35 mm in diameter. You can find these in craft stores or online. I like to add a few small beads or fine granulate inside the capsule and seal the holes with tape before inserting—this creates a lovely, gentle sound and ensures nothing escapes!
Two Juniper Beads: Approximately 8 mm, for the antennae tips. Juniper is a safe, natural wood that smells wonderful when warmed. If you don’t have these, you can simply stuff the antennae tips with fiberfill.
Fiberfill: For stuffing the body segments.
Tools:
- Tapestry needle for sewing and embroidery
- Sharp scissors
- Tweezers and a chopstick or stuffing tool for getting fiberfill into those small spaces
Stitch Guide: Abbreviations (US Terms)
- ch: chain
- sc: single crochet
- sl st: slip stitch
- inc: increase (2 sc in one stitch)
- dec: decrease (single crochet 2 together)
- (…)*6: repeat the instructions in parentheses 6 times
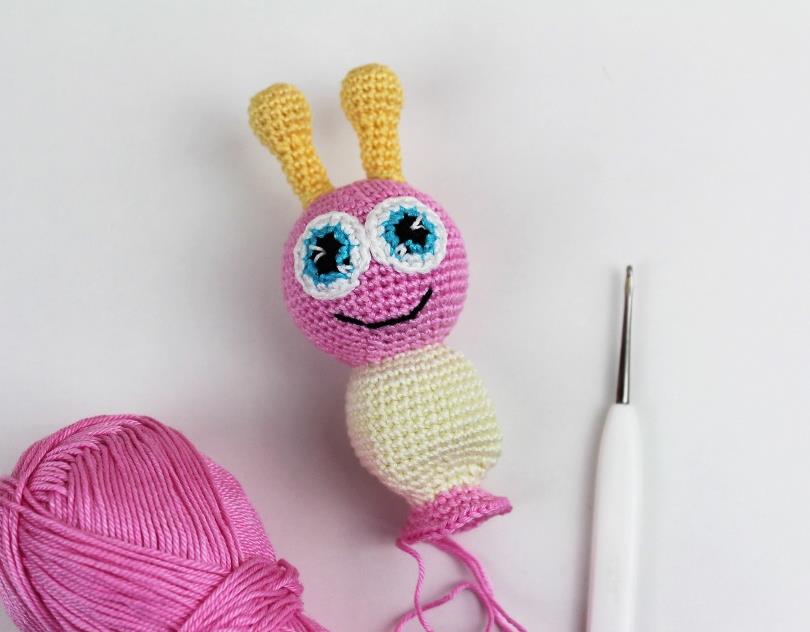
Let’s Create! The Butterfly Rattle Pattern
We’ll start from the top and work our way down, building the butterfly’s body segment by segment.
The Head
We begin with a sphere that will become our butterfly’s cheerful face.
- Rnd 1: Ch 2, work 6 sc in the second ch from the hook. (6)
- Rnd 2: 6 inc. (12)
- Rnd 3: (1 sc, inc) repeat 6 times. (18)
- Rnd 4: (2 sc, inc) repeat 6 times. (24)
- Rnd 5: (3 sc, inc) repeat 6 times. (30)
- Rnd 6: (4 sc, inc) repeat 6 times. (36)
- Rnd 7: (5 sc, inc) repeat 6 times. (42)
Rnds 8-17: Work 42 sc even. (10 rounds)
Now, set your head piece aside for a moment. It’s much easier to attach the eyes now while the head is still open!
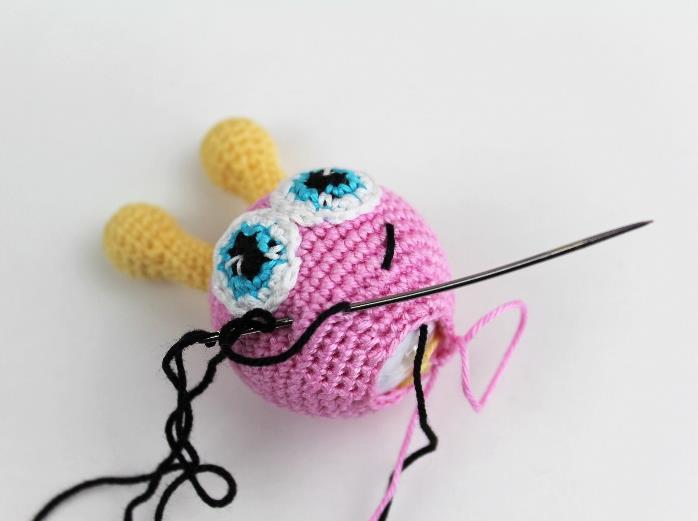
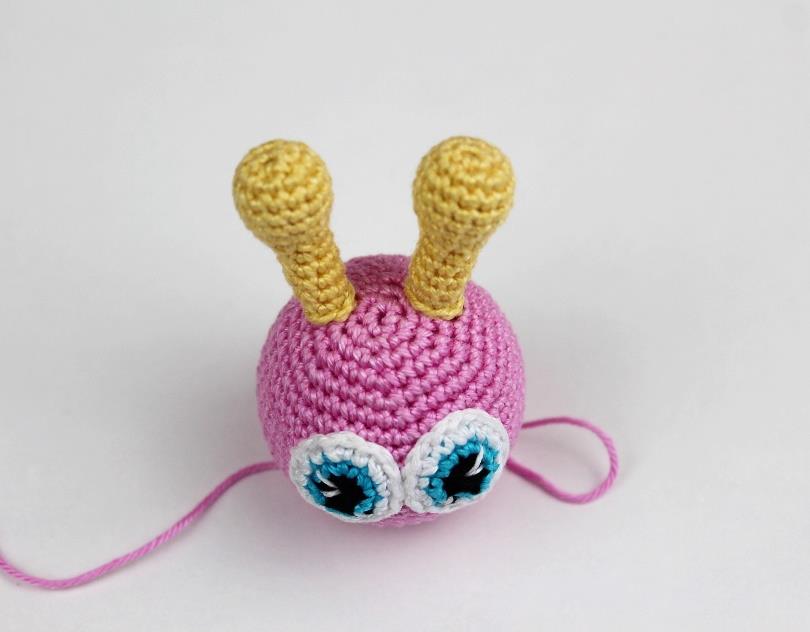
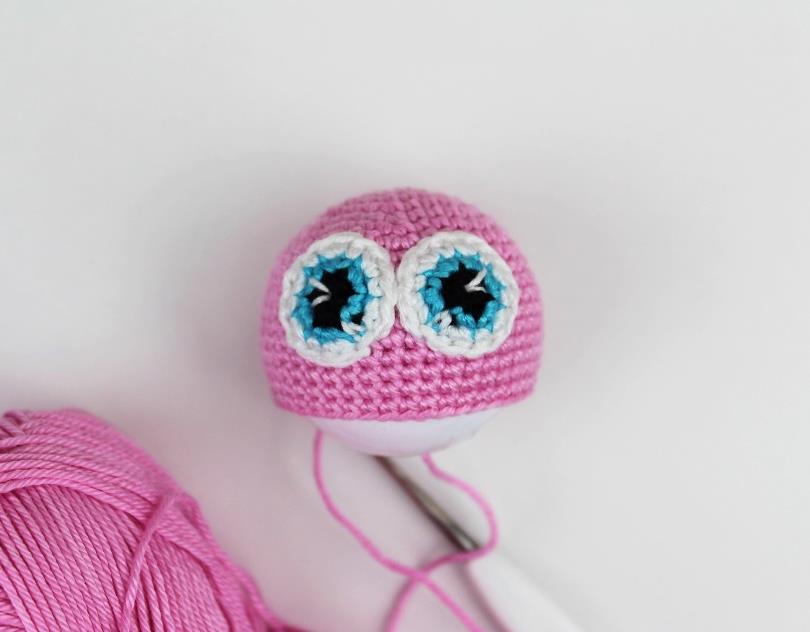
The Sweetest Eyes (Make 2)
These little cuties are worked in three colors to give them depth and sparkle.
- Rnd 1: With black yarn, ch 2, work 6 sc in the second ch from the hook. (6)
- Rnd 2: Switch to your chosen middle color (blue, green, or brown). Work 6 inc. (12)
- Rnd 3: Switch to white yarn. Work (1 sc, inc) repeat 6 times. (18)
Fasten off, leaving a long tail of the white yarn for sewing the eye to the head and for embroidering a little highlight (sparkle) later. Trim the other yarn tails short and tie them securely at the back of the eye. Make the second eye exactly the same way.
Attach the Eyes: Position the eyes close together on the head, between Rounds 7 and 14. Sew them on securely using the white tails. Then, use the same white yarn to embroider a tiny highlight stitch on each eye to make them shine! Tie off and hide your ends.
Back to the Head: Closing and Adding the Rattle
Now it’s time to insert our secret sound-maker!
- Rnd 18: (5 sc, dec) repeat 6 times. (36)
- Rnd 19: (4 sc, dec) repeat 6 times. (30)
- Rnd 20: (3 sc, dec) repeat 6 times. (24)
- Rnd 21: (2 sc, dec) repeat 6 times. (18)
Before you close the head completely, insert your prepared rattle capsule. Make sure it’s nestled snugly inside.
The Antennae (Make 2)
These sweet little stems give our butterfly her character!
- Rnd 1: Ch 2, work 6 sc in the second ch from the hook. (6)
- Rnd 2: 6 inc. (12)
- Rnd 3: 1 sc, inc, 5 sc, inc, 4 sc. (14)
- Rnds 4-6: Work 14 sc even. (3 rounds)
Now, insert a juniper bead into the top of the antenna. If you’re not using beads, just make a note to stuff this part lightly later.
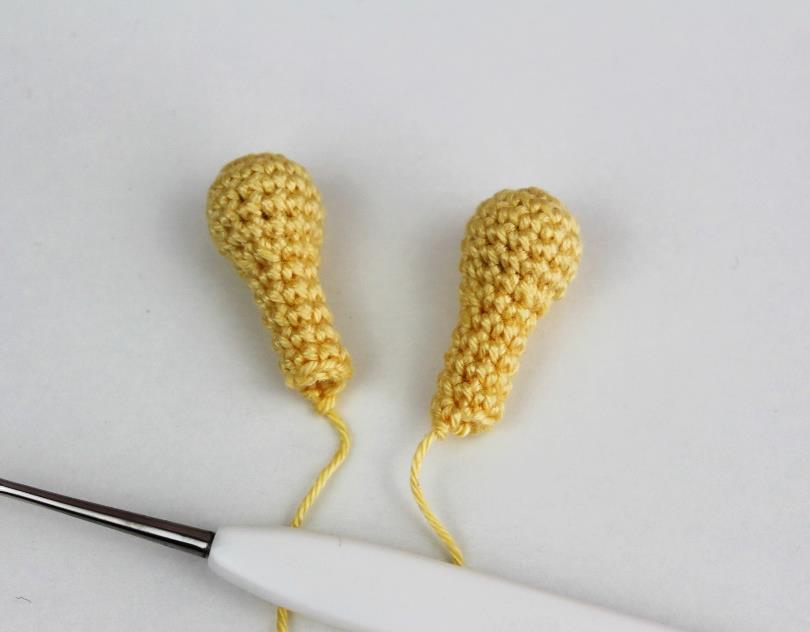
- Rnd 7: (1 sc, dec, dec, dec) repeat 2 times. (8)
- Note: This round decreases 6 stitches. Work 1 sc, then work three decreases in a row, then repeat from the beginning. It will create a gathered look around the bead.
- Rnds 8-12: Work 8 sc even. (5 rounds)
Fasten off, leaving a long tail for sewing. Repeat for the second antenna. Sew the antennae securely to the top of the head.
Time for a Smile!
Using black embroidery thread or a strand of black yarn, embroider a sweet smile on your butterfly’s face. Take your time and make it curved and cheerful!