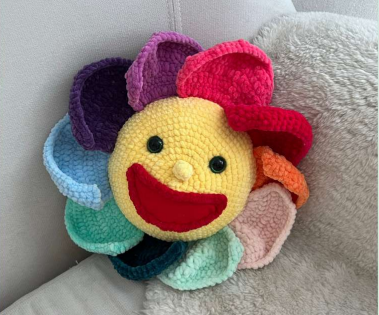
Flower Pillow Crochet Master Class
Materials
To create your own cuddly crochet flower pillow, you’ll need the following supplies:
- Plush Yarn: Himalaya Dolphin Baby or a similar chenille yarn.
- Main Color (for the face): ~75 g
- Petal Colors: 10 different colors, ~12 g each
- Red (for mouth): A small amount
- Crochet Hook: Size 4 mm
- Safety Eyes: 20 mm
- Felt: A small piece of red felt for the mouth
- Sewing Supplies: Sewing thread and a needle
- Stuffing: Polyester fiberfill or your preferred stuffing material
- Large-Eye Needle: For sewing with plush yarn
Abbreviations
This pattern uses standard US crochet terminology.
- Ch: Chain stitch
- Sl st: Slip stitch
- MR: Magic ring
- Sc: Single crochet
- Hdc: Half double crochet
- Dc: Double crochet
- Inc: Increase (2 sc in the same stitch)
- Dec: Decrease (sc 2 stitches together)
- Hdc-inc: Half double crochet increase (2 hdc in the same stitch)
- Dc-inc: Double crochet increase (2 dc in the same stitch)
- (…)*X: Repeat the instructions in the parentheses X times
Finished Size
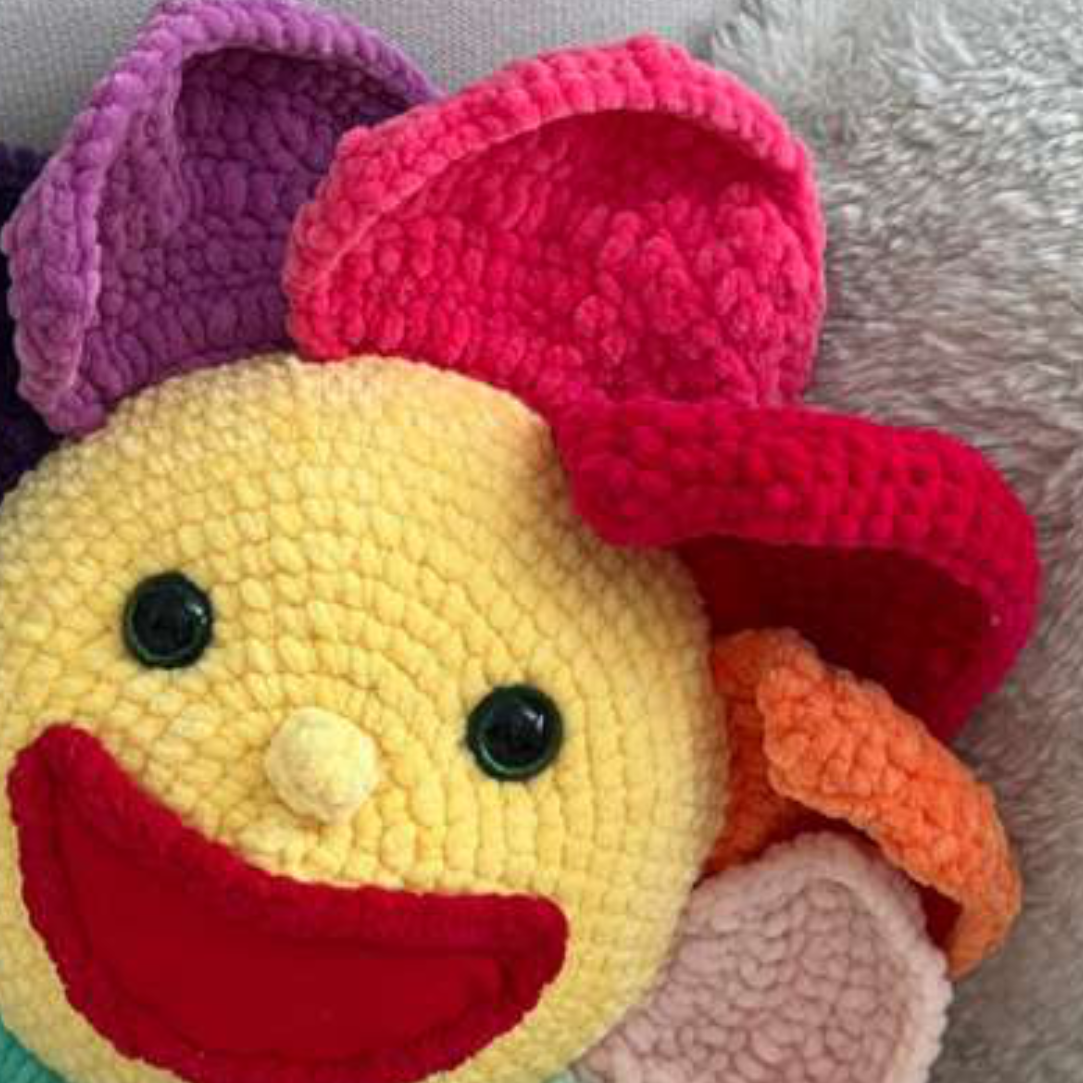
When using the recommended yarn and hook size, the finished flower pillow will measure approximately 35 cm (about 13.8 inches) in diameter, including the petals. Your final size may vary depending on your crochet tension.
Crochet Flower Pillow Instructions
Let’s begin creating the main part of your flower pillow!
Head (Center Base)
You will crochet the center of the flower in a continuous spiral. We will make two of these pieces to form the pillow.
Tip for a Perfect Circle:
To avoid a hexagonal shape and create a smoother circle, we’ll shift the increases on every even-numbered round starting from Round 4. For example, a round written as (4 sc, inc)*6 should be worked as: 2 sc, inc, (4 sc, inc)*5, 2 sc. This splits the first set of stitches and places the seam at the end of the round.
- Round 1: 6 sc in MR (6)
- Round 2: 6 inc (12)
- Round 3: (Sc, inc)*6 (18)
- Round 4: (2 sc, inc)*6 (24)
- Round 5: (3 sc, inc)*6 (30)
- Round 6: (4 sc, inc)*6 (36)
- Round 7: (5 sc, inc)*6 (42)
- Round 8: (6 sc, inc)*6 (48)
- Round 9: (7 sc, inc)*6 (54)
- Round 10: (8 sc, inc)*6 (60)
- Round 11: (9 sc, inc)*6 (66)
- Round 12: (10 sc, inc)*6 (72)
- Round 13: (11 sc, inc)*6 (78)
- Round 14: (12 sc, inc)*6 (84)
- Round 15: (13 sc, inc)*6 (90)
- Round 16: (14 sc, inc)*6 (96)
- Round 17: (15 sc, inc)*6 (102)
Now, we will create the side of the pillow and begin decreasing.
- Round 18: Working in the back loops only, crochet 102 sc around. (This creates the front loops we will use for the petals later).
- Round 19: (15 sc, dec)*6 (96)
- Round 20: (14 sc, dec)*6 (90)
- Round 21: (13 sc, dec)*6 (84)
- Round 22: (12 sc, dec)*6 (78)
- Round 23: (11 sc, dec)*6 (72)
- Round 24: (10 sc, dec)*6 (66)
- Round 25: (9 sc, dec)*6 (60)
- Round 26: (8 sc, dec)*6 (54)
- Round 27: (7 sc, dec)*6 (48)
- Round 28: (6 sc, dec)*6 (42)
- Round 29: (5 sc, dec)*6 (36)
- Round 30: (4 sc, dec)*6 (30)
- Round 31: (3 sc, dec)*6 (24)
- Round 32: (2 sc, dec)*6 (18)
- Round 33: (Sc, dec)*6 (12)
Begin stuffing the pillow firmly. Continue to add stuffing as you close the opening.
- Round 34: 6 dec (6)
Fasten off, leaving a long tail. Use your needle to weave the tail through the front loops of the final 6 stitches and pull tight to close the opening. Weave in the end to secure it.
Crocheting the Petals
We will now attach the petals directly to the center base. You will crochet 10 petals in total, working into the front loops left from Round 18. For a stronger hold, you can work into the full stitch of that round instead of just the front loops. The petals are worked in turning rows.
Attach your petal-colored yarn to begin.
- Row 1: Join yarn and make 10 sc along the front loops of the base.
- Row 2: Ch, turn. Starting from the second stitch from the hook, (dc, dc-inc)*5. (15)
- Row 3: Ch 2, turn. Starting from the third stitch, 15 dc. (15)
- Row 4: Ch 2, turn. Starting from the third stitch, work the following sequence: 2 hdc, hdc-inc, 2 hdc, dc-inc, 2 dc, dc-inc, dc, hdc, hdc-inc, 2 hdc, hdc-inc. (20)
- Row 5: Ch, turn. Starting from the second stitch: 3 sc, hdc-inc, 3 hdc, dc-inc, 3 dc, dc-inc, 3 dc, hdc-inc, 2 hdc, sc, sc-inc. (25)
- Row 6: Ch, turn. 5 sc, 5 hdc, 5 dc, 5 hdc, 5 sc. (25)
- Row 7: 5 sl st, 5 sc, 5 hdc, 5 sc, 5 sl st.
Do not fasten off. To create a clean edge, single crochet evenly down the side of the petal back to the flower base. Fasten off and weave in the end.
For the next petal, attach your new color. The start of the next petal should overlap the previous one by 1 stitch to ensure there are no gaps. The side of the petal that you just edged should remain facing the front.
Assembly and Finishing
With all the crocheting done, it’s time to bring your flower to life by adding the facial features!
Mouth and Nose
- Mouth: Cut a smile shape from the red felt. To give it a defined edge, crochet a chain with red plush yarn, making it long enough to trace the felt mouth. Sew this chain onto the felt piece, and then sew the entire mouth securely onto the pillow’s face.
- Nose: Using the main color yarn:
- Round 1: 6 sc in MR (6)
- Round 2: 6 sc (6)
Fasten off, leaving a long tail for sewing. Position the nose on the face just above the mouth and sew it in place using your large-eye needle.
Attaching Eyes and Creating Indentations
Insert the 20mm safety eyes into the desired position on the face, but don’t secure the backs yet. We will create slight indentations to give the face more character.
- Cut a long piece of your main color plush yarn.
- Insert your needle from the back of the pillow, coming out at the corner of one eye (point 1). Leave a 5 cm tail hanging out the back.
- Insert the needle back into the face at the other corner of the same eye (point 2). You can pass the yarn under the safety eye post.
- Bring the needle out at the back of the head, near where your starting tail is.
- Gently pull on both ends of the yarn. You will see an indentation form around the eye. Pull until you are happy with the look.
- Tie the two ends of the yarn together in a secure double knot. Trim any excess.
- Repeat this process for the second eye.
- Once you are satisfied with the indentations, securely fasten the backs of the safety eyes.
Your beautiful crochet flower pillow is now complete and ready for snuggles


