Easy Tessellated Triangles Crochet Throw In 2025
Hello, crochet friends! Are you ready to dive into a fun and rewarding project?
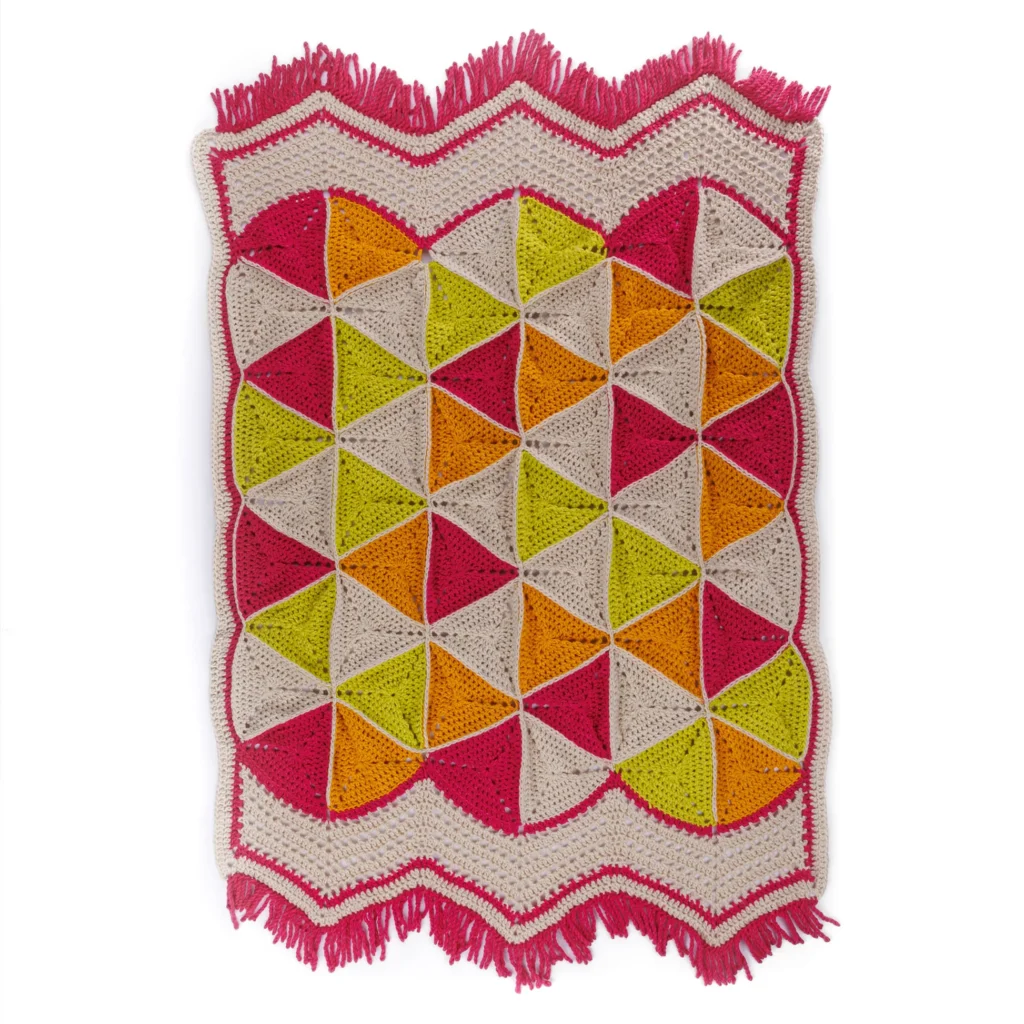
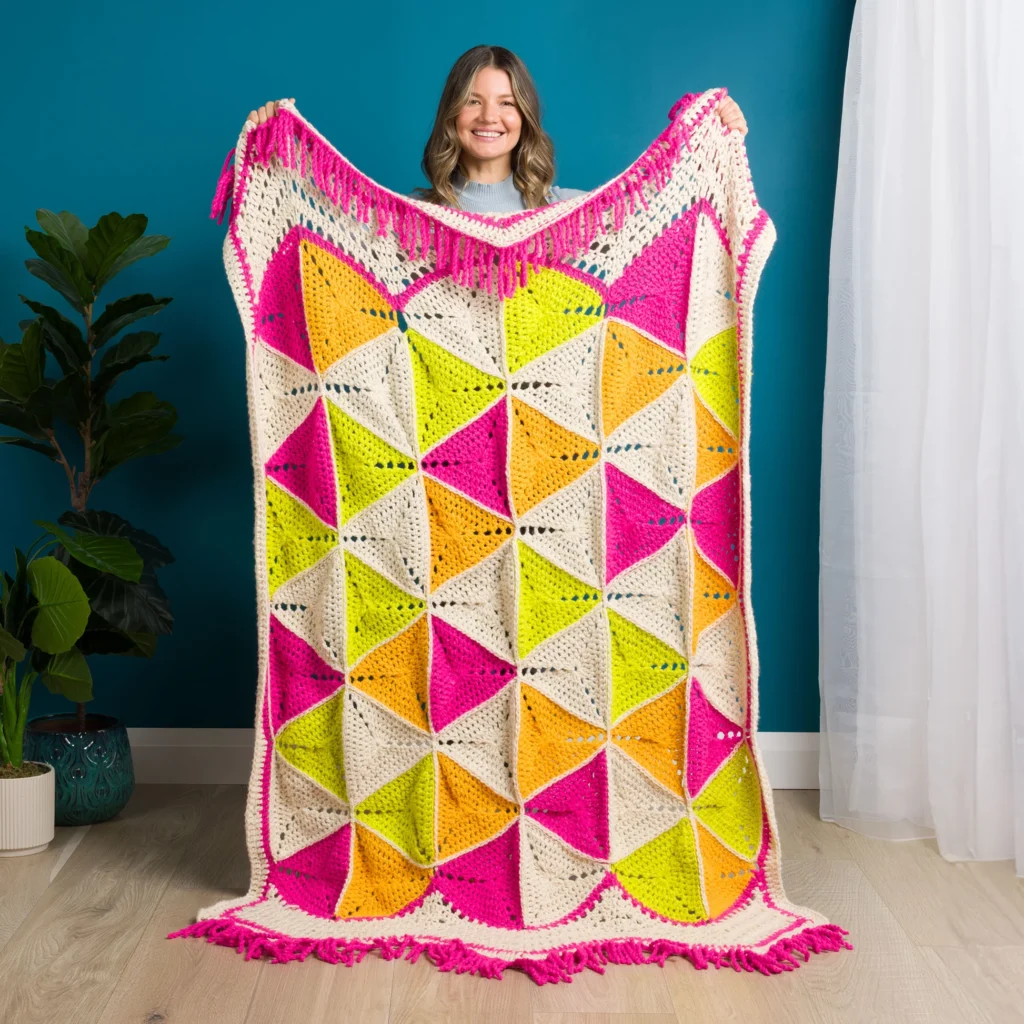
Today, we’re making a beautiful Tessellated Triangles Crochet Throw—a cozy, geometric masterpiece that’s perfect for snuggling under or gifting to someone special.
This pattern is designed with beginners in mind, using simple stitches like double crochet (dc) and slip stitch (sl st). The tessellated triangles create a modern, textured look, and the fringe adds a playful touch. Whether you’re new to crochet or looking for a relaxing project, this throw is a fantastic choice. Let’s get started
Materials Needed
Here’s what you’ll need to make your own Tessellated Triangles Throw:
- Yarn:
- Version 1 (Bright & Cheery):
- Main Color (MC): Cream – 3 balls (1231 yds/1125.5 m)
- Contrast A: Sunshine Yellow – 1 ball (415 yds/380 m)
- Contrast B: Citronella – 1 ball (415 yds/380 m)
- Contrast C: Vivid Pink – 2 balls (685 yds/626.5 m)
- Version 2 (Cool & Calm):
- Main Color (MC): Afternoon Blue – 3 balls (1231 yds/1125.5 m)
- Contrast A: Quartzite – 1 ball (415 yds/380 m)
- Contrast B: Ocean Depths – 2 balls (685 yds/626.5 m)
- Contrast C: Cream – 1 ball (415 yds/380 m)
- Version 1 (Bright & Cheery):
- Hook: Size U.S. L/11 (8 mm) crochet hook (or size needed to match gauge)
- Other Tools: Yarn needle, scissors
Abbreviations & Notes
Before we begin, here’s a quick guide to the abbreviations and special notes:
Abbreviations:
- ch = chain
- sl st = slip stitch
- dc = double crochet
- dc2tog = double crochet 2 together (decrease)
- RS = right side
- WS = wrong side
- sp = space
Notes:
The triangles will slightly cup or indent during joining—this is intentional for a 3D effect
Keep your working yarn on the wrong side (WS) when joining to create a flat seam.
Crochet Pattern Instructions
Step 1: Make the Triangle Motifs (54 Total)
You’ll need:
- 18 triangles in MC
- 12 triangles in Contrast A
- 12 triangles in Contrast B
- 12 triangles in Contrast C
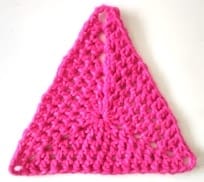
Triangle Motif Instructions:
- Foundation: Chain 7.
- Row 1 (RS): Work [(5 dc, ch 3) twice, 4 dc] all in the 7th chain from the hook. Join with a sl st to the 4th chain of the starting chain. You’ll have 15 dc and 3 ch-3 spaces.
- Row 2: Sl st into the first ch-3 sp, ch 6 (counts as 1 dc + ch 3), work 2 dc in the same sp. Skip the next dc, work 1 dc in the space between stitches. Repeat across, working (2 dc, ch 3, 2 dc) in each corner ch-3 sp. Join with a sl st to the 3rd chain of the starting ch-6.
- Rows 3–5: Repeat Row 2 three more times. Fasten off after Row 5
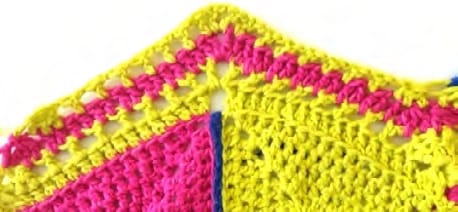
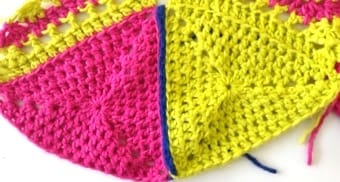
Step 2: Join the Triangles
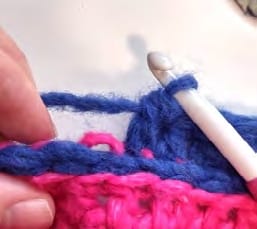
- Flat Slip Stitch Join: With the right side (RS) facing, use MC to slip stitch the triangles together through the back loops only. Join them into 6 vertical strips (9 triangles per strip), then join the strips side by side.
- Finishing Side Seams: Work slip stitches up the side edges through the back loops to mimic the flat join seam.
Step 3: Add the Edging
- Top/Bottom Edging:
- Join Contrast C (Version 1) or B (Version 2) to the top edge.
- Work dc2tog decreases and dc stitches evenly across, following the pattern for 8 rows.
- Final Edging: Work a round of dc stitches around the entire blanket, adding ch-3 corners for a polished finish.
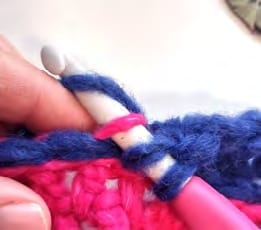
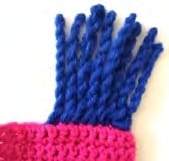
Step 4: Fringe (Optional but Fun)
- Twisted Fringe: Cut 10-inch strands of Contrast C (Version 1) or B (Version 2). Twist each strand 24 times, then attach to the top and bottom edges with slip stitches.
Helpful Tips for Beginners
- Tension Matters: Keep your stitches loose for a drapey throw.
- Count Your Stitches: Mark the first stitch of each row to avoid losing track.
- Blocking: Lightly steam or wet-block your triangles before joining for even edges.
conclusion
Congratulations! You’ve just created a stunning Tessellated Triangles Crochet Throw. Whether you keep it for yourself or gift it to a loved one, this throw is sure to impress. The geometric design and cozy texture make it a timeless piece.