Crochet Your Own Spooky Pal: Zero the Ghost Dog
The Cloak (Using White Yarn)
*Note: We work in rows for the cloak. The beginning ch-2 of each row does NOT count as a stitch.*
- Find the b.l.o. rounds on the body (Rnd 15). Turn the body upside down and attach white yarn to the front loop of any stitch—this will be the center front of the cloak.
- Row 1: ch 2, [(3 hdc, hdc inc)] x 6. (30 st)
- Row 2: ch 2, turn, [(hdc, hdc inc)] x 15. (45 st)
- Row 3: ch 2, turn, [(hdc, hdc inc)] x 22, 1 hdc. (67 st)
- Row 4: ch 2, turn, [(hdc, hdc inc)] x 33, 1 hdc. (100 st)
- Row 5-6: ch 2, turn, 100 hdc. (100 st for 2 rows)
- To finish, make a round of sc all around the front edge of the cloak for a smooth look. F.O. and weave in the tail.
Cloak Tip (The Back Point)
- From the right side of the cloak, count 35 stitches from the right and attach white yarn at the 36th stitch.
- Row 1: 30 hdc.
- Row 2: ch 2, turn, skip 2 st, 26 hdc, skip 1 st, slst into the next st. (26 st)
- Row 3: ch 2, turn, skip 2 st, 22 hdc, skip 1 st, slst into the next st. (22 st)
- Row 4: ch 2, turn, skip 2 st, 18 hdc, skip 1 st, slst into the next st. (18 st)
- Row 5: ch 2, turn, skip 2 st, 14 hdc, skip 1 st, slst into the next st. (14 st)
- Row 6: ch 2, turn, skip 2 st, 10 hdc, skip 1 st, slst into the next st. (10 st)
- Row 7: ch 2, turn, skip 2 st, 6 hdc, skip 1 st, slst into the next st. (6 st)
- Row 8: ch 2, turn, skip 2 st, 2 hdc, skip 1 st, slst into the next st. (2 st)
- Row 9: ch 1, turn, skip 1 st, 1 sc into the next st. (1 st)
- F.O. For a neat finish, attach yarn to the first row of the tip and sc all around, making an inc3 at the very point.
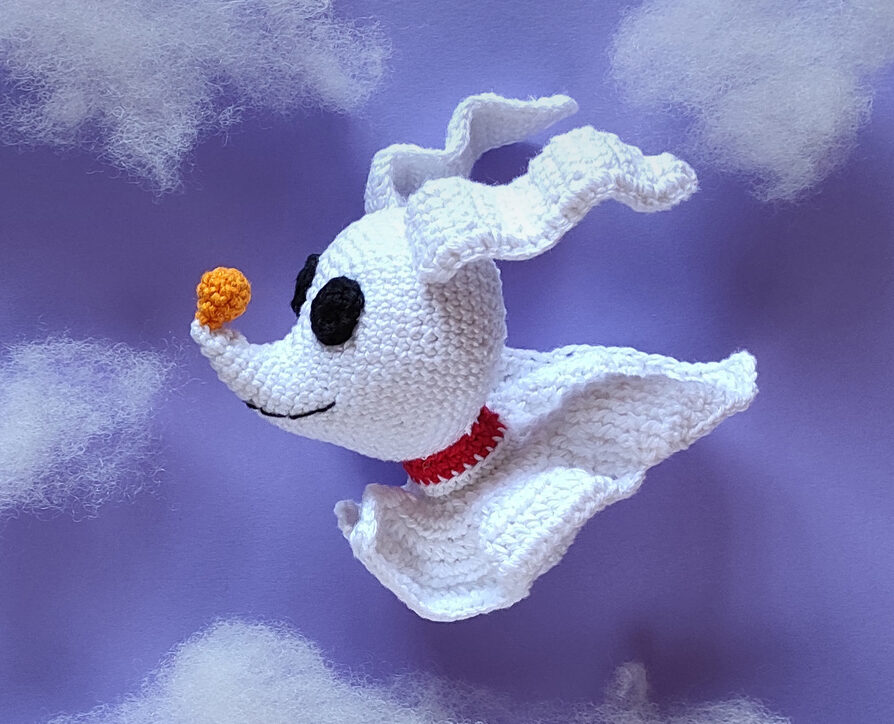
Assembly: Bringing Zero to Life
Now for the magic! Let’s put all the pieces together.
- Nose: Sew the orange nose onto the head between Rnd 1 and Rnd 2.
- Eyes: Sew the black eyes onto the head between Rnd 11 and Rnd 15, placing them about 4 stitches apart.
- Ears: Sew the ears onto the head at around Rnd 21, about 6 stitches apart. Important: Before you sew them on, push the exposed wire from each ear into the head. This will let you pose them later! After sewing, gently bend the ears to give them a cute, wavy shape.
- Mouth: Using black embroidery thread, stitch on a sweet mouth. Start at Rnd 12 on the right side and stitch down towards Rnd 7, then back up to Rnd 12 on the left side to form a soft “V” shape.
- Head to Body: Place the head onto the body. Position it so the open front of the cloak is lined up directly under the nose. Use the long red tail you left on the body to neatly sew the head in place.

You Did It!
Congratulations! You’ve just created your very own loyal ghost pup, Zero. He’s perfect for sitting on a shelf, guarding your desk, or being gifted to someone who loves a little spooky charm