Crochet the Playful Peekaboob Top: A Free & Flirty Bralette Pattern
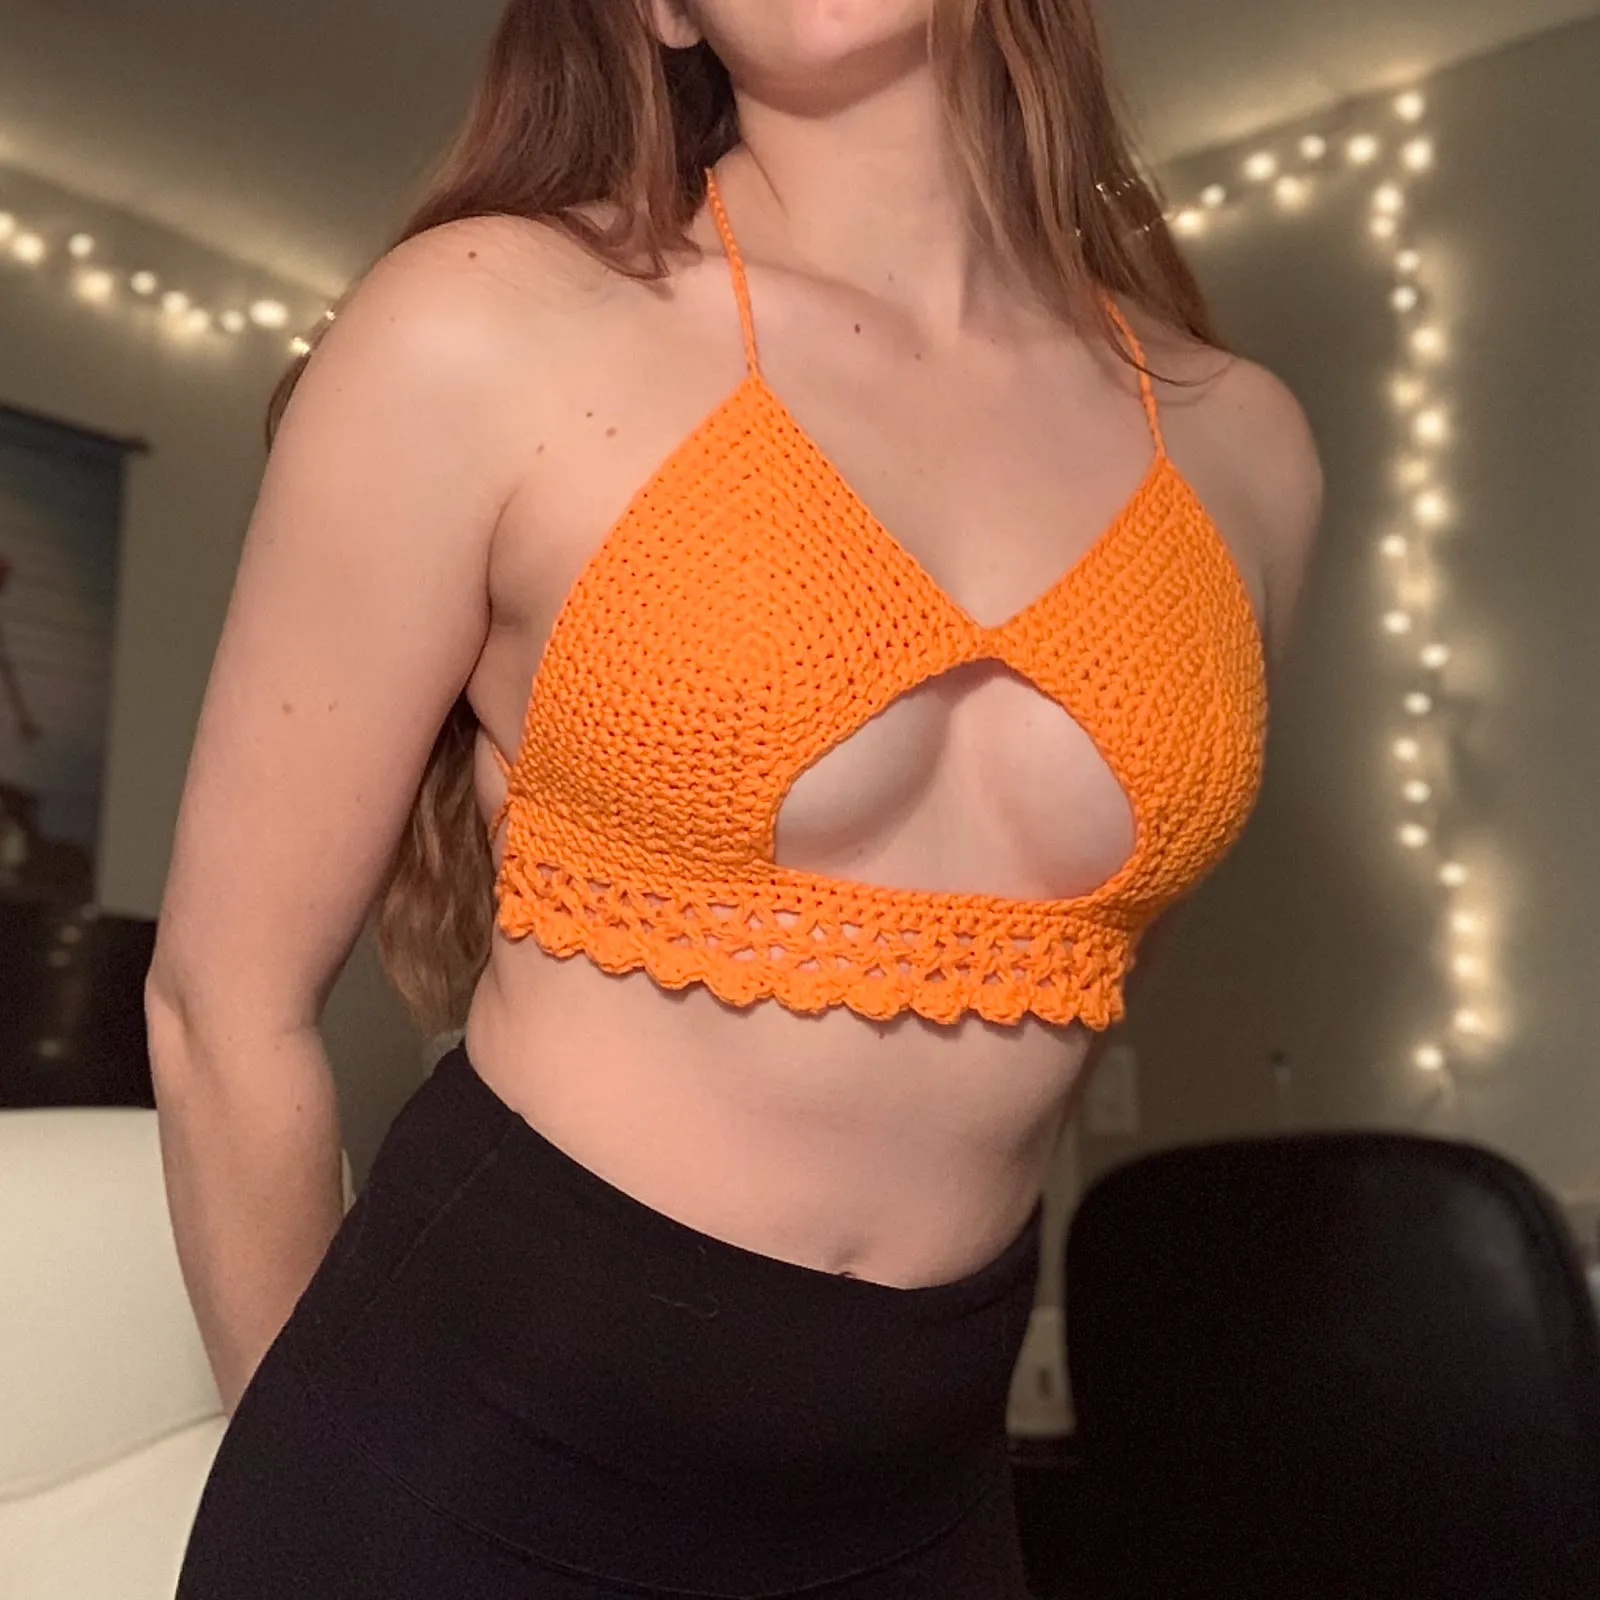
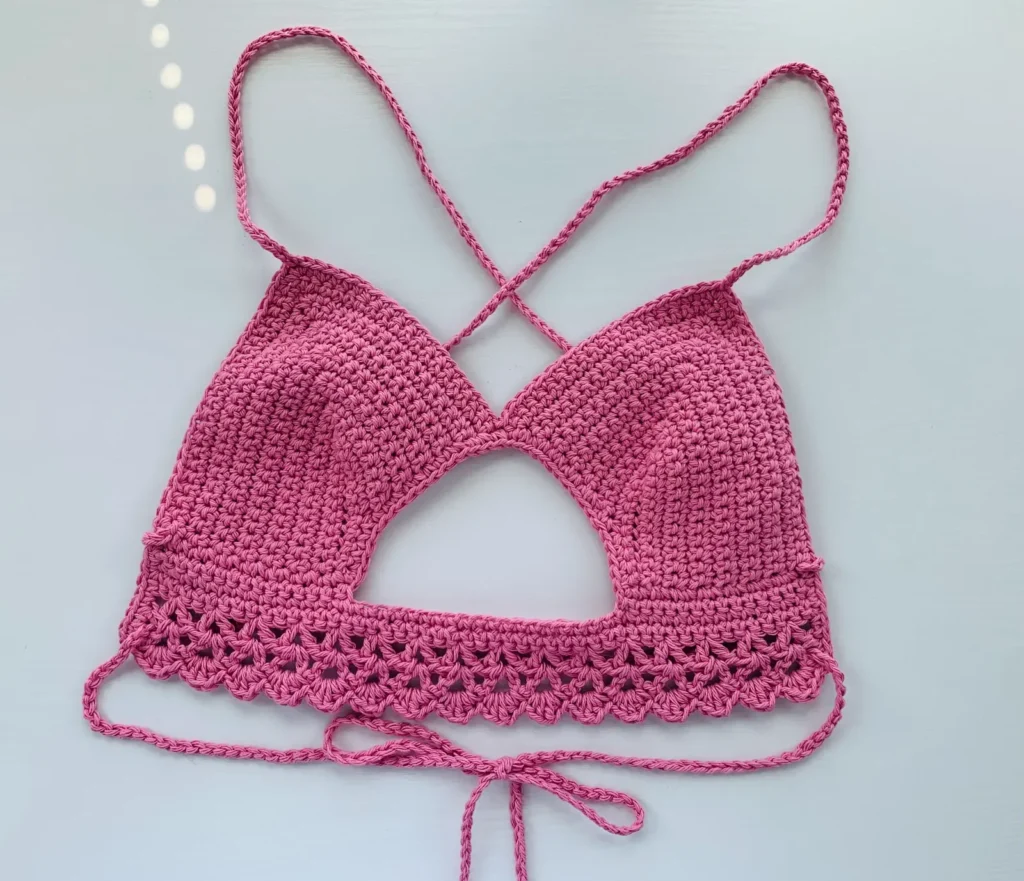
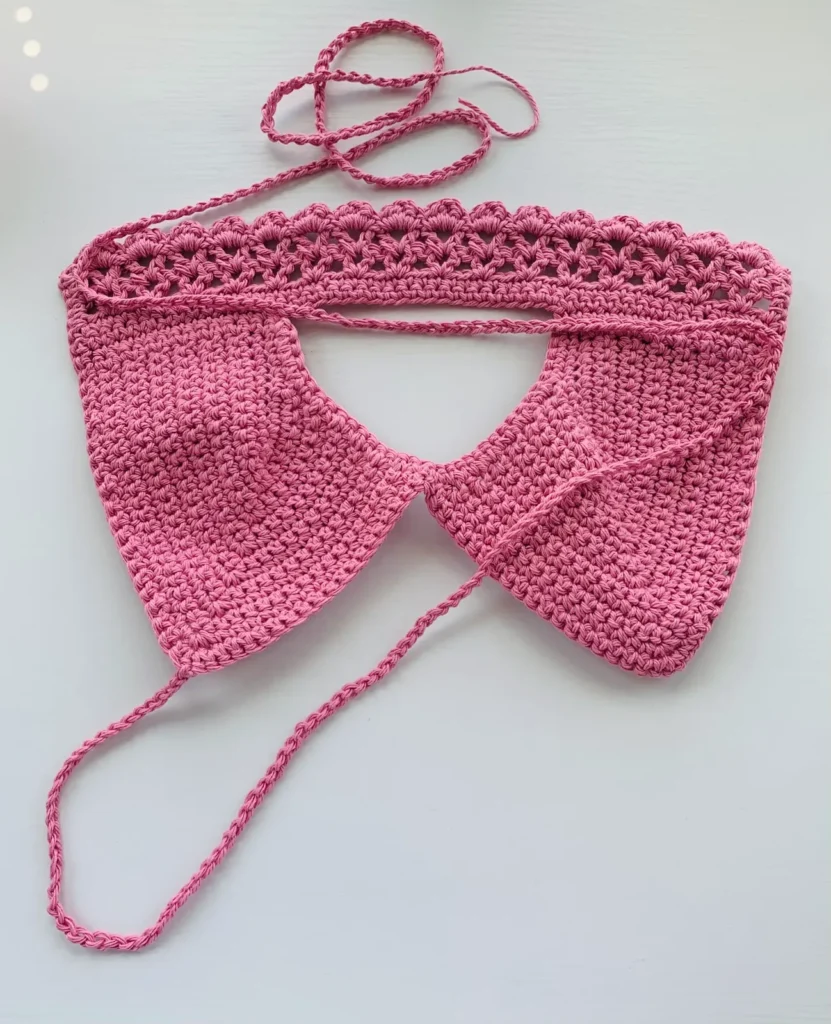
Hello, lovely makers! Get ready to add a touch of playful charm to your handmade wardrobe with the Peekaboob Top. This pattern is as fun to make as it is to wear, featuring a flattering fit, beautiful scalloped detailing, and the option for a cute peek-a-boo lace-up style.
Designed by the talented Kelsie of PassioKnit Goods, this top is perfect for crocheters who are ready to move beyond simple scarves and hats. Don’t let that intimidate you—the stitches are all basic, and the pattern is written in a clear, row-by-row format. It’s a fantastic project for building your skills and creating something truly special for yourself or a friend.
Whether you’re dressing it up for a festival, wearing it as a layering piece, or just enjoying it on a sunny day, this top is all about comfort and self-expression. So, pick out your favorite worsted weight cotton yarn, and let’s create something beautiful together
Materials You’ll Need
- Yarn: Any worsted weight yarn. The sample uses Lily Sugar ‘n Cream cotton, which is perfect for its structure and breathability.
- Crochet Hook: 5mm hook.
- Notions:
- Scissors
- Yarn Needle (for weaving in ends)
- Stitch Marker (incredibly helpful for marking the center of your increases!)
Stitch Abbreviations (US Terms)
- Ch: Chain
- Sc: Single Crochet
- Sl St: Slip Stitch
- Hdc: Half Double Crochet
- Dc: Double Crochet
- Sc2tog: Single Crochet Two Together (decrease)
Sizing Guide
This pattern is written for multiple sizes based on US bra band and cup sizing. Find your size in the chart below to know which set of instructions to follow.
| 30 | 32 | 34 | 36 | 38 | 40 | |
|---|---|---|---|---|---|---|
| A | XS | XS | S | S | M | M |
| B | XS | S | S | S | M | M |
| C | S | S | M | M | L | L |
| D | M | M | L | L | L | L |
| DD | M | L | L | XL | XL | XL |
| DDD | L | L | XL | XL | Custom | Custom |
Pattern Instructions
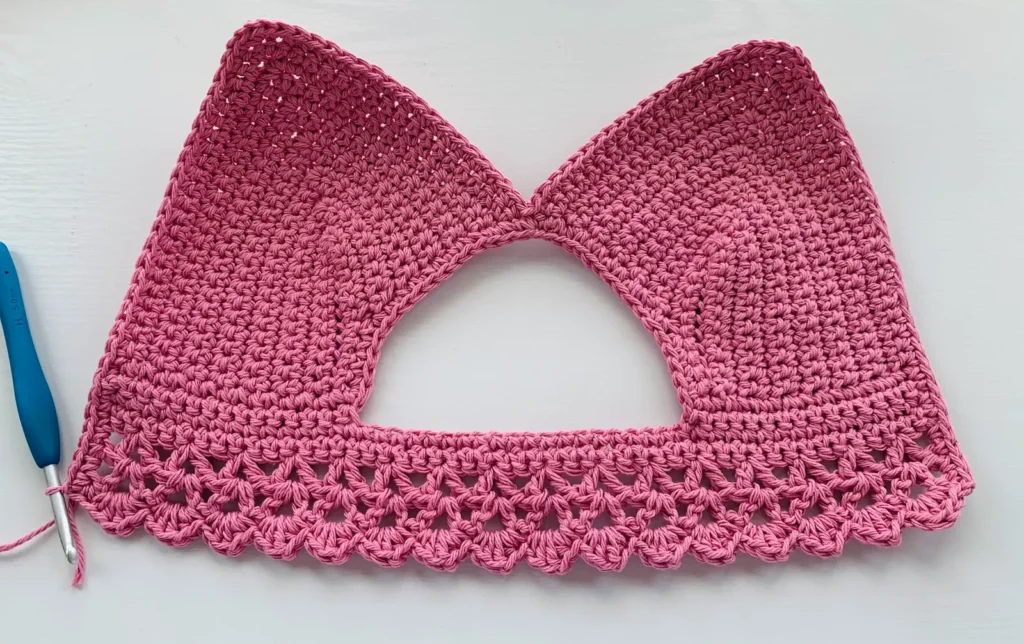
The top is worked in two main parts: two individual cups are made first, and then they are joined together with the bottom band and scalloped edging. Finally, you’ll add simple chain straps.
How to Make the First Cup
This tutorial uses the Small size as an example. Simply follow the row counts for your specific size from the PDF.
- Foundation: Chain 12.
- Row 1: Single crochet (Sc) in the second chain from the hook and in each of the next 9 chains (10 Sc). In the last chain, work 3 Sc. Place a stitch marker in the middle of these 3 Sc—this marks your center point for future increases! Now, working down the other side of the starting chain, Sc in the next 10 chains. Turn. (23 stitches)
- Row 2: Sc until you reach the stitch marker. Work 3 Sc together (an increase) in the marked stitch, and move the marker to the middle of these 3 new stitches. Continue to Sc until 6 stitches are left in the row. Work a Sc2tog (decrease). Turn. (20 stitches)
- Row 3: Sc to the marker. Work 3 Sc together in the marked stitch and move the marker to the center. Sc to the end of the row. Turn. (22 stitches)
- Row 4: Sc to the marker. Work 3 Sc together and move the marker. Sc until 2 stitches remain, then Sc2tog. Turn. (23 stitches)
- Rows 5-10: For each of these rows, Sc to the marker, work 3 Sc together and move the marker, then Sc to the end of the row. Turn after each row. Your stitch count will slowly increase.
- Rows 11-13: Follow the specific instructions for your size to add the final increases. For the Small, you’ll end with 43 stitches. Fasten off and cut your yarn.
How to Make the Second Cup
The second cup is almost identical to the first, but the first few rows are slightly different to create a mirrored effect for a perfect fit.
- Foundation: Chain 12.
- Row 1: Work exactly as Row 1 of the first cup. (23 stitches)
- Row 2: Slip stitch across the first 4 stitches. Chain 1. Work a Sc2tog (decrease). Sc until you reach the stitch marker. Work 3 Sc together in the marked stitch and move the marker. Sc to the end of the row. Turn. (20 stitches)
- Continue following the pattern for your size. The goal is to end with the same number of stitches as your first cup.
Joining the Cups & Making the Bottom Band
- With the wrong side (the back) facing you, attach your yarn to the outside corner stitch of the second cup.
- Row 1: Single crochet across the bottom edge of the cup. When you reach the corner (the underbust curve), work 2 Sc into that corner stitch. Continue working Sc around the curve between the cups, gently joining them as you go. When you reach the corner of the first cup, work 2 Sc into that stitch, then Sc across its bottom edge. It will form a slight omega (Ω) shape. Turn.
- Row 2: Sc across the bottom of the first cup. When you reach the gap between the cups, chain 20 (for Small size; check pattern for your size), then Sc across the bottom of the second cup. Turn.
- Rows 3 & 4: Sc in every stitch and chain across. Turn. (This creates a sturdy base band.)
Creating the Scalloped Edge
This is the pretty, decorative part!
- Row 5: Chain 2 (counts as first Dc). Skip a stitch, and in the next stitch work (1 Dc, Ch 1, 1 Dc)—this is your first “V” stitch. Skip 2 stitches, and work another “V” stitch (Dc, Ch 1, Dc) into the next stitch. Repeat this pattern all the way across. You should end the row with a single Dc in the last stitch. Turn.
- Row 6: Chain 2 (counts as Dc). In each Ch-1 space from the previous row, work a “V” stitch (Dc, Ch 1, Dc). End the row by working a Dc into the top of the beginning chain-2 from the previous row. Turn.
- Row 7: This row forms the scallops. Sc into the first stitch. Now, into each Ch-1 space below, work the following cluster: (1 Sc, 1 Hdc, 1 Dc, 1 Hdc, 1 Sc). This creates one beautiful scallop! Work one cluster into each “V” space across. End the row with a Sc into the top of the beginning chain-2 from the previous row. Do not turn.
Adding the Final Edging & Straps
- Edging: Chain 1. Now, you will work a round of Single Crochet all the way around the entire top edge of your bralette to create a neat finish. Work along the sides and across the top of the cups. When you reach the top center of each cup, work 3 Sc into that stitch to help it lay flat. This will create a big “M” shape. Join with a Sl St to the first Sc. Fasten off and weave in all ends.
- Optional Tip: To prevent side slippage, you can work a few casual decreases (Sc2tog) in the Sc edging around the outer sides of the cups.
- Straps: Cut a long piece of yarn. Tie it securely to the center stitch at the top of one cup, weaving in the short end. Simply chain until the strap is as long as you need it to be—long enough to tie behind your neck or back. Knot the end securely. Repeat for the second strap.
- Lace-Up: Criss-cross the straps in the back or front and tie them into a bow for an adjustable, cute finish
Tips for Beginners
- Trust the Process: The cups might look a little funny and wobbly at first, but they will quickly take shape. Trust the pattern!
- Use Your Marker: That stitch marker is your best friend! It keeps your center increases straight and ensures both cups are symmetrical.
- Mind the Turns: Remember to turn your work at the end of each row unless the pattern specifies otherwise (like for the final edging).
- Adjust for Fit: The chain length between the cups (20 for Small, etc.) determines how far apart they sit. You can add or subtract a few chains to customize the fit for your body
Final Thoughts
And there you have it! Your very own handmade, flirty, and fabulous Peekaboob Top. We hope you feel incredibly proud of what you’ve created. This pattern is a wonderful way to practice shaping and finishing techniques, and the result is a truly unique piece for your wardrobe.
Remember, you can always get creative with color—imagine this in a bold solid or a fun, summery stripe! Happy crocheting, everyone


