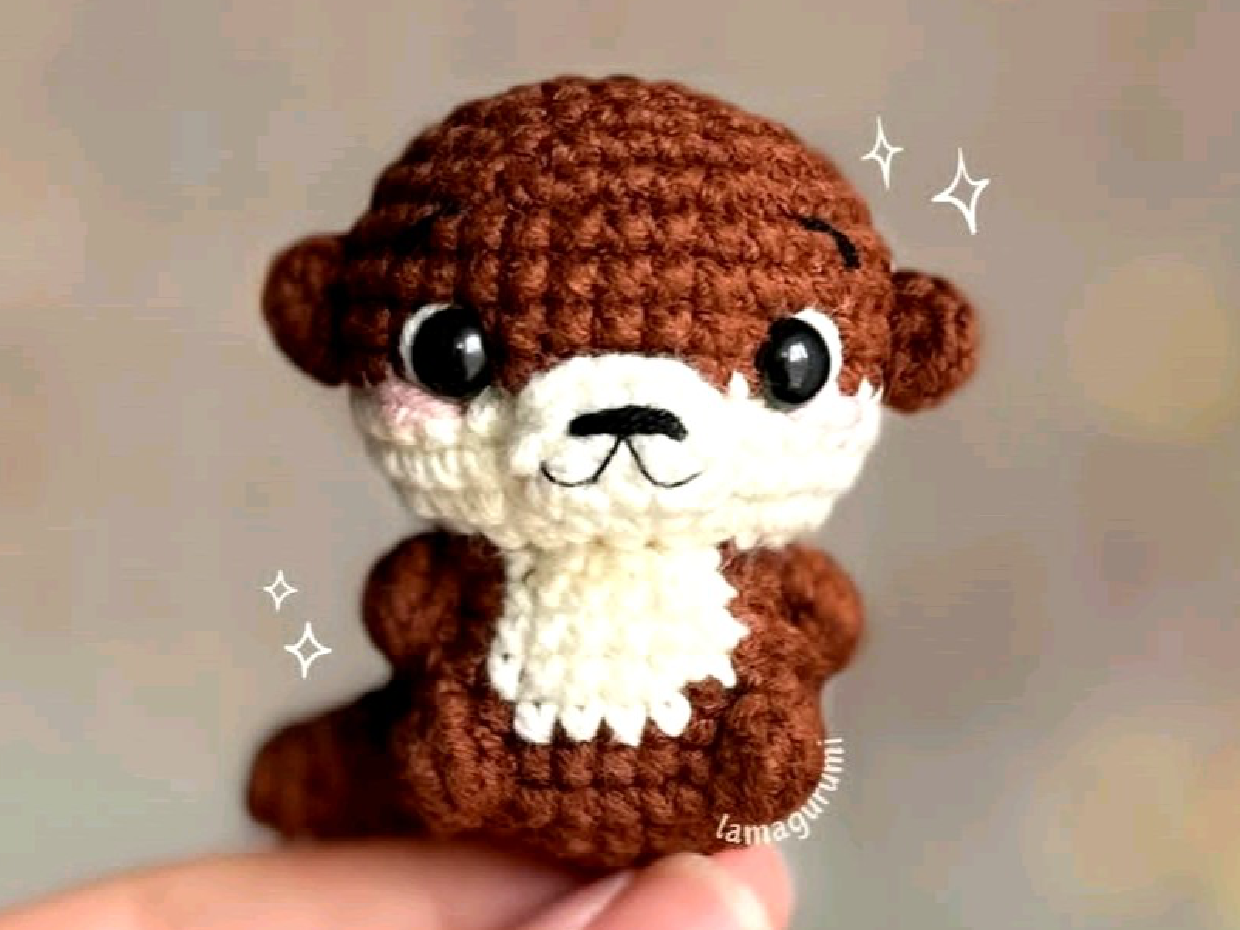
Crochet Otter Amigurumi Pattern
Tail
Crochet the tail with your brown yarn, adding stuffing as you go.
- R1: In a magic ring, work 6 sc. (6 stitches)
- R2: 6 sc. (6 stitches)
- R3: (1 sc, 1 inc) repeat 3 times. (9 stitches)
- R4-5: Work 9 sc for 2 rounds. (9 stitches)
- R6: (2 sc, 1 inc) repeat 3 times. (12 stitches)
- R7: 12 sc. (12 stitches)
- Stuff the tail lightly but firmly.
- R8: Work 6 dec. (6 stitches)
- R9: Fold the tail flat. Make 2 sc, crocheting through both sides to close the opening. (2 stitches)
Fasten off (FO) and cut the yarn, leaving a long tail for sewing.
Body
The body forms the main structure of your otter. This section incorporates popcorn stitches for texture. Use brown yarn throughout the body construction.
- R1: In a magic ring, work 6 sc. (6 stitches)
- R2: 6 increase (inc) stitches. (12 stitches)
- R3: (1 sc, 1 inc) repeat 6 times. (18 stitches)
- R4: (2 sc, 1 inc) repeat 6 times. (24 stitches)
- R5: 9 sc, 1 Popcorn Stitch (Pc), 6 sc, 1 Popcorn Stitch (Pc), 7 sc. (22 sc + 2 Pc)
- R6: 9 sc, sc into the 3rd dc of the first Popcorn Stitch, 1 sc, 4 sc, 1 sc, sc into the 3rd dc of the second Popcorn Stitch, 7 sc. (24 stitches)
- R7: Work 2 sc together with the tail piece (attaching the tail), 8 sc, 6 sc, 8 sc. (24 stitches)
- R8: 7 sc, 1 Popcorn Stitch (Pc), 2 sc, 6 sc, 2 sc, 1 Popcorn Stitch (Pc), 5 sc. (22 sc + 2 Pc)
- R9: 7 sc, sc into the 3rd dc of the Popcorn Stitch, 2 sc, 6 sc, 2 sc, sc into the 3rd dc of the Popcorn Stitch, 5 sc. (24 stitches)
- R10: (1 sc, 1 dec) repeat 3 times, 1 sc, (1 dec, 1 sc) repeat 2 times, 1 dec, (1 sc, 1 dec) repeat 2 times. (16 stitches)
- R11: In Front Loops Only (FLO), (1 sc, 1 inc) repeat 8 times. (24 stitches)
- R12: (1 sc, 1 inc) repeat 12 times. (36 stitches)
- R13-14: Work 36 sc for 2 rounds. (36 stitches)
- R15-18: Work 36 sc for 4 rounds. (36 stitches)
Eye Placement
After completing Round 18, it’s time to place the safety eyes.
- Carefully place the 6 mm safety eyes between the 15th and 16th rounds.
- Position them between the 15-16th and 23-24th stitches (counting from a consistent starting point).
- R19: (4 sc, 1 dec) repeat 6 times. (30 stitches)
- R20: (3 sc, 1 dec) repeat 6 times. (24 stitches)
- R21: (2 sc, 1 dec) repeat 6 times. (18 stitches)
- R22: (1 sc, 1 dec) repeat 6 times. (12 stitches)
- R23: 6 dec. (6 stitches)
Fasten off (FO), cut the yarn, and weave in the end to close the opening. Stuff the body firmly as you go.
Assembly and Finishing Your Otter
Once all the pieces are crocheted, it’s time to bring your otter to life!
- Sewing: Use the long yarn tails to sew the ears to the top of the head and the nose piece to the front of the face, centered between the eyes.
- Eye Embroidery: Using white yarn, embroider a small highlight or outline around the safety eyes to make them pop.
- Cheeks: With pink yarn, embroider small blush marks on the cheeks for a cute effect.
- Eyebrows: Separate a strand of black yarn into a single ply and embroider delicate eyebrows above the eyes.
Congratulations! You’ve successfully finished your very own crochet otter. Enjoy your charming handmade creation!
Tips for Amigurumi Beginners
Creating amigurumi, like this delightful otter, is a rewarding experience. Here are a few tips to help you along the way, especially with patterns involving special stitches:
- Read Through: Always read the entire pattern before you start. This helps you understand the flow and anticipate any tricky parts.
- Stitch Markers are Your Friend: Use a stitch marker to mark the first stitch of each round, especially for spiral crochet. This ensures you maintain the correct stitch count and don’t get lost.
- Consistent Tension: Maintaining an even tension is key for amigurumi to prevent gaps where stuffing can show through. Practice makes perfect!
- Stuffing Smart: Stuff your amigurumi firmly but gradually. Use small pieces of fiberfill and push them into all parts of the piece using tweezers or the back of your hook, ensuring a smooth, even shape without lumps.
- Don’t Fear Special Stitches: If a stitch like the popcorn stitch is new to you, practice it a few times separately before incorporating it into your main project. The step-by-step guide provided above is a great starting point!
- Invisible Decrease: While this pattern uses standard decreases, practicing invisible decreases (insert hook into front loop of first stitch, then front loop of second stitch, yarn over and pull through both front loops, yarn over and pull through remaining 2 loops) can make your finished amigurumi even smoother.
Happy crocheting