Crochet Fish Keychain
Materials for Your Crochet Fish Keychain
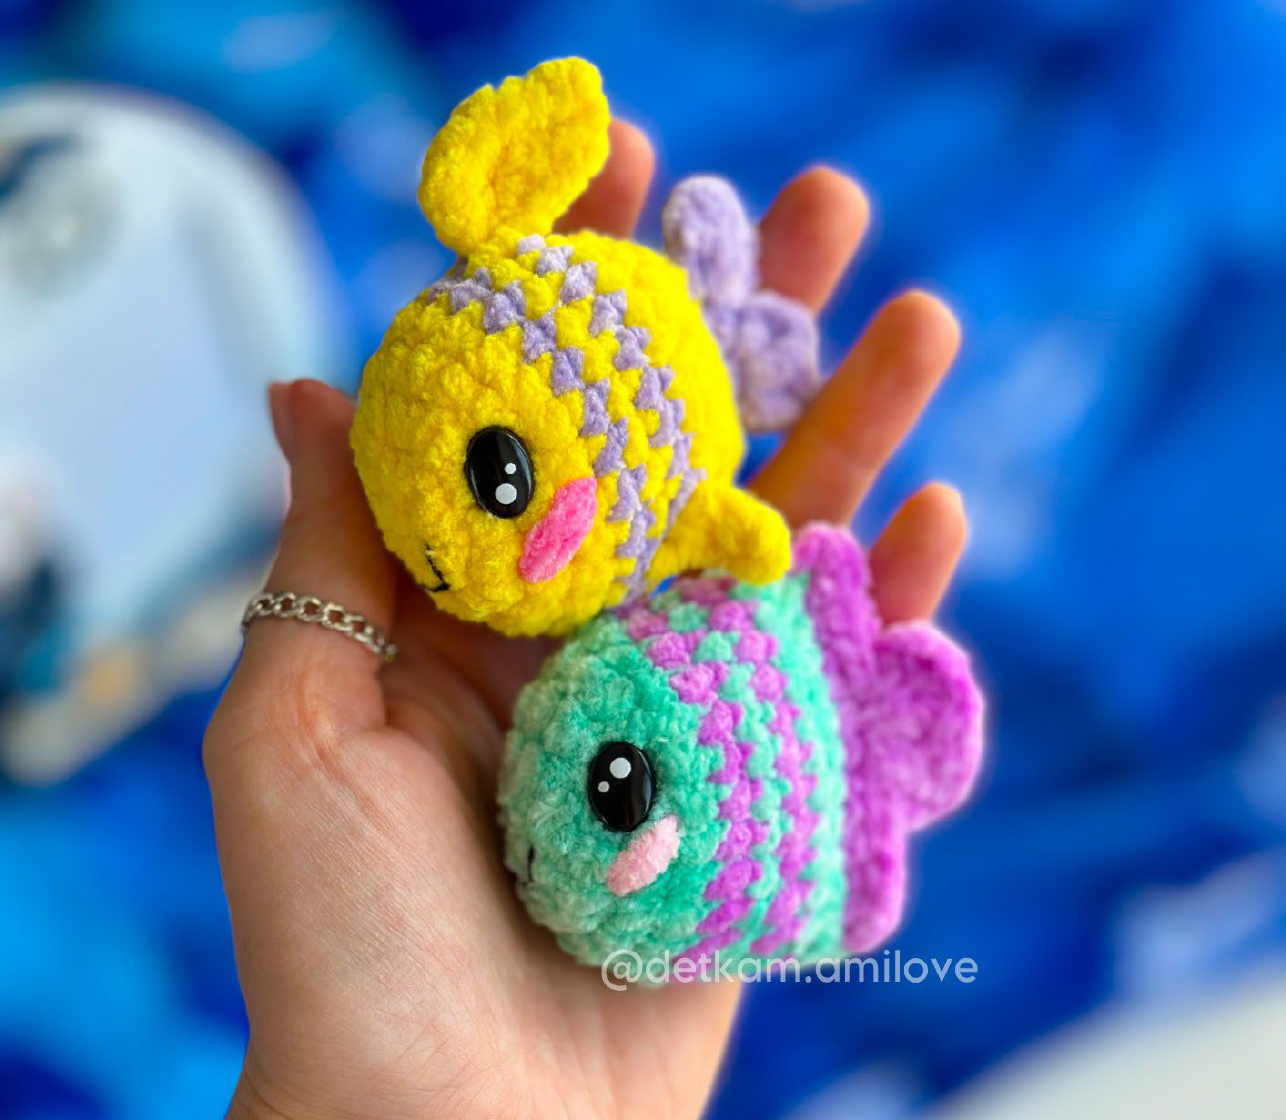
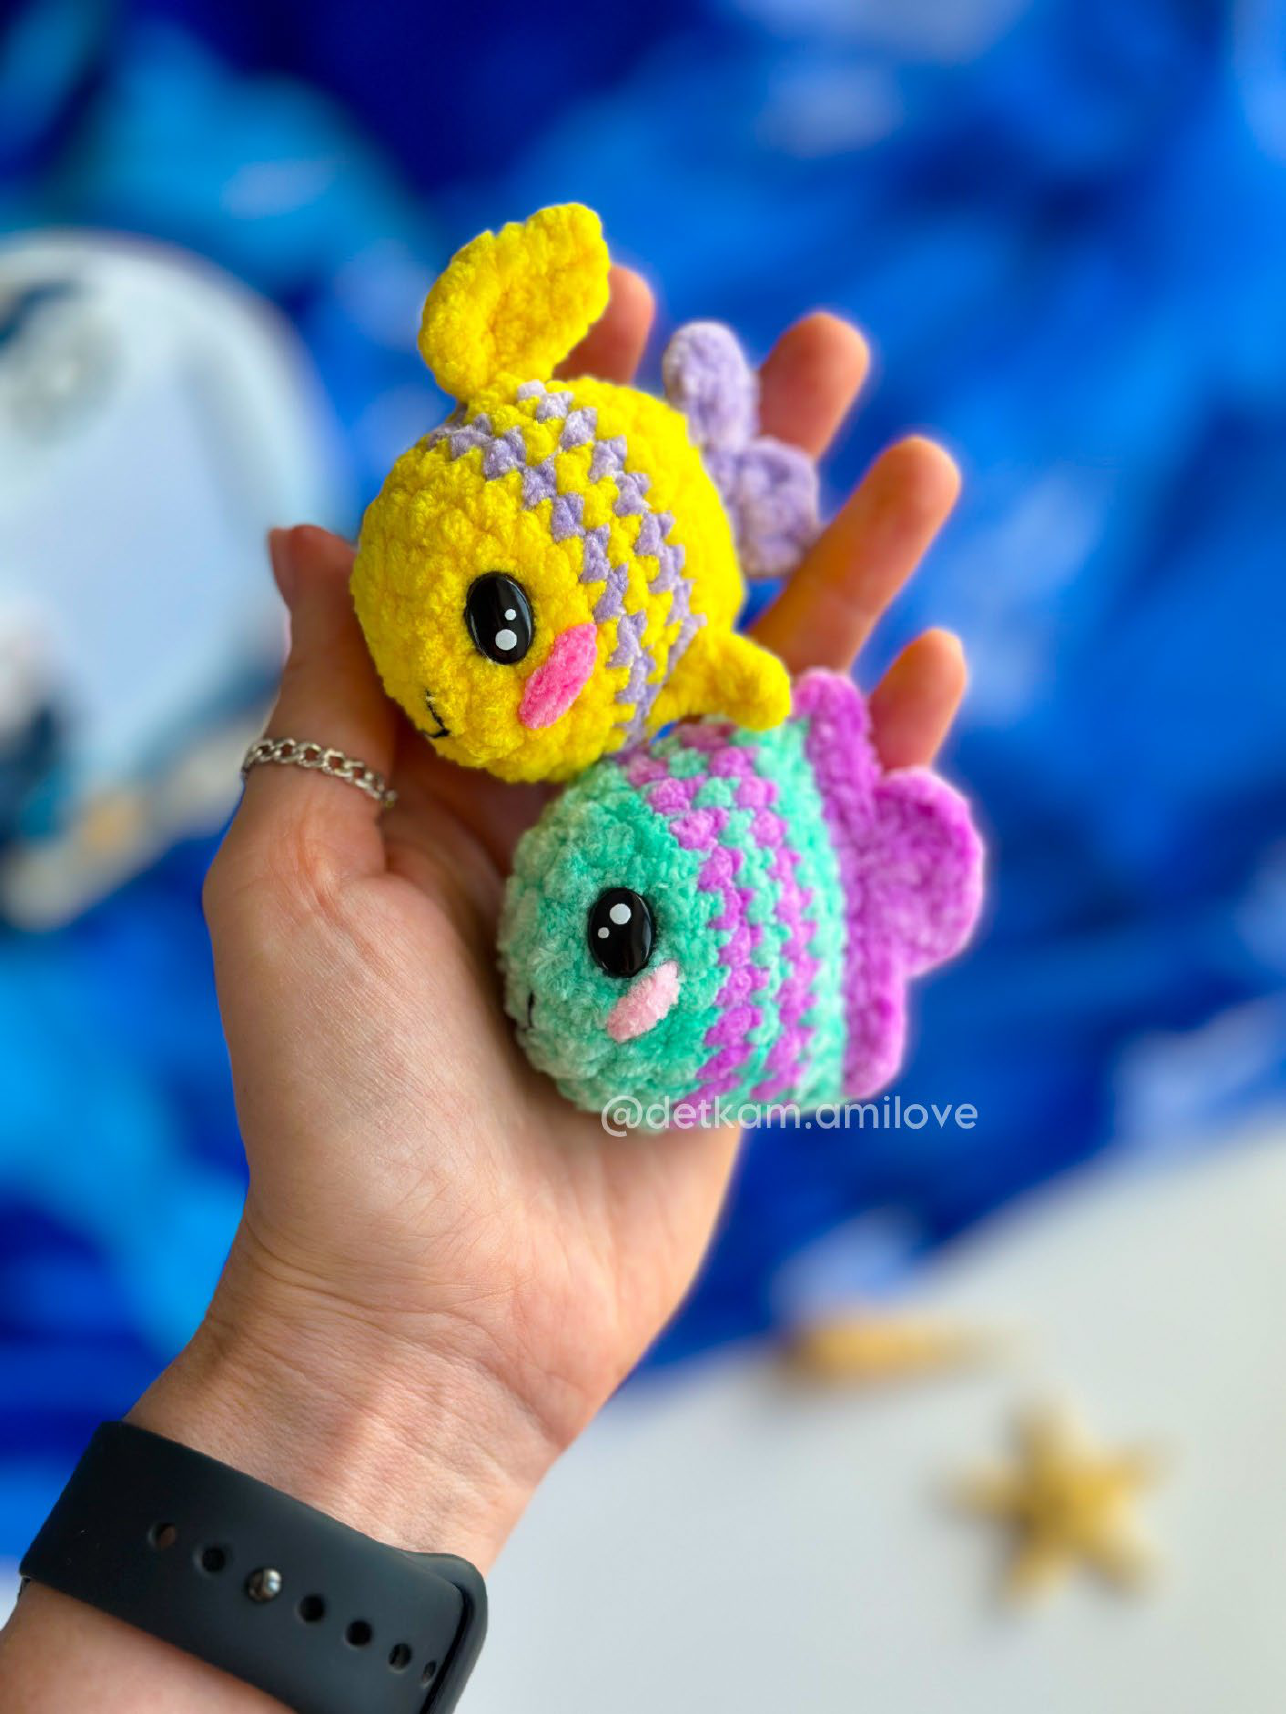
To create these adorable crochet fish keychains, you’ll need the following materials. We’ve chosen specific LaVita Yarn velour shades for a vibrant look, but feel free to experiment with your favorite colors and yarn types to personalize your project!
- Yarn:
- LaVita Yarn velour:
- № 2026 (Yellow)
- № 8207 (Green)
- № 5101 (Lilac)
- № 4158 (Purple)
- № 4007 (Pink – for cheeks, optional)
- YarnArt Jeans № 53 (Black – for embroidery, mouth decoration)
- LaVita Yarn velour:
- Hook: № 3
- Stuffing: Holofiber (fiberfill)
- Safety Eyes: Oval, 9×12 mm (the size used in the example)
- Tools: Needle, stitch marker
- Hardware: Keychain base
- Optional: Decorative elements (for added flair)
Crochet Abbreviations Guide
Familiarize yourself with these standard crochet abbreviations to follow the pattern with ease. This amigurumi fish pattern assumes basic crocheting skills.
- ch: Chain stitch
- sc: Single crochet
- inc: Increase (work 2 single crochets in one stitch)
- dec: Decrease (crochet 2 single crochets together)
- sl st: Slip stitch
- hdc: Half double crochet
- dc: Double crochet
- (): The number of stitches in the row is indicated in parentheses
- ()*n: Repeat the combination in parentheses ‘n’ times
Finished Size and Gauge
The size of your finished crochet fish keychain may vary depending on your personal tension, the specific yarn you choose, and your hook size. Using the specified materials and a № 3 hook, the finished toy measures approximately 7-8 cm in length. This is a compact and adorable size, perfect for a keychain!
General Crochet Instructions for Fish Keychains
These cute amigurumi fish keychains are crocheted in one continuous piece, starting from the head and working towards the tail. Remember to stuff your fish as you go, ensuring it’s not too tightly packed. A moderate amount of stuffing will help the toy remain flat and pliable, ideal for a keychain. The stitch marker should run along the belly of the fish for consistent shaping. When changing yarn colors, work offset stitches if necessary to maintain a neat seam.
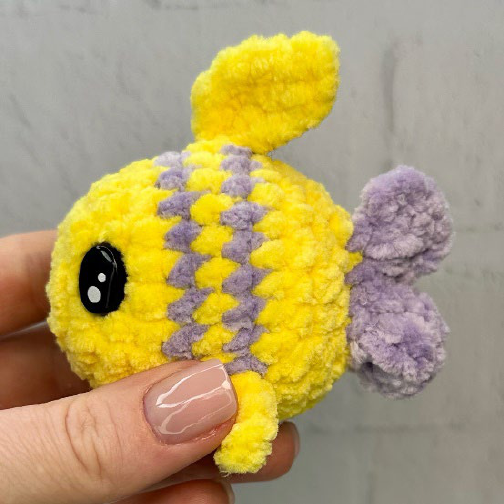
Yellow Fish Crochet Pattern
Let’s begin crafting your vibrant yellow fish keychain! This pattern utilizes a lovely combination of yellow and lilac yarn for a striking effect. Ensure your stitch marker is placed along the belly throughout the process.
Starting with Yellow Yarn:
- 2 ch, 8 sc in the 2nd ch from the hook
- 8 inc (16)
- (1 sc, 1 inc)*8 (24)
- 24 sc
- 24 sc
Change yellow yarn to lilac yarn. Do not cut the yellow yarn, as you will be alternating between the two colors.
Continuing with Lilac Yarn:
- 24 sc
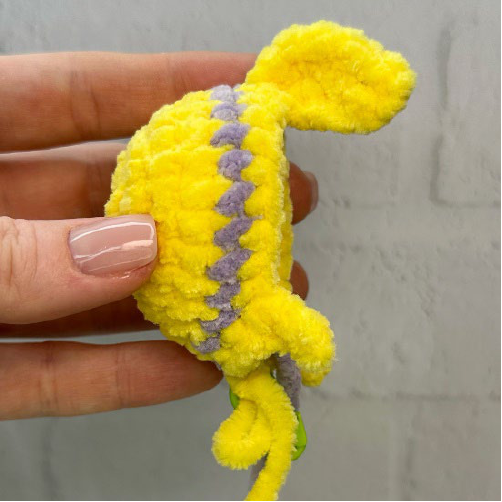
In the next row, you’ll crochet the fins. The large fin is worked in turning rows. Remember to work 1 chain stitch for turning at the end of each turning row.
Continuing with Yellow Yarn (Fins Integration):
- 2 sc along the body; 4 ch, starting from the 2nd ch from the hook 2 sl st, 1 hdc; 9 sc along the body; 5 ch, starting from the 2nd ch from the hook 2 sl st, 2 hdc, turn your work, 2 sc, 2 sl st, 1 ch and single crochet along the top and front of the fin with sl st; 10 sc along the body; 4 ch, starting from the 2nd ch from the hook 2 sl st, 1 hdc; 3 sc along the body (24)
Continuing with Lilac Yarn:
- 24 sc
Continuing with Yellow Yarn:
- 24 sc
Now is the time to insert the safety eyes. Place them between rows 3 and 4, ensuring they are evenly spaced.
Continuing with Yellow Yarn (Shaping the Body):
- (2 sc, 1 dec)*6 (18)
- (1 sc, 1 dec)*6 (12)
- (2 sc, 1 dec)*3 (9)
Change yellow yarn to lilac yarn. Secure and cut the yellow yarn, as it’s no longer needed for this section.
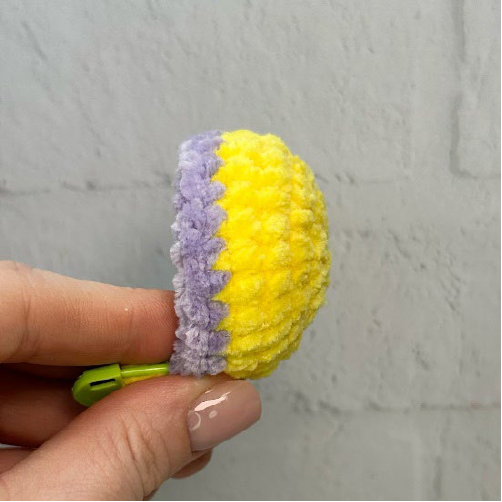
Folding and Tail Construction:
Fold the toy in half. Make sure the color change line is aligned with the belly. If needed, work some offset stitches to ensure proper alignment. Crochet 4 sc through both sides to close the opening.
Do not cut the yarn! You will now crochet the tail directly from these stitches.
- Chain 3, turn your work.
- 2 dc in the first stitch, 3 ch, 1 sl st in the same stitch;
- 2 sl st, 3 ch, 2 dc in the last stitch, 3 ch, 1 sl st in the same stitch.
Secure and cut the yarn at the end. Your yellow fish body and tail are complete!
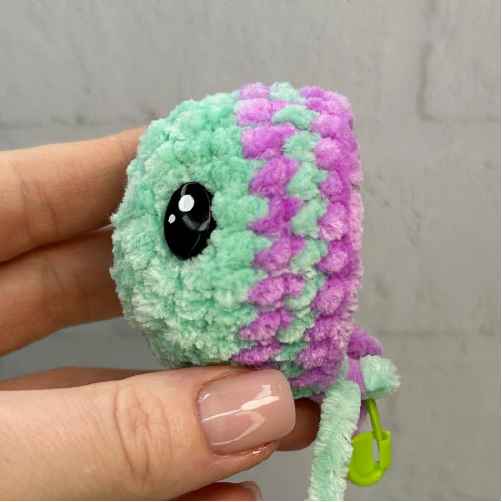
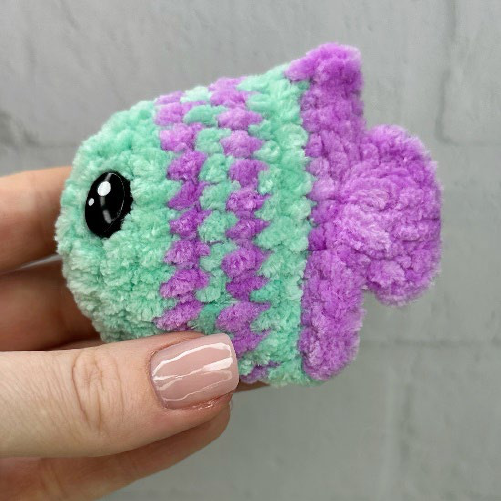
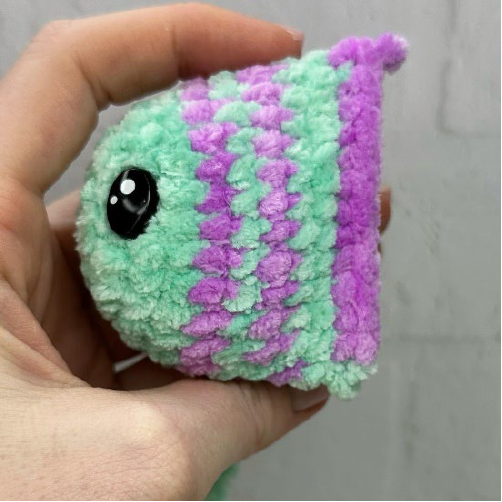
Green Fish Crochet Pattern
Next up is the charming green fish! This version uses green and purple velour yarn, offering a different yet equally vibrant aesthetic. Keep your stitch marker positioned along the belly as you crochet.
Starting with Green Yarn:
- 2 ch, 8 sc in the 2nd ch from the hook
- 8 inc (16)
- (1 sc, 1 inc)*8 (24)
- 24 sc
- 24 sc
Insert safety eyes between rows 3 and 4, ensuring they are centered.
Change green yarn to purple yarn. Do not cut the green yarn, as you’ll be switching back to it.
Continuing with Purple Yarn:
- 24 sc
Continuing with Green Yarn:
- 24 sc
Continuing with Purple Yarn:
- 24 sc
Continuing with Green Yarn:
- 24 sc
- 24 sc
Change green yarn to purple yarn. Secure and cut the green yarn.
Folding and Tail Construction:
Fold the toy in half, ensuring the color change is along the belly. Adjust with offset stitches if necessary. Crochet 12 sc through both sides to close the opening.
Do not cut the yarn! Proceed directly to crocheting the tail.
- Chain 1, turn your work.
- 5 sl st, 3 ch, 2 dc inc, 3 ch, 1 sl st in the stitch with the last increase, 5 sl st.
Secure and cut the yarn at the end. Your green fish is now ready for decoration!
Decoration and Finishing Touches
Now for the fun part: adding the personality to your colorful crochet fish keychains!
- Embroider the Mouth: Using black mercerized cotton yarn (YarnArt Jeans № 53 is a great choice), carefully embroider a small, curved mouth beneath the safety eyes.
- Embroider Cheeks (Optional): For an extra touch of cuteness, embroider small pink cheeks with pink plush yarn (LaVita Yarn velour № 4007 works well).
- Add Decorative Elements (Optional): Feel free to attach any small decorative elements you like, such as beads, sequins, or tiny buttons, to make your fish truly unique.
- Attach Keychain Base: Securely attach the keychain base to the top of your fish. This usually involves threading it through a loop of stitches at the top center of the fish’s head.