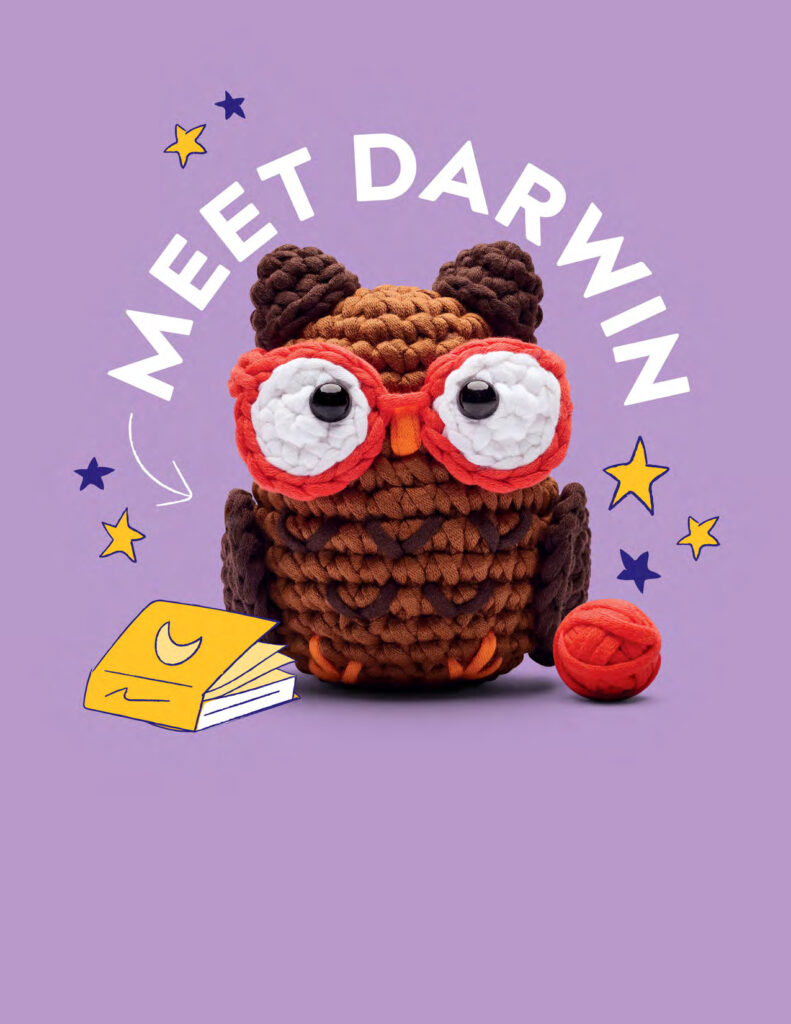
Crochet Darwin the Owl
Materials You’ll Need to Crochet Darwin the Owl
- Yarn: Medium-weight (worsted weight/aran) yarn in the following colors and approximate amounts:
- Brown: 33 yards (comes with 3 stitch markers!)
- Dark Brown: 17 yards
- Red: 5 yards
- White: 4 yards
- Orange: 3 yards
- Crochet Hook: 4mm (US Size G-6)
- Safety Eyes: 10mm pair
- Other Essentials:
- Tapestry needle
- Scissors
- Stuffing
- Stitch markers (highly recommended)
Crochet Abbreviations (US Terms)
This pattern is worked in continuous rounds (don’t join at the end of each round, just keep going!). Place a stitch marker in the first stitch of each round to keep your place.
- blo: back loops only
- flo: front loops only
- ch: chain
- dc: double crochet
- dec: (invisible) decrease
- hdc: half double crochet
- hdc inc: 2 half double crochets in the same stitch
- inc: increase (2 single crochets in the same stitch)
- sc: single crochet
- slst: slip stitch
- x [number]: repeat the instructions the specified number of times
Pattern Instructions
Head & Body (with Brown Yarn)
We’ll start by making Darwin’s head and body all as one piece!
- Rnd 1: Start with a magic ring and work 6 sc into the ring. (6 sts)
- Rnd 2: Make an inc in each stitch around. (12 sts)
- Rnd 3: [Sc in the next st, inc in the next st] repeat 6 times. (18 sts)
- Rnd 4: [Sc in the next 2 sts, inc in the next st] repeat 6 times. (24 sts)
- Rnds 5-8: Sc in each stitch around for 4 rounds. (24 sts)
- Tip: Your piece will start to curl—this is normal! For a neater look, gently push the middle so it curves outward (the “right side”). Then keep crocheting.
- Rnd 9: [Sc in the next 5 sts, inc in the next st] repeat 4 times. (28 sts)
- Rnds 10-11: Sc in each stitch around for 2 rounds. (28 sts)
- Rnd 12: [Sc, inc] x 2, sc in the next 20 sts, [sc, inc] x 2. (32 sts)
- Rnd 13: Sc in each stitch around. (32 sts)
- Rnd 14: [Sc in the next 2 sts, dec over the next 2 sts] repeat 8 times. (24 sts)
- Rnd 15: Sc in each stitch around. (24 sts)
- Rnd 16: [Sc in the next st, dec over the next 2 sts] repeat 8 times. (16 sts)
- Rnd 17: Sc in each stitch around. (16 sts)
- Stuffing Time! Firmly stuff the piece, shaping it like a cute little egg.
- Rnd 18: Dec 8 times around. (8 sts)
- Fasten Off: Cut the yarn, leaving a long tail. Thread your tapestry needle and weave the tail through the front loops of the remaining 8 stitches. Pull tightly to close the hole. Weave in the end to secure. The starting point of your rounds is the back of the owl
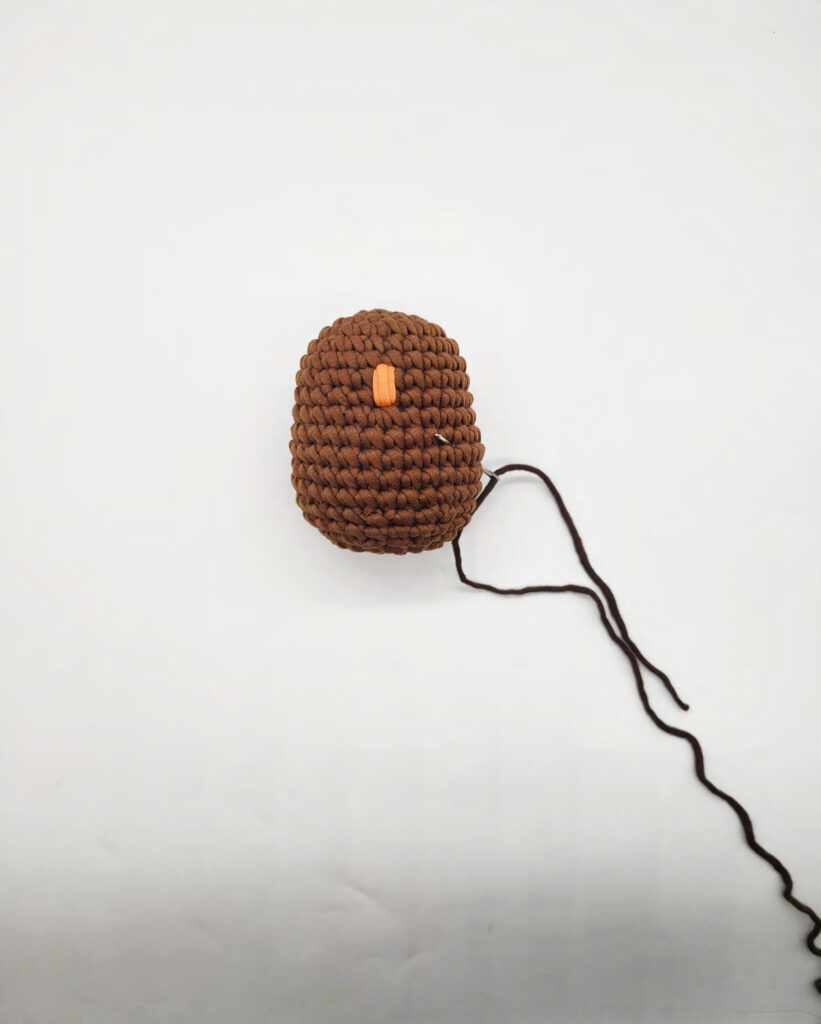
Embroider the Beak (with Orange Yarn)
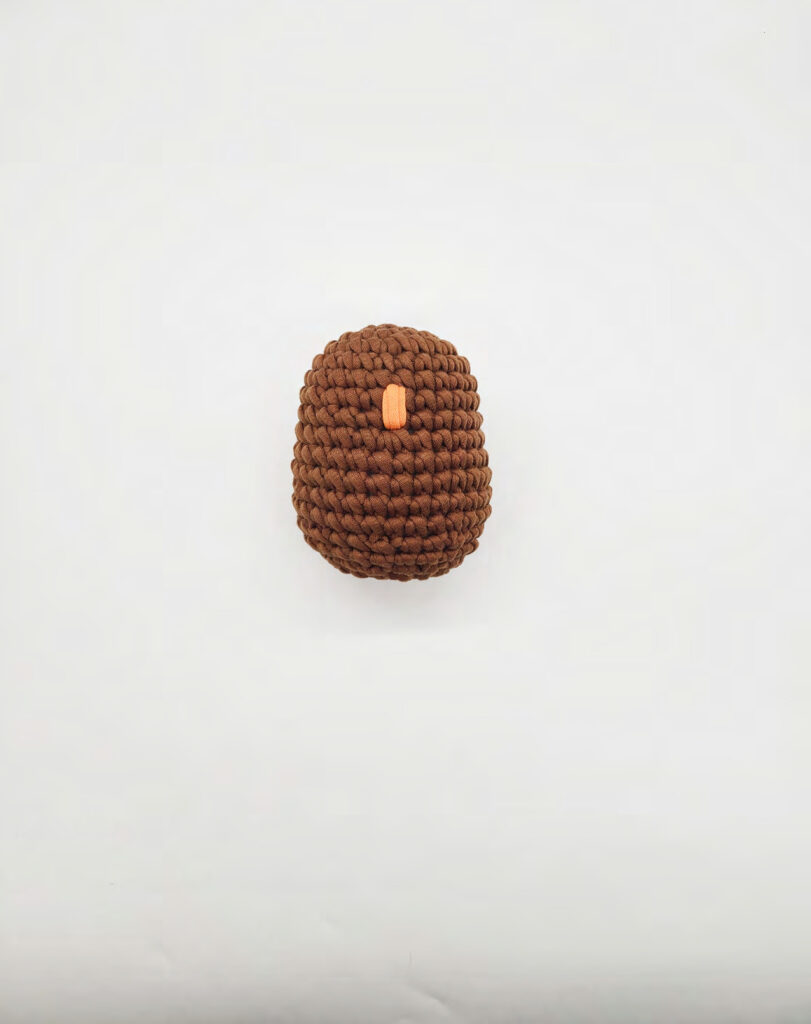
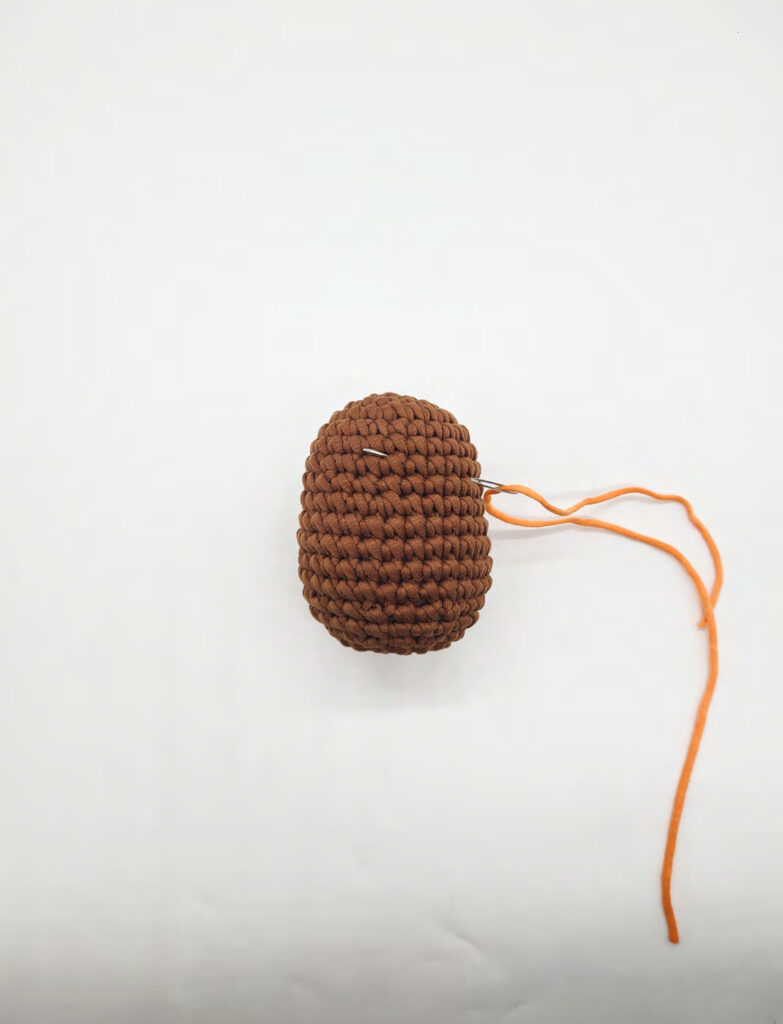
- Thread a long piece of orange yarn onto your needle. From the right side of the body, push the needle through and bring it out at the front, centered between Rounds 6 and 7. Leave a 6-inch tail.
- To form the top of the beak, push the needle back in two rounds down, in the middle of a “V” stitch, and pull it out of the same hole you just came from.
- Repeat this, making sure the strands between Rounds 6-7 lie flat side-by-side, and the strands between Rounds 8-9 are on top of each other to create a triangle shape.
- For the final stitch, push the needle in two rounds down and pull it out at your original starting point on the side.
- Tie the two yarn tails together in a knot close to the body and hide the ends inside
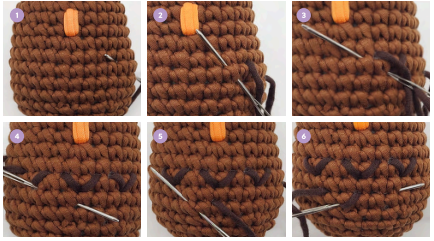
Embroider the Chest Feathers (with Dark Brown Yarn)
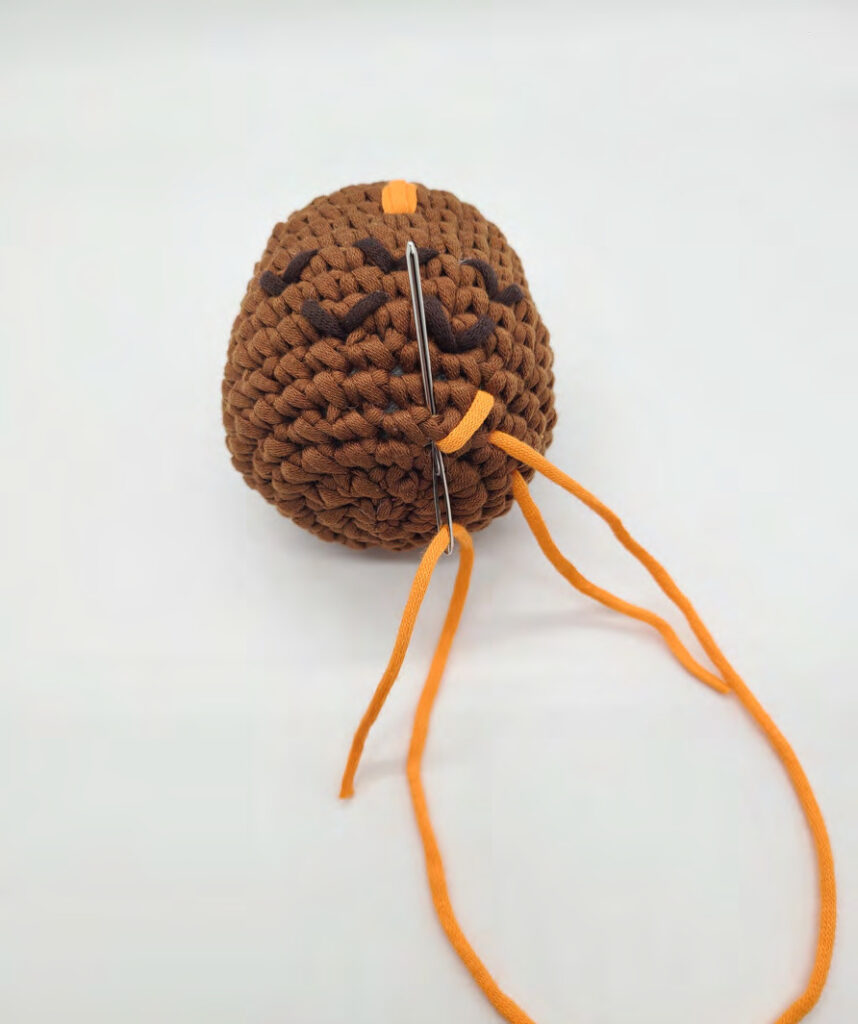
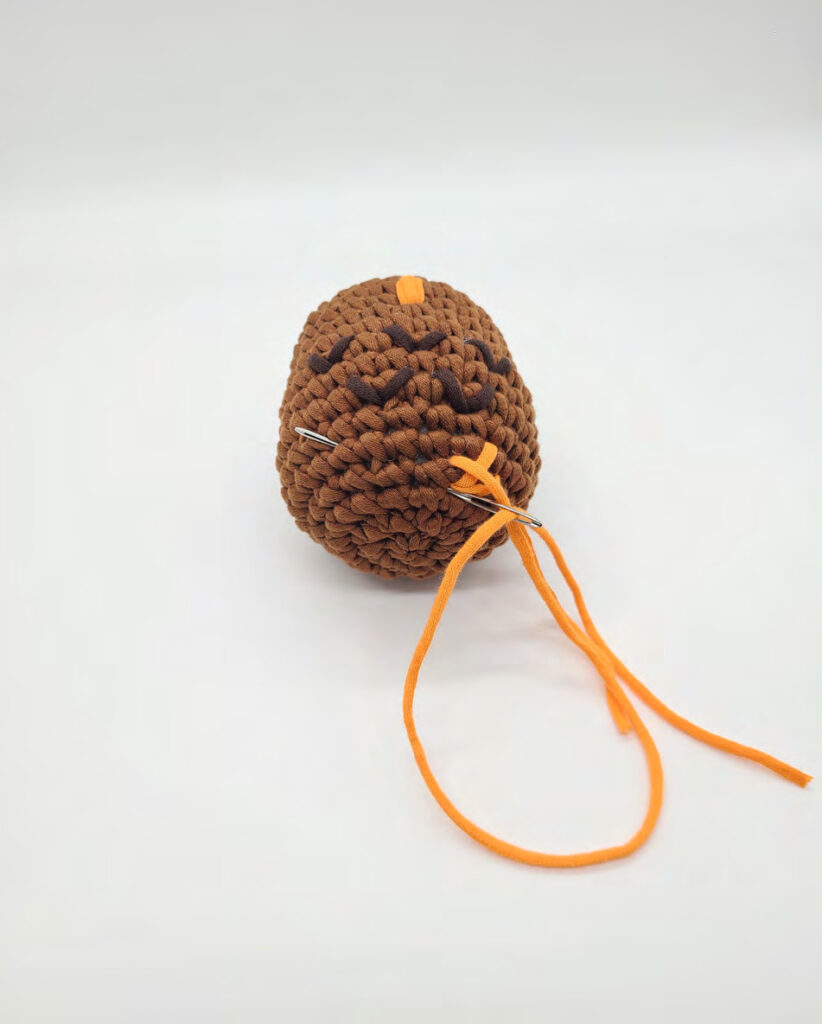
- Thread a long piece of dark brown yarn. Come out between Rounds 10 and 11, about 4 stitches to the right of the beak’s center.
- To form the first “V”, insert your needle one round down and one stitch left, then bring it out one round up and one stitch left.
- To complete the “V”, insert the needle into the bottom point of the previous stitch and bring it out one round up and two stitches to the left.
- Repeat this process to make four more “V” feathers, each one stitch apart from the last.
- On the last stitch, bring your needle out where you started. Tie the ends together and hide them inside the body
Make the Feet (with Orange Yarn)
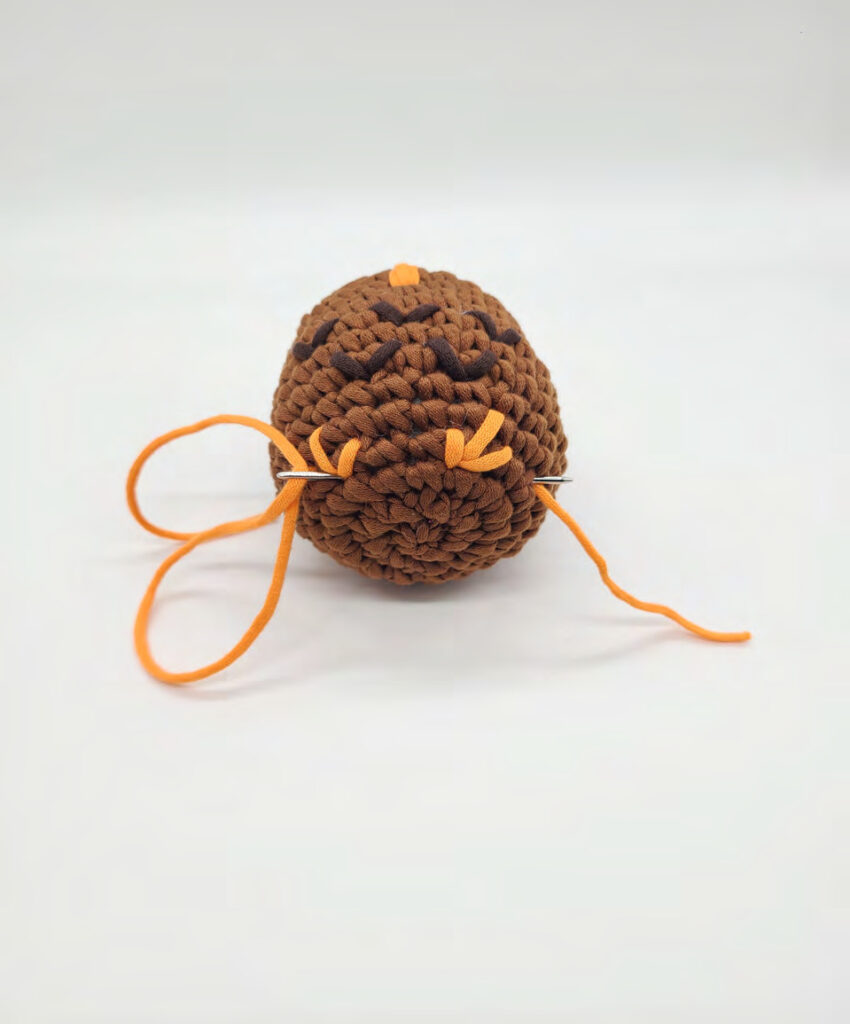
- Thread a long piece of orange yarn. Come out between Rounds 14 and 15, just to the right of the bottom point of the right-most feather “V”.
- To form a toe, insert the needle two rounds down and bring it out one round up and one stitch to the right.
- Insert the needle back into the bottom point of that toe and bring it out one round up and one stitch to the left.
- To move to the next toe, insert the needle into the same bottom point and bring it out five stitches to the left.
- Repeat steps 2 and 3 to form the second toe.
- Finally, insert the needle into the bottom point and bring it out where you first started. Tie off and hide the ends
Ears (make 2 with Dark Brown Yarn)
- Rnd 1: 6 sc in a magic ring. (6 sts)
- Rnd 2: [Sc, inc] repeat 3 times. (9 sts)
- Rnd 3: Sc, inc, sc, hdc inc, dc, hdc inc, sc, inc, sc. (13 sts)
- Fasten off invisibly, leaving a long tail for sewing. Sew the ears to either side of the head, spanning from Round 2 to Round 5
Wings (make 2 with Dark Brown Yarn)
This creates a cute teardrop shape.
- Rnd 1: 6 sc in a magic ring. (6 sts)
- Rnd 2: 6 inc. (12 sts)
- Rnd 3: 3 inc, 3 sc, (in the next st: sc, hdc), dc inc, (in the next st: hdc, sc), 3 sc. (18 sts)
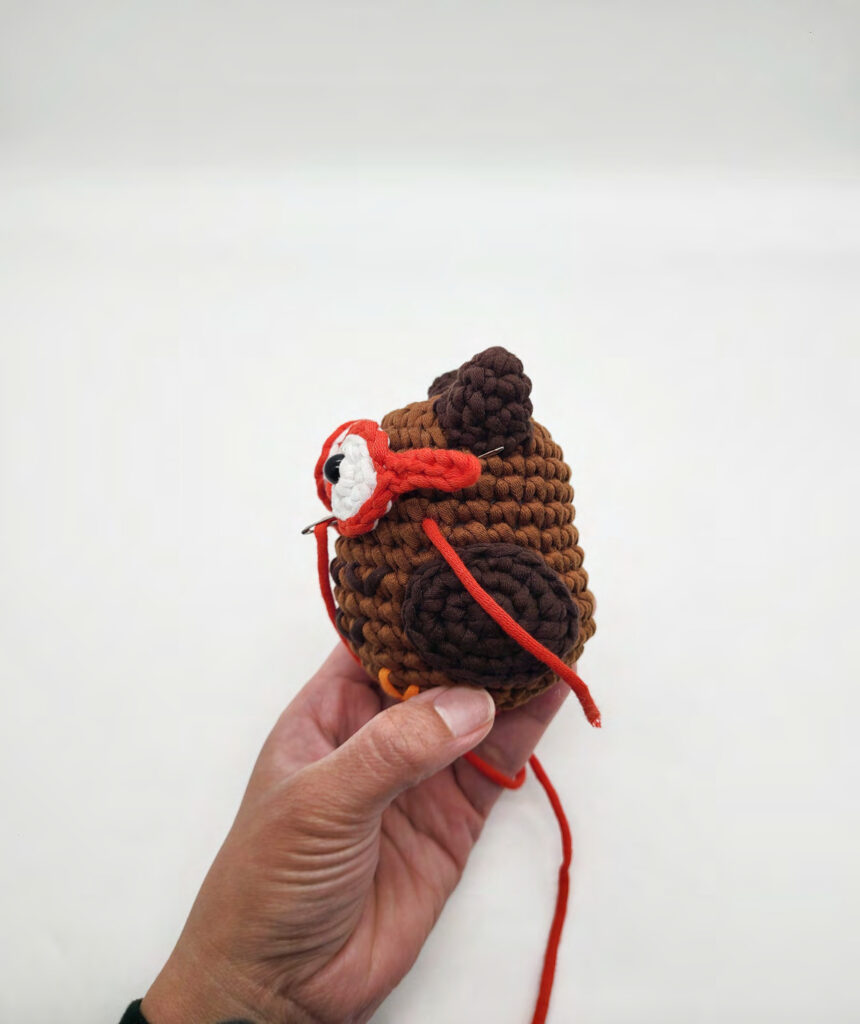
- Fasten off invisibly, leaving a long tail. Sew the wings to the sides of the body, about one stitch away from the outer edges of the feathers, from Round 10 to 15. Point the tip of the teardrop slightly downward
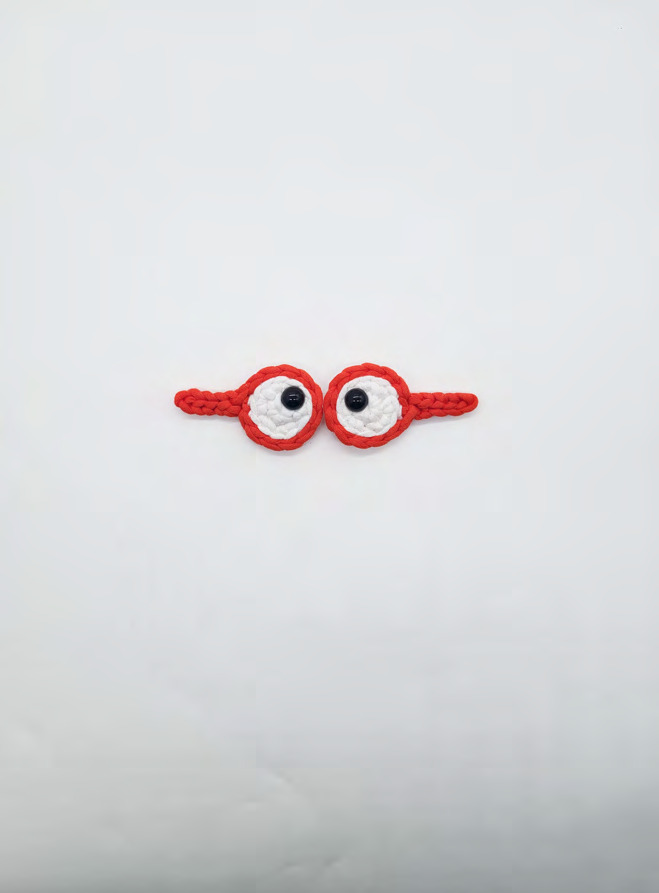
Glasses (make 2 with White and Red Yarn)
For the Lenses (White Yarn):
- Rnd 1: 6 sc in a magic ring. (6 sts)
- Rnd 2: 6 inc. (12 sts)
- Fasten off and weave in the ends.
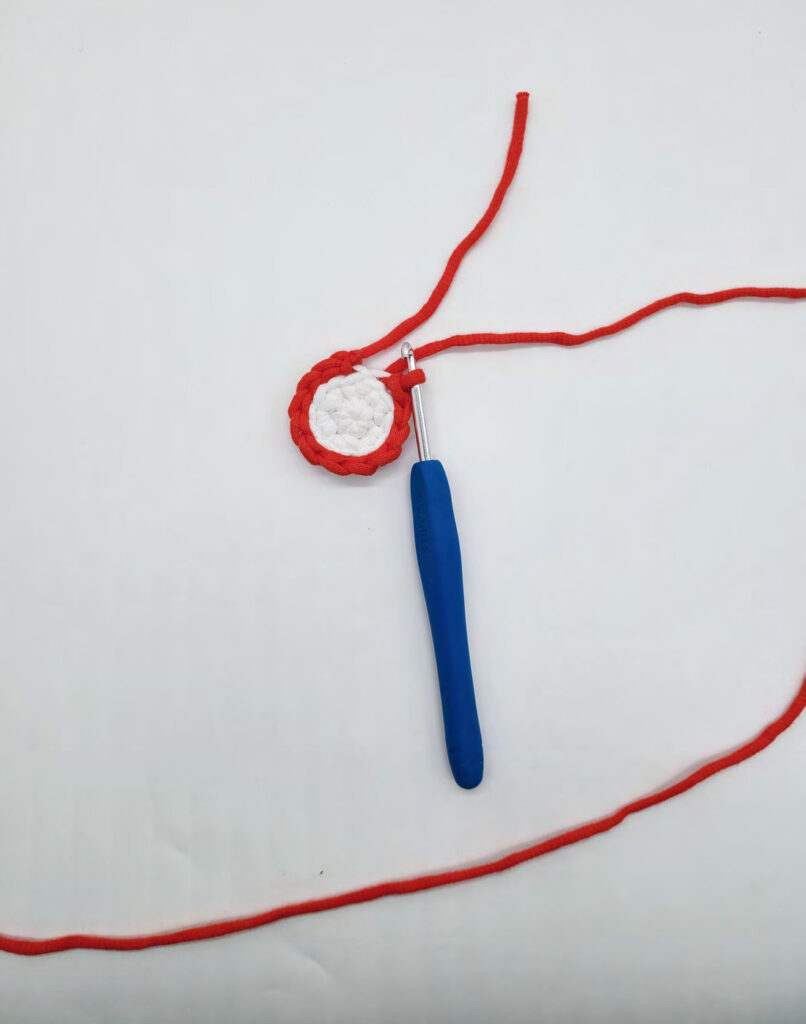
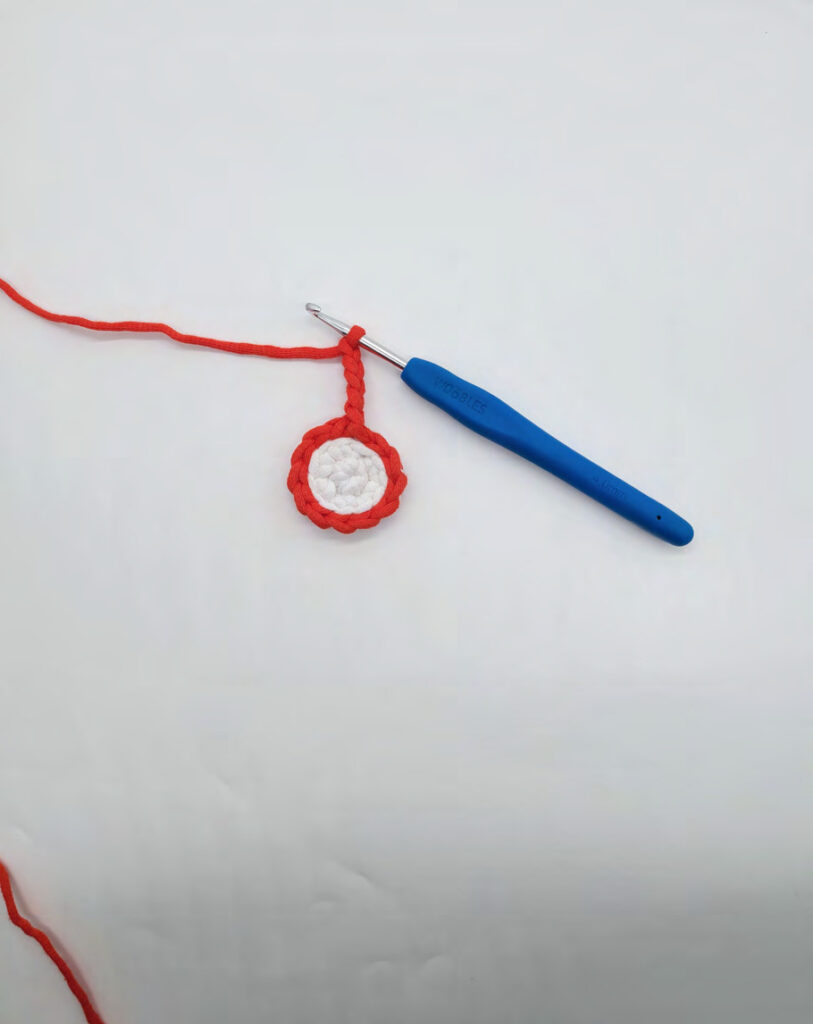
For the Rim & Handle (Red Yarn):
- Make a slip knot and join with a slst into the back loop only (blo) of any stitch on Round 2.
- Slst in the blo of the next 10 stitches.
- Slst in the blo of the same stitch you started in.
- Ch 5.
- Slst into the 2nd chain from the hook, and then into the next 3 chains.
- Fasten off by slipping the stitch into your starting slst.
Attach the Eyes: With the handles pointing up, attach a 10mm safety eye for the left lens in a stitch slightly to the right of the center (between Rnds 1-2). Attach the right eye in a stitch slightly to the left of the center.
- Important Safety Note: If this owl is for a baby or pet, please embroider the eyes with yarn instead of using safety eyes.
Final Assembly
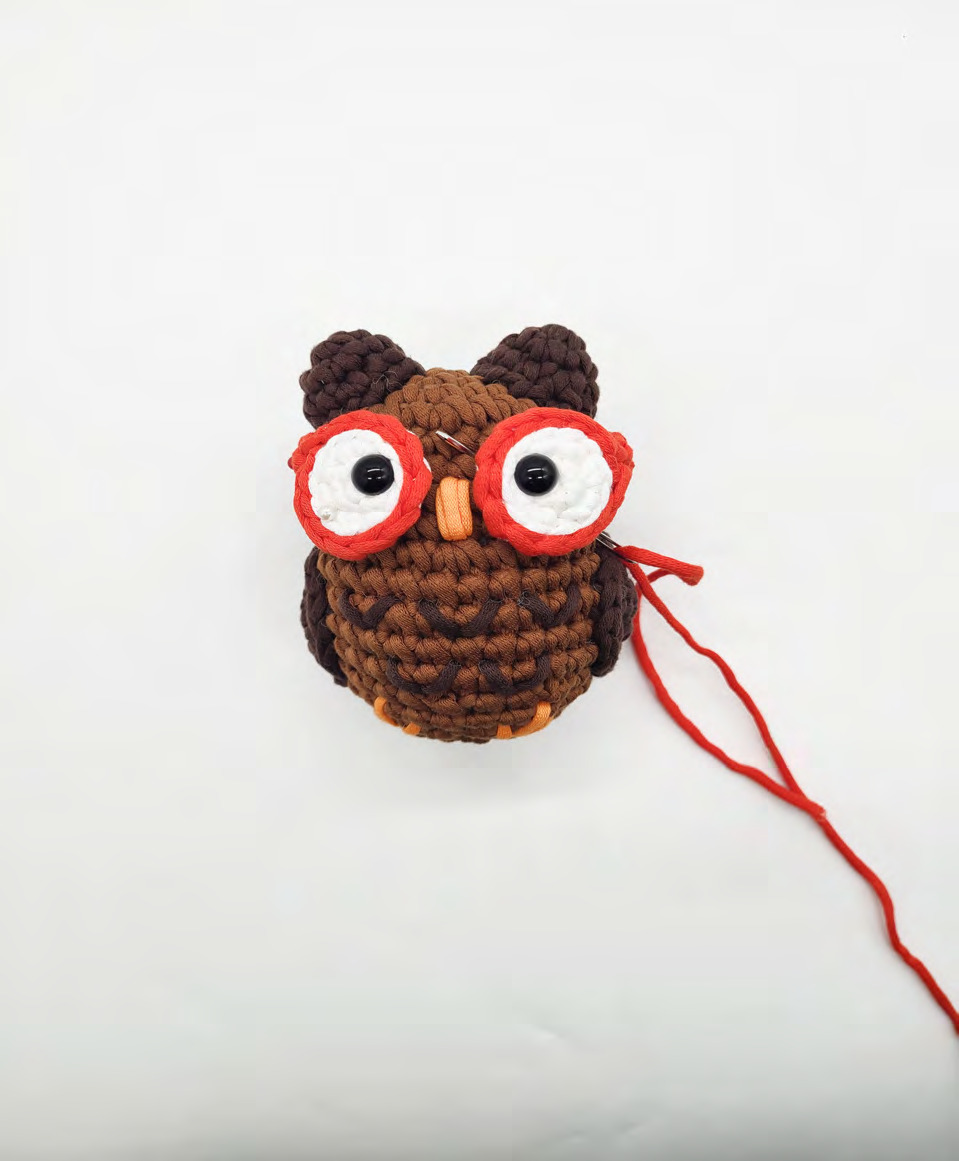
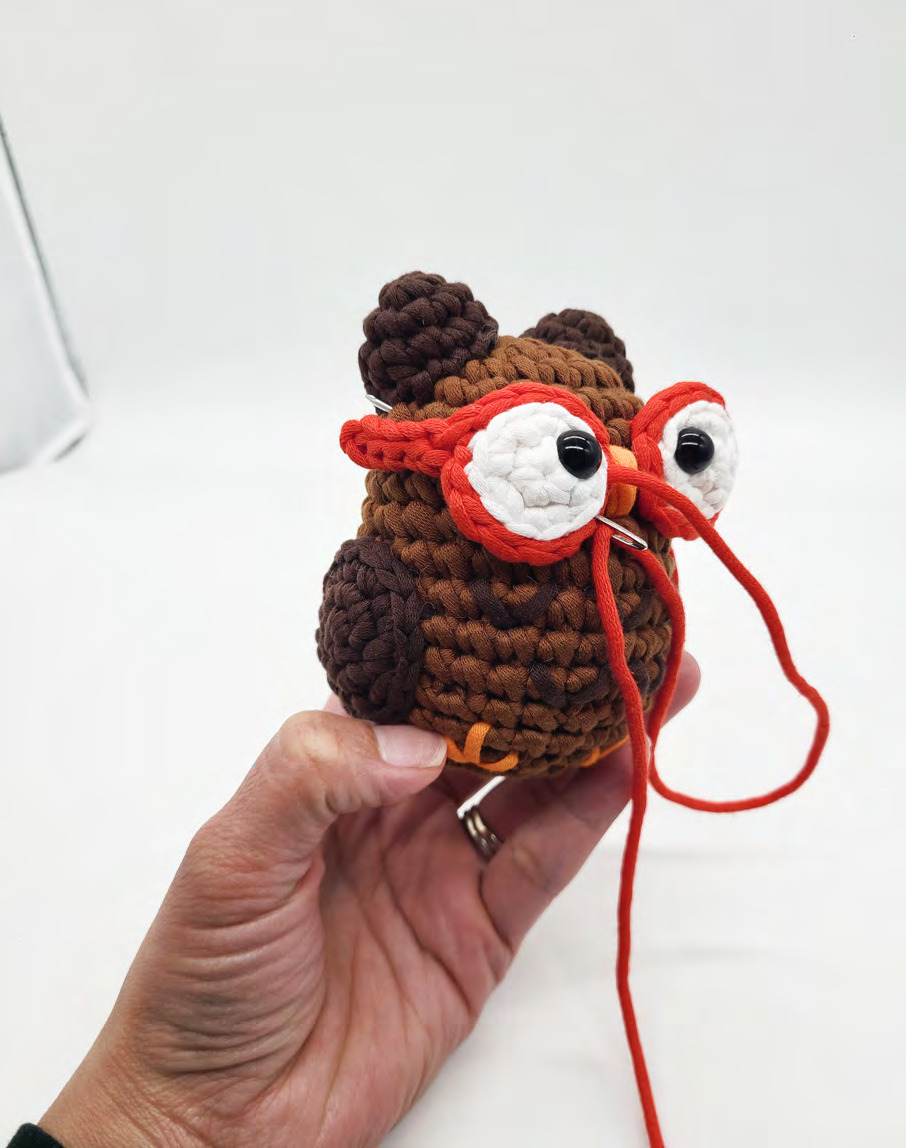
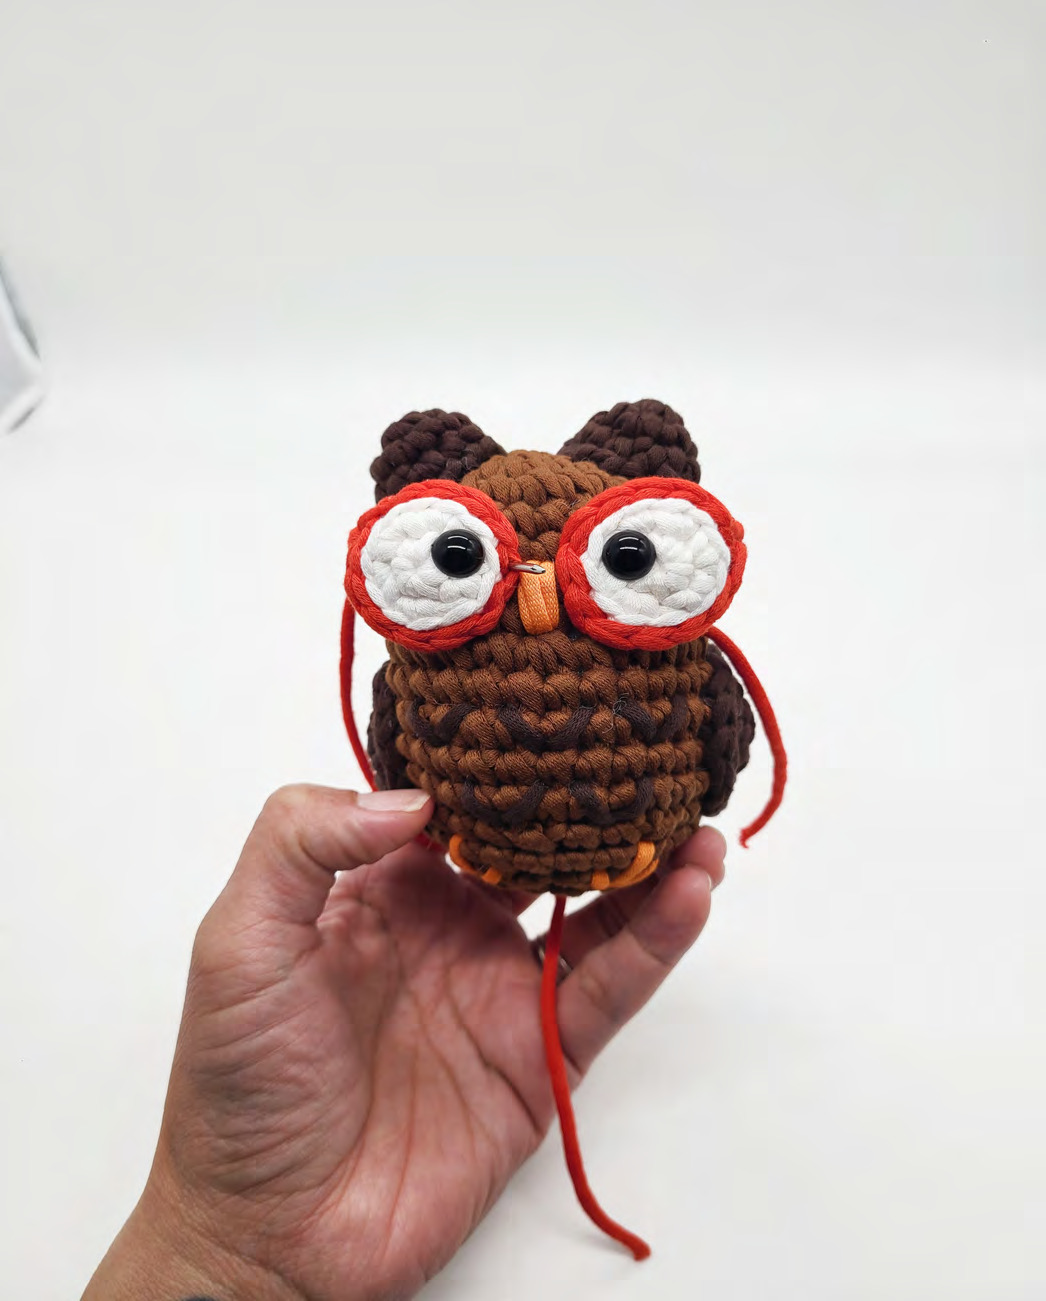
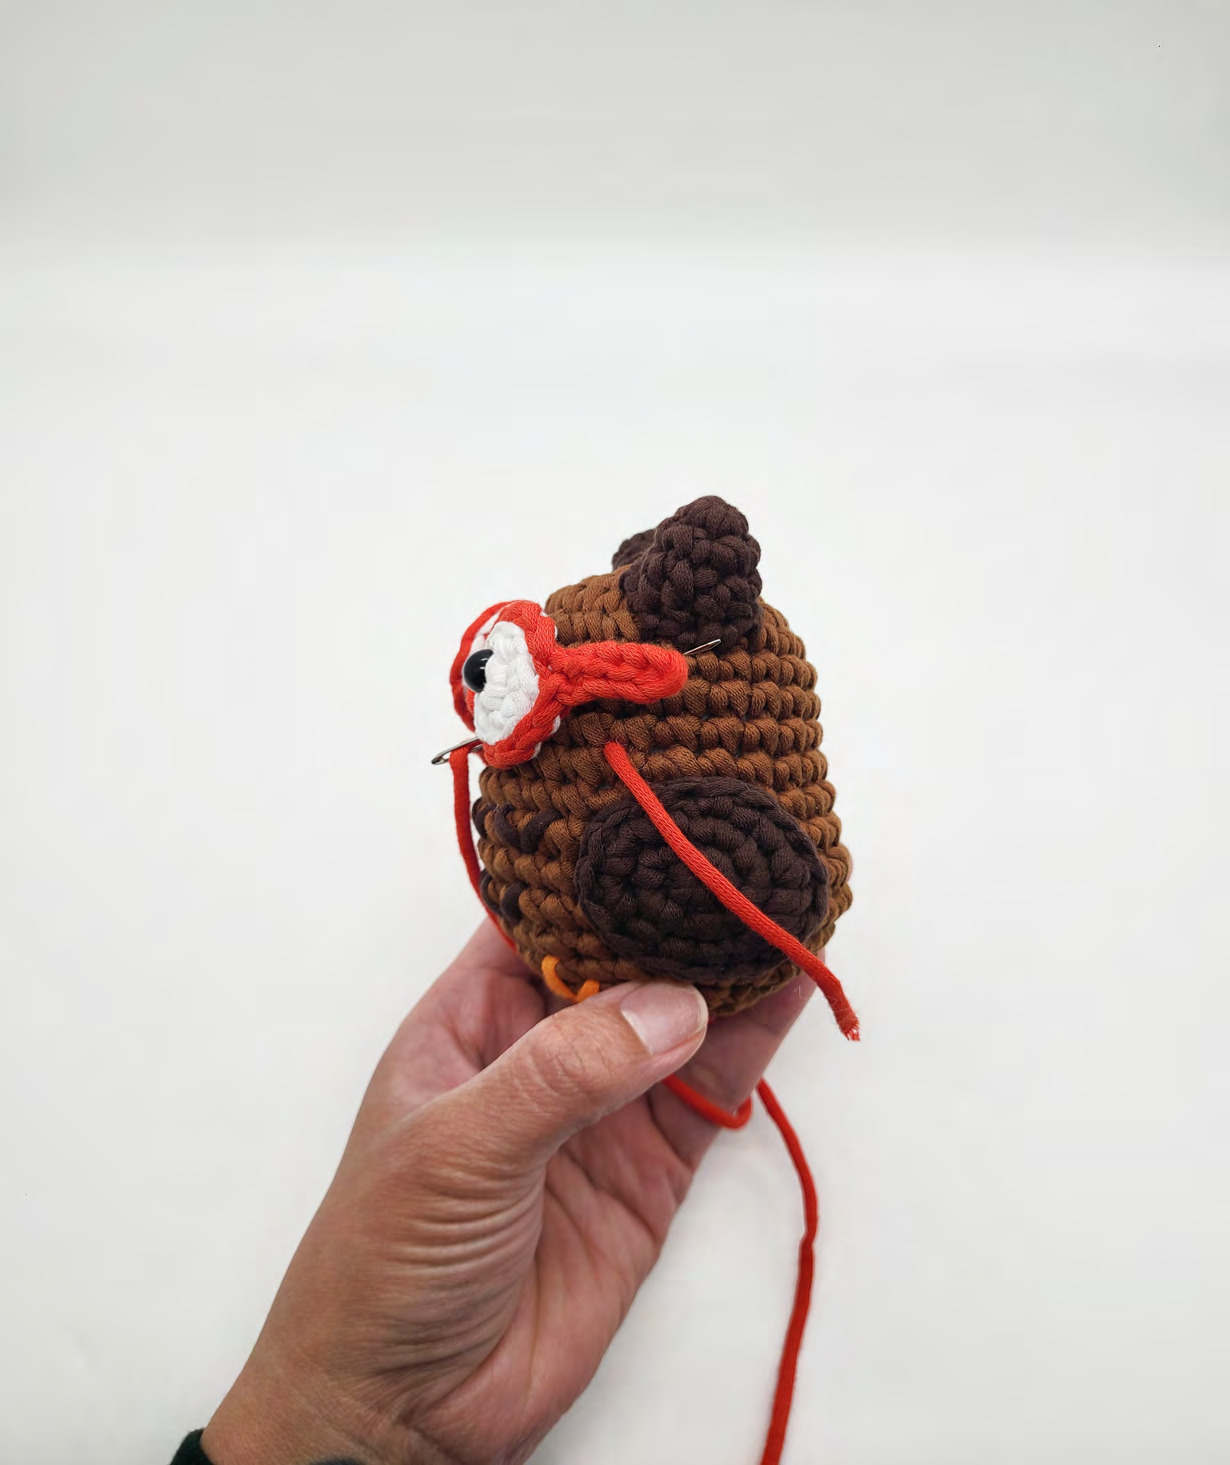
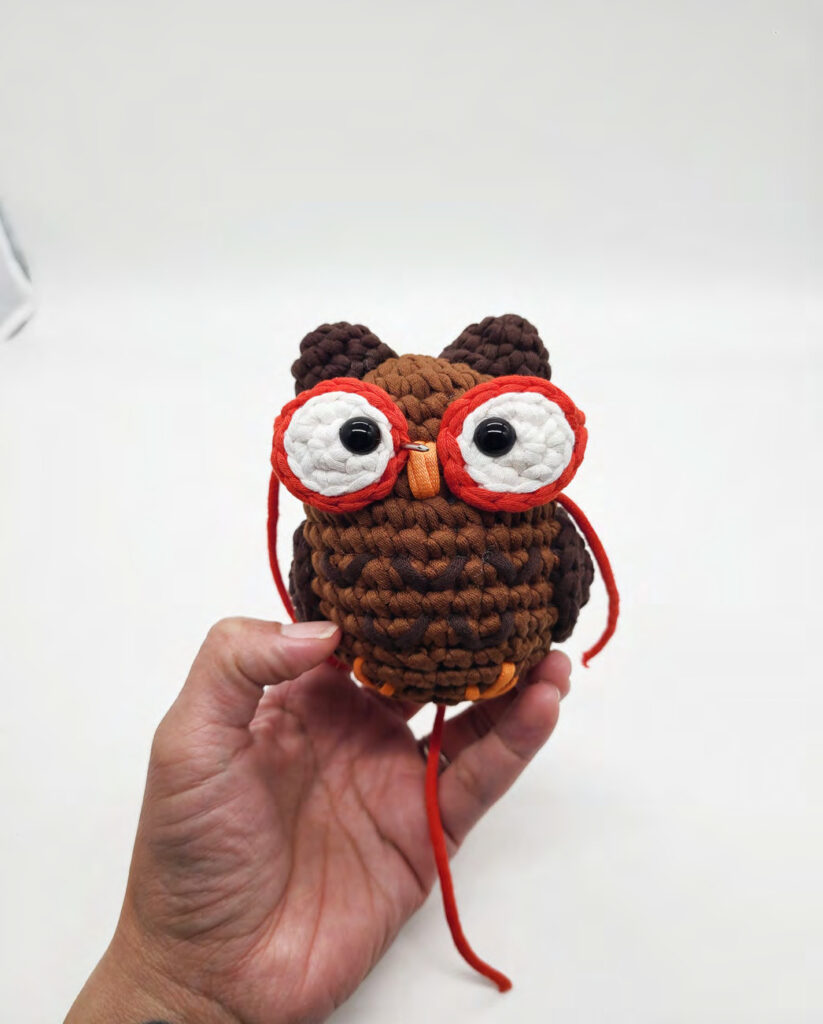
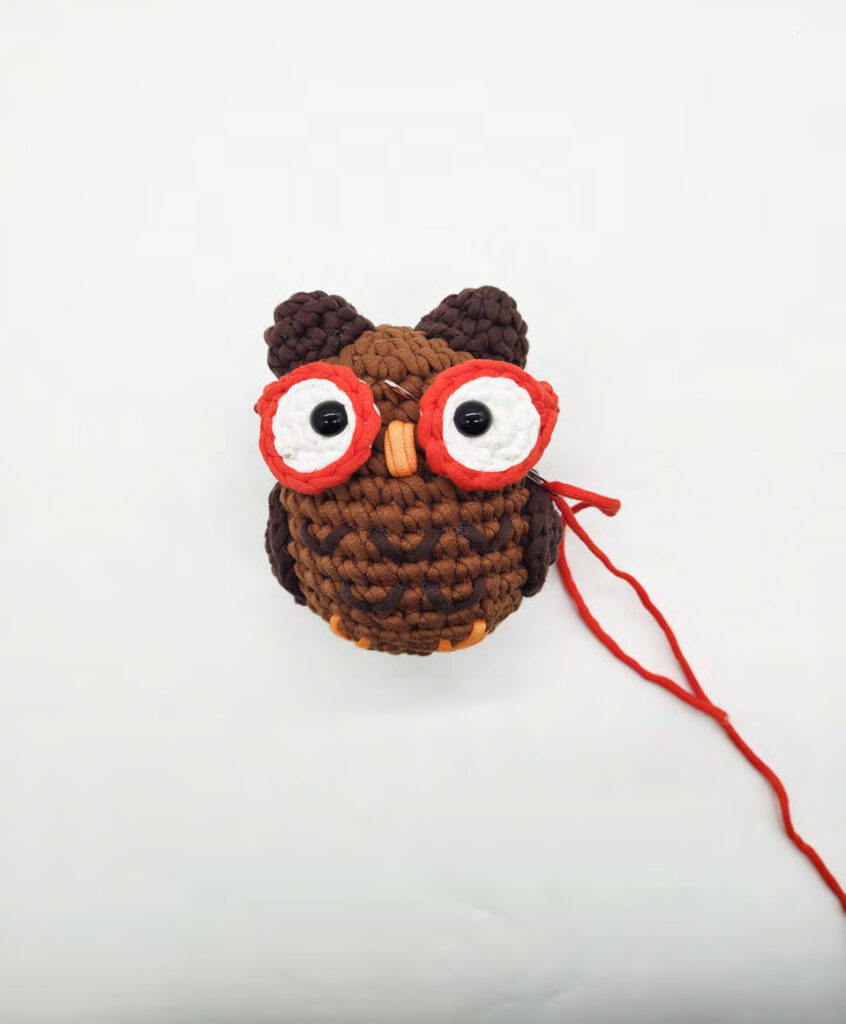
- Position the glasses on either side of the beak, spanning Rounds 5 to 9, with the handles on the outside.
- Embroider the Bridge (with Red Yarn):
- Thread a long red yarn. Come out under the edge of the right glasses lens (above the eye, between Rnd 5-6).
- Sew down the inner edge of the glasses (about 3 stitches counter-clockwise), then push the needle back into the body and bring it out under the right ear.
- Sew through the last stitch of the right glasses handle and go back into the same hole. Bring the needle out under the left glasses lens.
- Sew down the inner edge of the left glasses (about 3 stitches clockwise), then push the needle back into the body and bring it out under the left ear.
- Sew through the last stitch of the left glasses handle and go back into the hole. Bring the needle out near the top of the beak on the left side.
- To create the bridge, insert the needle directly across the top of the beak and into the right side of the glasses. Pull it through to where you started.
- Tie off securely and hide the ends inside the body
