Crochet Cow Amigurumi Pattern
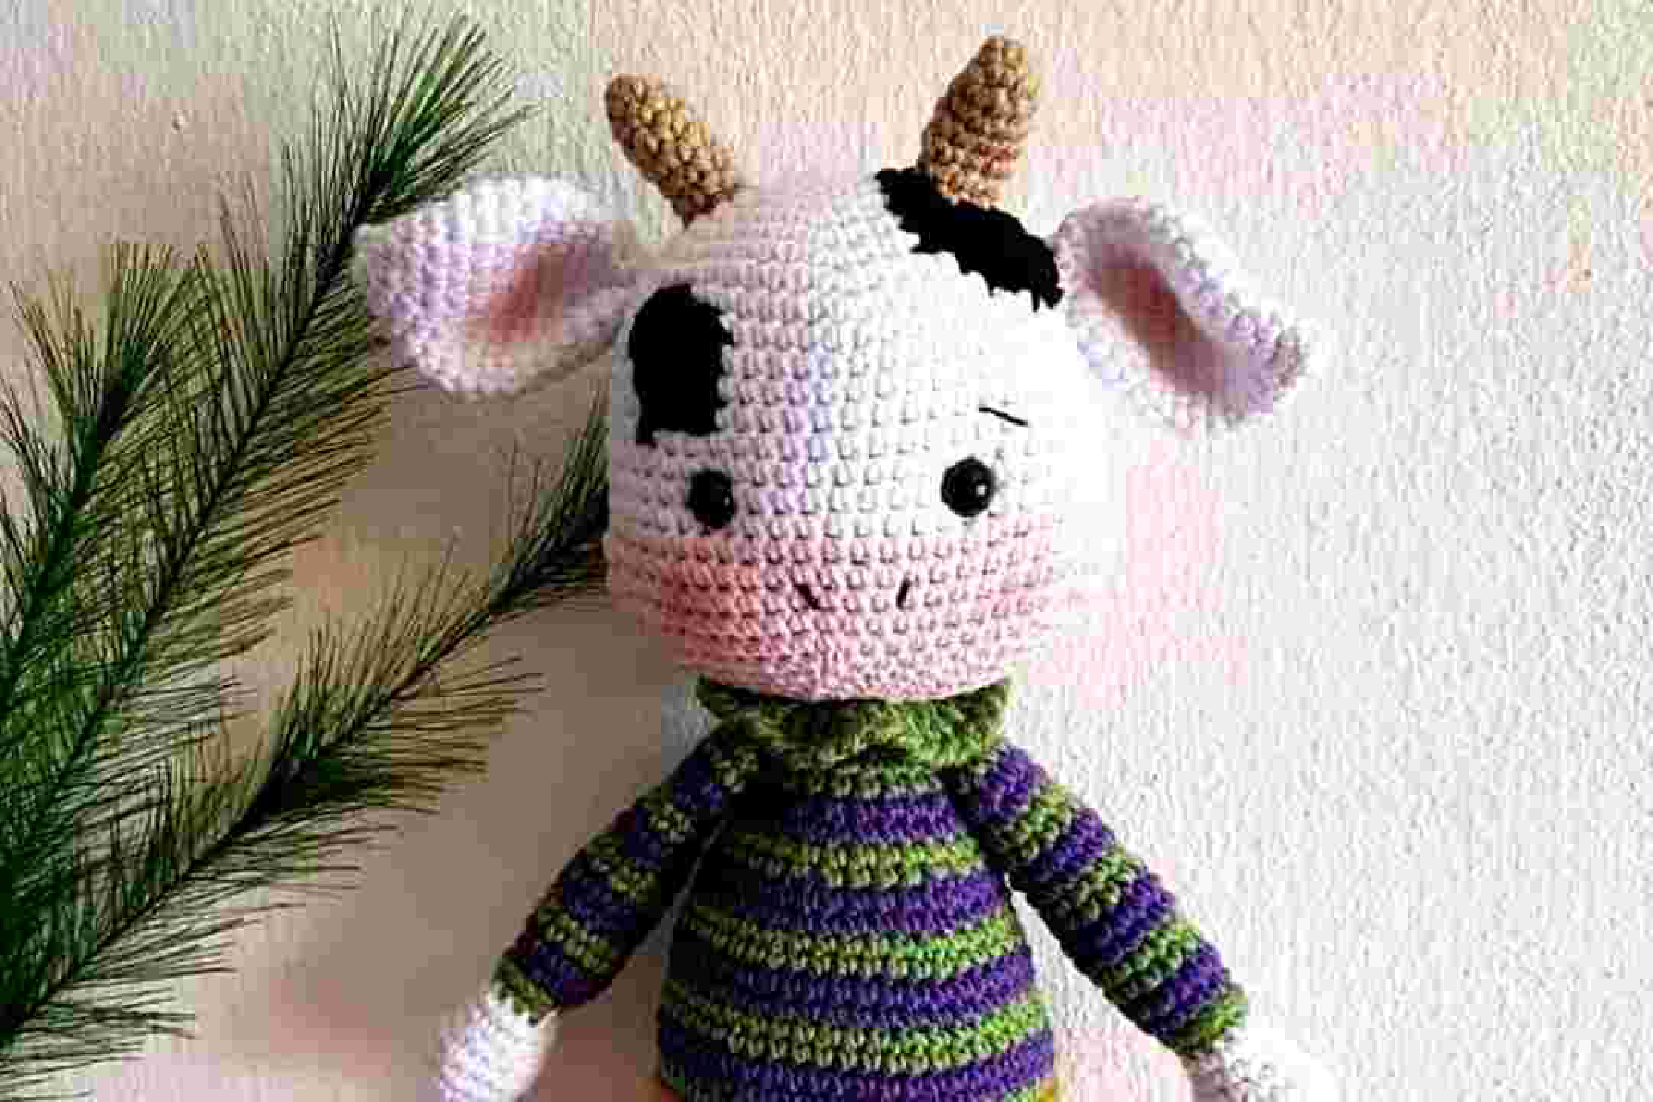
Collar/Neck Detail
This decorative detail is worked into the front loops that were left from Round 47 of the body, creating a neat collar effect around the cow’s neck.
With Green Yarn:
- Chain 2, then work double crochet increases (DCV) into each of the 18 front loops from Round 47 of the body. This should result in 36 double crochets (36).
- Sc in each of the 36 stitches. For a more decorative and defined finish, consider working these as reverse single crochets (crab stitch). (36)
Fasten off and weave in ends.
Ears (Make 2)
Use White yarn for the ears. These are not stuffed, and will be folded for attachment.
- 6 sc in magic ring (6)
- Sc in each of the 6 stitches (6)
- Inc in each stitch around (12)
- Sc in each of the 12 stitches (12)
- (1 sc, Inc) x 6 (18)
- Sc in each of the 18 stitches (18)
- (2 sc, Inc) x 6 (24)
- Sc in each of the 24 stitches (24)
- Sc in each of the 24 stitches (24)
- Sc in each of the 24 stitches (24)
- Sc in each of the 24 stitches (24)
- (2 sc, Dec) x 6 (18)
- Sc in each of the 18 stitches (18)
- Sc in each of the 18 stitches (18)
- (1 sc, Dec) x 6 (12)
Fasten off, leaving a long tail for sewing. Fold the ears flat along the last round to prepare for attachment.
Assembly and Finishing
Once all the individual crochet parts are complete, it’s time to bring your amigurumi cow to life by assembling and adding the final touches:
- Attach Head: Firmly sew the head to the top of the body. Ensure it is centered and securely attached for stability.
- Attach Arms: Sew the arms to the sides of the body, positioning them symmetrically and securely.
- Attach Horns: Using the long tails, sew the brown horns onto the top of the head, placing them slightly above and towards the back of the eyes.
- Attach Ears: Fold the ears in half (the flat opening from the last round) and sew them to the sides of the head, typically a few rounds below the horns.
- Attach Spots: Using the long tails, carefully sew the black spots onto the cow’s body and head in your desired arrangement. Use a yarn needle to stitch them down neatly for a smooth finish.
- Embroider Details: If desired, you can use black embroidery floss or a thin strand of black yarn to add small nostrils or a gentle smile to the pink muzzle, enhancing your cow’s expression.
- Weave in All Ends: Securely weave in any remaining loose yarn ends into the respective pieces. This gives your finished amigurumi cow a clean, professional, and durable finish.
Tips for Beginners
Crocheting amigurumi can be a fun and rewarding experience. Here are a few tips to help you along the way, especially with this multi-part cow pattern:
- Use a Stitch Marker: Amigurumi is typically worked in continuous rounds without joining. A stitch marker is invaluable for keeping track of the beginning of each round, preventing errors in your stitch count.
- Maintain Tight Tension: A tight and even tension is crucial for amigurumi projects. This helps create dense fabric where the stuffing won’t show through. If your stitches appear loose, consider using a smaller crochet hook.
- Stuff Firmly and Evenly: For a well-shaped amigurumi, stuff your pieces very firmly, pushing the stuffing evenly into all areas. Use small pieces of fiberfill to avoid lumps and ensure a smooth contour.
- Read Ahead: Always read through the instructions for an entire section before you begin crocheting it. This helps you understand the overall flow, anticipate color changes, and prepare for special stitches like the Triple Increase (W).
- Don’t Be Afraid to Undo: If you find a mistake a few rounds back, it’s often best to undo your work and correct it. Taking the time to fix errors will ensure your finished piece looks its best.
- Pay Attention to Special Stitches: Rounds with Triple Increases (W) and the intricate spot shaping require careful counting and attention to detail. Take your time with these specific instructions to achieve the intended results.
- Practice Sewing: Good sewing technique is important for attaching all the separate components. Use a yarn needle and stitch neatly for seamless joins. Invisible seams will make your amigurumi cow truly shine.