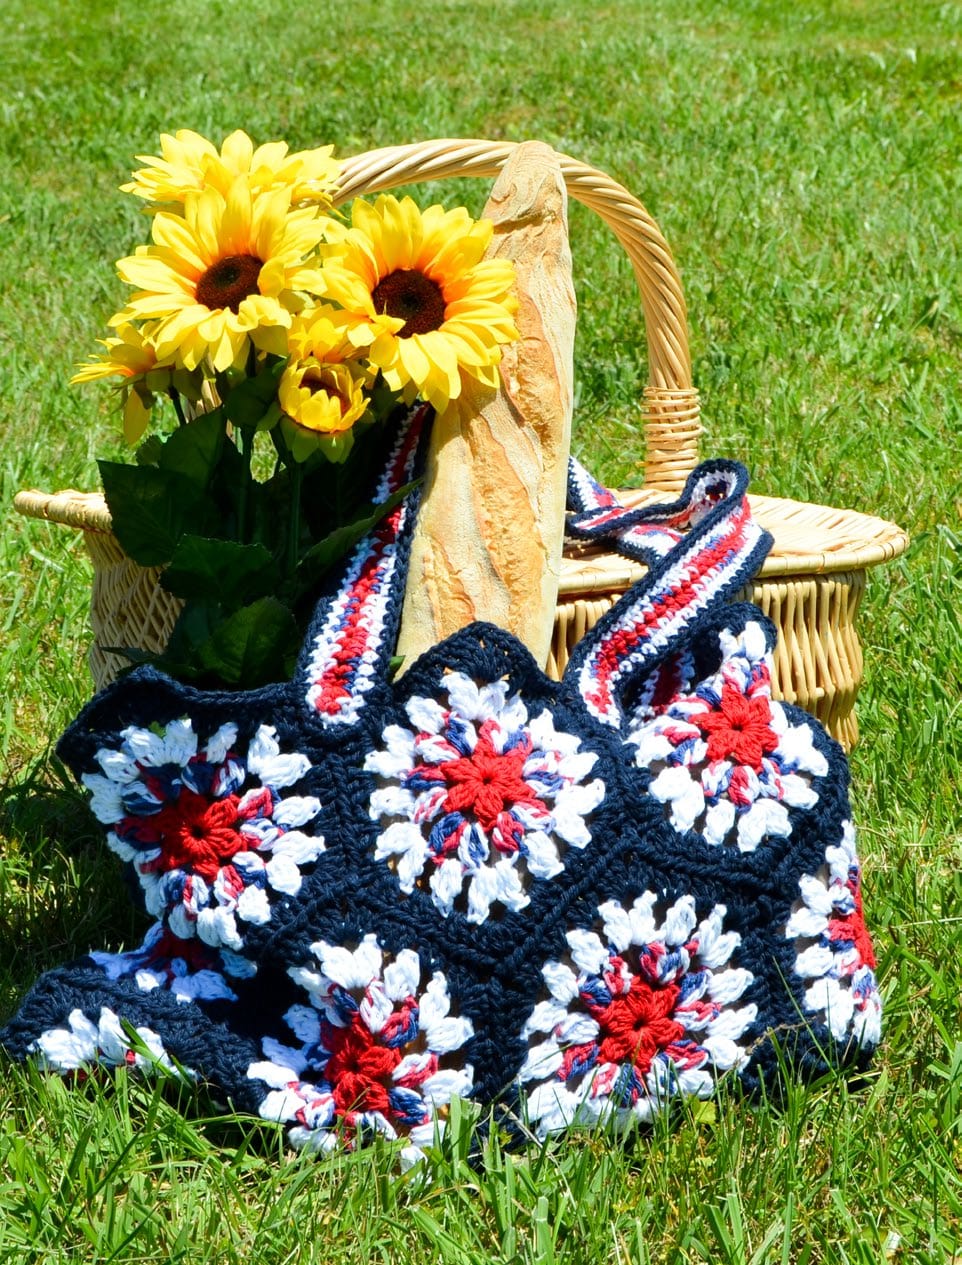
Crochet a Stunning Floral Motif Tote Bag
Materials & Tools You’ll Need
Yarn: Approximately 366 meters (400 yards) of Cotton Crochet Thread in Size 10 (Ecru color used in the original pattern). Great options include:
Crochet Hook: 1.4mm hook
Fabric: Approximately 90cm (1 yard) of single-sided quilted fabric for structure.
Lining: Approximately 90cm (1 yard) of matching lining fabric.
Handles: 234cm (92 inches) of home decor cord.
Notions: Sewing thread in a matching color, a hand-sewing needle, and access to a sewing machine (though you can hand-sew if you prefer!).
Crochet Abbreviations (US Terms)
| Abbreviation | Meaning | Abbreviation | Meaning |
|---|---|---|---|
| ch | chain | sc | single crochet |
| ss | slip stitch | hdc | half double crochet |
| sc2tog | 2 sc together | dc | double crochet |
| dc2tog | 2 dc together | tr | treble crochet |
| tr2tog | 2 tr together | p | picot |
| con p | connecting picot | sp | space |
| st(s) | stitch(es) | rnd | round |
| rep | repeat | sk | skip |
| blo | back loop only | flo | front loop only |
Gauge & Finished Size
- Gauge: 1 motif = 7cm (2 5/8 inches) in diameter.
- Finished Bag Size: 30cm (12″) wide x 35.5cm (14″) high.
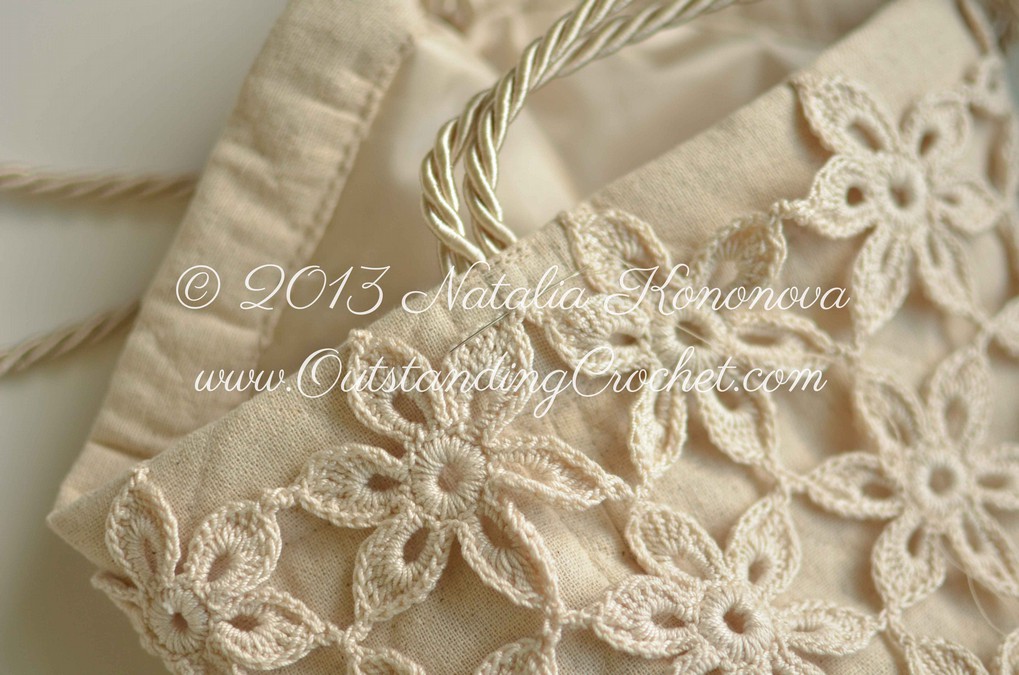
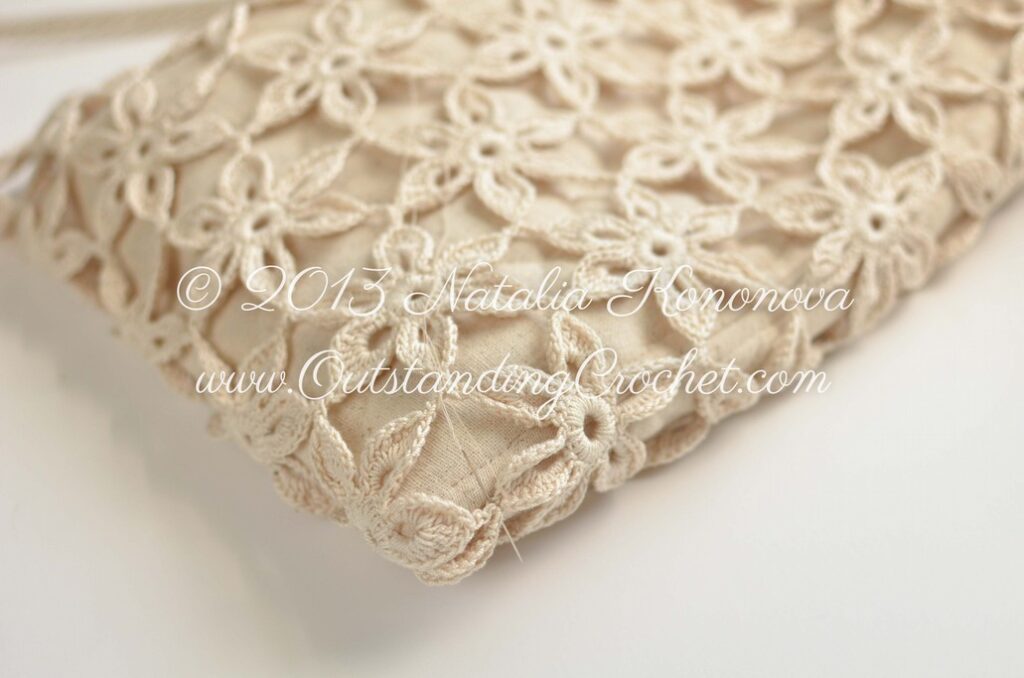
The Crochet Pattern: Motif Tote Bag
The bag is made by crocheting 65 individual motifs and joining them as you go, following the schematic on page 5 of the original pattern. We start at the top and work down to the bottom.
Special Stitches to Know
- Picot (p): Chain 3, make a slip stitch into the first chain.
- Connecting Picot (con p): Chain 1, make a single crochet into the picot of the previous motif, chain 1, make a slip stitch into the first chain.
How to Crochet the Main Motif (Motif 1.1)
This is the base motif. All others are variations of this, joined with connecting picots.
Rnd 1: Create a magic ring or: Chain 8, join with a slip stitch to the first chain to form a ring.
Rnd 2: Chain 1 (does not count as a stitch), work 16 single crochets into the center of the ring. Join with a slip stitch to the first sc.
Rnd 3: Chain 1 (does not count as a stitch), work 2 sc into the center of the ring. Chain 9, make a slip stitch into the first chain to form a picot loop. Work 4 sc into the center of the ring. Repeat from * to * 4 more times. Work 2 more sc into the center of the ring. Join with a slip stitch to the first sc. (You should have 6 picot loops).
Rnd 4: *Work the following into the next chain-9 space: 2 sc, 2 hdc, 2 dc, 3 tr, make 1 picot (p), 2 tr, 2 dc, 2 hdc, 2 sc. Skip the next 2 sc from Round 3, make a slip stitch in the next sc.* Repeat from * to * 5 more times, joining the last slip stitch to the first sc of the round. Fasten off.
You’ve made one full motif! It should look like a beautiful six-petaled flower.
Joining the Motifs As You Go
- Motifs 1.2 – 1.9: Repeat the instructions for Motif 1.1, but when you get to the top of the last two petals (where the picot is), make a connecting picot (con p) instead of a regular picot to join it to the previous motif.
- Motif 1.10: This final motif closes the loop. Make a Motif 1.1, but create connecting picots on the 2nd, 3rd, 5th, and 6th petals, joining them to the corresponding picots on Motifs 1.1 and 1.9.
Continue building the bag downward in layers (Rounds 2-6), following Schematic 1. Each new motif will connect to the ones above it using connecting picots in two places.
Creating the Bag Bottom
The bottom is formed by 5 motifs (7.1 – 7.5) that join the sides together.
- Motif 7.1: Connect this motif to the bottom of the bag by joining its petals to Motifs 6.3, 6.2, and 6.10 and the spaces between them as directed in the pattern.
- Motifs 7.2 & 7.3: Connect these to the bag the same way as Motif 7.1.
- Motifs 7.4 & 7.5: These motifs fill in the gaps on either end of the bottom, connecting to the side motifs and the bottom motifs you just made.
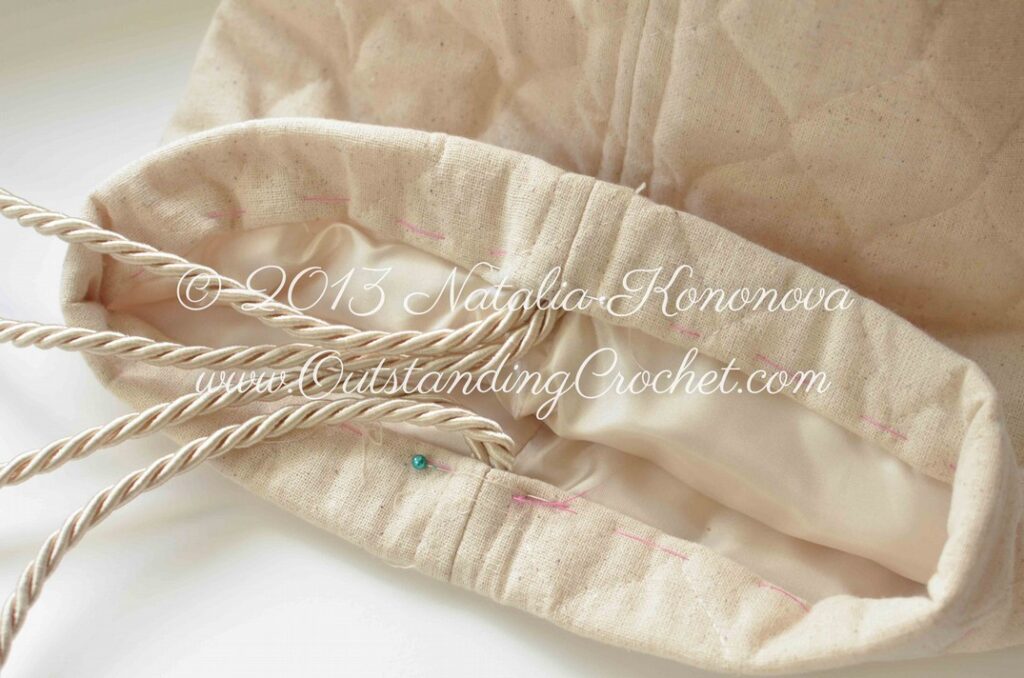
Assembly & Finishing: Lining and Handles
Weaving in Ends: Before you start lining, make sure to weave in all your yarn ends neatly.
Making the Lining:
- Quilted Layer: Measure your bag. Cut the quilted fabric to the width of your bag + 3cm (1 ¼”) by the height of your bag x 2 + 10cm (4″). Fold it in half with the right sides together and sew up the sides with a 1.5cm seam allowance. Finish the raw edges and press the seams open.
- Lining Layer: Cut the lining fabric to the same width as above by the height of your bag + 5cm (2″). Fold it in half, right sides together, sew the sides, and finish the edges.
- Combine: Insert the lining layer into the quilted layer. You now have one double-thick lining pouch.
Attaching the Handles & Top Edge:
- Place the lining inside your crocheted bag to check the fit; it should be about 5cm taller.
- Fold the cord in half to find the center. At the top edge of the bag, fold the quilted fabric down 2.5cm, tuck the raw edges of the lining and the two ends of the cord inside this hem. The folded center of the cord should be on the opposite side.
- Baste everything in place and then sew close to the folded edge, going back and forth over the cord ends several times for extra strength.
- Pull the cord up to form the handles and stitch them securely to the top edge of the bag on both sides.
Final Assembly:
- Place the finished lining back inside the bag.
- Using a needle and thread, hand-stitch the top edge of the crocheted motifs to the lining using a backstitch, taking care to make small, invisible stitches on the right side.
- For a perfect fit, hand-stitch the bottom corners of the crocheted bag to the bottom corners of the lining