Crochet a Charming Black Cat: A Complete Amigurumi Pattern
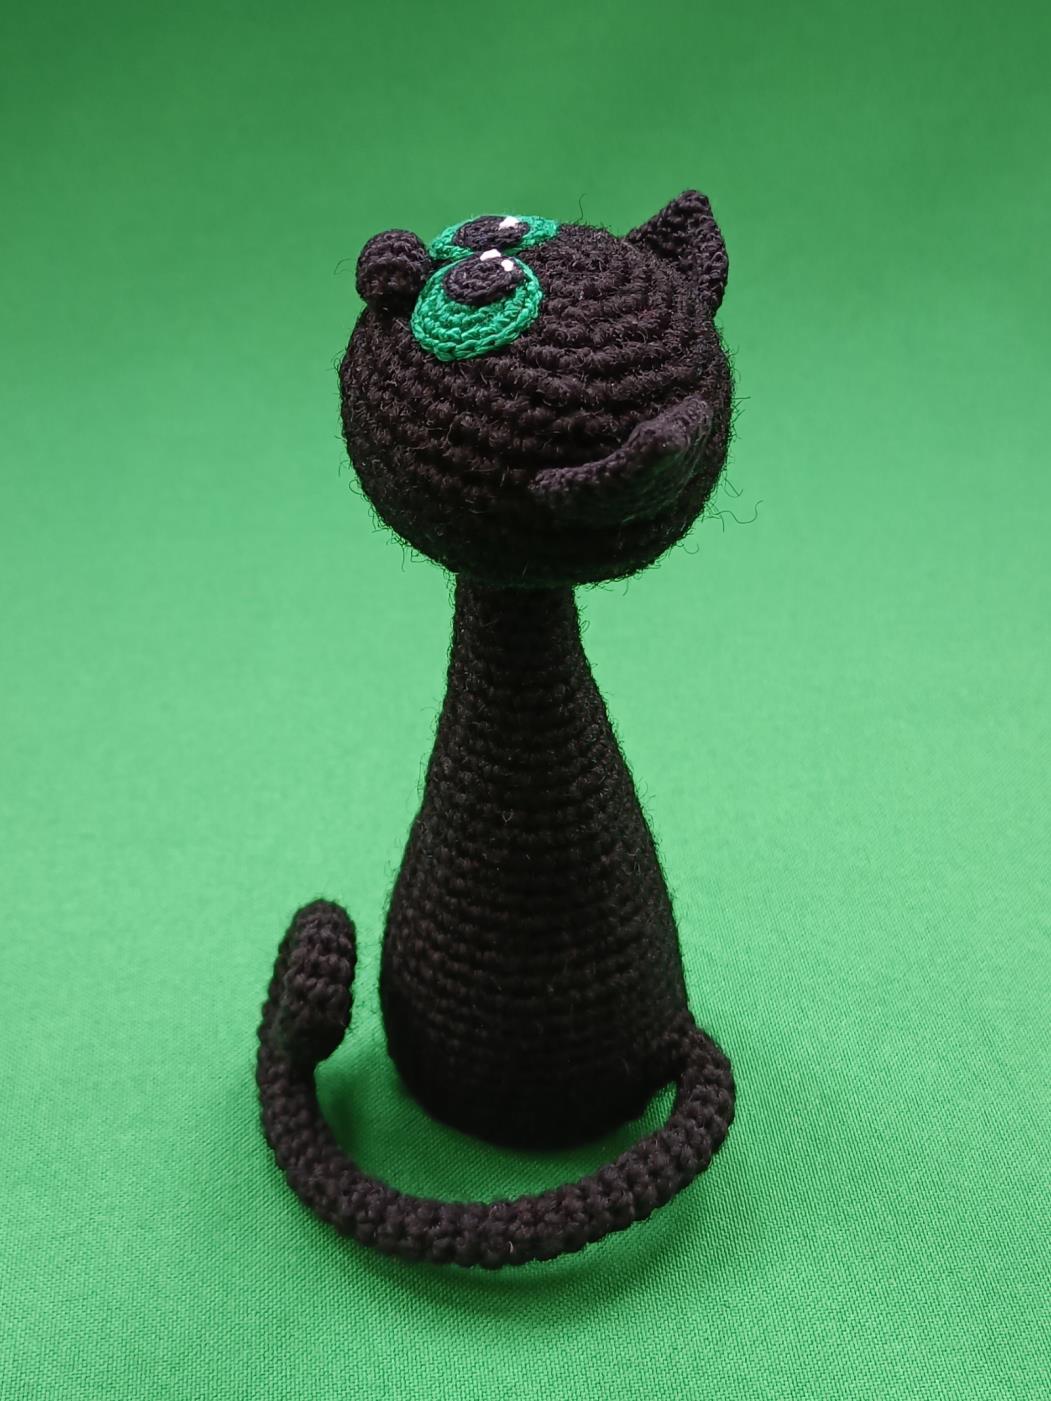
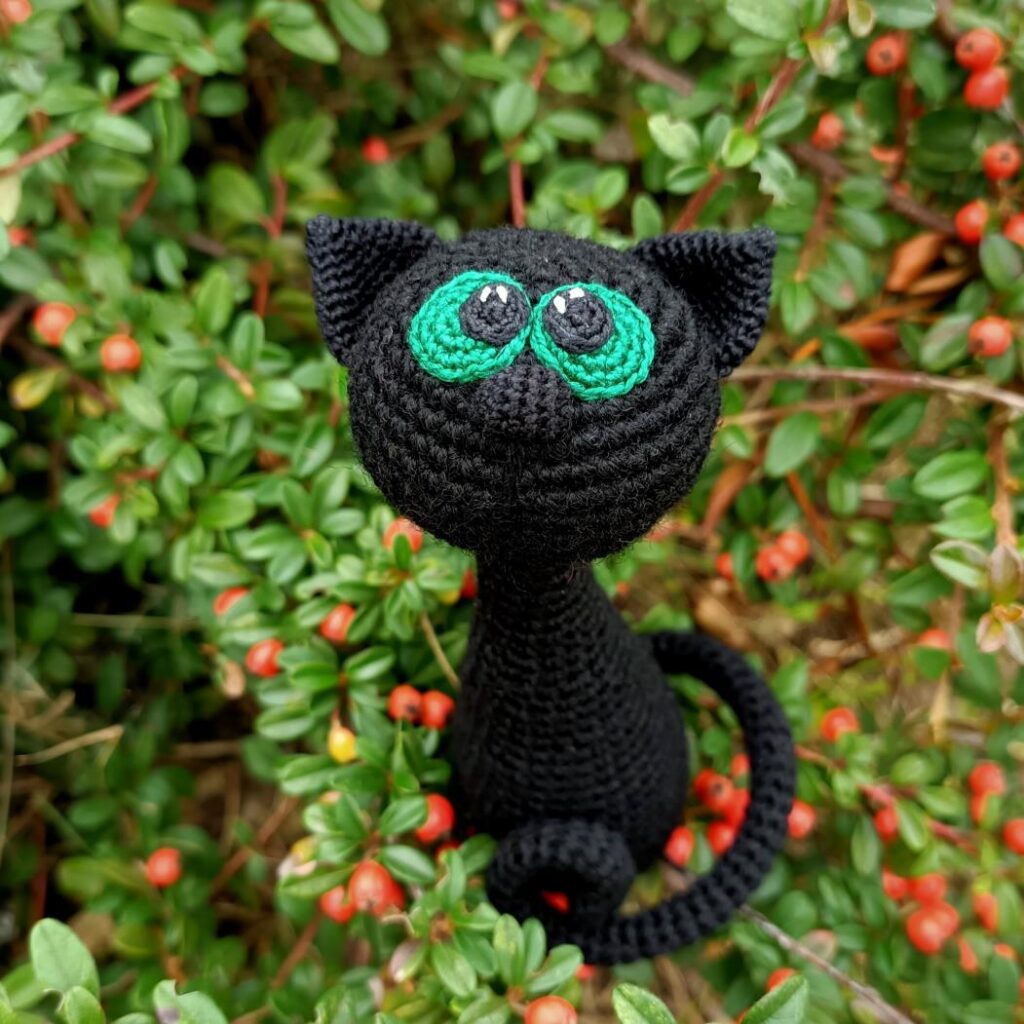
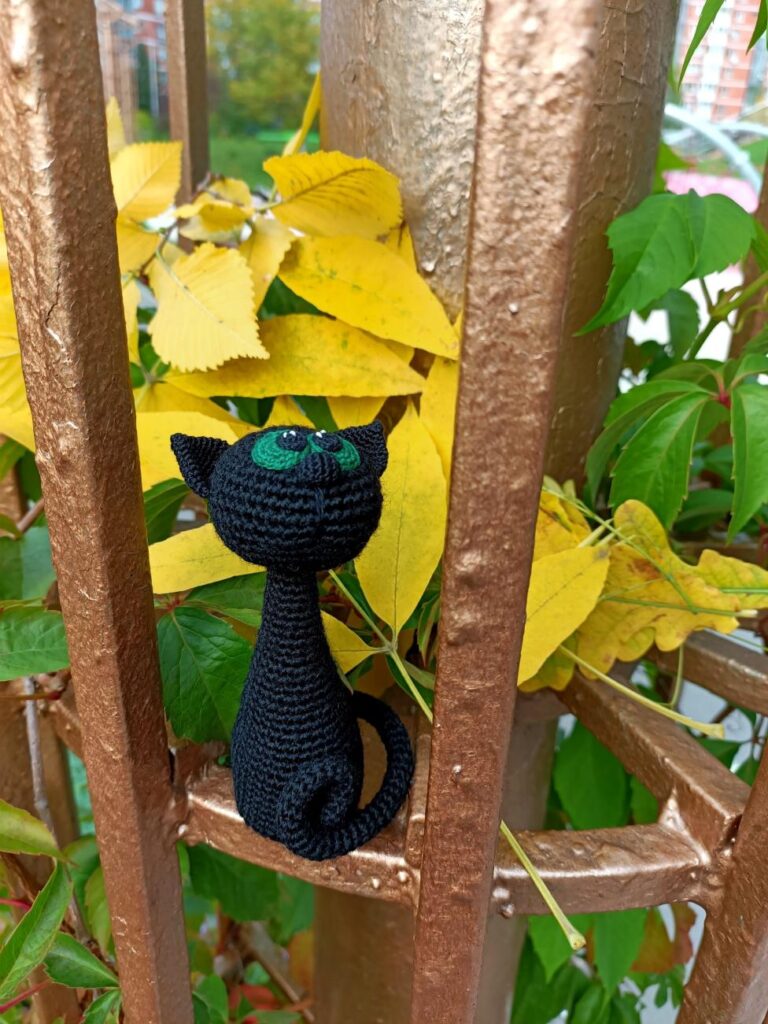
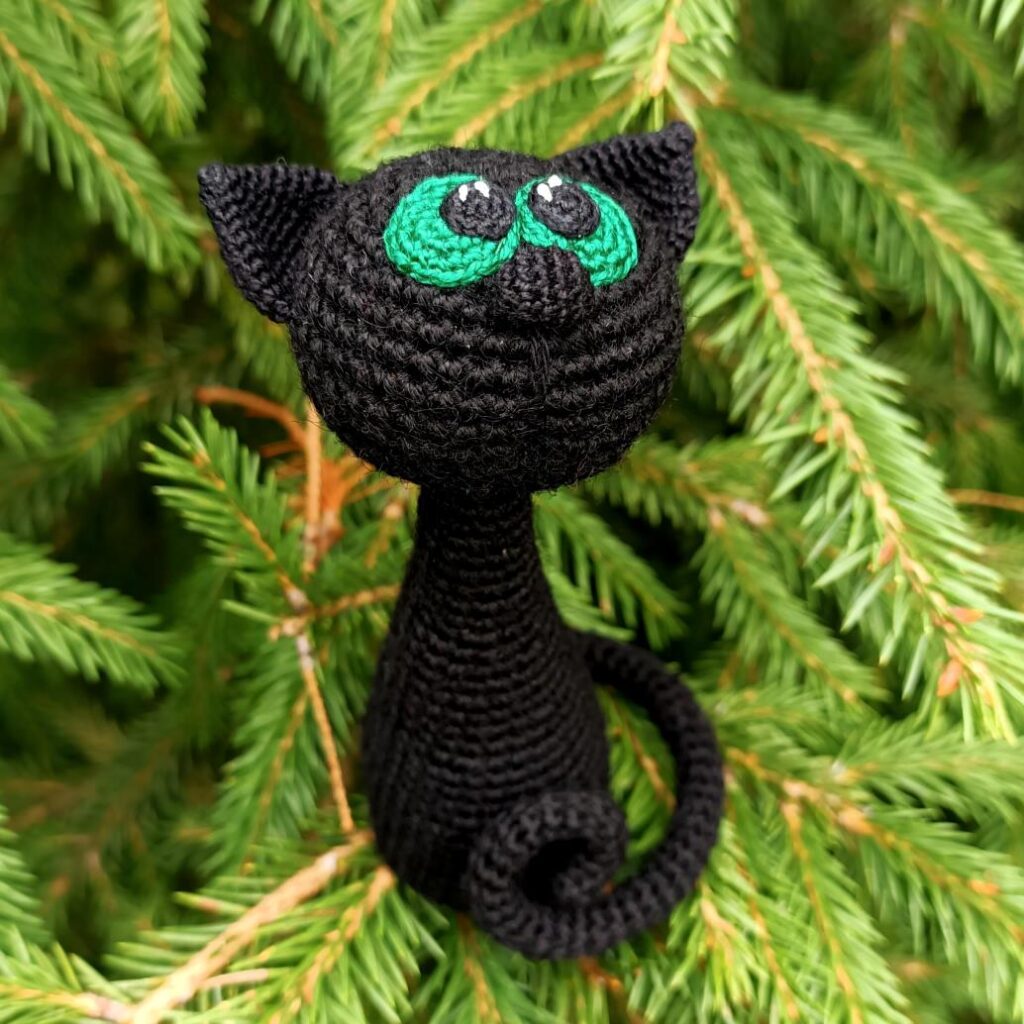
Hello, lovely crafters and cat lovers! Is there anything more magical than a little black cat? A symbol of mystery, grace, and good luck, this charming feline friend is waiting to be conjured from your yarn and hook. Today’s pattern is for a beautifully proportioned, 12cm tall cat with enchanting green eyes, perky ears, and a delightful secret: a tail you can pose and bend for endless playful expressions!
This project is perfect for those who have some amigurumi experience and are ready to incorporate new techniques like sewing detailed small parts and adding a simple wire armature. The result is a professional-looking, fully customizable companion. You can follow the classic black cat aesthetic or choose any color your heart desires—imagine a calico, a gray tabby, or a snowy white kitty!
This little cat makes a wonderful gift for anyone who adores felines, needs a pocket-sized comfort companion, or appreciates handcrafted artistry. The process of bringing her to life—from the spiraling increases of the head to the careful embroidery of her face—is a deeply satisfying creative journey. It’s a wonderful way to spend a cozy afternoon.
So, let’s summon our supplies and a dash of patience. We’re about to create a miniature friend full of character and charm. Get ready to say, “Hello, beautiful!”
Materials to Gather
- Main Yarn (Body): Alize “Baby Wool” or similar (approx. 50g / 175m). Shown in black.
- Fine Accent Yarn (Ears, Nose, Pupils): A fine black yarn like Madame Tricote “Coton perle 8” (approx. 10g).
- Eye Color Yarn: A small amount of fine green yarn (e.g., “Iris” cotton).
- Crochet Hooks: Size 1.5 mm (main body), Size 1.0 mm (small parts).
- Fiberfill: For stuffing.
- Wire: 18-20 cm of 1.2 mm wire for the tail.
- Stability Disc (Optional): A large button or plastic disc slightly smaller than the body’s base.
- Small Button: For securing the wire inside the tail.
- Notions: Scissors, tapestry needle, sewing needle and black thread, pins, stitch markers, a small piece of medical tape.
Finished Size: Approximately 12 cm tall with recommended materials.
Crochet Abbreviations
- MR: Magic Ring
- sc: single crochet
- inc: increase (2 sc in same stitch)
- dec: decrease (sc 2 together)
- ch: chain
- sl st: slip stitch
- BLO: Back Loop Only
Pattern Instructions
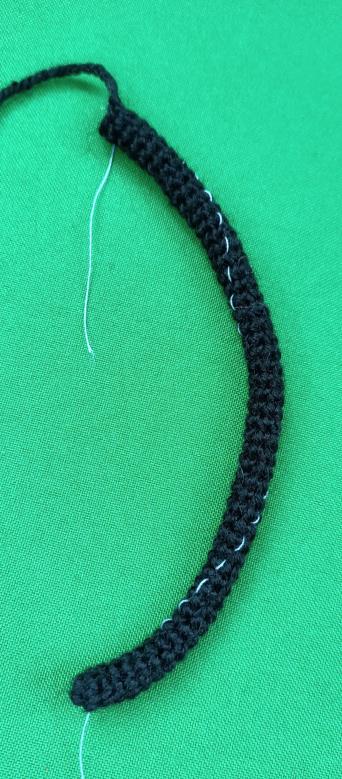
Tail
Use main yarn and 1.5 mm hook.
- Round 1: 6 sc in MR. (6)
- Round 2: 4 sc, inc. (6) Place marker.
- Rounds 3-51: Sc in each stitch. (49 rounds of 6 sc)
- Round 52: 5 sc, inc. (7)
- Round 53: 1 sc, 1 sl st. Fasten off, leaving a tail. Weave in end. Leave tube open for wire.
Eyes (Make 2)
Use green yarn and 1.0 mm hook.
- Round 1: 6 sc in MR. (6)
- Round 2: 6 inc. (12)
- Round 3: (1 sc, inc) x 6. (18)
- Round 4: 1 sc, inc, (2 sc, inc) x 5, 1 sc. (24) Fasten off.
Pupils (Make 2):
Use fine black yarn and 1.0 mm hook.
- Round 1: 6 sc in MR.
- Round 2: 6 inc. (12) Fasten off.
Sew a black pupil onto the center of each green eye using sewing thread. Add tiny white speckles if desired!
Nose
Use fine black yarn and 1.0 mm hook.
- Round 1: 6 sc in MR. (6)
- Round 2: 1 sc, 4 inc, 1 sc. (10)
- Rounds 3-6: Sc in each stitch. (4 rounds of 10 sc)
- Round 7: 1 sc, 4 dec, 1 sl st. (6) Draw remaining loops tight. Fasten off, leaving a 12 cm tail for sewing.
Ears (Make 2)
Use fine black yarn and 1.0 mm hook.
- Round 1: 5 sc in MR. (5)
- Round 2: 4 sc, inc. (6)
- Round 3: (1 sc, inc) x 3. (9)
- Round 4: 1 sc, inc, (2 sc, inc) x 2, 1 sc. (12)
- Round 5: (3 sc, inc) x 3. (15)
- Round 6: 2 sc, inc, (4 sc, inc) x 2, 2 sc. (18)
- Round 7: (5 sc, inc) x 3. (21)
- Round 8: 3 sc, inc, (6 sc, inc) x 2, 3 sc. (24)
- Round 9: (7 sc, inc) x 3. (27)
- Rounds 10-11: Sc in each stitch. (2 rounds of 27 sc)
- Round 12: 1 sl st. Fasten off and weave in end.
Fold the ear into a triangle and sew the inner edges together with sewing thread.

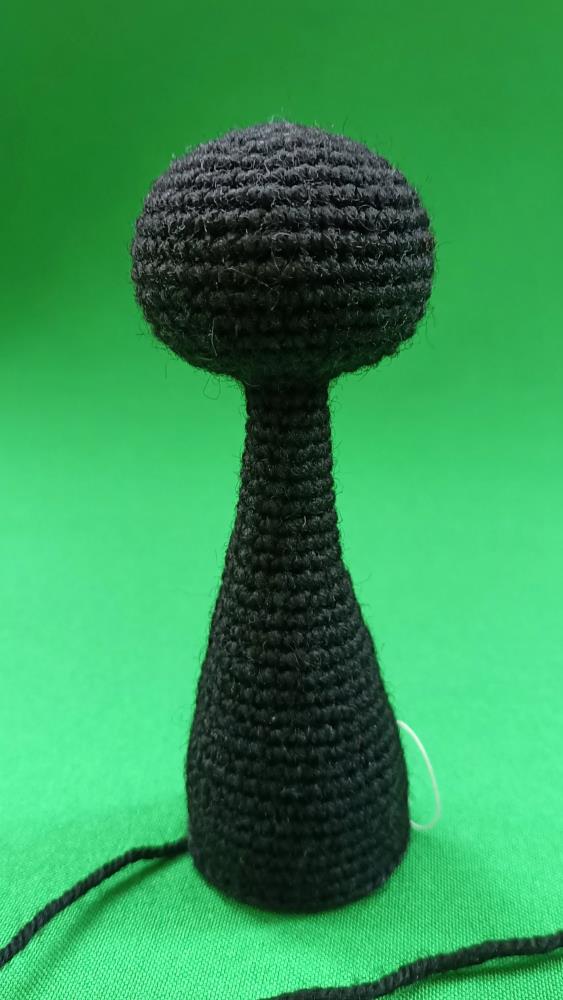
Head & Body (Worked as one piece)
Use main yarn and 1.5 mm hook.
- Round 1: 6 sc in MR. (6)
- Round 2: 6 inc. (12)
- Round 3: (1 sc, inc) x 6. (18)
- Round 4: 1 sc, inc, (2 sc, inc) x 5, 1 sc. (24)
- Round 5: (3 sc, inc) x 6. (30)
- Round 6: 2 sc, inc, (4 sc, inc) x 5, 2 sc. (36)
- Round 7: 36 sc.
- Round 8: (5 sc, inc) x 6. (42)
- Rounds 9-12: 42 sc. (4 rounds)
- Round 13: (dec, 5 sc) x 6. (36)
- Round 14: 36 sc.
- Round 15: 2 sc, dec, (4 sc, dec) x 5, 2 sc. (30)
- Round 16: (dec, 3 sc) x 6. (24) Begin stuffing the head.
- Round 17: 1 sc, dec, (2 sc, dec) x 5, 1 sc. (18)
- Round 18: (dec, 1 sc) x 6. (12)
- Rounds 19-21: 12 sc. (3 rounds)
- Round 22: 11 sc, inc. (13) Stuff head firmly.
- Rounds 23-24: 13 sc. (2 rounds)
- Round 25: 12 sc, inc. (14)
- Round 26: 14 sc.
- Round 27: 13 sc, inc. (15)
- Round 28: 15 sc.
- Round 29: 2 sc, inc, (4 sc, inc) x 2, 2 sc. (18)
- Round 30: 18 sc.
- Round 31: (5 sc, inc) x 3. (21)
- Round 32: 21 sc.
- Round 33: 3 sc, inc, (6 sc, inc) x 2, 3 sc. (24)
- Round 34: 24 sc.
- Round 35: (7 sc, inc) x 3. (27)
- Round 36: 27 sc.
- Round 37: 4 sc, inc, (8 sc, inc) x 2, 4 sc. (30)
- Round 38: 30 sc.
- Round 39: (9 sc, inc) x 3. (33)
- Round 40: 33 sc.
- Round 41: 5 sc, inc, (10 sc, inc) x 2, 5 sc. (36)
- Rounds 42-48: 36 sc. (7 rounds)
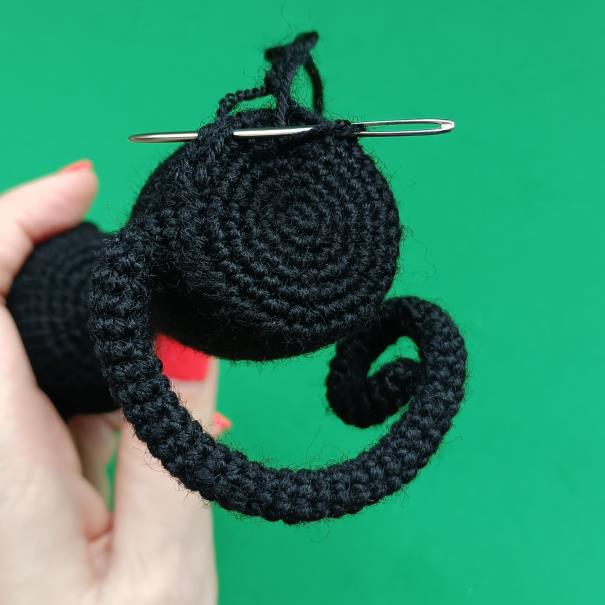
- Round 49 (Attach Tail): 33 sc, then work 3 sc by stitching through both the body and the open end of the tail tube simultaneously.
- Round 50: 33 sc, then work 3 sc into the other side of the tail opening, leaving a small hole for the wire.
- Round 51: 36 sc.
- Round 52: 1 sl st. Fasten off and weave in end. Leave the body open at the bottom.
Body Base
Use main yarn and 1.5 mm hook.
- Round 1: 6 sc in MR. (6)
- Round 2: 6 inc. (12)
- Round 3: (1 sc, inc) x 6. (18)
- Round 4: 1 sc, inc, (2 sc, inc) x 5, 1 sc. (24)
- Round 5: (3 sc, inc) x 6. (30)
- Round 6: 2 sc, inc, (4 sc, inc) x 5, 1 sc, 1 sl st. (36) Fasten off, leaving a 30 cm tail for sewing.
Assembly & Finishing
- Wire Tail: Cut wire to length of tail + 3 cm. Wrap one tip with medical tape. Gently thread the wire into the tail, taped end first. Inside the body, form the exposed wire end into a small loop. Thread the tail yarn through this loop and sew it securely to a small button. Sew this button firmly to the inside base of the body. This anchors the tail.
- Stability (Optional): Insert a large button or plastic disc (smaller than the base) into the bottom of the body to help it stand.
- Close the Body: Stuff the body firmly. Use the long tail from the base to sew it securely to the bottom of the body.
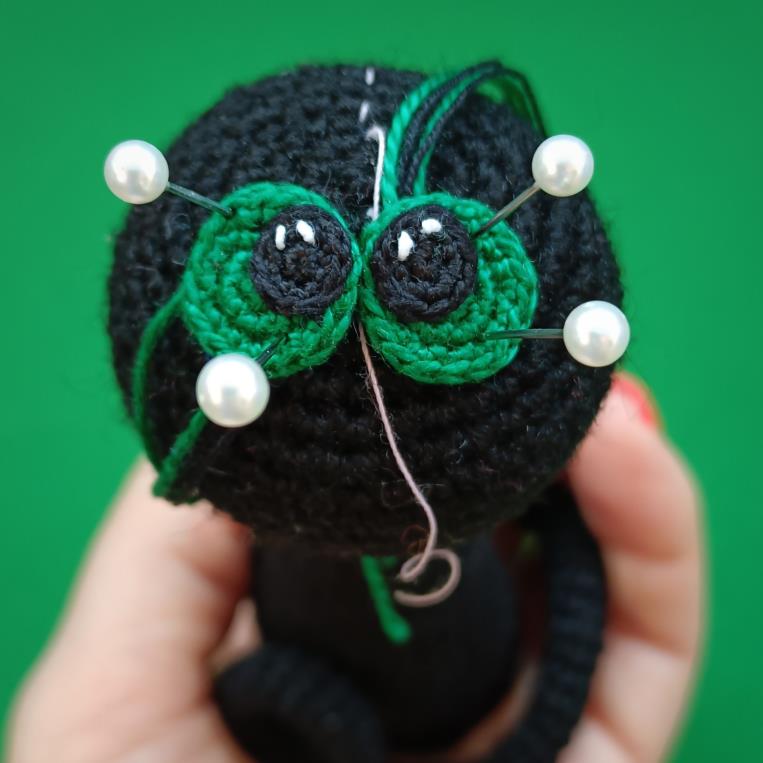
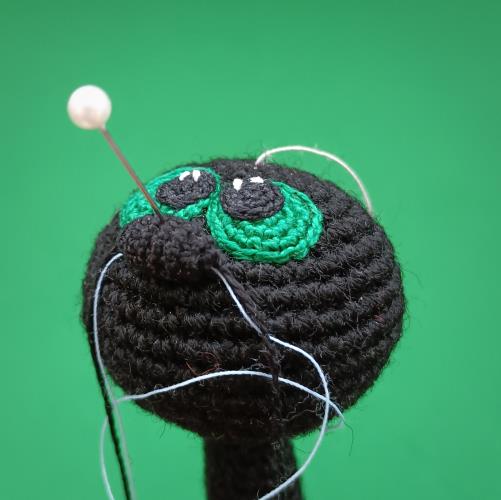
- Attach the Face: Pin all features in place before sewing.
- Eyes: Place them high on the head, close together. Sew on securely with matching thread.
- Nose: Position just below and between the eyes. Sew on firmly. You can make a single vertical stitch downward from the nose to define the muzzle.
- Ears: Experiment with placement! Angled outwards for curiosity, straight up for alertness, or slightly tilted for sweetness. Once happy, sew them on securely at the base.
Tips for a Purr-fect Finish
- Pose Before You Sew: The magic of this cat is in her expression. Take your time posing the wire tail and pinning the ears in different positions before making anything permanent. Her personality is in your hands!
- Stuffing Matters: Stuff the head very firmly so it holds its shape, and stuff the body evenly to support the wire armature.
- Sewing Security: Use the yarn tails and matching sewing thread to attach features. Take small, tight stitches for a seamless look. For the nose, come up through the body and back down through the nose piece to hide knots.
- Embrace Customization: This pattern is a canvas. Try different eye colors, add whiskers with embroidery floss, or even a little pink tongue!
Your enchanting, poseable black cat is now complete, ready to bring a little magic and mischief to your home. I hope you enjoyed every moment of crafting this special companion. Happy crocheting