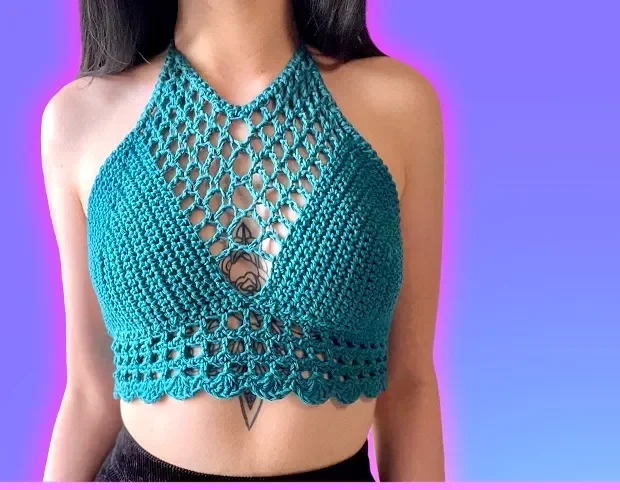
Create a Stunning Caged Halter Top: A DIY Crochet Tutorial for All Sizes
Let’s Make Something Beautiful Together
Hey there, creative friend! Welcome to a project that’s going to add a little handmade magic to your wardrobe. Today, we’re diving into the wonderful world of crochet fashion, and I’m so excited to show you how to make this stunning caged halter top.
This gorgeous top is the perfect blend of boho charm and modern style. With its delicate caged netting, beautiful scalloped edging, and adjustable corset-style back, it’s a piece that looks incredibly impressive – but I promise, it’s totally achievable for a confident beginner!
What I love most about this pattern is that it’s made for all sizes. Whether you’re crafting a tiny top for yourself or a gift for a friend, I’ve got the stitch counts you need. This top is perfect for summer days, music festivals, beach vacations, or just feeling a little extra beautiful at home. So grab your yarn and hook, put on your favorite podcast, and let’s create something you’ll be proud to wear
Materials You’ll Need
- Yarn: Any worsted weight or DK yarn (the sample uses a beautiful teal color). One skein (about 200-250g) makes almost a whole bralette!
- Crochet Hook: Size appropriate for your yarn (check your yarn label – typically 4.0mm – 5.0mm)
- Stitch Markers (highly recommended – you’ll use these a lot)
- Scissors
- Yarn Needle (for weaving in ends)
Abbreviations (US Terms)
- sc – single crochet
- dc – double crochet
- sl st – slip stitch
- ch – chain
- inc – increase (in this pattern, usually 3 sc in one stitch)
- st – stitch
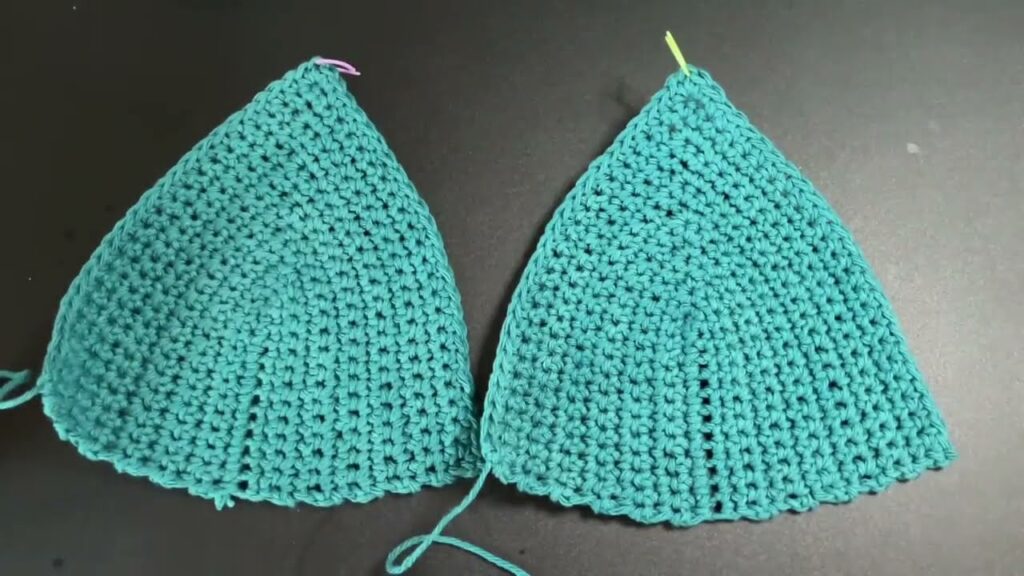
Part 1: Making the Bra Cups (Make Two)
The bra cups are worked in rows, starting from the bottom point and working upward. We’ll be increasing at the center of each row to create a rounded cup shape.
Foundation Chain by Size
| Size | Starting Chain | Total Rows |
|---|---|---|
| XS | 11 | 11 |
| S | 13 | 13 |
| M | 15 | 15 |
| L | 17 | 17 |
| XL | 19 | 19 |
This tutorial demonstrates a size Small (13 chains, 13 rows).
Row 1 (Foundation Row)
- Make a slip knot and chain your starting number (for S: ch 13)
- Sc into the 2nd chain from the hook
- Continue sc all the way down your chain – stop before you reach the last chain
- In that very last chain, work 3 sc (all in the same stitch)
- Place your stitch marker in the middle stitch of those three – this marks your center increase point for every row!
- Continue sc along the opposite side of your foundation chain (weave in your yarn tail as you go)
- Check your work: You should have the same number of stitches on both sides of your stitch marker
Row 2
- Ch 1, turn your work
- Sc into the very first stitch
- Continue sc all the way up until you reach your stitch marker
- At the stitch marker: Work 3 sc into that same stitch (the marked stitch)
- Replace your stitch marker into the middle stitch of those three
- Continue sc along the opposite side
Rows 3 through Final Row
- Repeat the exact same process for every single row:
- Sc across to the marker
- 3 sc in the marked stitch (replace marker in the middle stitch)
- Sc across the other side
Finishing the Cup
Once you’ve completed all your rows:
- Ch 1
- Cut your yarn and pull it through to secure
- Repeat the entire process to make a second bra cup exactly like the first
Pro Tip: To make sure both cups are identical, count the stitches along the side of each cup. They should match perfectly