Beekind Crochet Bag Pattern
Materials
To crochet your very own “Let’s Bee Kind” bag, gather these essential supplies:
Hooks
- 8.0 mm (US L-II) for the main bag body.
- 6.0 mm (US J-10) for the optional clasp.
Other Notions
- Stitch marker
- Yarn needle
- Optional: 1 large button for the clasp.
Yarn
- Bobbiny Junior 3 mm braided cotton cord in Mustard color.
- Approximately 110 meters (121 yards) needed (around 267 grams used for the sample).
Abbreviations
Familiarize yourself with these common crochet abbreviations to follow the pattern:
- ch – chain
- sc – single crochet
- dc – double crochet
- sl st – slip stitch
- hbhdc – herringbone half double crochet: Yarn over, skip 1 stitch, insert hook into next stitch, yarn over and pull through the stitch and the first loop on hook, yarn over and pull through remaining 2 loops.
Gauge
The exact gauge is not critical for this crochet project, allowing for some flexibility in your stitching tension.
Finished Size
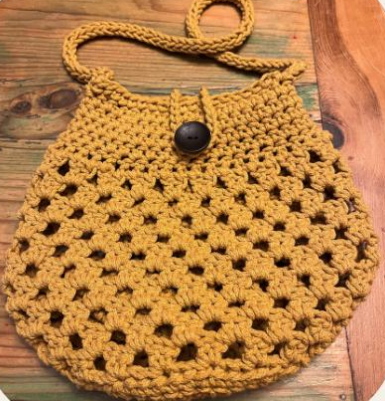
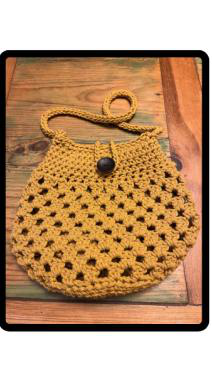
Your completed “Let’s Bee Kind” bag will measure approximately 12 inches tall when laying flat, with a 24-inch strap. Due to the open honeycomb design and the I-cord strap, the bag will expand by 2-4 inches depending on the weight carried inside.
Instructions
This charming crochet bag is worked in the round from the bottom up, starting with a magic ring for the base. The strap is a 3-stitch I-cord worked directly from the bag’s edge.
Bag Bottom
Using your 8 mm crochet hook, begin the foundation of your bag.
Magic Ring: Create a magic ring.
Rnd 1: Work 8 single crochets (sc) into the magic ring. Pull the ring tight to close. Place your stitch marker. (8 stitches)
Rnd 2: Work 2 sc in each stitch around. (16 stitches)
Rnd 3: *2 sc in the next stitch, 1 sc in the next stitch*; repeat around. (24 stitches)
Rnd 4: *2 sc in the next stitch, 1 sc in the next 2 stitches*; repeat around. (32 stitches)
Rnd 5: *2 sc in the next stitch, 1 sc in the next 3 stitches*; repeat around. (40 stitches)
Rnd 6: *2 sc in the next stitch, 1 sc in the next 4 stitches*; repeat around. (48 stitches)
Rnd 7: Double crochet (dc) in each stitch around. (No increases in this round). (48 stitches)
Tip: If you desire a wider base, continue with Rnd 7 as: *2 sc in the next stitch, 1 sc in the next 5 stitches*; repeat around, then proceed to the Bag Body.
Bag Body
Now, create the beautiful honeycomb design that gives this bag its unique character.
Rnd 1: *Work 1 dc, then 1 sc in the same stitch, chain 2, skip the next 2 stitches*; repeat from * around.
Rnd 2: Skip the first dc and sc from the previous round. In the space between each dc/sc cluster from the previous round: *work 1 dc, 1 sc, then chain 2*; repeat from * around.
Repeat Rnd 2: Continue repeating Round 2 until your bag reaches the desired height. The sample bag shown has 10 rounds, which measures approximately 7.5 inches.
Bag Top
Finish the top edge of your bag with a neat row of herringbone half double crochets (hbhdc).
- Rnd 1: Work 1 hbhdc in every other stitch around. (40 stitches)
- Rnds 2-5: Work 1 hbhdc in each stitch around.
- Rnd 6: Work 1 hbhdc for the first 18 stitches (this should bring you to approximately 1 stitch before the side of the bag). Refer to the Stitches & Abbreviations section for hbhdc instructions.
I-Cord Strap
Create a sturdy and stylish I-cord strap directly attached to your bag.
- Slip stitch (sl st) into the next 2 stitches, ensuring all 3 loops remain on your hook.
- Carefully drop the first 2 loops from your hook (hold them taut to prevent unraveling).
- Working with the 3rd loop still on your hook:
- Work 1 sl st.
- Place the 2nd dropped loop back onto your hook and work 1 sl st.
- Place the 1st dropped loop back onto your hook and work 1 sl st.
- Repeat Step 3 until your strap reaches the desired length. The sample strap shown is approximately 24 inches long.
Assembly/Finishing Steps
To Join Strap
Securely attach the end of your I-cord strap to the opposite side of the bag.
- Line up the end of your I-cord with the 3 stitches on the opposite side of the bag’s top edge.
- Drop the live loops from your hook, letting them hang on the outside of the bag.
- Insert your hook from the inside of the bag to the outside, going through both a bag stitch and one of the dropped I-cord loops.
- Slip stitch to join each of the 3 I-cord loops to the corresponding stitches on the bag.
- Continue working the final round of hbhdc across the remaining half of the bag’s top edge.
- Fasten off your yarn and weave in all loose ends securely.
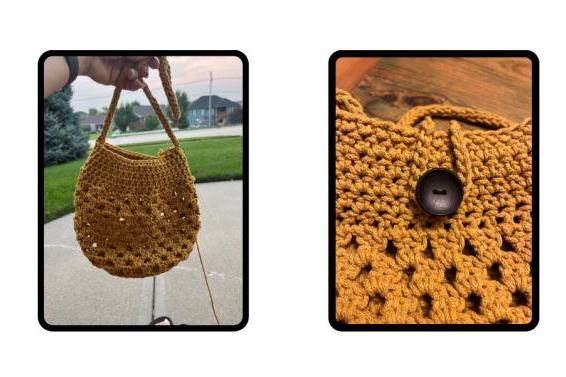
Optional Clasp
If you desire a clasp for your bag, follow these steps:
- Change to your 6 mm crochet hook.
- Chain 30, leaving approximately 2-inch tails on each end of the chain.
- Pull each yarn tail through the top center of the bag, spacing them about 1-2 inches apart.
- Tie or secure the tails on the inside of the bag.
- Sew a large button to the opposite side of the bag to align with your newly created chain loop.
Finishing
Ensure your handmade “Let’s Bee Kind” bag is neat and tidy.
- Weave in all remaining yarn ends securely into the fabric of the bag.
Congratulations, your “Let’s Bee Kind” bag is now complete


