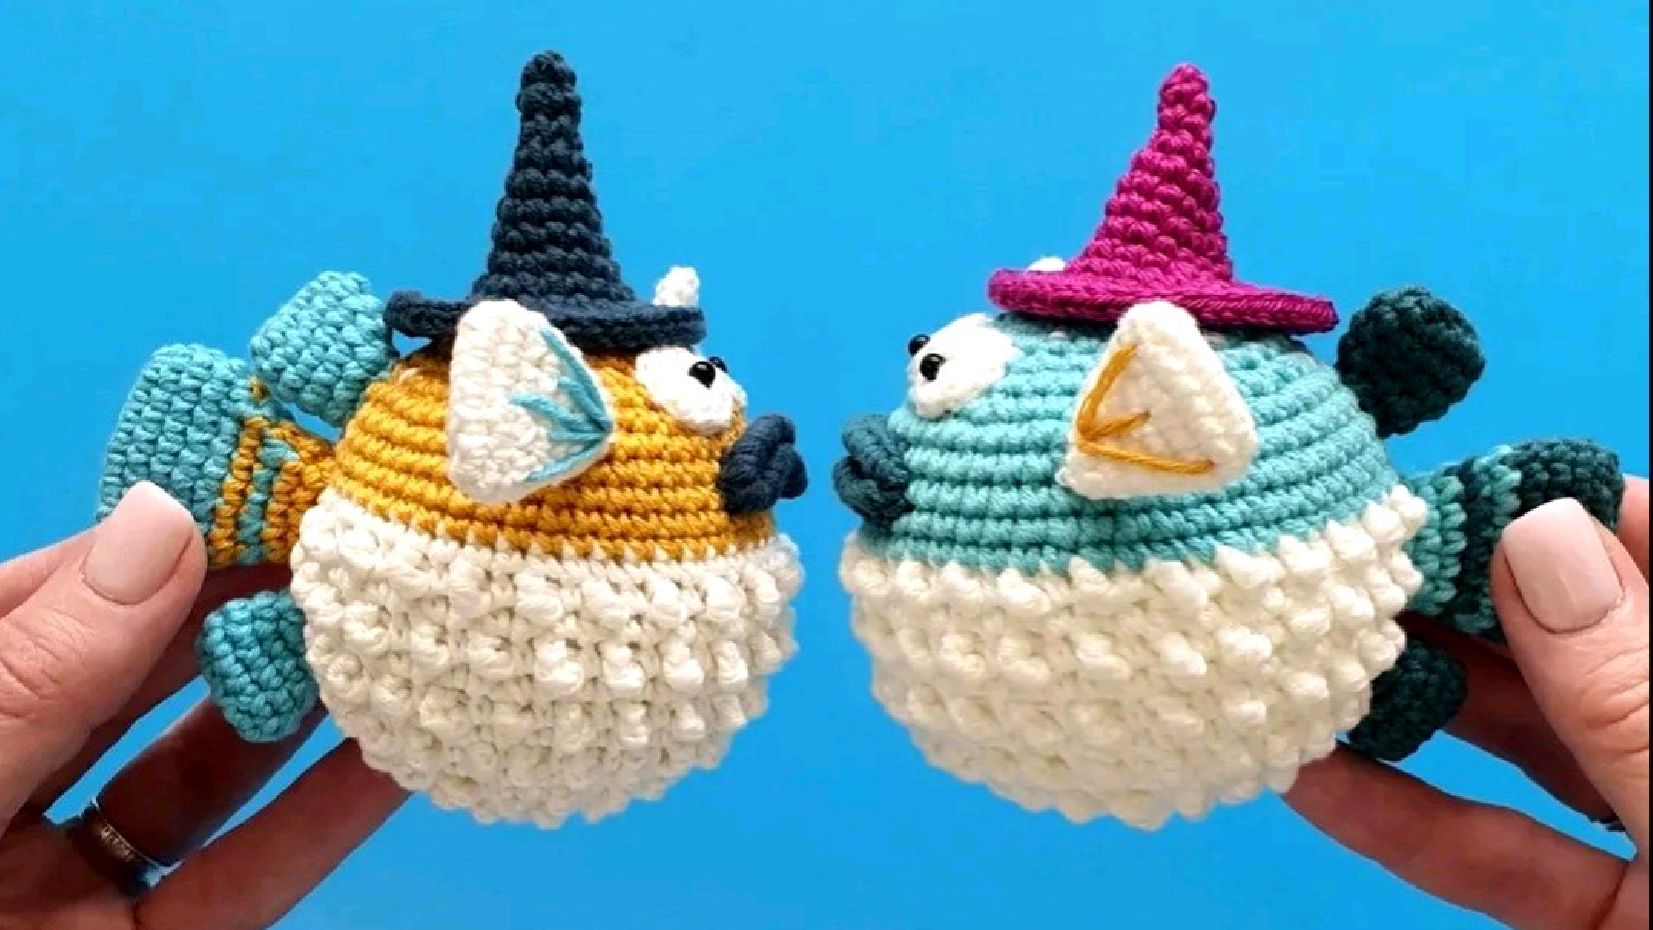
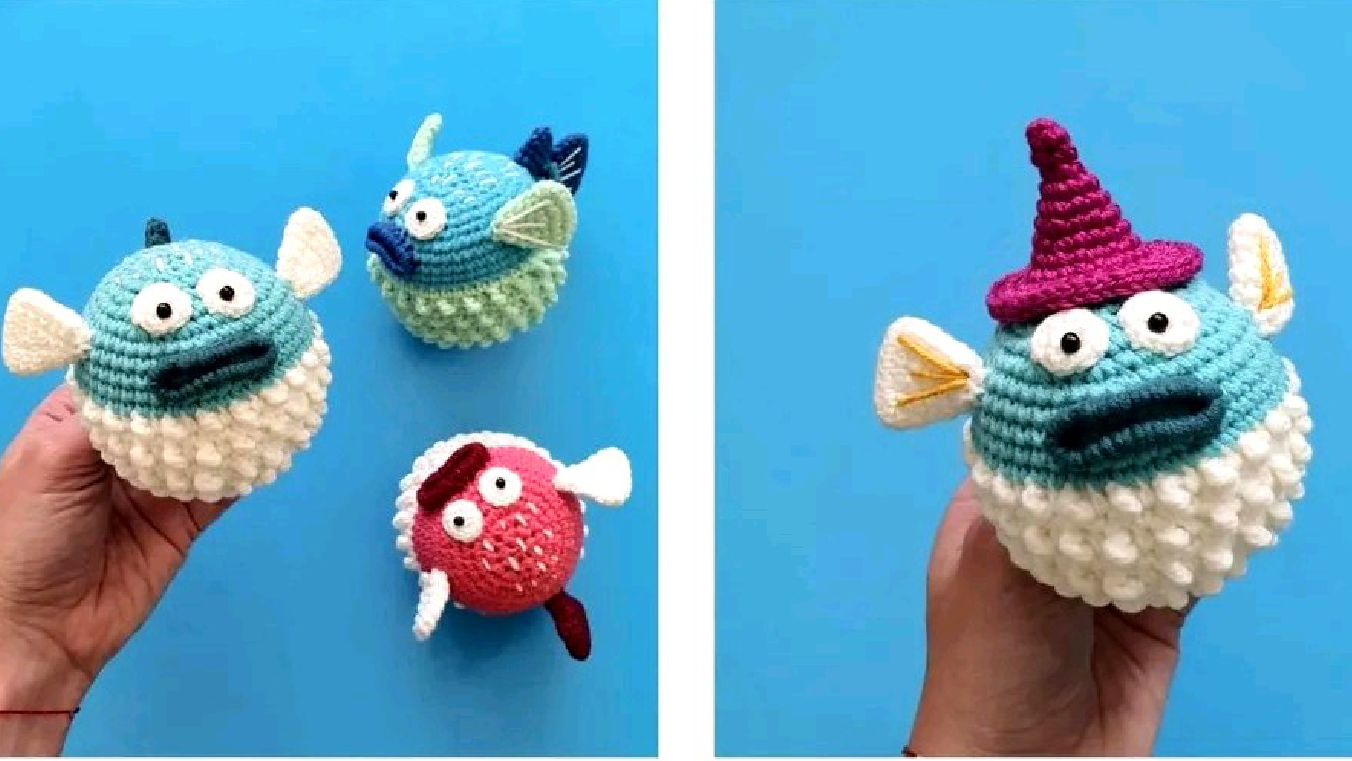
Amy The Puffer Fish Free Crochet Pattern
Mouth (In Turquoise)
A cute little mouth for your amigurumi puffer fish.
- Ch 18 and join with a slst to make a circle, ensuring the chain isn’t twisted.
- Crochet 20 sc (or as many as needed to cover the chain) into the circle by wrapping them around the chain, rather than working into individual chain spaces. Slst into the first stitch.
Fasten off, cut the yarn, and weave the end in between the stitches. As with the eyes, it’s highly recommended to split a separate yarn tail into strands and use a single strand of turquoise yarn for sewing the mouth. Sew the mouth between rounds 16 and 20 of the body and head.
Hat (In Purple)
Complete your adorable puffer fish with a charming little hat!
- Round 1: 4 sc in a MR [4]
- Round 2: 3 sc, inc [5]
- Round 3: 4 sc, inc [6]
- Round 4: (sc, inc) x 3 [9]
- Round 5: (2 sc, inc) x 3 [12]
- Round 6: sc in all 12 st [12]
- Round 7: (2 sc, inc) x 4 [16]
- Round 8: sc in all 16 st [16]
- Round 9: (3 sc, inc) x 4 [20]
- Round 10: (4 sc, inc) x 4 [24]
- Round 11: sc in all 24 st [24]
- Round 12: inc in all 24 st [48]
- Round 13: slst in all 48 st [48]
Slst into the next stitch. Fasten off, leaving a long tail for sewing. The hat does not need to be stuffed. Sew the hat securely onto the top of the body and head.
Assembly and Finishing Touches
Once all your crochet pieces are made, it’s time to bring Amy the Puffer Fish to life!
- Attach Fins: Carefully sew the tail between rounds 11 and 16 of the body. Attach the two dorsal fins above the tail with approximately 22 stitches between them. Sew the lateral fins to the sides of the body and head between rounds 18-22, ensuring about 20 stitches separate them at the front.
- Attach Facial Features: Secure the eyes between rounds 20 and 25 of the body, with about 1 stitch separating them. Sew on the mouth between rounds 16 and 20.
- Hat: Finally, sew the purple hat onto the top of the head.
- Embellishments: To add extra character, embroider straight stitches onto the body, head, and lateral fins using your off-white and yellow yarn scraps. These small details truly make your amigurumi unique.
Tips for Beginners
Even if you’re new to amigurumi, you can create this cute puffer fish! Here are a few tips to help you along the way:
- Tension is Key: For the body, try to make your double treble crochet (dtr) stitches a bit looser and your single crochet (sc) stitches tighter. This will help the dtr stitches “pop” out more, creating distinct spikes for your puffer fish.
- Shaping Spikes: Don’t be afraid to gently push the dtr stitches into the correct direction as you work the subsequent sc stitches. This helps define the textured surface.
- Working with Small Parts: When sewing on the small parts like the eyes and mouth, consider splitting your yarn strands. Using a single strand of yarn will make your stitches finer and less noticeable, resulting in a cleaner finish.
- Stuffing Consistency: Stuff the body firmly, especially as you go. Consistent stuffing helps maintain the shape and gives your amigurumi a polished look.
- Stitch Markers are Your Friend: Always use stitch markers, especially in continuous rounds, to keep track of your first stitch and avoid miscounting.
Enjoy crafting your adorable Amy the Puffer Fish! This free crochet pattern is a fantastic project for anyone looking to make a charming handmade toy or gift.