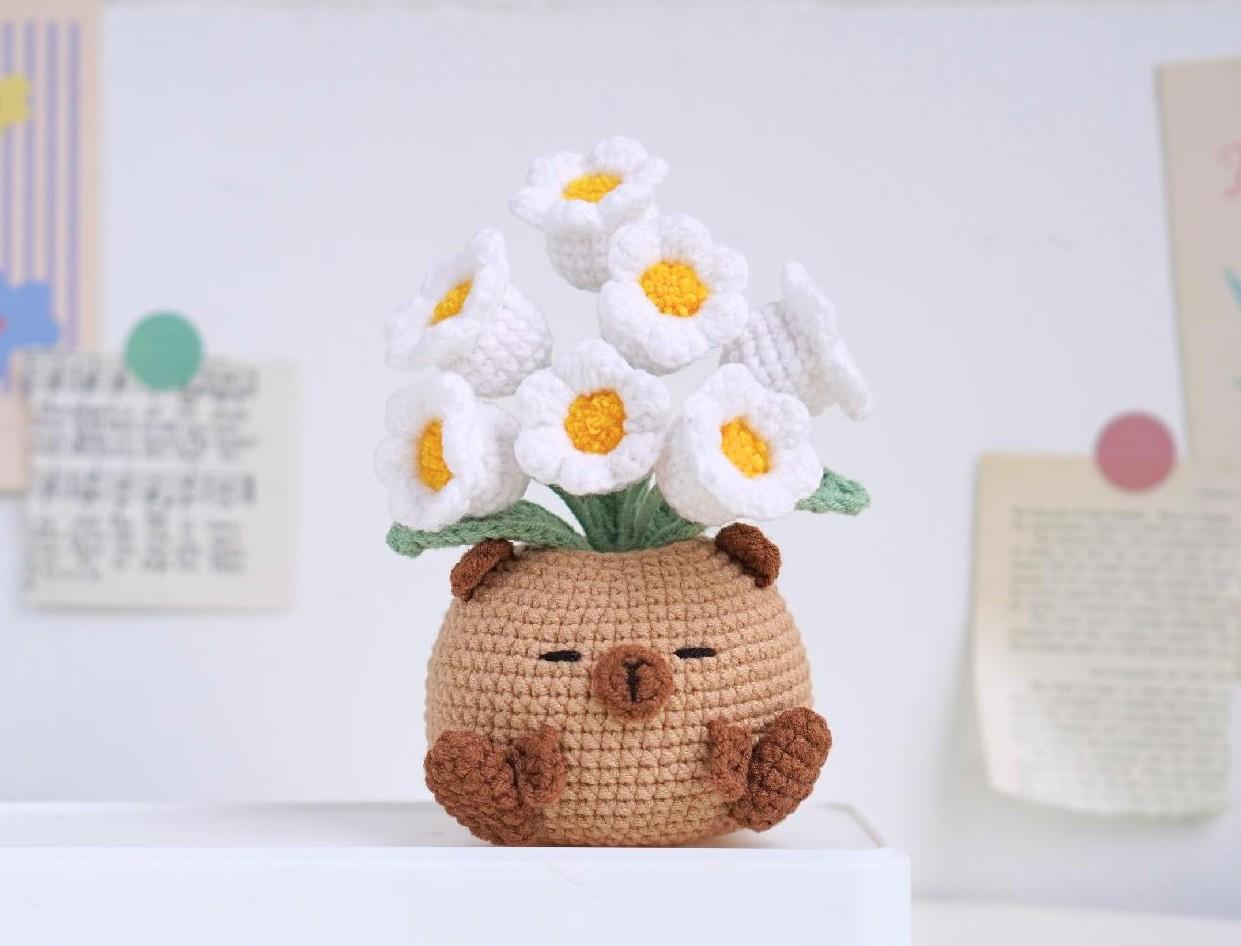
Amigurumi Capybara Lily of the Valley Pattern
Materials
To crochet your adorable Capybara Pot with “Lilies of the Valley” flowers, gather these essential supplies:
- Yarn Weight: Sport | Fine (2)
- Colors: White, Brown, Dark Brown, Yellow, Green, a little Black yarn
- Hook: 2.5mm (C) crochet hook
- Stitch markers
- Sewing needle
- Scissors
- Stuffing (polyester fiberfill)
- Wire
- Glue
Abbreviations
Familiarize yourself with these standard crochet abbreviations to follow the pattern with ease:
- MR: Magic Ring
- ST: Stitch
- SL ST: Slip Stitch
- CH: Chain
- SC: Single Crochet
- HDC: Half Double Crochet
- DC: Double Crochet
- INC: Increase (2 single crochet in one stitch)
- DEC: Decrease (single crochet 2 together)
- BLO: Back Loop Only
Finished Size & Notes
The final size of your crocheted Capybara Pot may vary based on your chosen yarn and individual stitch tension, but it will measure approximately 12 cm. It’s recommended to use a stitch marker to mark the first stitch of each row to help you keep track of your progress, especially when working in continuous rounds. You will typically need one 50g skein of yarn in each specified color for this project.
Understanding different foundation types can be helpful for various crochet projects, though this pattern specifically uses a Magic Ring and chain foundations.
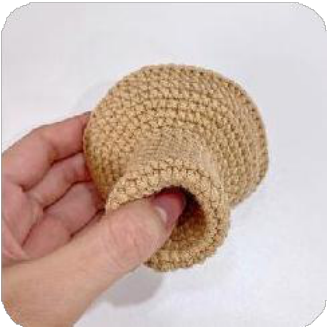
Crochet Instructions: Capybara Pot
Pot Body
Using brown yarn, begin creating the main body of your capybara pot:
- Row 1: 6 SC in MR (6 stitches)
- Row 2: 6 INC (12 stitches)
- Row 3: (SC, INC) 6 times (18 stitches)
- Row 4: (SC, INC, SC) 6 times (24 stitches)
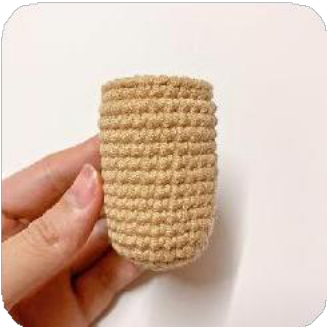
- Rows 5-16: 24 SC (24 stitches) – Continue for 12 rows.
- Row 17: BLO, (3 SC, INC) 6 times (30 stitches)
- Row 18: (2 SC, INC, 2 SC) 6 times (36 stitches)
- Row 19: (5 SC, INC) 6 times (42 stitches)
- Row 20: (3 SC, INC, 3 SC) 6 times (48 stitches)
- Row 21: 48 SC (48 stitches)
- Row 22: (7 SC, INC) 6 times (54 stitches)
- Row 23: 54 SC (54 stitches)
- Row 24: (4 SC, INC, 4 SC) 6 times (60 stitches)
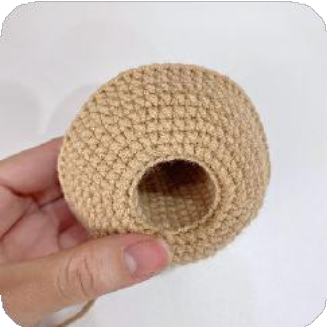
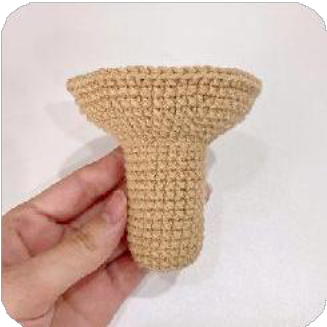
At this stage, gently push the cylindrical part inward with your fingers to start forming the pot shape.
- Rows 25-32: 60 SC (60 stitches) – Continue for 8 rows.
- Row 33: (4 SC, DEC, 4 SC) 6 times (54 stitches)
- Row 34: 54 SC (54 stitches)
- Row 35: (7 SC, DEC) 6 times (48 stitches)
- Row 36: 48 SC (48 stitches)
- Row 37: (2 SC, DEC, 2 SC) 8 times (40 stitches)
- Row 38: (3 SC, DEC) 8 times (32 stitches) – Stuff the pot firmly with fiberfill at this point.
- Row 39: (SC, DEC, SC) 8 times (24 stitches)
- Row 40: (SC, DEC) 8 times (16 stitches)
- Row 41: 8 DEC (8 stitches)
Fasten off and cut the yarn, weaving in the tail to secure the opening.
Nose
Using dark brown yarn, crochet the capybara’s nose:
- Row 1: 8 SC in MR (8 stitches)
Fasten off and cut, leaving a tail for sewing.
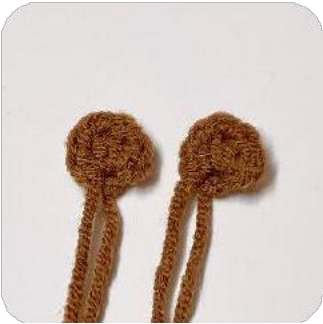
Ears (Make 2)
Using dark brown yarn, create two ears:
- Row 1: (CH, HDC, 2 DC, HDC, CH) in MR (4 stitches)
Cut yarn and leave a long tail for sewing.
Front Legs (Make 2)
Using dark brown yarn, make two front legs:
- CH 5, start in 3rd CH from hook: 3 HDC, CH
Cut yarn and leave a long tail for sewing.

Back Legs (Make 2)
Using dark brown yarn, make two back legs:
- Row 1: 5 SC in MR (5 stitches)
- Row 2: 5 INC (10 stitches)
- Rows 3-6: 10 SC (10 stitches) – Continue for 4 rows.
- Row 7: 5 DEC (5 stitches)
Cut yarn and leave a long tail for sewing.
Assembly & Finishing: Capybara Pot
Now it’s time to bring your capybara to life by attaching all the crocheted pieces and adding details.
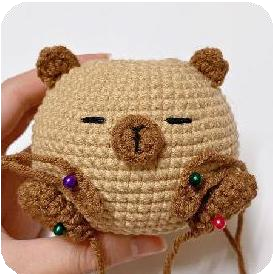
- With black yarn, embroider two straight lines for closed eyes between rows 24-25, approximately 5 stitches apart.