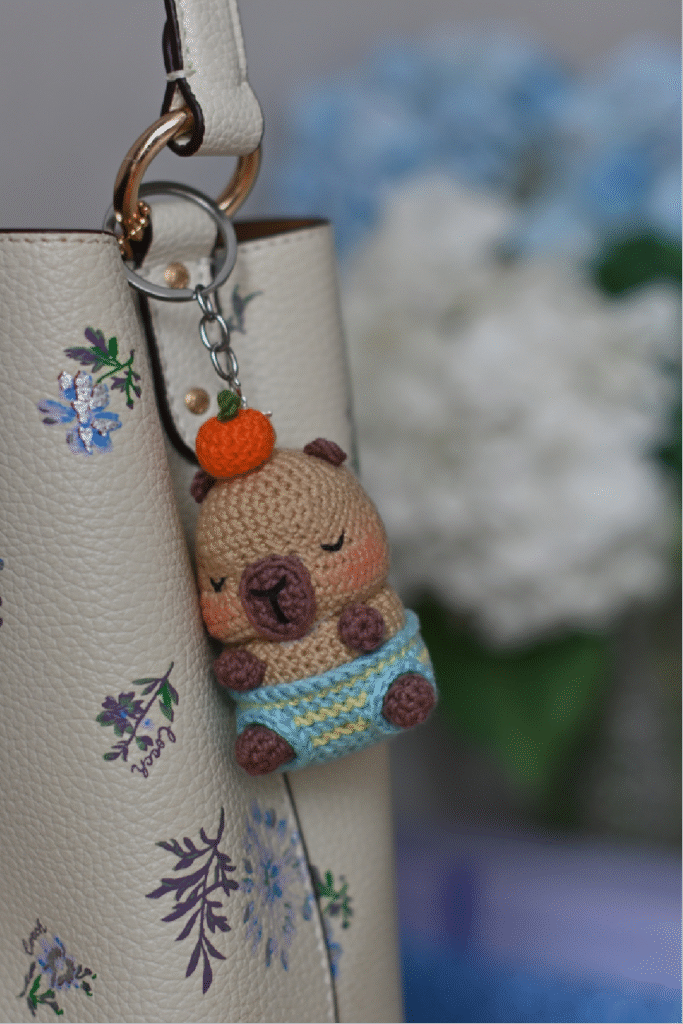
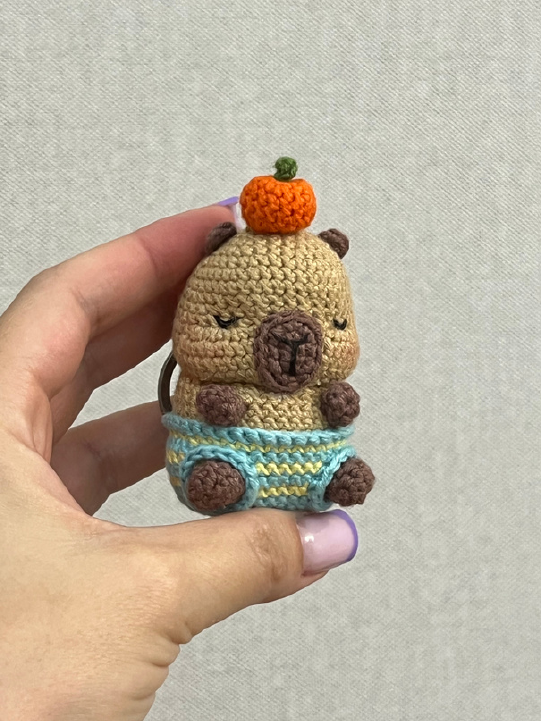
Amigurumi Capybara Keychain Pattern
Materials
To create your adorable Capybara Keychain, gather these essential crochet supplies. Using the specified materials will result in a finished toy approximately 6.5-7 cm in size.
Yarn
We recommend Yarn Art Baby Cotton (50g/165m; 50% cotton, 50% acrylic) in the following shades:
- 405: Light brown
- 407: Brown
- 421: Orange
- 446: Turquoise
- 431: Light yellow
- 440: Green
Tools & Notions
- Hook: 2 mm crochet hook
- Needle: Blunt-ended sewing needle
- Scissors: For cutting yarn
- Pins: Sewing pins for positioning pieces
- Stuffing: Fiberfill for toy stuffing
- Pastel/Blush: Dry pastel or peach-colored blush for tinting cheeks
- Embroidery Floss: DMC embroidering thread in black (4 threads)
- Keychain Fastener: For the final assembly
Abbreviations
Familiarize yourself with these standard crochet abbreviations used throughout the pattern:
- MR: Magic ring
- sc: Single crochet
- inc: Increase (2 single crochets in one stitch)
- dec: Decrease (2 single crochets together)
- ch: Chain
- 3in1: Crochet 3 single crochets in one stitch
- sl st: Slip stitch
- BLO: Back loops only
- FLO: Front loops only
- (…): Number in brackets indicates the total number of stitches in a round
- (…)*N: Repeat the instruction in brackets N times
Understanding the Extra Stitch: A Tip for Amigurumi Beginners
When crocheting amigurumi in continuous rounds, you might notice the stitch marker for the beginning of the round gradually shifting to the right. To maintain the correct shape and alignment, especially for symmetrical pieces, an “extra stitch” is often used.
The extra stitch is simply an additional single crochet (1sc) worked at the end of a round, *after* you have completed the specified number of stitches for that round. After working this extra stitch, you then shift your stitch marker to this new stitch. This effectively repositions the start of your next round, aligning it as needed.
Important: This extra stitch is solely for alignment and is NOT counted as part of the stitch count for the round. Always refer to the number in brackets (…) for the actual stitch count of your round, excluding any extra stitches for marker alignment.
Gauge
Gauge is not explicitly provided in this pattern. Your finished size may vary depending on your yarn weight, hook size, and personal tension. The stated finished size of 6.5-7 cm serves as a guideline using the recommended materials.
Finished Size
The finished Capybara Keychain, when crocheted with the indicated materials, will measure approximately 6.5-7 cm.
Crochet Pattern Details
Let’s begin crocheting your adorable Capybara Keychain! Follow these step-by-step instructions for each component.
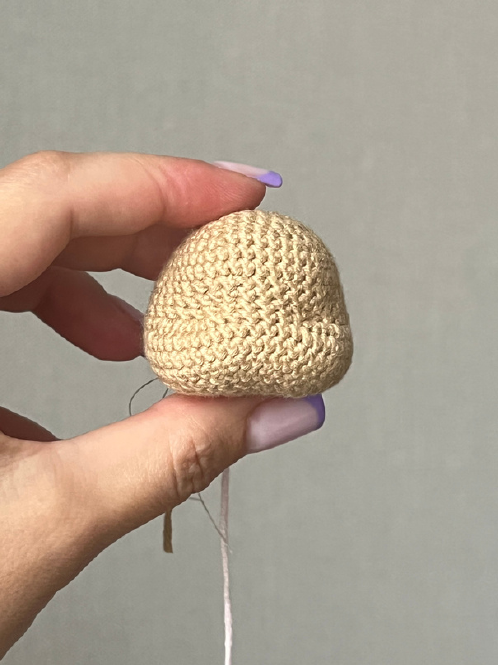
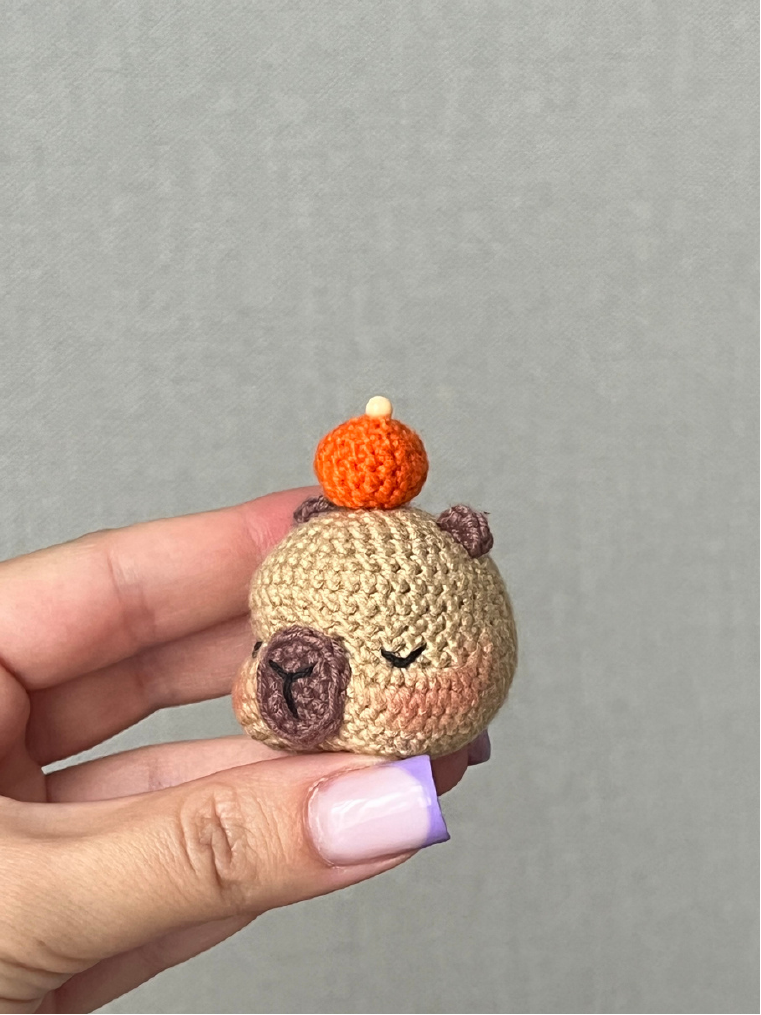
Head
Crochet the head using light brown yarn. Ensure the marker for the beginning of the round runs along the back center of the head. Crochet extra stitches as needed to maintain alignment.
- 6sc in a MR (6)
- 6inc (12)
- (1sc, inc)*6 (18)
- (2sc, inc)*6 (24)
- (3sc, inc)*6 (30)
- 2sc, inc, (4sc, inc)*5, 2sc (36)
- (6sc, inc)*2, 8sc, (inc, 6sc)*2 (40)
- 40sc (40)
- 10sc, inc, (2sc, dec)*4, 2sc, inc, 10sc (38)
- 38sc (38)
- 10sc, inc, (4sc, dec)*2, 4sc, inc, 10sc (38)
- Round 12 (Special Stitches):
- If you crochet in the usual way (right side out): 13sc, FLO (3in1)*3, 6sc in both loops, FLO (3in1)*3, 13sc in both loops (50)
- If you crochet with the wrong side out: 13sc, BLO (3in1)*3, 6sc in both loops, BLO (3in1)*3, 13sc in both loops (50)
- Rounds 13-15: 50sc (3 rounds)
- (3sc, dec)*10 (40)
- (2sc, dec)*10 (30)
- (1sc, dec)*10 (20)
- Gradually stuff the head firmly with fiberfill as you crochet.
- 10dec (10)
- 5dec (5)
Cut the yarn, but do not pull the opening closed yet, as you will need this opening for needle sculpting.
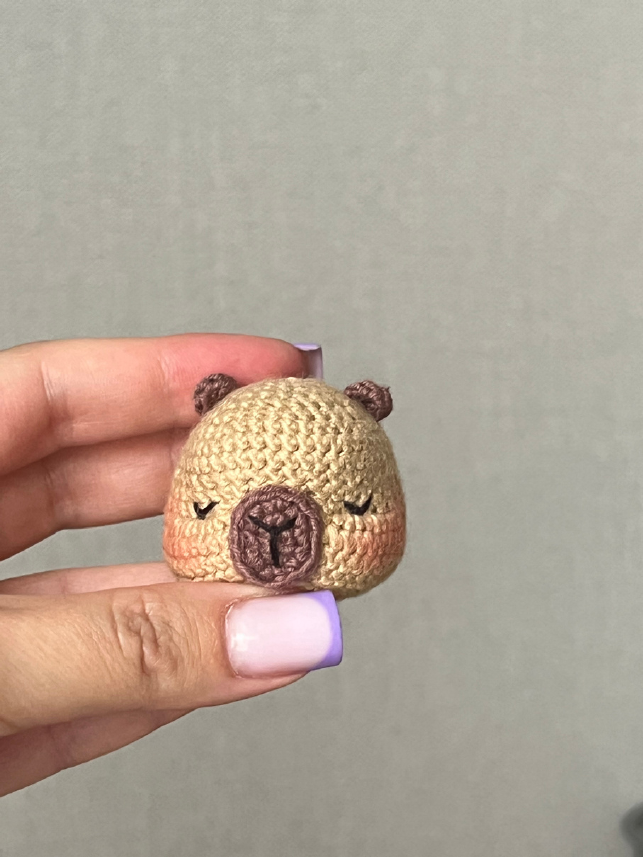
Head Design & Facial Features
These steps add character to your Capybara’s head.
- Eye Needle Sculpting:
Insert your blunt needle into point 1 (the remaining opening on the head). Exit the needle through point 2. Re-insert the needle into point 3 and exit back through point 1. Gently pull to create a slight indentation for the eye. Repeat this process for the second eye using points 4 and 5 (which mirror points 2 and 3). Secure and hide the thread ends inside the head.
Points 2, 3 and 4, 5 are located between rounds 11 and 12, directly above the ‘3in1’ sections you created.


- Embroider Eyes: After needle sculpting, use black DMC embroidering floss (4 threads) to embroider sleeping eyes over the sculpted indentations.
Snout
Crochet the snout using brown yarn. Begin with a chain and work around both sides.
Chain 4. Starting from the second chain from the hook:
- 2sc, 3sc in the last chain, then continue on the other side of the chain: 1sc, inc (8)
- inc, 1sc, 3inc, 1sc, 2inc (14)
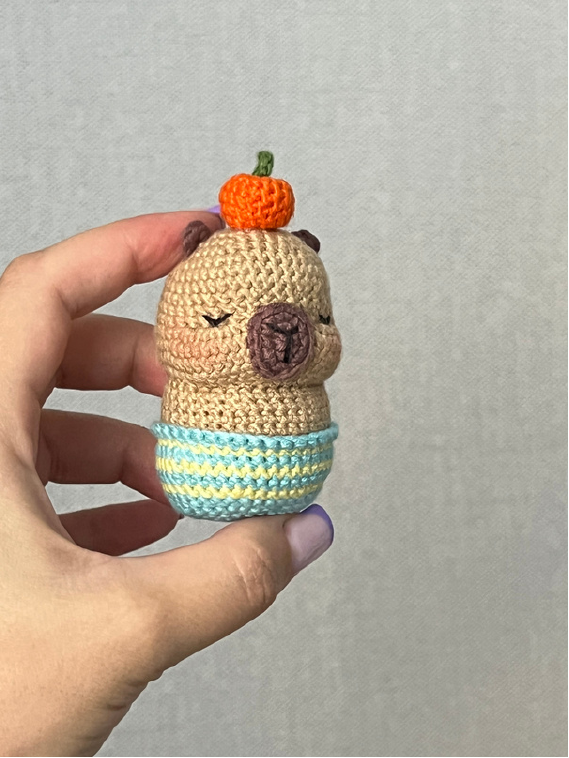
Cut the yarn, leaving a long tail for sewing. Using sewing pins, carefully position and secure the snout onto the head, then sew it in place. With black DMC embroidering floss (4 threads), embroider the nose onto the snout. Finally, use dry pastel or peach-colored blush to add a touch of color to the cheeks.
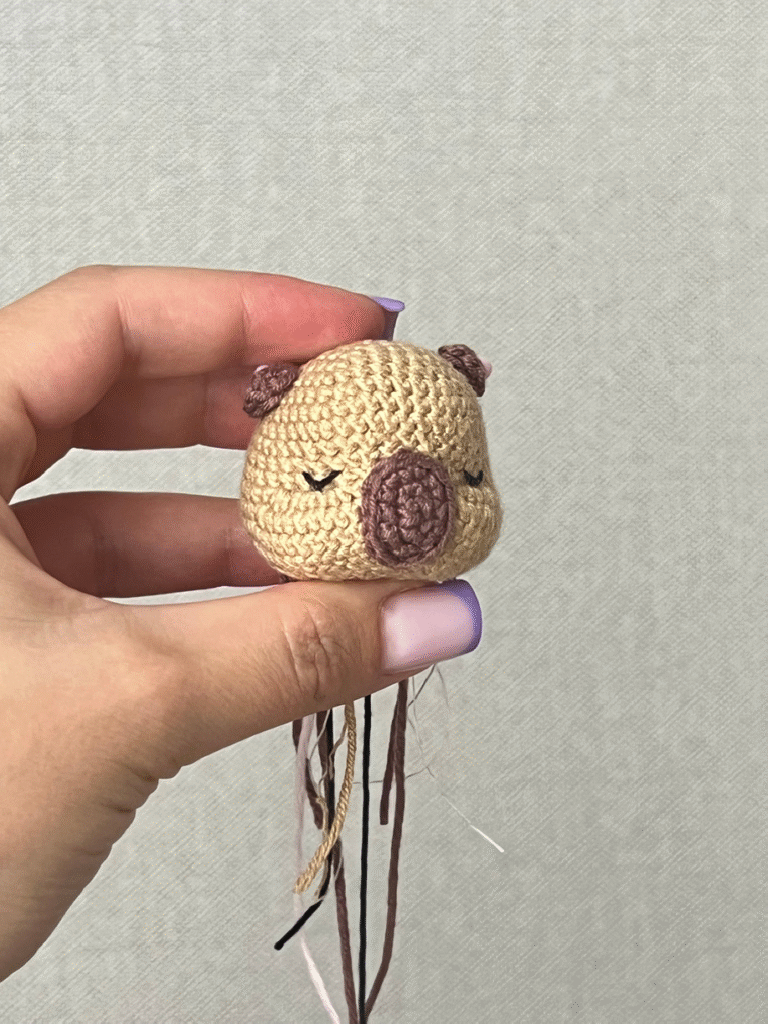

Ears (Make 2)
Crochet both ears using brown yarn.
4sc in a MR (4)
Cut the yarn, leaving a long tail for sewing. Pin the ears to the head in your desired position and then sew them securely.
Orange
Crochet the orange using orange yarn.
- 6sc in a MR (6)
- 6inc (12)
- (2sc, inc)*4 (16)
- 16sc (16)
- (2sc, dec)*4 (12)
- 6dec (6)
Cut the yarn, leaving a long tail for sewing, and pull the remaining hole closed.
Leaf for the Orange
Crochet the leaf using green yarn. Chain 3. Starting from the second chain from the hook:
1sc, sl st.
Cut the yarn, leaving a long tail for sewing. Sew the leaf onto the orange. Then, sew or glue the completed orange to the head as shown in the photo.
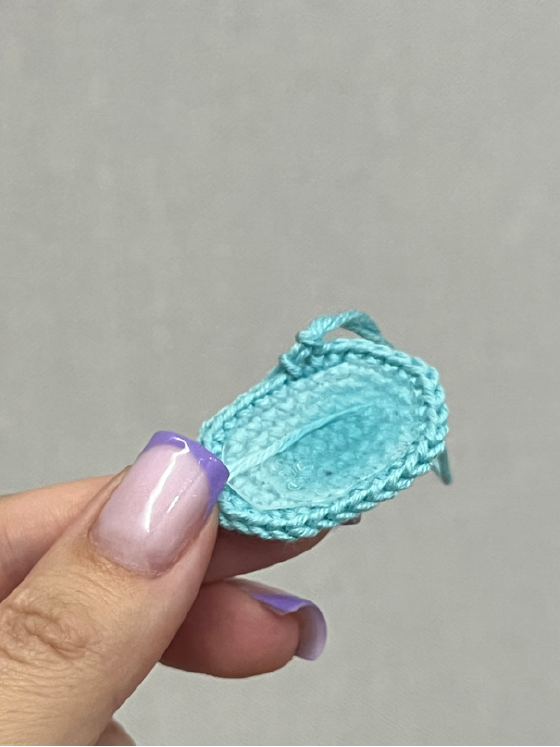
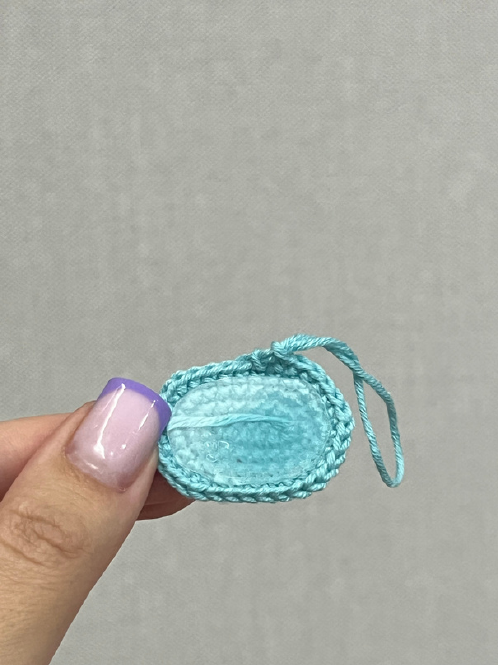
Body
Start crocheting the body using turquoise yarn. This part also includes a plastic insert for stability.
Chain 7. Starting from the second chain from the hook:
- 5sc, 3sc in the last chain, then continue on the other side of the chain: 4sc, inc (14)
- inc, 4sc, 3inc, 4sc, 2inc (20)
- 1sc, inc, 4sc, (1sc, inc)*3, 4sc, (1sc, inc)*2 (26)
Trace the shape of the crocheted piece onto thick cardboard or plastic (e.g., from a container lid). Cut out this shape to create a base for the body. Set it aside for now.
- 2sc, inc, 4sc, (2sc, inc)*3, 4sc, (2sc, inc)*2 (32) + 6sc (extra stitches to move the marker)
Move your stitch marker. From now on, it should run along the middle of the back. Align the marker by crocheting extra stitches if necessary. Glue the plastic base you cut earlier to the inner side of this crocheted part, ensuring a stable bottom for your body.
- 8sc, inc, 14sc, inc, 8sc (34)
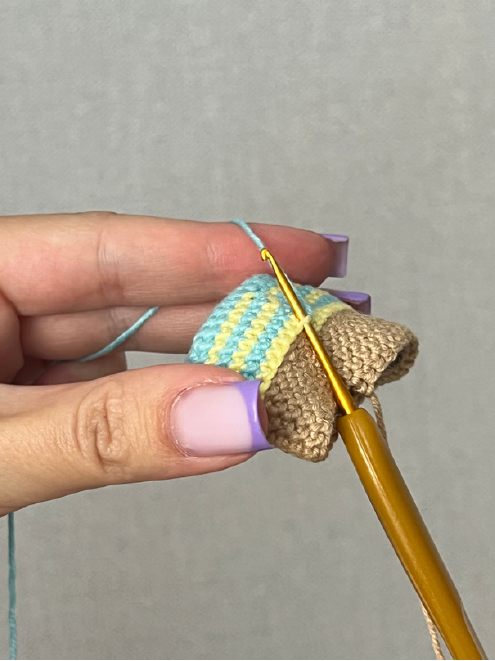
- Change color to light yellow: 2sc, inc, 11sc, inc, 4sc, inc, 11sc, inc, 2sc (38)
- Change color to turquoise: 7sc, inc, 3sc, inc, 14sc, inc, 3sc, inc, 7sc (42)
- Change color to light yellow: 42sc (42)
- Change color to turquoise: 42sc (42)
- Change color to light yellow: 7sc, dec, 3sc, dec, 14sc, dec, 3sc, dec, 7sc (38)
Change color to light brown. Leave the turquoise yarn hanging in front (do not cut it yet), and cut the light yellow yarn.
- Round 11 (Special Loops):
- If you crochet in the usual way (right side out): BLO: 2sc, dec, 30sc, dec, 2sc (36)
- If you crochet with the wrong side out: FLO: 2sc, dec, 30sc, dec, 2sc (36)
- Rounds 12-13: 36sc (2 rounds)
- 14sc, dec, 4sc, dec, 14sc (34)
- 34sc (34)
Cut the yarn, leaving a long tail for sewing.
Now, return to the turquoise yarn you left in front earlier. Working into the front loops of round 10, work 38sc (hold the head towards you for easier access). Cut the yarn and hide it inside the body.
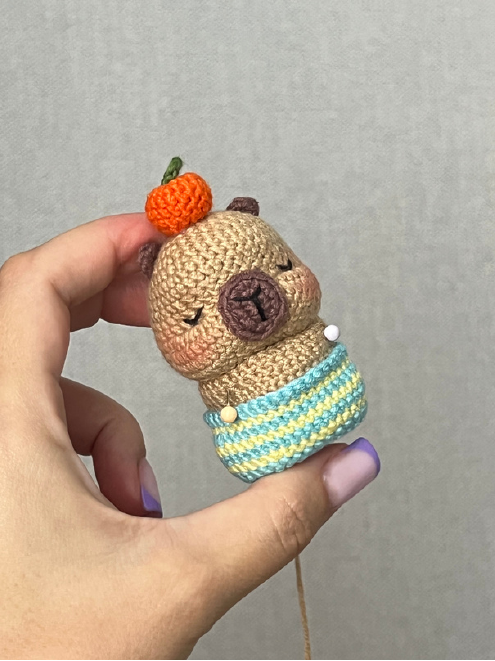
Using sewing pins, attach the body to the head. Ensure that the markers for the beginning of the round on both the body and the head are aligned in the middle of the back. This is crucial for correct positioning. Sew the head to the body, stuffing the body with fiberfill as you sew.
Legs (Make 2)
Crochet both legs using brown yarn.
- 6sc in a MR (6)
- (1sc, inc)*3 (9)
- Rounds 3-4: 9sc (2 rounds)
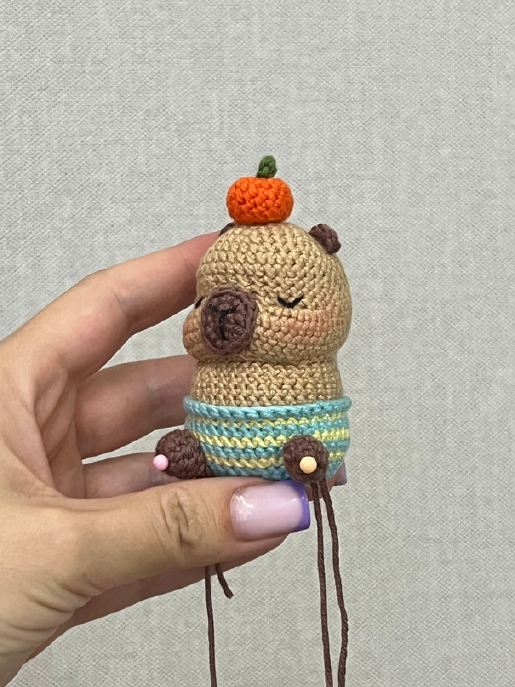
Cut the yarn, leaving a long tail for sewing. Pin the legs to the lower part of the body, as shown in the photos, and sew them securely. Then, attach turquoise yarn and work approximately 15sc around the base of each leg, grabbing stitches on the body, to create a neat border. Cut the yarn, fasten off, and hide the ends inside.
Arms (Make 2)
Crochet both arms using brown yarn.
- 6sc in a MR (6)
- Rounds 2-3: 6sc (2 rounds)
Cut the yarn, leaving a long tail for sewing. Pin the arms to the upper part of the body, as indicated in the photo, and sew them firmly in place.
Assembly & Finishing
Your Capybara Keychain is almost complete! Just a few final touches.
- Sew a keychain fastener securely to the top of the Capybara’s head (the crown).