Crochet the Owl Granny Square
Materials You’ll Need
- Yarn: Worsted Weight Yarn (like Vanna’s Choice) in the following colors:
- Body: Tan/Light Brown
- Accent: A contrasting color for the “ears” and inner circle (e.g., pink)
- Border: 2-3 colors for the granny square rounds
- Details: Small amounts of black and yellow
- Crochet Hook: US G-6 (4.25 mm)
- Eyes: Two small black buttons (½ inch or smaller)
- Notions:
- Scissors
- Yarn Needle
- Stitch Markers (helpful for keeping place)
Stitch Abbreviations (US Terms)
- ch: chain
- sl st: slip stitch
- sc: single crochet
- hdc: half double crochet
- dc: double crochet
- tc: triple (treble) crochet
Pattern Instructions
Part 1: Making the Owl
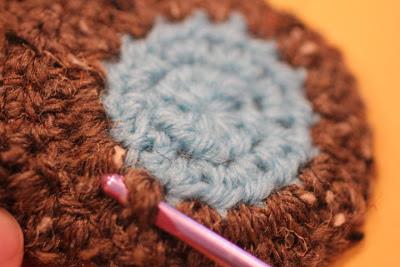
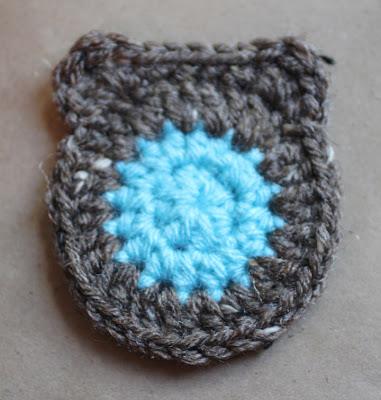
We start by creating the owl’s face in the center.
- Round 1: With your main body color (tan), create a magic ring. Ch 1 (does not count as a stitch). Work 8 hdc into the ring. Join with a sl st to the first hdc. Ch 1. (8 hdc)
- Round 2: Work 2 hdc in each stitch around. Join with a sl st to the first hdc. Change to your accent color (e.g., pink). (16 hdc)
- Round 3: Ch 2 (counts as first dc). Work 1 dc in the same stitch. Work 2 dc in each remaining stitch around. Join with a sl st to the top of the beginning ch-2. Ch 1. (32 dc)
- Round 4 (Making the Ears): This round shapes the top of the head into “ears”.
- Stitch 1: Work 1 hdc in the first stitch.
- Stitch 2: In the next stitch, work (1 dc, 1 tc, 1 dc). This creates the first “ear”.
- Stitches 3-7: Work 1 sc in each of the next 5 stitches.
- Stitch 8: In the next stitch, work (1 dc, 1 tc, 1 dc). This creates the second “ear”.
- Stitch 9: Work 1 hdc in the next stitch.
- Join with a sl st to the first hdc.
- Fasten off and weave in the ends. Turn the owl over so the “right side” (the side without the yarn tails) is facing you.
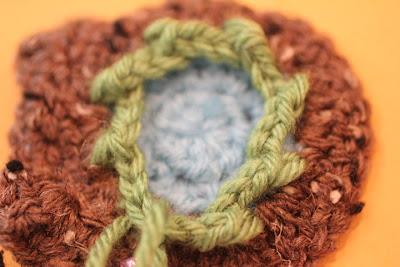
Part 2: Creating the Foundation for the Square
Now, we’ll build a frame around the owl to turn it into a square.
- Look at the back of your owl. You will see the posts of the brown dc stitches from Round 3 connecting to the pink round.
- Starting to the right of an “ear”, insert your hook under the bottom of one of these dc stitches. Draw up a loop of your first border color.
- Ch 3.
- Skip the next dc stitch. Insert your hook under the bottom of the following dc stitch, work 1 sc.
- Ch 3.
- Repeat from * all the way around the owl. You will be alternating (sc, ch3, skip) around the circle.
- You should end up with 8 sc joins and 8 ch-3 spaces.
- Join with a sl st to the base of the very first ch-3 you made.
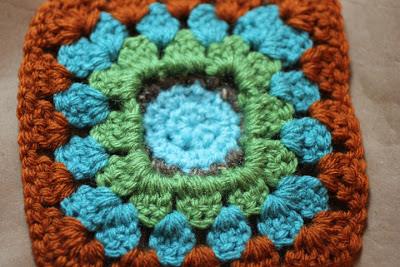
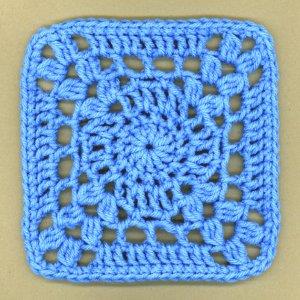
Part 3: The First Granny Round
Now we work into the ch-3 spaces to form the first square round.
- You are now working in the round of ch-3 spaces.
- In the first ch-3 space, work: (ch 3, 2 dc, ch 1, 3 dc). This is your first corner.
- Ch 1.
- In the next ch-3 space, work (3 dc). This is the side of the square. Ch 1.
- *In the next ch-3 space, work (3 dc, ch 1, 3 dc) for the next corner. Ch 1.
- In the next ch-3 space, work (3 dc) for the side. Ch 1.
- Repeat from * around until you have worked all 4 corners and 4 sides.
- Join with a sl st to the top of the beginning ch-3.
- Fasten off.
Part 4: Adding More Granny Rounds
The pattern continues with classic granny square rounds. Each round adds more groups on the sides between the corners.
Round 2 with New Color:
- Join your new color in any corner space.
- In that corner space, work (ch 3, 2 dc, ch 1, 3 dc). Ch 1.
- *In the next space (a side space), work (3 dc). Ch 1.
- In the next space (another side space), work (3 dc). Ch 1.
- In the next corner space, work (3 dc, ch 1, 3 dc). Ch 1.
- Repeat from * around.
- Join and fasten off.
Round 3 with New Color:
- Join your next color in any corner space.
- Work your corner: (ch 3, 2 dc, ch 1, 3 dc). Ch 1.
- *Work (3 dc, ch 1) in each of the next three side spaces.
- In the next corner space, work (3 dc, ch 1, 3 dc). Ch 1.
- Repeat from * around.
- Join and fasten off.
- Weave in all ends.
You can continue adding rounds following this pattern: each new round will have one more 3-dc group on each side between the corners.

Part 5: Adding the Owl’s Face
- Eyes: With black yarn, make a magic ring. Ch 1, work 8 hdc into the ring. Join with a sl st. Fasten off, leaving a long tail for sewing. Sew these small black circles onto the owl’s face. Sew your small black buttons into the center of each circle.
- Beak & Feet: Using your yarn needle and yellow yarn, embroider the details.
- Beak: Make a small, upside-down “V” shape between and just below the eyes.
- Feet: At the bottom of the owl, make two small clusters of three loops each to look like talons

Tips for Success
- Tension: Keep your stitches consistent, especially when working the initial frame around the owl. This will ensure your square lays flat.
- Button Safety: If this square is for a baby, consider using safety eyes or embroidering the eyes instead of buttons to avoid a choking hazard.
- Blocking: Gently block your finished square to open up the granny stitches and make it perfectly square.
- Get Creative: Feel free to use different colors for your owl! A white owl with gray accents would be a beautiful snowy owl
Final Thoughts
Congratulations! You’ve just created an unbelievably cute and unique granny square that is sure to be a treasured item. This little owl is full of personality and is a joy to make