Crochet Eyeball Coaster Pattern
Materials
- 5 mm crochet hook
- Bernat Premium #4 worsted (medium) weight yarn in Black, White, Red, and Blue
- Yarn needle
- Scissors
Abbreviations
This crochet pattern is written in standard US terminology.
- st/sts: stitch/stitches
- sl st: slip stitch
- Ch: chain
- SC: single crochet
- HDC: half double crochet
- DC: double crochet
Finished Size
- Approximately 10 cm in diameter
Crochet Eyeball Coaster Instructions
Important Pattern Notes
Before you begin, please review these technical notes for a successful project:
- All rounds are joined with a slip stitch.
- Work the joining slip stitches into the first stitch of the round, not into the starting chains.
- The stitch count for each round is provided in brackets at the end of the line, for example: (10 sts).
- Stitch counts do not include chains or slip stitches.
Part 1: The Eyeball Coaster Base
You will work in continuous rounds, changing colors as indicated to create the pupil, iris, and sclera (the white part) of the eye.
Pupil (Start with Black Yarn)
Round 1: Make a magic circle, Ch 1, and work 10 HDC into the magic circle. Join with a sl st to the first HDC. (10 sts)
Iris (Change to Blue Yarn)
Round 2: Ch 2. Work 2 DC in each stitch around. Join with a sl st. (20 sts)
Whites of the Eye (Change to White Yarn)
Round 3: Ch 2. *Work 2 DC in the first st, 1 DC in the next st.* Repeat from * to * around. Join with a sl st. (30 sts)
Round 4: Ch 1. *Work 1 SC in the next 2 sts, 2 SC in the next st.* Repeat from * to * around. Join with a sl st. (40 sts)
Bloody Edge (Change to Red Yarn)
Round 5: Ch 1. *Work 1 SC in the first st, 2 SC in the next st, 1 SC in the next 2 sts.* Repeat from * to * around. Join with a sl st. (50 sts)
Fasten off, leaving a long 60 cm (approx. 24-inch) yarn tail. You will use this tail to embroider the bloodshot veins.
Assembly: Creating the Bloodshot Effect
Using the long red yarn tail and a yarn needle, you will now add the signature bloodshot details to your coaster. These are simple, straight stitches that create a “V” shape.
Step 1: Making the Veins
Start with your 60 cm red yarn tail threaded onto your yarn needle.
- Bring your needle down from front to back, inserting it in the space between Round 3 (white) and Round 4 (white).
- Bring the needle up from back to front through the middle of a stitch in Round 4, just to the left of the line you just made.
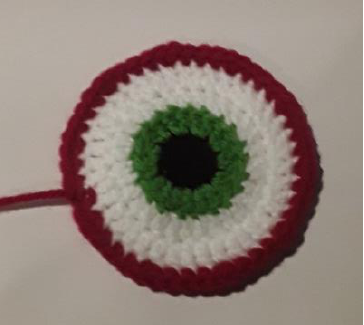
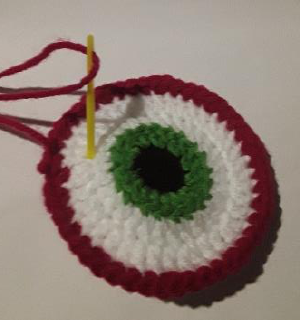
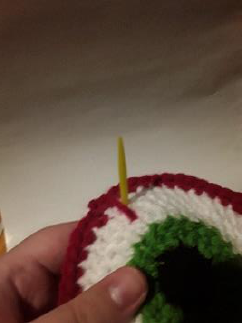
Your first stitch should look like the image above.
- Now, bring the needle down again into the space between Rounds 3 and 4, but this time go into the space just to the right of your first stitch. This completes one “V” shaped vein.
Repeat this process, creating “V” shaped veins randomly spaced around the white part of the eye until you are happy with the look. Secure the yarn tail on the back of your work and weave in the end.
Step 2: Finishing Touches
To make your eyeball pop, add a couple of final embroidered details.
- Outline the Iris: Using black yarn and your needle, create a simple backstitch or running stitch around the edge of the blue iris, where it meets the white. This adds definition.
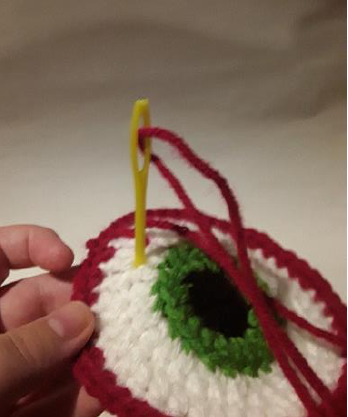
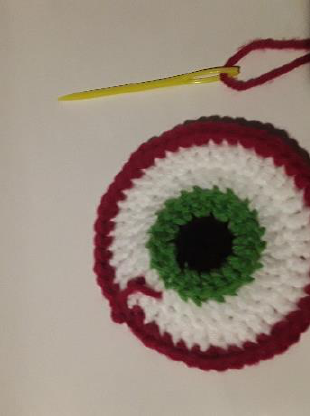
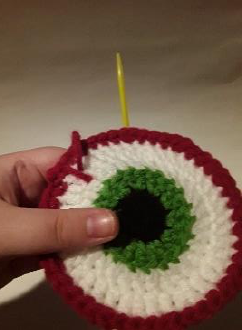
- Add the Glare: With white yarn, make a few small, straight stitches on the black pupil to create the look of a reflection or glare. This simple touch adds a lot of life to your project!
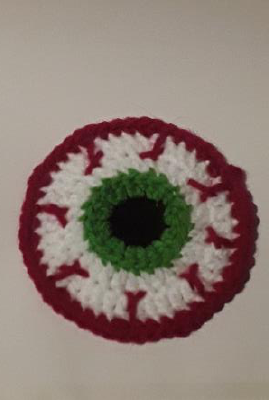
Weave in all remaining ends, and your spooky eyeball coaster is complete! Make a set for a fun and festive touch to your Halloween decor.


