Crochet a Friendly Zombie Doll – Perfect for Walking Dead Fans!
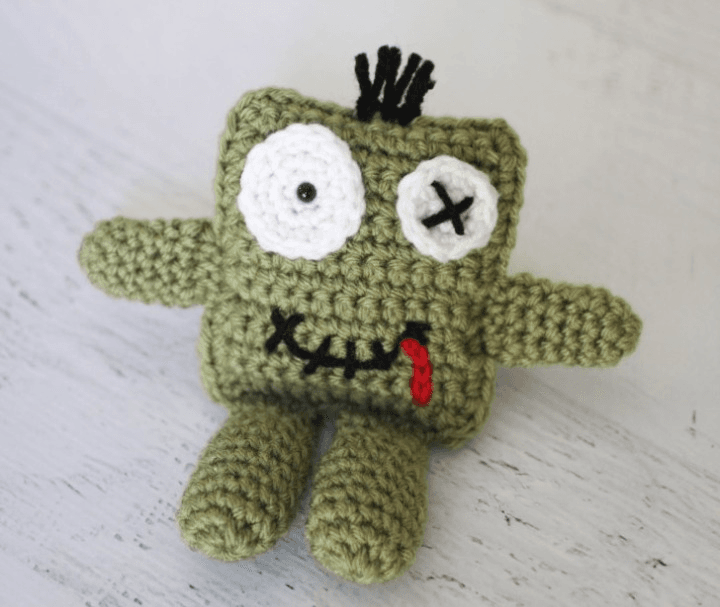
If you love The Walking Dead or just enjoy cute, creepy-cuddly creatures, this friendly crochet zombie doll is the perfect project for you Unlike the mindless, flesh-hungry zombies we usually see, this little guy is sweet, snuggly, and full of charm. With his stitched-on grin, mismatched eyes, and a touch of “blood” detail, he’s more huggable than horrifying.
This pattern is great for beginners—it uses basic stitches like single crochet (SC) and magic rings, making it an excellent introduction to amigurumi. Plus, you can customize his size, arm length, or even add extra zombie details if you’re feeling creative
Finished, this zombie measures about 6.5 inches tall and wide, making him a fun desk buddy, Halloween decoration, or gift for fellow zombie enthusiasts. Mark your calendars—this little guy might just be the perfect companion for The Walking Dead Season 5 premiere (or any cozy crafting session)
Ready to bring your undead pal to life?
Let’s get stitching
Materials
- Yarn:
- Main color: Green worsted weight (Lion Brand Vanna’s Choice in Dusty Green used here)
- Small amounts of white, black, and red yarn for details
- Hook: Size G (4.0 mm)
- Stuffing: Poly-fil
- Other Supplies:
- Stitch marker
- Tapestry needle
- One small safety eye or button (for the zombie’s peeper)
Abbreviations
- Magic Ring (tutorial linked in original pattern)
- SC = Single Crochet
- SC Decrease = Single Crochet Decrease (invisible or regular)
- HDC = Half Double Crochet
- DC = Double Crochet
Finished Size
Approximately 6.5 x 6.5 inches (from head to toe and arm to arm)
Pattern Instructions
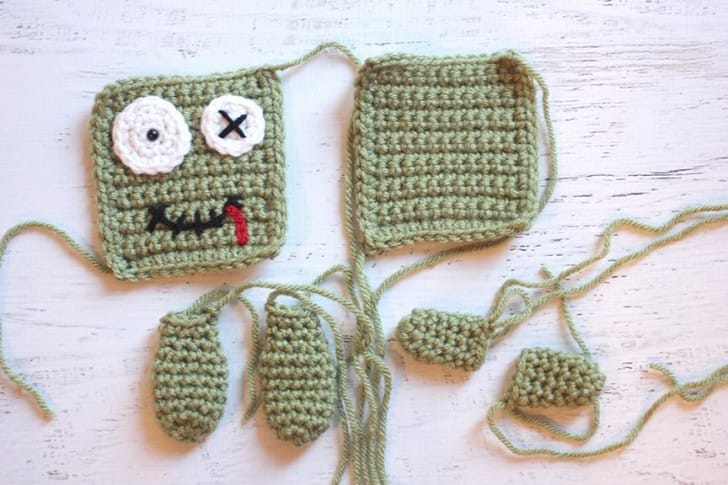
Zombie Head & Body (Make 2)
- Chain 13, then SC in the second chain from the hook and across (12 SC).
- Rows 2–14: SC in each stitch across, chain 1, turn (12 SC per row).
- Fasten off, leaving a long tail on one piece for sewing.
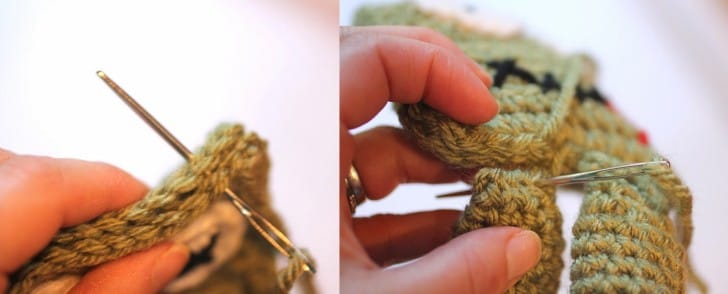
Assembly:
- Before sewing, attach the eyes (see below) and stitch on the mouth with black yarn.
- Add red “blood” details with surface slip stitches if desired.
- Lightly stuff with poly-fil, then sew the two head pieces together.
Zombie Eyes
Large Eye:
- Magic ring, chain 1, make 5 SC in the ring, join, chain 1.
- Round 2: 2 SC in each stitch around (10 SC), join, chain 1.
- Round 3: SC in first stitch, 2 SC in next, repeat around (15 SC). Fasten off, leaving a tail to sew onto the head.
Small Eye:
- Magic ring, chain 1, make 6 SC in the ring, join, chain 1.
- Round 2: 2 SC in each stitch around (12 SC). Fasten off with a tail.
Attaching Eyes:
- Sew both eyes onto the head.
- Add a safety eye or button to the center of the large eye.
- Stitch an “X” with black yarn on the small eye for a fun, cartoonish look.
Zombie Arms (Make 2)
- Magic ring, 6 SC in ring (work in continuous rounds).
- Round 2: *2 SC in first stitch, SC in next 2*, repeat around (8 SC).
- Rounds 3–6: SC in each stitch (8 SC).
- Fasten off, lightly stuff, and sew shut. Leave a tail to attach to the body.
Tip: Adjust arm length by adding more rounds
Zombie Legs (Make 2)
- Magic ring, 8 SC in ring (work in continuous rounds).
- Round 2: 2 SC in first stitch, SC in next, repeat around (12 SC).
- Rounds 3–6: SC in each stitch (12 SC).
- Round 7: SC decrease, SC in next, repeat around (8 SC).
- Rounds 8–9: SC in each stitch (8 SC).
- Fasten off, lightly stuff, and sew shut. Leave a tail to attach to the body.
Finishing Touches
- Sew arms and legs onto the body using the long tails.
- Add hair: Tie a few strands of black yarn at the top of the head for spiky zombie hair.
- Embroider details like extra stitches or “wounds” if you want a more rugged look.
Tips for Beginners
- Magic rings can be tricky at first—practice a few times before starting!
- Stuff lightly to keep your zombie soft and squishy.
- Use stitch markers to keep track of rounds.
- Customize! Make your zombie unique with different colors or expressions.
Final Thoughts
And there you have it—a friendly, crocheted zombie doll ready to bring a little undead charm to your life! Whether you’re making this for yourself, a fellow Walking Dead fan, or just for fun, this little guy is sure to delight.