Transform Your Old Jeans into Chic Baskets: 20 Stunning DIY Ideas
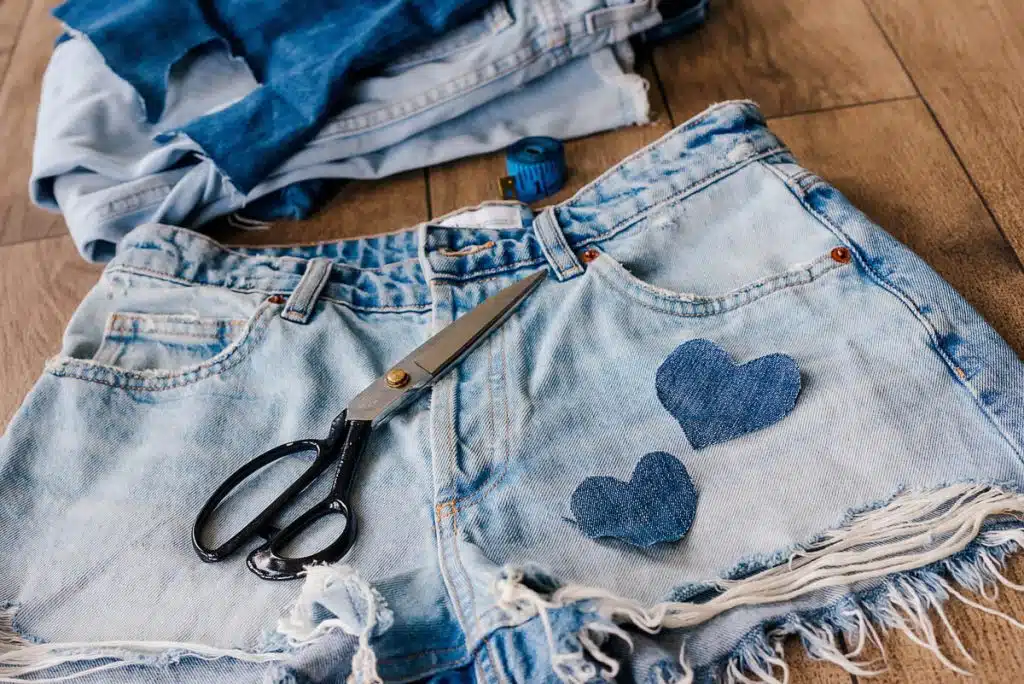
Hey, fellow crafters and home decor dreamers! Take a peek into your closet. Do you have a pile of old jeans staring back at you? The ones that don’t quite fit anymore, have a rip in the wrong place, or are simply out of style? We all do! But before you think about tossing them, what if I told you that pile of denim is actually a treasure trove of crafting material, just waiting to be transformed into something beautiful and incredibly useful?
Welcome to the wonderful world of upcycled denim! We’re going on a creative journey to turn that forgotten fabric into gorgeous, sturdy, and stylish DIY denim baskets. From super-simple no-sew projects you can finish in an afternoon to more intricate woven wonders, there’s a project here for every skill level.
These baskets aren’t just a win for your wallet (hello, free materials!); they’re a win for the planet, too. By upcycling, you’re giving new life to old clothes and creating unique, personalized pieces that add a touch of rustic charm to any room. Imagine a chic denim bin holding your favorite magazines, a cute little pot for your craft supplies, or a sturdy basket for your kid’s toys—all made by you!
So, grab your scissors, dust off that glue gun, and let’s dive into 20 incredible DIY denim basket ideas that will de-clutter your home and unleash your inner artist. Don’t forget to pin your favorite ideas to your DIY & Crafts board to save them for later!
Before You Begin: Your Denim Crafting Toolkit
A little prep work goes a long way in ensuring your projects turn out perfectly. Here’s a quick guide to what you’ll need and some pro tips for working with this wonderfully rugged fabric.
Gathering Your Denim:
- Variety is Key: Don’t just stick to one shade of blue! Collect jeans in various washes—light, dark, acid-washed, and even colored denim. The contrast will make your projects, especially the patchwork and woven ones, look amazing.
- Weight Matters: Heavier, non-stretch denim is fantastic for sturdy, structured baskets. Lighter, stretchier denim (jeggings) works well for projects that require more flexibility, like drawstring bags or lining.
- Don’t Forget the Details: The most charming parts of a pair of jeans are the details! Carefully save the pockets, waistbands, belt loops, seams, and even the zippers. These elements can become unique features on your baskets.
Essential Tools & Supplies:
While each project has its own specific list, here are the basics you’ll likely need for most of them:
- Sharp Fabric Scissors or a Rotary Cutter & Mat: Denim is tough! Sharp scissors are non-negotiable to get clean cuts and save your hands from aching. A rotary cutter is a game-changer for cutting long, straight strips.
- Hot Glue Gun & Plenty of Glue Sticks: Your best friend for all the no-sew projects. Opt for high-temp glue for a stronger, more permanent bond.
- Strong Fabric Glue: For projects where you want a flatter finish than hot glue provides (like laminating denim onto cardboard).
- Ruler or Measuring Tape: For accurate measurements.
- Sewing Machine (Optional): A machine with a denim or heavy-duty needle (size 90/14 or 100/16) will make sewn projects a breeze.
- Hand-Sewing Needles & Strong Thread (Optional): For smaller sewing tasks or for those who prefer hand-stitching. Upholstery thread is a great choice for its strength.
- Seam Ripper: An essential tool for carefully deconstructing jeans and salvaging pockets and waistbands.
Category 1: No-Sew Wonders (Perfect for Beginners!)
No sewing machine? No problem! These projects rely on clever cutting, folding, and gluing to create fabulous and functional baskets.
1. The 10-Minute Jean Leg Planter Pot
This is the ultimate quick-win project! It’s perfect for hiding a plain plastic planter pot and adding a rustic touch to your greenery.
- What You’ll Need: A leg from an old pair of jeans, a small planter pot, sharp scissors, a hot glue gun.
- Step-by-Step:
- Slide the planter pot inside the jean leg to measure the height. Add about 2 inches to the top and 2 inches to the bottom and cut the leg section off.
- Stand your pot on a flat surface and slide the jean leg sleeve over it.
- Fold the extra 2 inches of denim at the top down inside the pot, securing it to the inner wall with a few dabs of hot glue.
- Flip the pot over. Cut slits in the excess denim at the bottom, like sun rays.
- Fold each slit flap towards the center of the pot’s base, gluing them down one by one until the bottom is completely covered.
- Style It: For a classic look, use the bottom cuff of the jean leg as the top of your pot cover—no folding required!
2. The Glued Denim Coil Bowl
This project mimics the look of a coiled rope bowl but uses strips of denim instead. It’s wonderfully meditative to make.
- What You’ll Need: Lots of 1-inch wide denim strips (cut from the legs), a high-temp hot glue gun.
- Step-by-Step:
- Take your first denim strip and begin rolling it into a tight, flat spiral, like a snail shell. Add a tiny dab of glue every half-turn to keep it secure. This will be the base of your bowl.
- Continue coiling until your base is the desired diameter (e.g., 6 inches for a small catch-all bowl).
- To build the walls, stop gluing the strips flat and start gluing them on top of the edge of the previous row, slightly offset.
- Keep adding new strips by gluing the end of a new strip to the end of the last one.
- Continue coiling upwards until your basket reaches the desired height.
- Pro Tip: Alternate between light and dark denim strips for a beautiful, variegated look.
3. The Denim-Wrapped Cardboard Box
Transform a boring old shipping box into a chic, fabric-covered storage bin.
- What You’ll Need: A sturdy cardboard box, large pieces of denim, fabric glue or a hot glue gun, scissors.
- Step-by-Step:
- Cut a piece of denim large enough to wrap around the four outer sides of the box, with about an inch of overlap.
- Apply glue to one side of the box and press the denim down smoothly. Continue, one side at a time, pulling the fabric taut as you go. Secure the seam where the denim overlaps with glue.
- Fold and glue the excess denim at the top edge down inside the box.
- For the bottom, you can either fold the denim like you’re wrapping a present or cut a separate piece of denim to fit the base and glue it on.
- To make it even nicer, cut and glue denim or a coordinating fabric to line the inside of the box.
- Style It: Glue a salvaged belt loop on each side to create faux handles.
4. The No-Sew Pocket Wall Organizer
This isn’t a traditional basket, but it’s a brilliant storage solution that uses the best part of the jeans!
- What You’ll Need: Several back pockets (carefully cut from jeans with a seam ripper), a sturdy branch or dowel, twine or denim strips, hot glue.
- Step-by-Step:
- Decide on your layout. Arrange the pockets on a flat surface in a pattern you like.
- Cut a long, wide strip of denim from a jean leg to serve as the backing. Make it slightly wider than your dowel.
- Glue your pockets onto the backing strip.
- Fold the top edge of the backing strip over the dowel and glue it to itself on the back, creating a loop to hold the dowel.
- Tie a piece of twine or a braided denim strip to both ends of the dowel for hanging.
- Pro Tip: This is perfect for a craft room to hold scissors, brushes, and pens, or by the entryway for keys and mail.
5. The Waistband-Wrapped Canister
Upcycle an old coffee can or Pringles tube into a stylish desk caddy.
- What You’ll Need: An empty, clean can or tube, several waistbands from old jeans (with buttons and buttonholes are a bonus!), hot glue.
- Step-by-Step:
- Remove the belt loops from the waistbands unless you want to keep them for texture.
- Starting at the bottom of the can, apply a line of hot glue and press the end of a waistband onto it.
- Wrap the waistband tightly around the can in a spiral, adding glue as you go.
- When you reach the end of one waistband, simply glue it down and start the next one right where it left off.
- Continue until the entire can is covered. If you end with the buttonhole part of a waistband, you can fasten it to the button part for a fun, decorative closure!
Category 2: Simple Sewing Projects
If you have a sewing machine or don’t mind some hand-stitching, these projects offer more durability and a more professional finish.
6. The Classic Sewn Boxy Bin
This is the quintessential fabric basket. Once you master this simple technique, you can make them in any size.
- What You’ll Need: Denim, coordinating fabric for lining, sewing machine, thread, ruler, fabric marker.
- Step-by-Step:
- Decide on your bin’s dimensions (e.g., 10″ wide x 8″ tall x 6″ deep).
- Cut two identical rectangles from your denim and two from your lining fabric. The width should be your desired width + depth + 1″ seam allowance. The height should be your desired height + half the depth + 1″ seam allowance.
- Create the Box Corners: On the bottom two corners of all four fabric pieces, draw and cut out a square. The side of the square is half your desired depth (so for a 6″ deep box, cut a 3″x3″ square).
- Sew the Outer Shell: Place the two denim pieces right-sides together. Sew along the sides and the bottom, leaving the top and the corner cutouts open.
- Pinch one of the corner cutouts so the side seam and bottom seam meet. Sew across this opening. Repeat for the other corner. You’ve now created a 3D box shape!
- Sew the Lining: Repeat steps 4 and 5 with your lining fabric, but leave a 4-inch gap in the bottom seam for turning.
- Assemble: Turn the denim shell right-side out. Leave the lining inside-out. Place the denim shell inside the lining. The right sides of both fabrics should now be facing each other.
- Line up the top edges and side seams. Sew all the way around the top edge.
- Turn the entire basket right-side out through the gap you left in the lining.
- Stitch the gap in the lining closed. Push the lining down into the denim shell, press the top edge, and topstitch around the rim for a crisp finish.
7. The Reversible Denim & Fabric Bin
This is a variation of the boxy bin, but it’s designed to be reversible, giving you two looks in one!
- What You’ll Need: Same as the boxy bin, but choose a fun, bold print for the lining.
- Step-by-Step:
- Follow the exact same instructions as for the Classic Sewn Boxy Bin (Project #6).
- The only difference is your attention to detail. When you stitch the gap in the lining closed, take extra care to make it neat and tidy, as it will be visible when you reverse the bin.
- Instead of just pushing the lining in, you can fold the top edge down to show off a cuff of the contrasting fabric.
8. The Round-Bottom Drawstring Pouch
Perfect for storing yarn, toiletries when traveling, or as a unique gift bag.
- What You’ll Need: Denim, lining fabric, cord or braided denim for the drawstring, sewing machine.
- Step-by-Step:
- Cut two circles of the same size from both denim and lining fabric for the base.
- Cut two long rectangles for the sides—the length should be the circumference of your circle plus a seam allowance. The height is up to you.
- Sew the short ends of the denim rectangles together to form a tube. Do the same for the lining.
- Pin the denim tube to the denim circle (right sides together) and sew around the base. Repeat for the lining.
- Follow steps 7-10 from the Boxy Bin project to assemble the outer shell and lining, leaving a gap to turn.
- Before topstitching, sew two parallel lines of stitching around the top of the bag, about 1.5 inches and 0.5 inches from the top edge, to create the casing for the drawstring.
- Use a seam ripper to carefully open the side seam between these two lines of stitching.
- Thread your cord through the casing, and you’re done!
9. The Patchwork Denim Storage Cube
A fantastic scrap-buster project that results in a one-of-a-kind, bohemian-style basket.
- What You’ll Need: Various denim scraps, fusible interfacing (medium-weight), lining fabric, sewing machine.
- Step-by-Step:
- Cut your denim scraps into squares of the same size (e.g., 4×4 inches).
- Arrange your squares into a pleasing pattern to create larger “sheets” of patchwork fabric. You’ll need one for the bottom and four for the sides.
- Sew the squares together, row by row, to create your patchwork sheets. Press the seams open.
- Iron the fusible interfacing onto the back of your patchwork sheets. This adds stability and strength.
- From here, you can construct a boxy bin using your patchwork sheets just as you would solid fabric. Follow the instructions for the Classic Sewn Boxy Bin (Project #6).
10. The Jean Seam Coiled Basket
This is a sewn version of the coiled bowl that uses the thick, felled seams of jeans for a super textured and durable result.
- What You’ll Need: Long strips of felled seams (the thick, double-stitched seams on the inside leg of jeans), a sewing machine with a zigzag stitch and a denim needle.
- Step-by-Step:
- Begin by tightly coiling the end of one seam strip to create the center of your base.
- Place this small coil under your sewing machine needle. Using a wide zigzag stitch, begin sewing the coil together, slowly rotating it and adding more of the seam strip as you go. The zigzag stitch should catch both the inner and outer edges of the coil.
- Continue in a flat spiral until your base is the desired size.
- To build the walls, simply tilt the base on its edge and start sewing the new row of seam strip onto the top edge of the base.
- Keep going, building the walls up row by row, until your basket is the perfect height.
Category 3: Braided & Woven Beauties
These projects require a bit more patience but the results are absolutely stunning, with a rich texture that’s hard to beat.
11. The Classic Braided Rag Basket
This technique is timeless. You create one long, continuous braid from denim strips and then sew it into a basket shape.
- What You’ll Need: Lots of 1.5-inch wide denim strips, sewing machine with a zigzag stitch or a heavy-duty needle and thread for hand sewing.
- Step-by-Step:
- Stitch three denim strips together at one end. Begin braiding them.
- When you get near the end of a strip, sew on a new strip and continue braiding. You are aiming to create one very, very long braid. The longer the braid, the bigger the basket.
- Once you have a massive pile of braid, you can start forming the basket.
- Coil the beginning of the braid into a flat spiral for the base.
- Using a wide, strong zigzag stitch on your machine, sew the braid to itself. Go slowly, keeping the braids butted up against each other.
- Continue coiling and sewing until the base is the size you want.
- To form the walls, start angling the base upwards and sewing the braid onto the top edge of the previous row.
- Keep building the walls until you reach the desired height. Tuck the final end in and secure with several stitches.
12. The Woven Denim Strip Basket
This creates a true over-under woven look. It’s easiest to do this around a form, like a box.
- What You’ll Need: A box to use as a mold, lots of 1-inch denim strips, fabric glue, binder clips.
- Step-by-Step:
- Start with the base. Lay out several denim strips vertically (these are your “warp” strips). Weave another set of strips through them horizontally (“weft” strips) to create a flat woven mat the size of your box’s base. Glue the intersections.
- Place your box in the center of the mat.
- Apply glue to the sides of the box. Fold the warp (vertical) strips up against the sides of the box, securing them with binder clips at the top.
- Now, starting from the bottom, begin weaving your weft strips horizontally around the box, going over and under the vertical strips. Use dabs of glue to secure the strips as you go.
- Continue weaving all the way to the top.
- Fold the excess length of the vertical strips down inside the box and glue them securely.
- Let the glue dry completely before gently removing the box from the inside.
13. The “Denim Rope” Woven Bowl
This method creates a chunky, rustic bowl by first making ‘rope’ out of denim.
- What You’ll Need: Denim strips (about 2 inches wide), clothesline rope or other thick cotton cording, fabric glue.
- Step-by-Step:
- Create your denim rope. Apply a line of fabric glue along a denim strip and wrap it tightly around the cotton cording. Continue adding new denim strips until you have a long length of denim-covered rope.
- Using a high-temp hot glue gun, begin coiling the rope into a tight, flat spiral, just like in Project #2. Apply a generous bead of glue between the coils.
- Once the base is your desired size, begin building the walls by gluing the new row on top of the previous row.
- When you reach the desired height, cut the rope and secure the end with extra glue.
- Pro Tip: This is a great no-sew alternative to the sewn coiled baskets, and it’s incredibly sturdy.
14. The No-Sew Woven Basket with a Canvas Base
Plastic canvas, found at craft stores, provides a perfect grid for a simple, no-sew weaving project.
- What You’ll Need: A sheet of plastic canvas, denim strips (about 1/2-inch wide), scissors.
- Step-by-Step:
- Cut your plastic canvas to size. You’ll need one piece for the bottom and four for the sides.
- “Sew” the box together by weaving a denim strip through the holes along the edges to connect the sides to the base and to each other.
- For the vertical “warp” strips, thread long denim strips up and down through the holes in the canvas walls.
- Now, weave your horizontal “weft” strips over and under the warp strips, covering the plastic canvas completely.
- Tuck in all the loose ends to finish.
15. The Macrame-Style Denim Hanger
Perfect for a hanging planter or a fruit basket.
- What You’ll Need: Long, sturdy denim strips (made by sewing shorter strips together), a metal or wooden ring.
- Step-by-Step:
- Take 8 long denim strips and fold them in half over the ring, resulting in 16 hanging strands.
- Secure the strips below the ring with a gathering knot (wrap another strip tightly around all 16 strands and tuck in the end).
- Separate the strands into four groups of four.
- Working with one group of four, tie a square knot about 4-5 inches down from the main gathering knot. Repeat for the other three groups.
- Now, take two strands from one knot and two strands from the adjacent knot. About 3-4 inches down, tie these four strands together with another square knot. Repeat this all the way around, connecting the groups.
- Repeat this process one more time to create a net-like structure.
- Gather all 16 strands together at the bottom and tie one large knot to form the base of the basket. Trim the ends.
Category 4: Creative & Embellished Baskets
Ready for a challenge? These projects incorporate unique details and embellishments for a truly artistic finish.
16. The Embellished Boho Basket
Take any basic denim basket and give it a bohemian flair.
- What You’ll Need: A finished denim basket (the Boxy Bin or Coiled Bowl work well), yarn for tassels, wooden beads, lace trim, hot glue.
- Step-by-Step:
- Make several yarn tassels in complementary colors.
- Glue a strip of lace trim around the top rim of your basket.
- String wooden beads onto the top loop of your tassels.
- Glue the tassels evenly spaced around the basket, just below the lace trim.
17. The Stenciled & Painted Denim Pot Cover
Add a graphic, modern touch to a simple denim basket.
- What You’ll Need: A finished denim basket (a simple Jean Leg Pot Cover is perfect), letter or pattern stencils, white or metallic fabric paint, a stencil brush or sponge.
- Step-by-Step:
- Place your stencil on the basket.
- Using a dabbing motion, apply the fabric paint. Using less paint is better to avoid bleeding under the stencil.
- Carefully lift the stencil. Let it dry completely. You can add words, geometric patterns, or botanical motifs.
18. The Lace & Denim Romantic Basket
For lovers of shabby chic and romantic decor.
- What You’ll Need: A finished basket, various scraps of lace, doilies, fabric flowers, hot glue.
- Step-by-Step:
- This is all about layering. Start by gluing a wide piece of lace around the basket.
- Cut out motifs from other pieces of lace and glue them on top.
- Glue a small doily to the front as a centerpiece.
- Finish with a cluster of fabric flowers in one corner. The contrast between the rugged denim and delicate lace is stunning.
19. The Zipper-Edged Utility Pouch
Incorporate some hardware for an industrial-chic look.
- What You’ll Need: A finished sewn basket (like the Boxy Bin), a long decorative metal zipper, fabric glue.
- Step-by-Step:
- Measure the top perimeter of your basket.
- Get a zipper that is slightly longer than this measurement.
- Apply a thin bead of strong fabric glue along the top edge of the basket.
- Carefully press one side of the zipper tape onto the glue, with the zipper teeth sitting just above the basket’s rim. Let it dry.
- You can leave the zipper functional if you add a top flap, or simply glue it shut as a purely decorative element.
20. The “Whole Jean Top” Basket
This might be the most clever upcycle of all! It uses the entire top portion of a pair of jeans.
- What You’ll Need: The top part of a pair of jeans (cut off at the crotch), a round piece of sturdy cardboard or a sewn denim circle for the base, hot glue or a sewing machine.
- Step-by-Step:
- Zip up the fly and button the waist of your jean top.
- You now have a tube with two leg holes at the bottom.
- No-Sew Method: Turn the jean top inside out. Place your cardboard circle at the bottom. Heavily glue the raw denim edge around the leg holes onto the cardboard base. Let it dry completely, then turn it right-side out.
- Sewn Method: Turn the jean top inside out. Stitch the two leg holes closed in a straight line. Then, create boxy corners (like in Project #6) by pinching the corners and sewing across to create a flat bottom. Turn it right-side out.
- The Result: You have an instant basket where the pockets are perfectly functional for holding small items! It’s the ultimate conversation-starter craft.
Now, Go Create!
There you have it—20 ways to rescue your old jeans from landfill and turn them into functional works of art for your home. The beauty of crafting with denim is that each piece you make will be utterly unique, carrying the history of the fabric with it.
Start with a project that excites you, don’t be afraid to mix and match techniques, and most importantly, have fun with it!
Happy crafting, and don’t forget to share this article and pin your favorite ideas so other creative souls can join the upcycling revolution! We’d love to see what you create.


