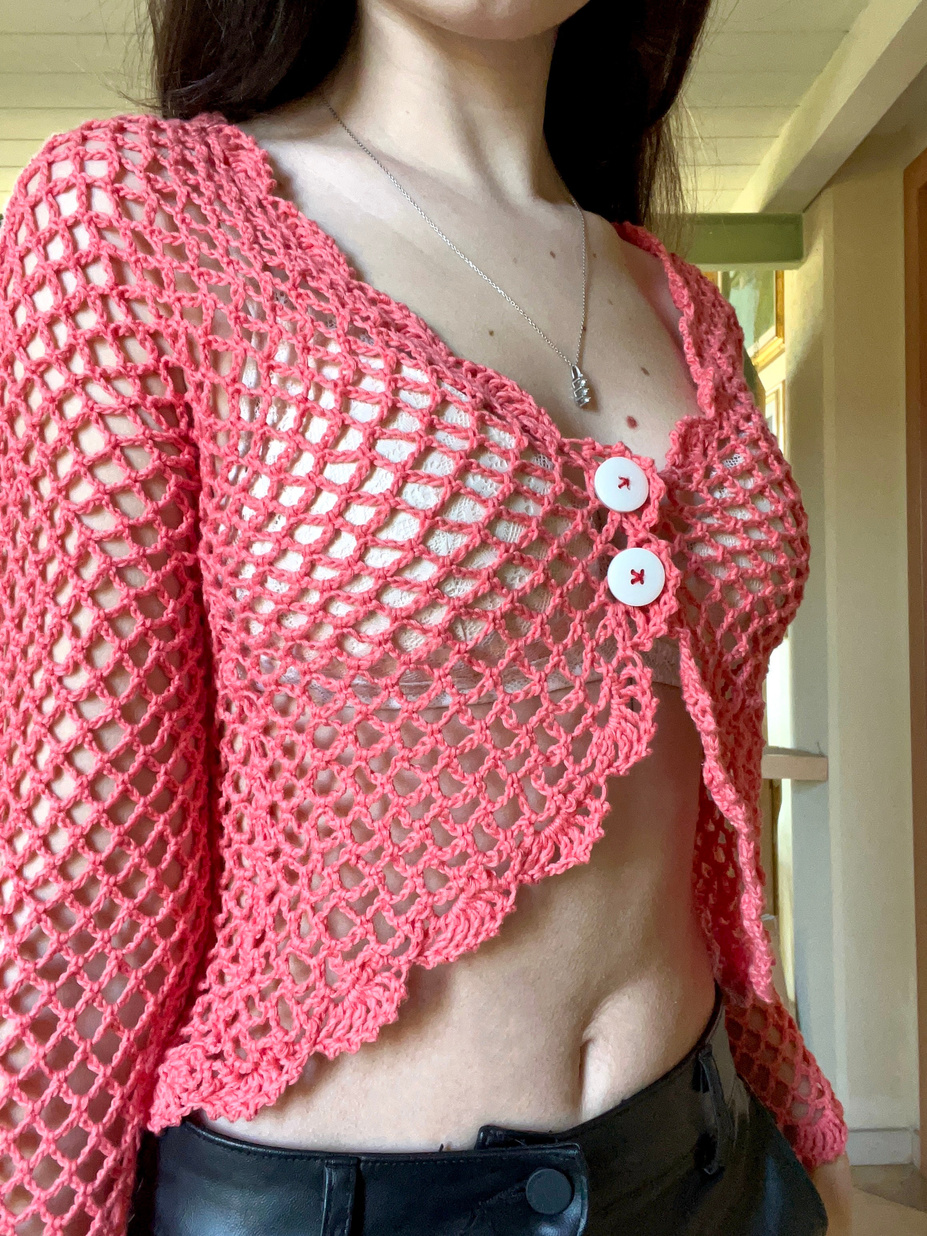
Lightweight Mesh Cardigan: A Free Crochet Pattern
Hello, beautiful makers🌸
There’s nothing quite like the feeling of creating a garment that’s both comfortable and effortlessly stylish. If you’ve been dreaming of a lightweight, airy cardigan that’s perfect for layering over your favorite tops, you’ve come to the right place!
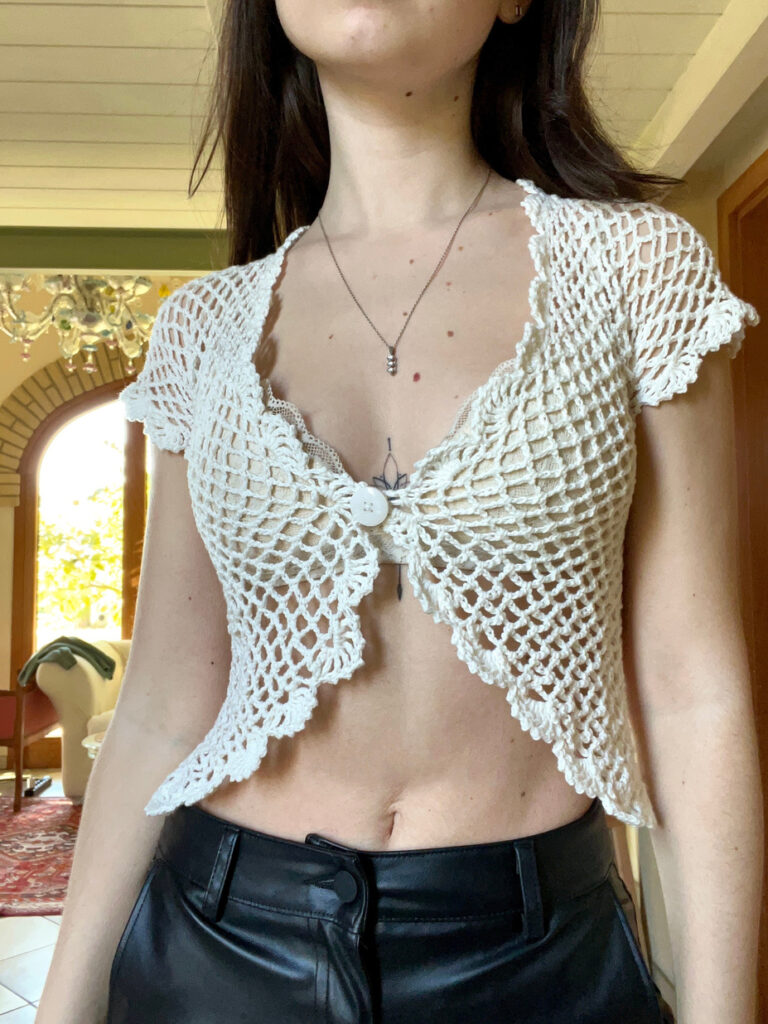
I’m so excited to share this Mesh Cardigan Crochet Pattern with you. Designed with simplicity and elegance in mind, this project uses a repeating mesh stitch that works up quickly and feels so satisfying to make. Whether you’re new to garment-making or just looking for a relaxing project, this cardigan is wonderfully approachable.
With its customizable fit and versatile length options (short or long sleeves!), you can truly make it your own. Plus, the open mesh design makes it perfect for breezy days, cozy evenings, or even as a beach cover-up.
So, if you’re ready to stitch something you’ll reach for again and again, let’s dive in together
Materials You’ll Need
- Yarn: Size 2 (Fine weight) yarn – choose a soft, drapey fiber like cotton or bamboo blend
- Crochet Hook: 3.00mm or 3.50mm
- Scissors
- Darning Needle
- Measuring Tape
- Buttons (optional – you can also use a tie or ribbon)
Crochet Abbreviations (US Terms)
- ch = chain
- st = stitch
- sc = single crochet
- tr = treble crochet
- sl st = slip stitch
- sk = skip
- yo = yarn over
- FO = fasten off
Skill Level
Advanced Beginner – You should be comfortable with basic stitches like chain, single crochet, and treble crochet.
Finished Size & Customization
This pattern is fully customizable! Here’s how to measure for your perfect fit:
- Measurement A (Front Panel Width):
Chest circumference ÷ 4, minus 4–5 cm
*Example: 83 cm ÷ 4 = 21 cm, minus 5 cm = 16 cm* - Measurement B (Front Panel Height):
Measure from the top of your shoulder to your underbust - Measurement C (Back Panel Width):
Chest circumference ÷ 2
*Example: 83 cm ÷ 2 = 41.5 cm*
💡 Tip: The stitch is stretchy! For a more fitted look, subtract a few centimeters from the back panel foundation chain.
Let’s Get Started!
Step 1: Front Panels (Make 2)
Foundation Chain:
Chain until you reach Measurement A. Make sure the number of chains is a multiple of 3.
Example: 33 chains
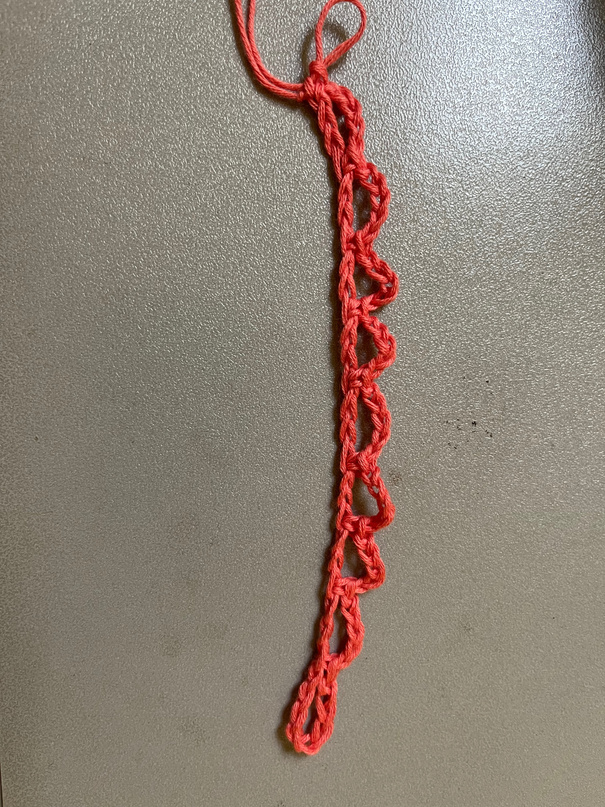
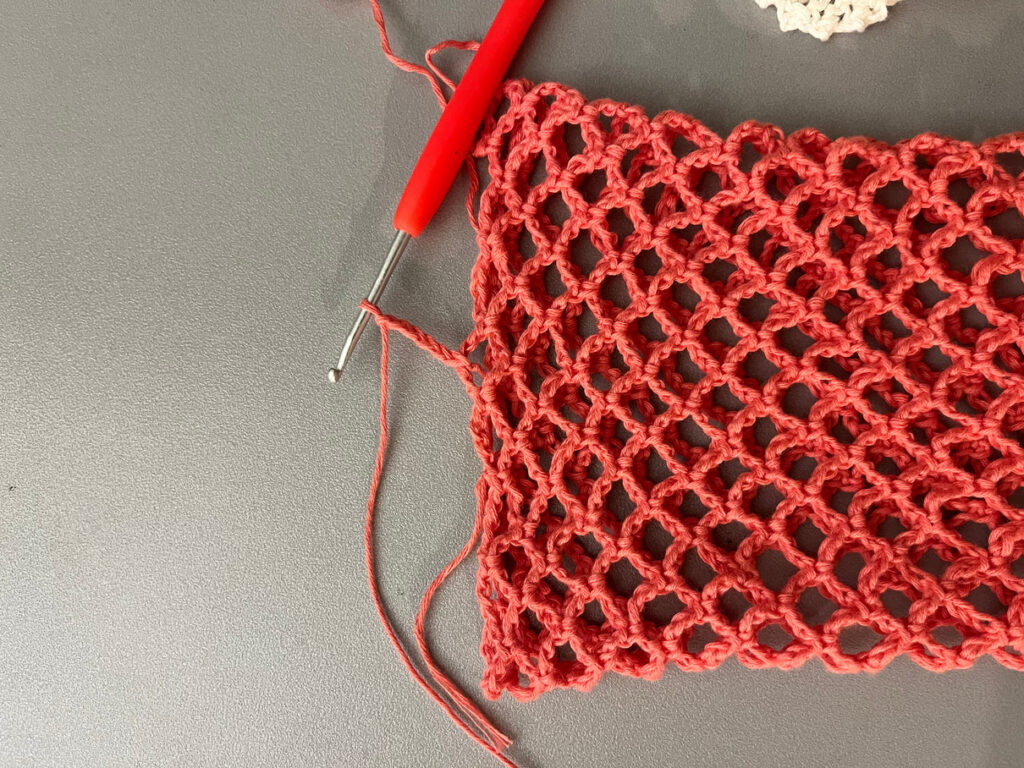
Row 1:
Skip the first 8 chains, sc in the 9th chain from hook.
Ch 5, skip 2 chains, sc in next chain. Repeat from * to * across. Ch 6, turn.
Row 2:
Sc in the first ch-5 space. *Ch 5, sc in next ch-5 space*. Repeat across. Ch 6, turn.
Repeat Row 2 until you reach Measurement B. Do not fasten off.
Decrease Rows (One Side Only):
- Decrease Row: Work across as usual until only one ch-5 space remains. Instead of ch-6, ch 3 and sc into the last ch-5 space. Ch 3, turn.
- Next Row: Sc in the ch-3 space, then continue pattern across. Ch 6, turn.
Alternate these two rows until only one ch-3 space remains. Fasten off.
Repeat for the second front panel.

Step 2: Back Panel
Foundation Chain:
Chain until you reach Measurement C (multiple of 3).
Example: 78 chains
Row 1:
Skip first 8 chains, sc in the 9th chain.
Ch 5, skip 2 chains, sc in next chain. Repeat across. Ch 6, turn.
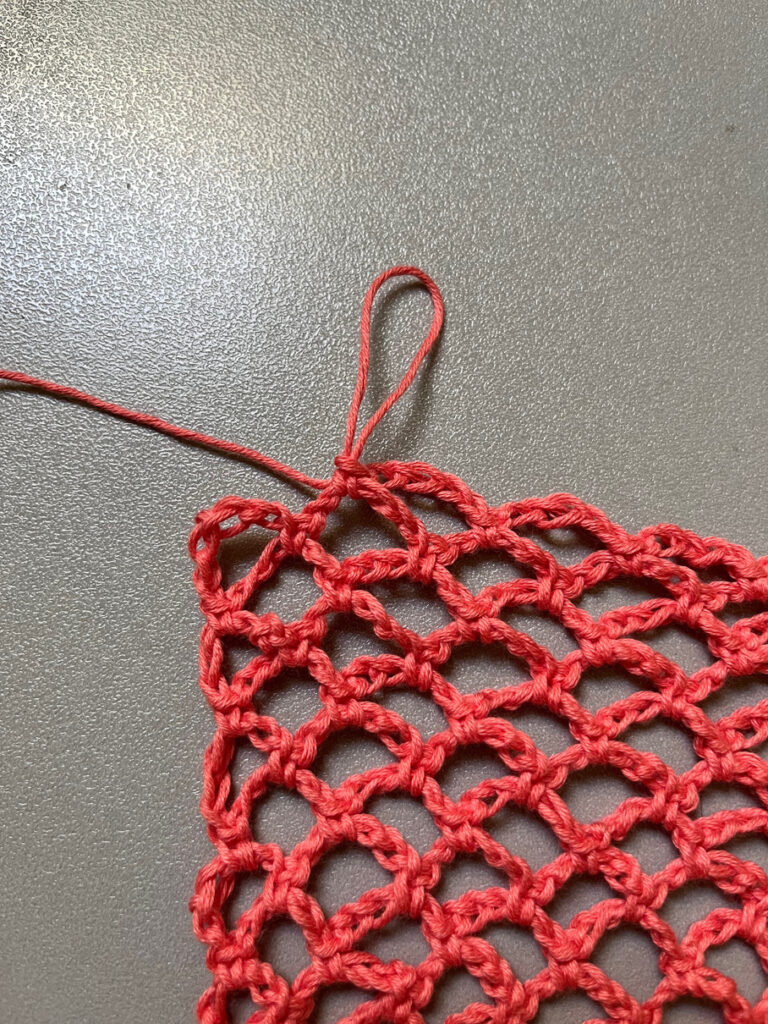
Row 2:
Sc in first ch-5 space, *ch 5, sc in next ch-5 space*. Repeat across. Ch 6, turn.
Repeat Row 2 until the back panel is the same height as the front panels. Fasten off.
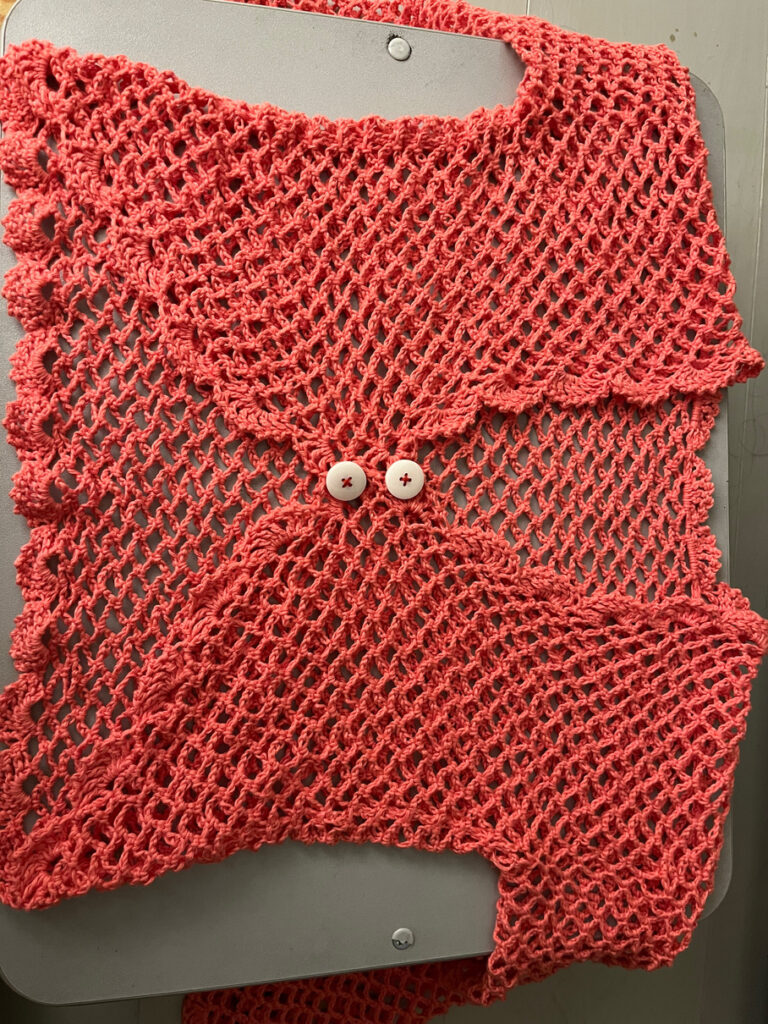
Step 3: Join the Panels
Lay the back panel flat with the foundation chain at the top. Place the front panels on top, with decreased edges facing inward and down.
Sew the shoulder seams together using your preferred method (e.g., sewing through the chains and sc between ch-5 spaces).
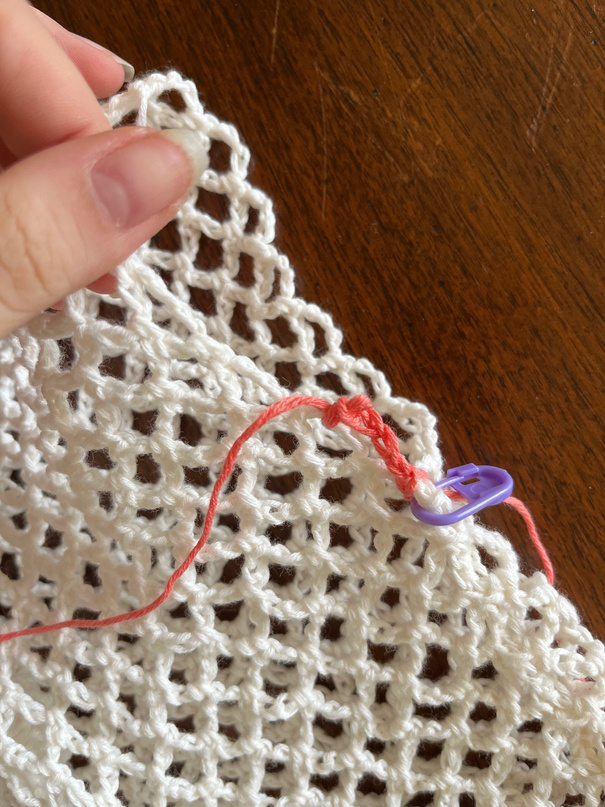
Step 4: Sleeves
Try on the cardigan and place stitch markers under the armpits to mark the armhole. Make sure it’s not too tight.
Sew the side seams from the marker down to the bottom edge.
Attach yarn at the marker and work in rounds:
*Ch 5, sc in next ch-5 space*. Repeat around.
Continue until sleeves reach desired length.
Short version: ~7 rounds | Long version: ~57 rounds
Fasten off.
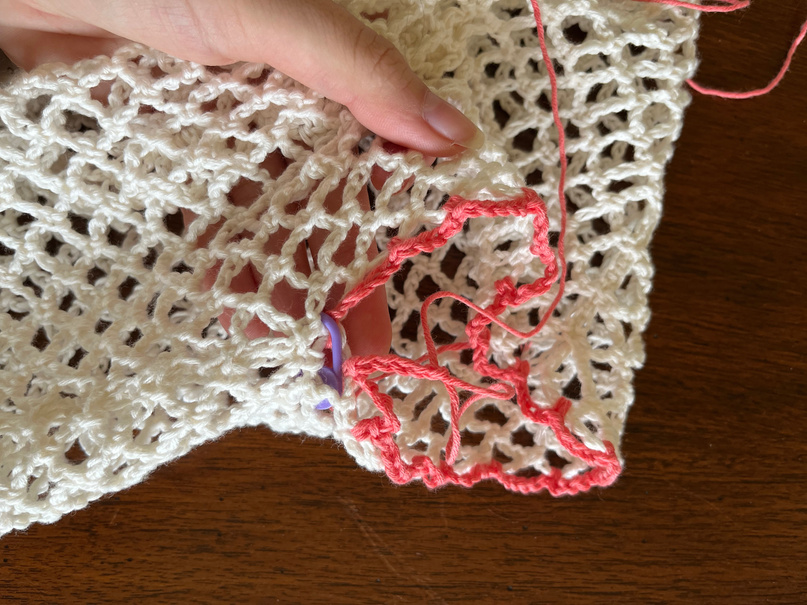
Step 5: Sleeve Edging
Attach yarn in a ch-5 space.
Ch 5, sc in the 3rd chain from hook.
In the same ch-5 space, work:
Tr, ch 2, sc on top of the tr. Repeat 4 more times, then work one more tr in the same space.
Sc in the next ch-5 space.
Repeat around the sleeve. Sl st to join at the end.
Step 6: Cardigan Edging
Attach yarn at the center back neckline.
Repeat the same shell edging pattern used on the sleeves, working around the entire cardigan front and bottom.
Skip the ch-3 spaces along the decreased edge—work only into ch-5 spaces.
Sl st to join at the end.
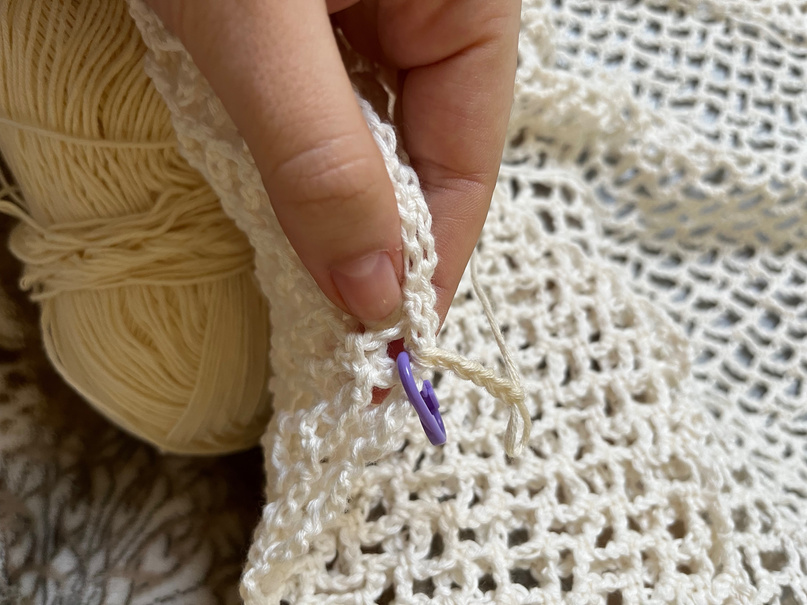
Step 7: Buttons or Closure
Try on the cardigan and mark where you’d like buttons. Sew them onto one front panel, using ch-5 spaces on the opposite panel as buttonholes.
Alternatively, add a crocheted tie, ribbon, or leave it open for a drapey look.
Weave in all ends. And you’re done
Tips for Success
- Keep it loose: Don’t chain too tightly—the foundation chain should be relaxed for a comfortable fit.
- Count your rows: Write down how many rows you make for the first front panel so the second one matches perfectly.
- Blocking: Lightly blocking your finished cardigan will help the mesh open up and drape beautifully
Wear It With Pride!
Congratulations, you’ve just created a gorgeous, handmade mesh cardiga