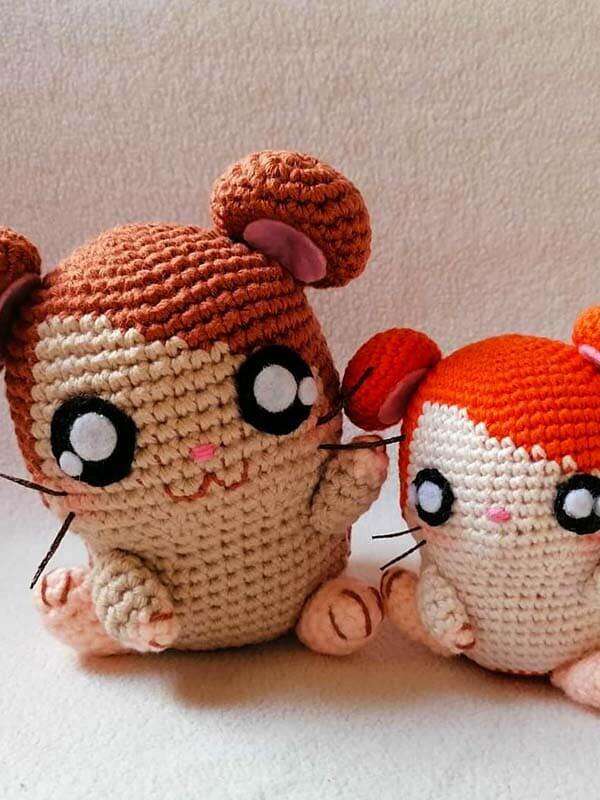
Hamtaro Amigurumi: A Free Crochet Pattern
Get ready to crochet one of the most charming cartoon hamsters ever created! Today, I’m delighted to share this free Hamtaro amigurumi pattern with you. Whether you grew up watching his tiny adventures or are just discovering this cute character, this project is sure to bring a smile to your face.
Hamtaro stands between 9-13cm tall depending on your yarn and hook size, making him the perfect pocket-sized friend. With his distinctive two-toned head, bright eyes, and sweet expression, he’s absolutely irresistible!
This pattern is perfect for intermediate crocheters who are comfortable with color changes and sewing pieces together. I’ll guide you through every step—from his color-changing head to his tiny paws and curly tail.
So grab your sunny-colored yarn and let’s bring this little hamster to life together
Materials You’ll Need
Yarn
- Dark brown or reddish-brown yarn (8-ply)
- Light beige yarn (8-ply)
- Black yarn (5-ply)
- Peach/pink yarn for arms, legs, and tail
Other Supplies
- 3.5mm crochet hook
- Poly-fil stuffing
- Black, white, and pink felt
- Tapestry needle
- Pins
- Brown and pink embroidery thread
- Fabric glue
Skill Level
Intermediate
Finished Size
9-13cm tall (depending on yarn weight and tension)
Crochet Abbreviations
- ch = chain
- sc = single crochet
- sl st = slip stitch
- inc = increase (2 sc in one stitch)
- dec = decrease (sc two together)
- MR = magic ring
Pattern Instructions
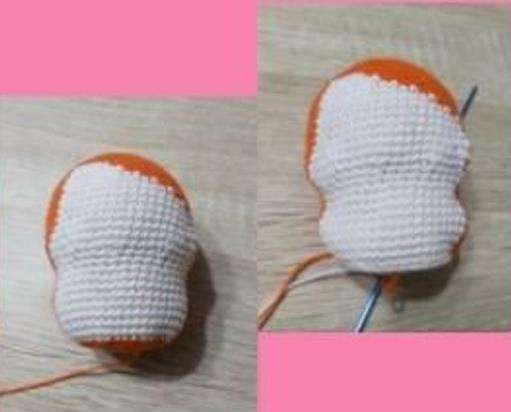
Head
Start with dark brown yarn.
- R1: 6 sc in MR (6)
- R2: 6 inc (12)
- R3: (sc, inc) x 6 (18)
- R4: (2 sc, inc) x 6 (24)
- R5: (3 sc, inc) x 6 (30)
- R6: (4 sc, inc) x 6 (36)
- R7: (5 sc, inc) x 6 (42)
- R8: (6 sc, inc) x 6 (48)
Begin color change to light beige:
9. R9: (7 sc, inc) x 2 + 5 sc + 2 sc, inc + (7 sc, inc) x 3 (54)
10. R10: Dark 18 sc + Light 7 sc + Dark 29 sc (54)
11. R11: Dark 18 sc + Light 9 sc + Dark 27 sc (54)
12. R12: Dark 18 sc + Light 11 sc + Dark 25 sc (54)
13. R13: Dark 18 sc + Light 13 sc + Dark 23 sc (54)
14. R14: Dark 18 sc + Light 15 sc + Dark 21 sc (54)
15. R15-16: Dark 18 sc + Light 17 sc + Dark 19 sc (54)
17. R17: Dark 18 sc + Light (inc + 15 sc + inc) + Dark 19 sc (56)
18. R18: Dark 18 sc + Light (3 inc + 13 sc + 3 inc) + Dark 19 sc (62)
19. R19: Dark 18 sc + Light (sc, dec, 19 sc, dec, sc) + Dark 19 sc (60)
20. R20: Dark (4 sc, dec) x 3 + Light (4 sc, dec) x 4 + Dark (4 sc, dec) x 3 (50)
21. R21: Dark (3 sc, dec) x 3 + Light (3 sc, dec) x 4 + Dark (3 sc, dec) x 3 (40)
22. R22: Dark 12 sc + Light 16 sc + Dark 12 sc (40)

Body
Continue with color work:
23. R23: Dark (4 sc, inc) x 2 + Light (2 sc, 2 sc, inc) + Dark (4 sc, inc) x 2 + Light 3 sc + Dark (sc, inc) + (4 sc, inc) x 2 (48)
24. R24-30: Dark 15 sc + Light 19 sc + Dark 14 sc (48)
Switch to dark brown only:
31. R31: (4 sc, dec) x 8 (40)
32. R32: (3 sc, dec) x 8 (32) – start stuffing
33. R33: (2 sc, dec) x 8 (24)
34. R34: (sc, dec) x 8 (16)
35. R35: 8 dec (8)
Close opening and fasten off.
Ears (Make 2)
Use dark brown yarn.
- R1: 6 sc in MR (6)
- R2: 6 inc (12)
- R3: (sc, inc) x 6 (18)
- R4: (2 sc, inc) x 6 (24)
- R5-8: 24 sc
- R9: (2 sc, dec) x 6 (18)
- R10: (sc, dec) x 6 (12) – stuff lightly and fold
- R11: 6 dec (6)
Leave tail for sewing. Attach pink felt ovals to inner ears with glue. Sew ears to head between rounds 8-10.
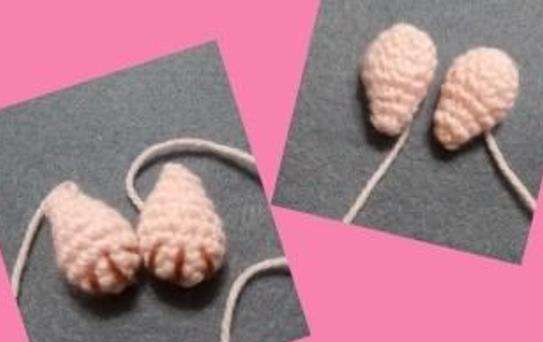
Arms (Make 2)
Start with peach yarn.
- R1: 4 sc in MR (4)
- R2: (sc, inc) x 2 (6)
Switch to dark brown:
3. R3: (2 sc, inc) x 2 (8)
4. R4-6: 8 sc
Stuff, fold, and sew. Embroider three finger lines with dark brown yarn. Sew to body: lower arm at round 22, upper arm at round 23.
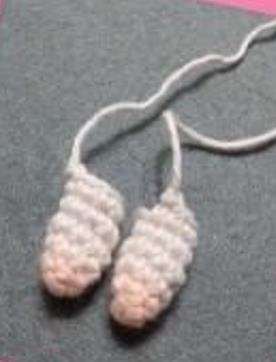
Legs (Make 2)
Use peach yarn.
- R1: 6 sc in MR (6)
- R2: (sc, inc) x 3 (9)
- R3: (2 sc, inc) x 3 (12)
- R4: 12 sc
- R5: (2 sc, dec) x 3 (9) – stuff
- R6: 9 sc
- R7: (sc, dec) x 3 (6)
Close and sew to body: upper leg at rounds 25-29, lower leg at rounds 30-32.
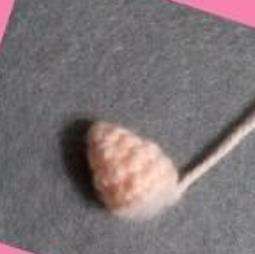
Tail
Use peach yarn.
- R1: 4 sc in MR (4)
- R2: (sc, inc) x 2 (6)
- R3: (2 sc, inc) x 2 (8)
- R4: (3 sc, inc) x 2 (10)
- R5: 10 sc
Stuff and sew to body between rounds 29-31.
Face & Details
Eyes (Make 2)
Use black yarn.
- R1: 6 sc in MR (6)
- R2: 6 inc (12)
- R3: (sc, inc) x 6 (18)
- R4: (2 sc, inc) x 6 (24)
Cut black felt circles for pupils and smaller white circles for highlights. Glue together and attach to head at round 13, 6 stitches apart.
Nose
Embroider a pink nose at round 16.
Mouth
With brown yarn, embroider a small mouth across 4 stitches at round 18, just below the nose.
Cheeks
Add blush below the eyes.
Whiskers
Add two whiskers on each side at rounds 16-17 using brown thread. Secure with fabric glue.
Assembly Tips
- Stuff firmly but not too tight—Hamtaro should be huggable!
- Use pins to position all pieces before sewing.
- Embroider facial features before attaching head to body for easier access.
- Color changes might feel tricky at first—take your time and carry yarn loosely on the inside.

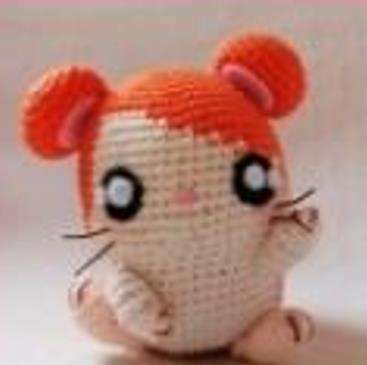

Your Hamtaro Is Complete!
Congratulations! You’ve just created your very own Hamtaro amigurumi! 🌟
This little hamster is ready for adventures—whether he’s perched on your desk, keeping you company in your craft room, or given as a gift to another Ham-Ham heart.
I hope you enjoyed every stitch of bringing this cheerful character to life. If you share your finished Hamtaro online, I’d be so happy to see—tag your photos with #HamtaroAmigurumi so I can admire your work!