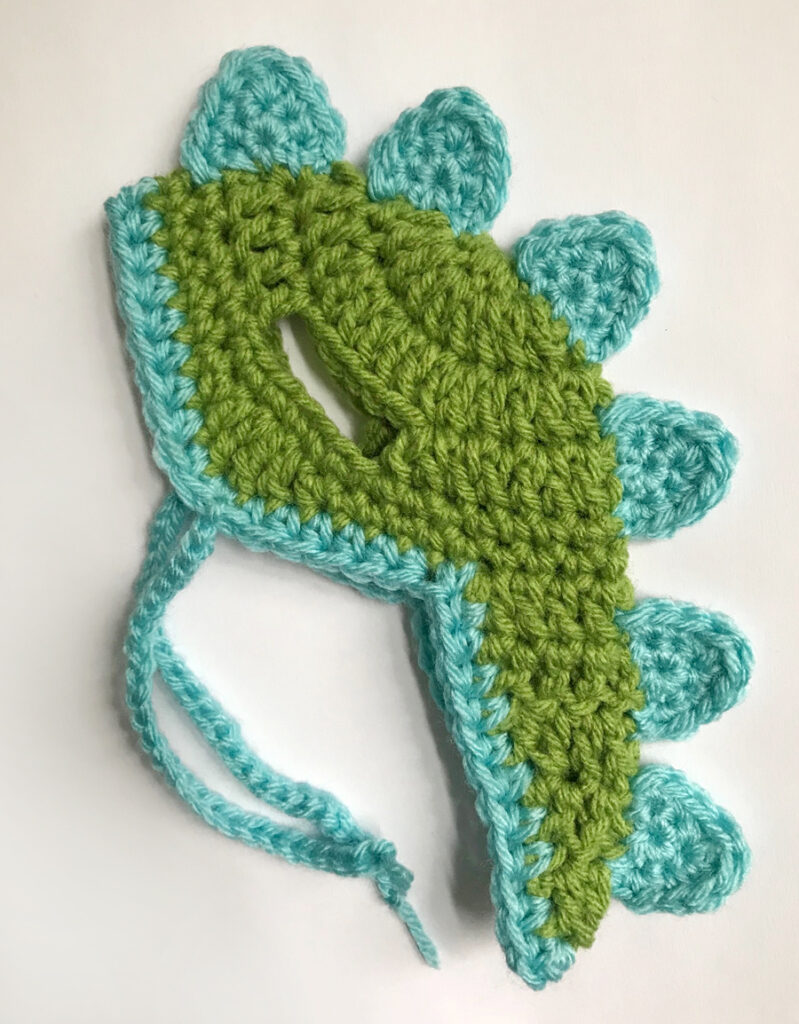
Crochet Dinosaur Hat Pattern For Cats And Small Dogs
Materials
To crochet this adorable dinosaur hat for your feline friend or small canine companion, you’ll need the following:
- Crochet hook 5.00 mm or 5.50 mm (to achieve the correct gauge)
- Crochet hook 4.00mm (specified for eyes, though specific eye instructions are not detailed in this pattern)
- Worsted weight yarn #4:
- Approximately 60 yards of Spring Green (e.g., Red Heart “Super Saver”)
- Aruba Sea color for detailing and spikes
- Large-eye needle (for weaving in ends and assembly)
Crochet Gauge
Achieving the correct crochet gauge is essential for your hat to fit perfectly. Work 13 single crochet (sc) stitches = 4 inches.
Finished Size
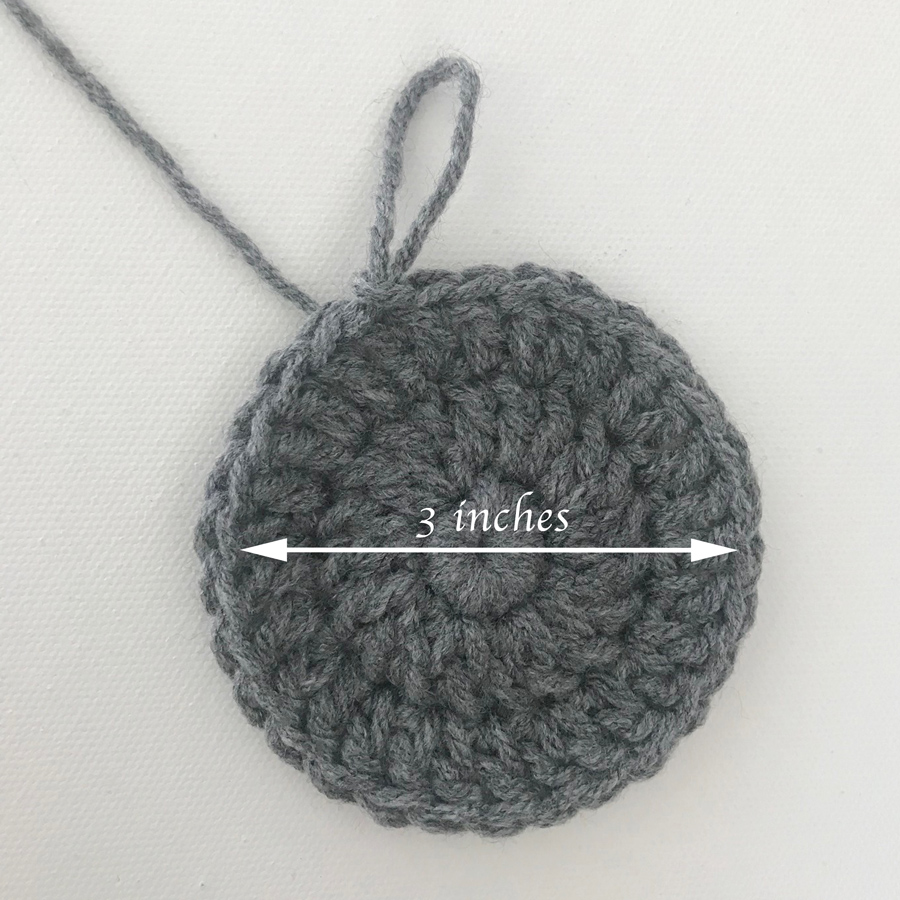
This pattern is designed for a small hat size, perfectly fitting cats and small dogs with approximately 2.5 to 3 inches of space between their ears. Crafting this crochet hat will result in a cozy and playful accessory for your pet.
Abbreviations
Familiarize yourself with these standard crochet abbreviations used throughout the dinosaur hat pattern:
- ch – chain
- yo – yarn over
- sc – single crochet
- hdc – half double crochet
- dc – double crochet
- tr – treble crochet
- sl st – slip stitch
- st(s) – stitch(es)
- sc2tog/dc2tog – single/double crochet decrease (working 2 stitches together)
Essential Crochet Stitches for This Pattern
Even if you’re a beginner, these fundamental crochet stitches are explained to help you confidently create your pet’s dinosaur hat. Understanding these crochet techniques is key to a successful project.
Slip Stitch (sl st)
To make a slip stitch, insert your hook into the next stitch, yarn over, and draw the yarn through all loops on your hook. This stitch is often used to join rounds or move yarn without adding height.
Single Crochet (sc)
For a single crochet, insert your hook into the next stitch and draw up a loop (you’ll have 2 loops on your hook). Yarn over, then draw the yarn through both loops on your hook. This is a basic and versatile crochet stitch.
Half Double Crochet (hdc)
To create a half double crochet, yarn over, insert your hook into the next stitch and draw up a loop (you’ll have 3 loops on your hook). Yarn over, then draw the yarn through all 3 loops on your hook. It’s taller than a single crochet but shorter than a double crochet.
Double Crochet (dc)
For a double crochet, yarn over, insert your hook into the next stitch and draw up a loop (you’ll have 3 loops on your hook). Yarn over, draw through 2 loops (2 loops remain on hook). Yarn over again, and draw through the last 2 loops on your hook. This stitch adds height quickly.
Treble Crochet (tr)
To work a treble crochet, yarn over hook twice, insert your hook into the next stitch and draw up a loop (you’ll have 4 loops on your hook). Yarn over and draw through 2 loops (3 loops remain on hook). Yarn over and draw through 2 loops (2 loops remain on hook). Yarn over and draw through both remaining loops on your hook. This is one of the tallest basic crochet stitches.
Single/Double Crochet Decrease (sc2tog/dc2tog)
This technique reduces your stitch count, shaping your crochet fabric. Insert your hook into the next stitch and draw up a loop (two loops on hook). Insert your hook into the next stitch, draw up a loop (3 loops on hook). Yarn over and draw through all 3 loops on your hook. This creates a neat decrease.
Dinosaur Hat Instructions
This crochet pattern starts with the main hat body, forming the snug base for your pet’s head. Remember to join each round with a slip stitch in the first stitch, not the chain, and count the slip stitch as 1 stitch. Begin with a magic adjustable ring for a neat center to your pet hat.
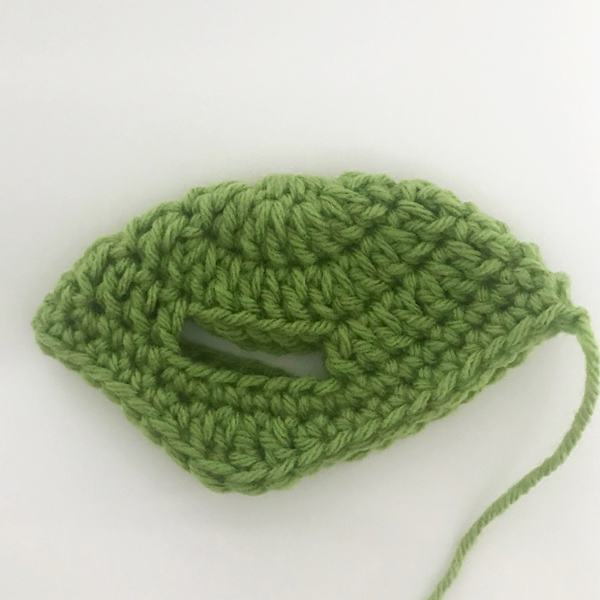
Hat Body
- Rnd 1: Work 9 sc into the center of the magic ring. Join with a sl st in the first sc. Tighten the ring by pulling on the yarn tail. (10 sts, including the slip stitch)
- Rnd 2: Ch 2, then work 2 dc in each stitch around. Join with a sl st. (20 sts)
- Rnd 3: Ch 2, dc in the next stitch. *Work 2 dc in the next stitch, then dc in the next stitch. Repeat from * around. Join with a sl st. (30 sts)
- Rnd 4: Ch 2, (dc in each of the next 2 sts, 2 dc in the next) repeat 2 times. Ch 7 (this forms an earflap opening), skip 5 sts, then dc in the 12th st, dc in the 13th st, dc in the 14th st, 2 dc in the 15th st. Dc in each of the next 3 sts. Ch 7 (second earflap opening), skip 5 sts, then dc in the 24th st, dc in the 25th st, dc in the 26th st, 2 dc in the 27th st. Dc in each of the next 2 sts. Join with a sl st. (38 sts)
- Rnd 5: Ch 1, sc in each of the next 8 sts. Sc in each of the next 7 sts of the chain (working into the chain space for the earflap). Sc in each of the next 2 sts, 2 sc in the next st. Sc in each of the next 2 sts, 2 sc in the next st. Sc in each of the next 2 sts. Sc in each of the next 7 sts of the chain. Sc in each of the next 8 sts. (40 sts)
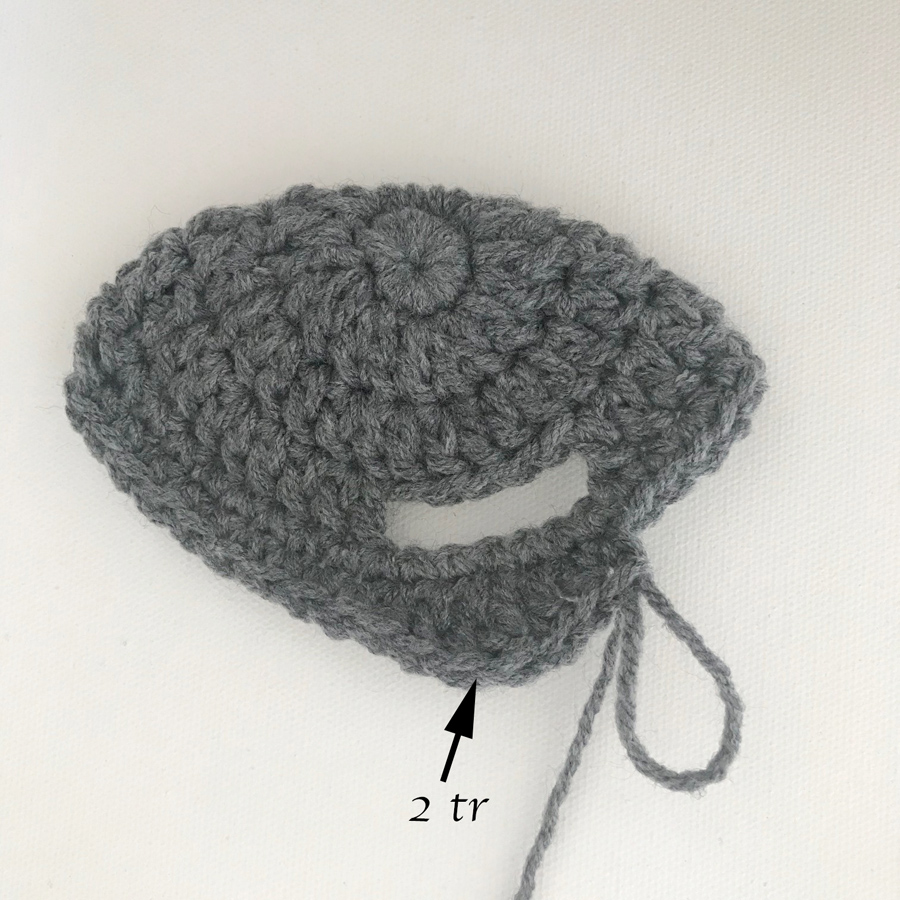
- Rnd 6: Ch 1, sc in each of the next 9 sts. Hdc in the 10th st, dc in the 11th st, 2 tr in the 12th st, dc in the 13th st, hdc in the 14th st. Sc in each of the next 12 sts. Hdc in the 27th st, dc in the 28th st, 2 tr in the 29th st, dc in the 30th st, hdc in the 31st st. Sc in each of the next 9 sts. (42 sts)
- Cut yarn and fasten off, weaving in the tail securely.
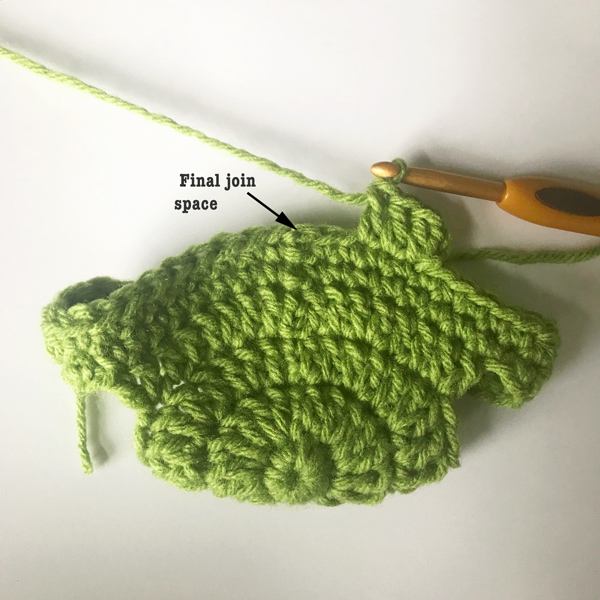
Dinosaur Tail
To create the cute, pointy dinosaur tail, locate the join space on the hat. Skip 5 stitches to the right of this join space and attach your yarn to begin the tail section.
- Row 1: Ch 2, dc in each of the next 10 sts. Turn your work. (10 sts)
- Row 2: Ch 2, dc2tog, dc in each of the next 6 sts, dc2tog. Turn your work. (8 sts)
- Row 3: Ch 2, dc2tog, dc in each of the next 4 sts, dc2tog. Turn your work. (6 sts)
- Row 4: Ch 2, dc2tog, dc in each of the next 2 sts, dc2tog. Turn your work. (4 sts)
- Row 5: Ch 2, dc2tog, repeat 2 times. (2 sts)
- Cut yarn and fasten off, leaving a short tail to weave in.
Finishing Touches and Assembly
Now it’s time to add the defining dinosaur features and assemble your pet’s new hat, bringing this fun crochet project to completion.
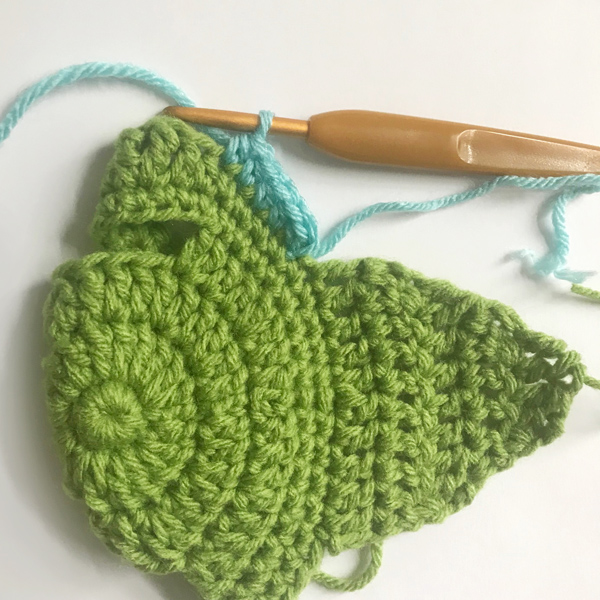
Hat Edging
Using your Aruba Sea color yarn, join the yarn in a corner of the hat (refer to the finished design for placement) and work half double crochet (hdc) stitches all around the hat edge for a neat and colorful finish. This creates a polished border for your pet’s hat.
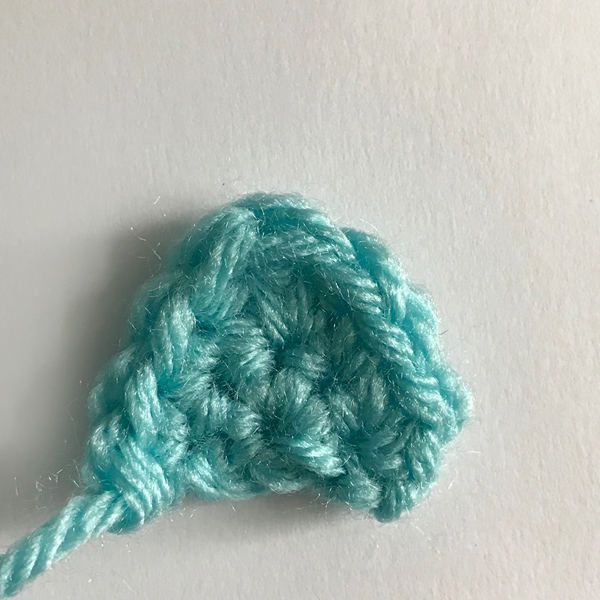
Dinosaur Spikes (Make 6)
These adorable spikes, worked in the Aruba Sea yarn, will bring your dinosaur hat to life. Work each spike individually.
- To start each spike, use the magic adjustable ring.
- Rnd 1: Work 5 sc into the center of the ring. Tighten the ring by pulling on the yarn tail. (5 sts)
- Rnd 2: Ch 1, turn your work and continue: 2 sc in the first st, sc in the 2nd st, *hdc, dc, hdc* all in the 3rd st, sc in the 4th st, 2 sc in the 5th st. (9 sts)
- Cut yarn, leaving a long tail for sewing.
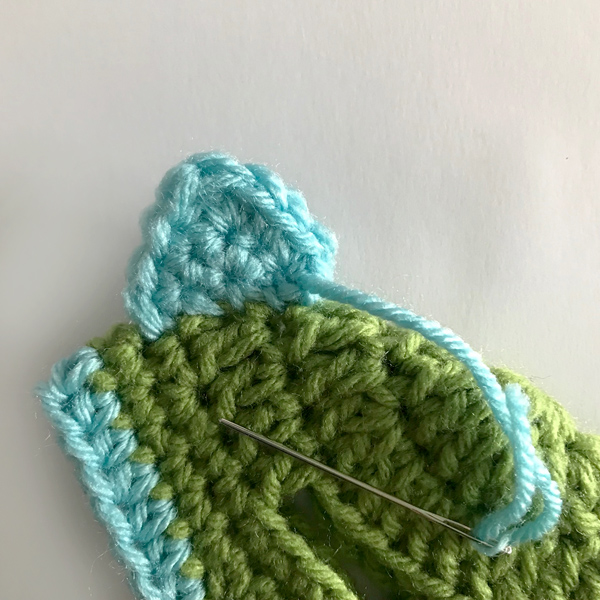
Attaching the Spikes
Once all 6 spikes are crocheted, carefully sew them along the top ridge of the hat, centered between the earflaps, using the long yarn tails and your large-eye needle. Arrange them evenly for the best dinosaur effect, creating a striking focal point for your pet accessory.
Ear Flap Tassels
For an extra playful touch and to help secure the hat, add tassels to the ear flaps:
- Join yarn (either Spring Green or Aruba Sea) to the top of an earflap.
- Chain 25 stitches.
- Cut yarn and fasten off. Repeat for the other earflap to complete your adorable dinosaur hat.
Tips for Beginners
This crochet dinosaur hat pattern is suitable for adventurous beginners. Here are a few crochet tips to help you succeed and create a beautiful pet hat:
- Practice Your Stitches: Before starting the hat, practice the single crochet, half double crochet, double crochet, and treble crochet stitches until you feel comfortable. Smooth, even stitches will make your finished hat look professional.
- Master the Magic Ring: The magic adjustable ring provides a very neat start without a hole. If you’re new to this technique, there are many video tutorials available online that can provide a visual guide.
- Keep Track of Stitches: Use stitch markers, especially in the initial rounds, to mark the first and last stitches of a round. This is a simple but effective trick to help ensure your stitch count stays accurate throughout the crochet project.
- Check Your Gauge: Don’t skip the gauge swatch! If your swatch is too big, try a smaller hook. If it’s too small, try a larger hook. Matching the gauge is crucial for the hat to fit its intended wearer properly.
- Don’t Be Afraid to Undo: Crochet is forgiving! If you make a mistake, it’s easy to unravel a few stitches or even a whole row and try again. Patience is key when learning new crochet patterns.
- Weave in Ends Neatly: A large-eye needle makes weaving in all those yarn tails much easier, ensuring a clean and professional-looking finish for your crochet dinosaur hat.