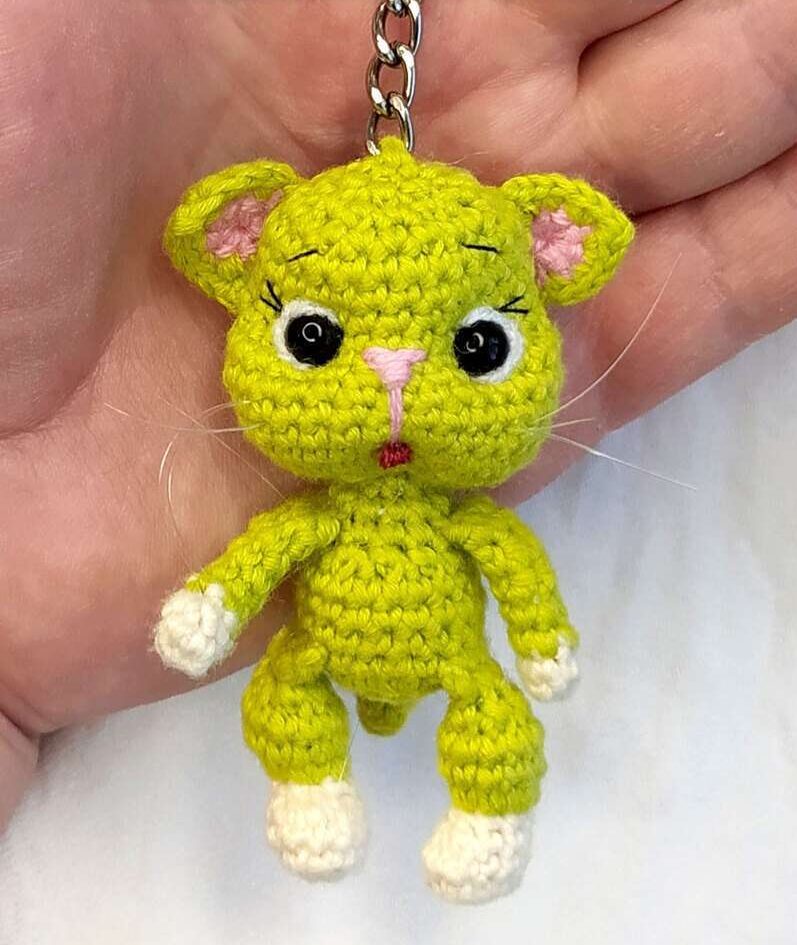
Crochet Avocato Kitty: A Detailed Tutorial for Beginners
Moving on to the head:
- Round 13: 9 inc (18)
- Round 14: (2 sc, inc) * 6 (24)
- Round 15: 5 sc, 3 inc, 9 sc, 3 inc, 4 sc (30) Important! The increases must be placed exactly on the sides, shaping the cheeks.
- Rounds 16-19: 30 sc – 4 rounds (30)
After round 19, work 1-2 extra sc to shift the end of the round to the center of the back. - Round 20: 5 sc, 3 dec, 8 sc, 3 dec, 5 sc (24) Important! The decreases must be placed exactly on the sides!
- Rounds 21-24: 24 sc – 4 rounds (24) – This forms the neck.
- Round 25: (2 sc, dec) * 6 (18)
- Round 26: (1 sc, dec) * 6 (12)
- Round 27: 6 dec (6)
Stuff the head very firmly, especially the cheeks. Leave the opening at the top of the head for now – you’ll need it for shaping the face.
Ears (make 2)
These are worked in turning rows to create a triangle shape.
- Row 1: 4 sc in MR, ch 1, turn (4)
- Row 2: (1 sc, inc) * 2, ch 1, turn (6)
- Row 3: 6 sc, ch 1, turn (6)
- Row 4: (2 sc, inc) * 2, ch 1, turn (8)
- Row 5: 8 sc, ch 1, turn (8)
- Row 6: (3 sc, inc) * 2, ch 1, turn (10)
- Row 7: 10 sc, ch 1, turn (10)
- Row 8: (4 sc, inc) * 2, ch 1, turn (12)
- Row 9: 12 sc, ch 1, turn (12)
- Row 10: (5 sc, inc) * 2, ch 1, turn (14)
- Row 11: 14 sc, ch 1, turn (14)
- Row 12: (6 sc, inc) * 2, ch 1, turn (16)
- Row 13: 16 sc, ch 1, turn (16)
- Row 14: (7 sc, inc) * 2, ch 1, turn (18)
- Row 15: 18 sc (18)
Shaping the inner ear:
Using pink yarn, embroider or surface crochet a small triangle inside the ear. Hide the pink yarn ends at the back of the ear using a yarn needle. Leave the green yarn tails for sewing the ears onto the head.
Shaping the Face: The Secret to Expression
This is the most crucial step! Through strategic stitching, our kitty will gain its personality.
- Marking the points for shaping with pins:
- Point 1 (Neck): Between rounds 11 and 12 of the body (this will be our anchor point).
- Points 3 and 3 (Eyes): Between rounds 20 and 21 of the head. This is where the safety eyes will go.
- Creating eye sockets:
- Insert your needle with strong thread into Point 1 (neck) and bring it out at a point near where the first eye will be (let’s call this Point 2 – see the original photo for exact placement).
- Move one stitch to the left and insert the needle back down to Point 1.
- Pull the thread tight and tie a knot. This creates a slight indentation for the first eye.
- Repeat for the second eye: from Point 1, bring the needle out at Point 3 (the marked spot for the second eye).
- Move one stitch to the right and insert the needle back to Point 1.
- Pull tight and tie off the thread.
- Shaping the nose and mouth:
- Attach or mark the eye placement with pins.
- Mark the spot for the nose (between rounds 20-21) and the mouth (between rounds 14-15) with pins.
- Insert the needle with thread near the neck (Point 1) and bring it out at the marked nose spot.
- Take a small stitch on the surface to the marked mouth spot, then bring the needle back to the nose spot (see original photo). Gently pull to create the smile.
- Take another surface stitch from the nose to the mouth, then bring the needle out at the top of the head.
- Bring the other end of the thread to the top of the head as well, pull tight to secure the shape, tie a knot, and trim the excess.
- Creating the mouth and tongue:
- Thread your needle with embroidery floss (red or pink, 3 strands). Insert it through the opening at the top of the head and bring it out at the mouth spot.
- From the mouth, bring the needle out to the side, near the nose area.
- Insert the needle on the other side and bring it out nearby to form a small tongue shape.
- Trim any excess and secure the thread inside the head.
- Final touches:
- Using a single strand of black sewing thread, embroider the eyebrows and little eyelashes.
- Pin the ears symmetrically on the head and sew them on securely using the green yarn tails.
- Close the opening at the top of the head by weaving the yarn through the last round and pulling tight.
Assembling Your Kitty
- Sew the back paws onto the body. Make sure they are symmetrical so your kitty can sit up straight.
- If you like, you can add a touch of blush to the cheeks using dry pastels or regular makeup blush.
- If you want to give your kitty an “avocado slice,” you can crochet a small oval from brown yarn and sew it onto the tummy.
Congratulations! Your Avocado Kitty is complete! He’s sure to become a favorite in your collection or a wonderful handmade gift for loved ones. This little guy will bring warmth and smiles to any home. Share photos of your creations and don’t be afraid to experiment with colors and facial expressions!