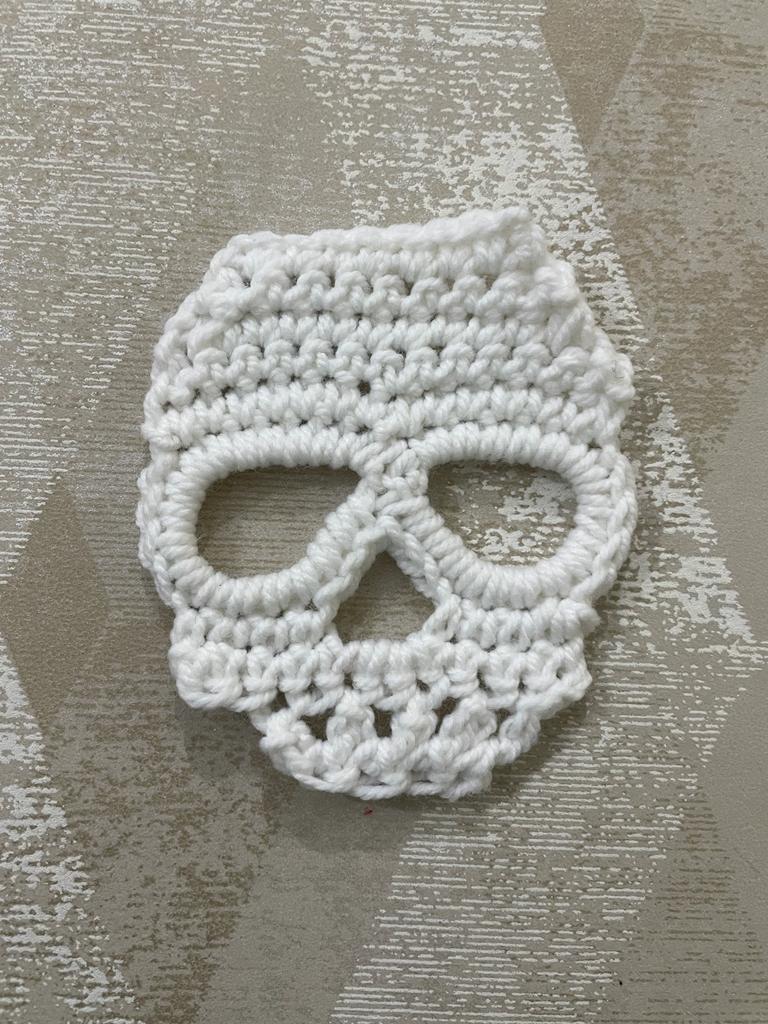
Kutie Crochet Skull Pattern: A Sweet & Spooky Make for Beginners
Hello, crochet friends! 👋🧶
Are you ready for a fun, fast, and oh-so-adorable project? Today we’re making a tiny crochet skull—perfect for keychains, bag charms, Halloween decorations, or even as a cute gift for someone who loves a little bit of cute spookiness!
This pattern is designed with beginners in mind. It uses simple stitches and works up quickly, so you can make a whole bunch in no time. Whether you’re new to amigurumi or just looking for a relaxing mini-project, this little skull is sure to put a smile on your face.
I love patterns that are both simple and satisfying, and this one definitely fits the bill. You only need a small amount of yarn, and you’ll be amazed at how a few rounds can turn into something so charming!
So grab your hook and let’s get started on this kutie little skull. 💀❤️
Materials You’ll Need
- Yarn: DK weight yarn in White
- Crochet Hook: 4mm
- Yarn Needle
- Scissors
Crochet Abbreviations Used
- ch = chain
- sc = single crochet
- dec = decrease (single crochet two stitches together)
- sp = space
- slst = slip stitch
- st(s) = stitch(es)
Finished Size
This mini skull measures about 2–2.5 inches wide, depending on your tension—perfect for attaching to a keyring or using as a decorative accent
Pattern Instructions
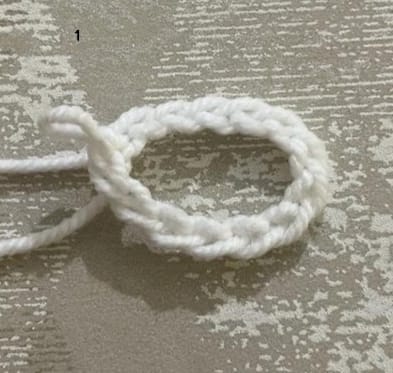
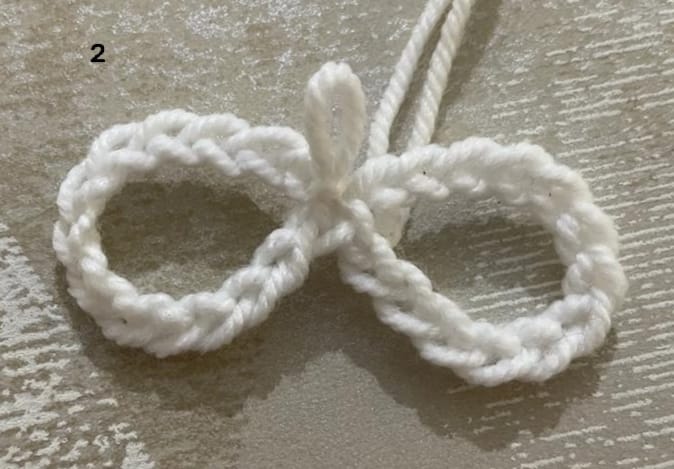
Step 1: Create the Base Rings
We’ll start by making two small rings that form the foundation of the skull.
- Row 1: Chain 14. Slip stitch into the first chain to form a ring. Repeat to make a second ring exactly the same. You’ll have a figure-8 or infinity symbol shape.
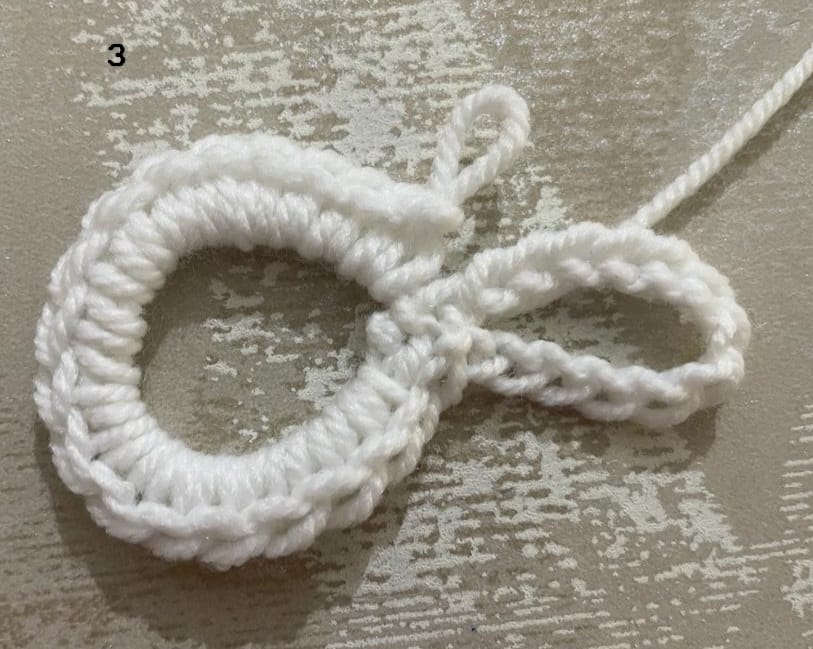
Step 2: Work Around the Rings
- Round 2: Chain 1. Make 18 single crochet stitches into the first ring. Then make 18 single crochet stitches into the second ring. You’ll have 36 stitches total. Cut the yarn.
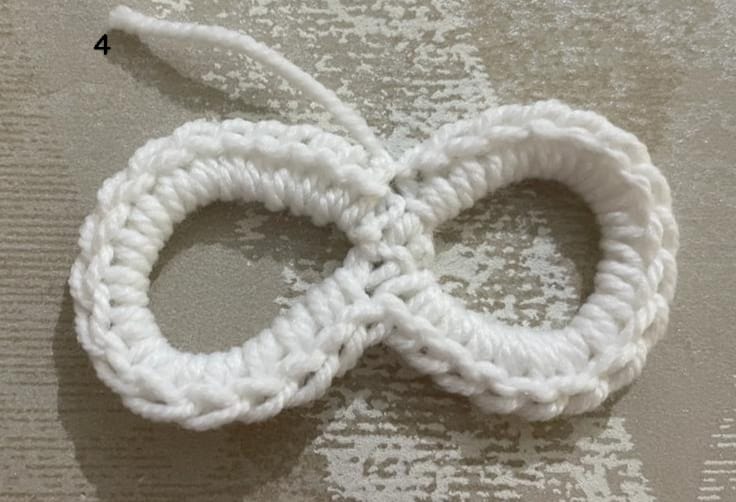
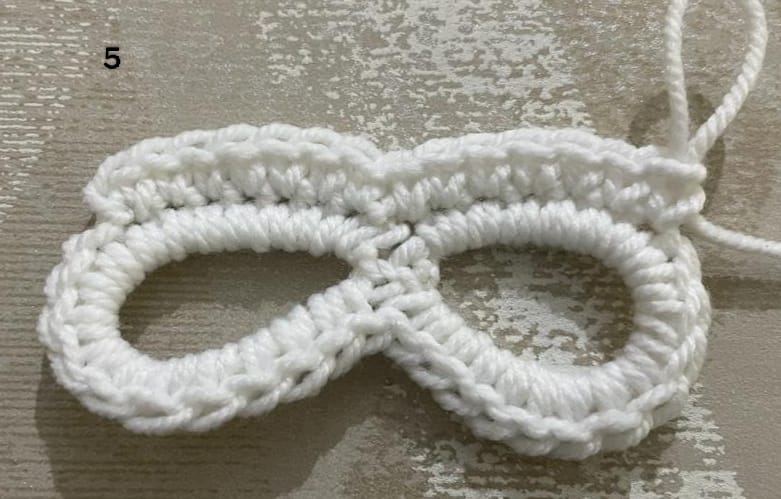
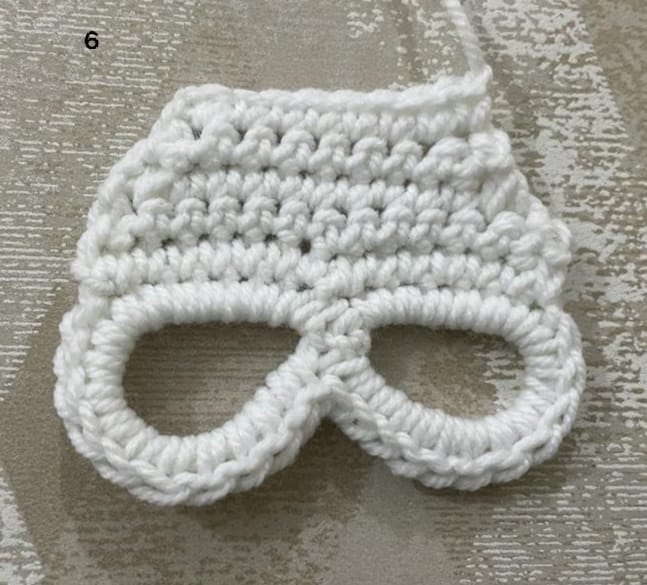
Step 3: Shape the Top of the Skull
- Round 3: Join yarn in the last 7 stitches of one ring. Make 7 sc across those stitches, then make 7 sc into the first 7 stitches of the second ring. You’ll have 14 stitches.
- Round 4: Ch 1. 1 sc dec, 10 sc, 1 sc dec across. (12 stitches)
- Round 5: Ch 1. 1 sc dec, 8 sc, 1 sc dec across. (10 stitches)
- Round 6: Ch 1. 1 sc dec, 6 sc, 1 sc dec across. (8 stitches)
- Round 7: Ch 1. 1 sc in each stitch across. (8 stitches) Cut the yarn.
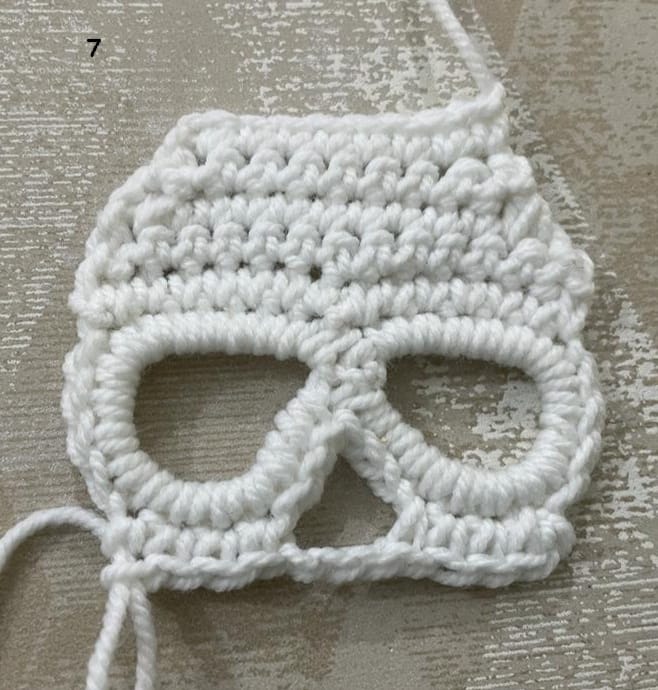
Step 4: Work the Lower Jaw
Now we’ll work on the bottom part of the skull to form the jaw.
- Round 8: Count 7 stitches from both rings (where you didn’t work earlier). Join yarn. Ch 1. Make 4 sc, skip the next 3 stitches from both rings (6 stitches total), chain 3, then make 4 sc in the last 4 stitches. (8 stitches + 3 ch)
- Round 9: Ch 1. 4 sc, 3 sc into the chain-3 space, 4 sc. (11 stitches)
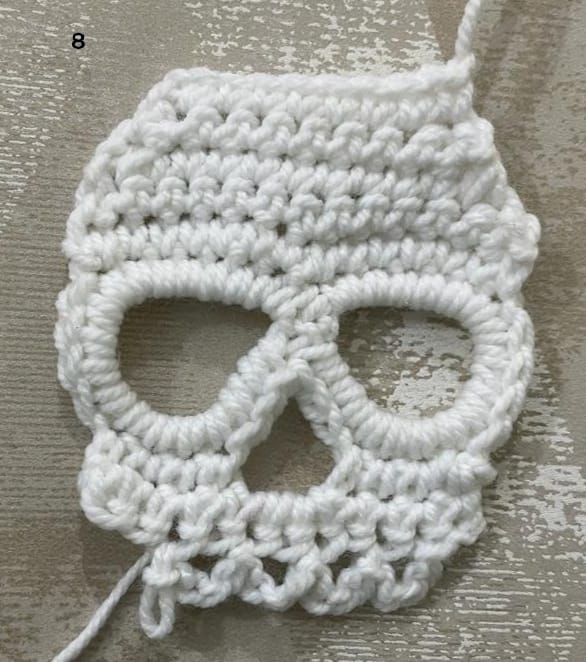
Step 5: Create the Eye Holes
- Round 10: Slip stitch into the next 2 stitches. Then, chain 3, skip 1 stitch, slip stitch into the next stitch — repeat 4 times to create 4 loops.
- Round 11: Ch 1. Slip stitch into the first loop, then make 1 sc in each of the 4 loops. (4 sc)
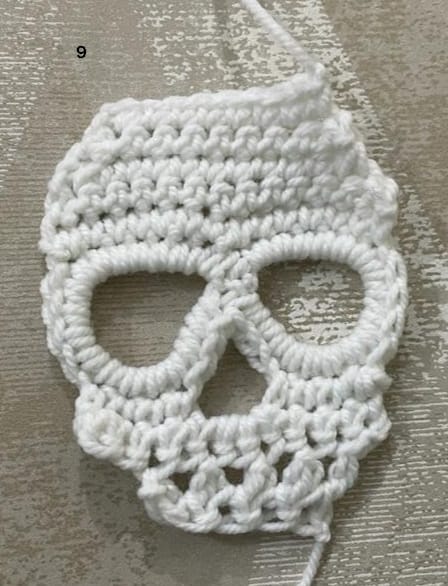
Step 6: Finishing
Cut the yarn, leaving a tail. Weave in all ends using your yarn needle
Tips for Beginners
- Use stitch markers to keep track of the beginning of rounds if needed.
- Keep your tension even so the skull holds its shape nicely.
- If you’re making a keychain, attach a small ring before closing the top
You’re All Done!
Yay! You’ve just created your very own cute crochet skull 🎉
These little guys are so fun to make in different colors—try black, pastels, or even sparkly yarn for a festive twist