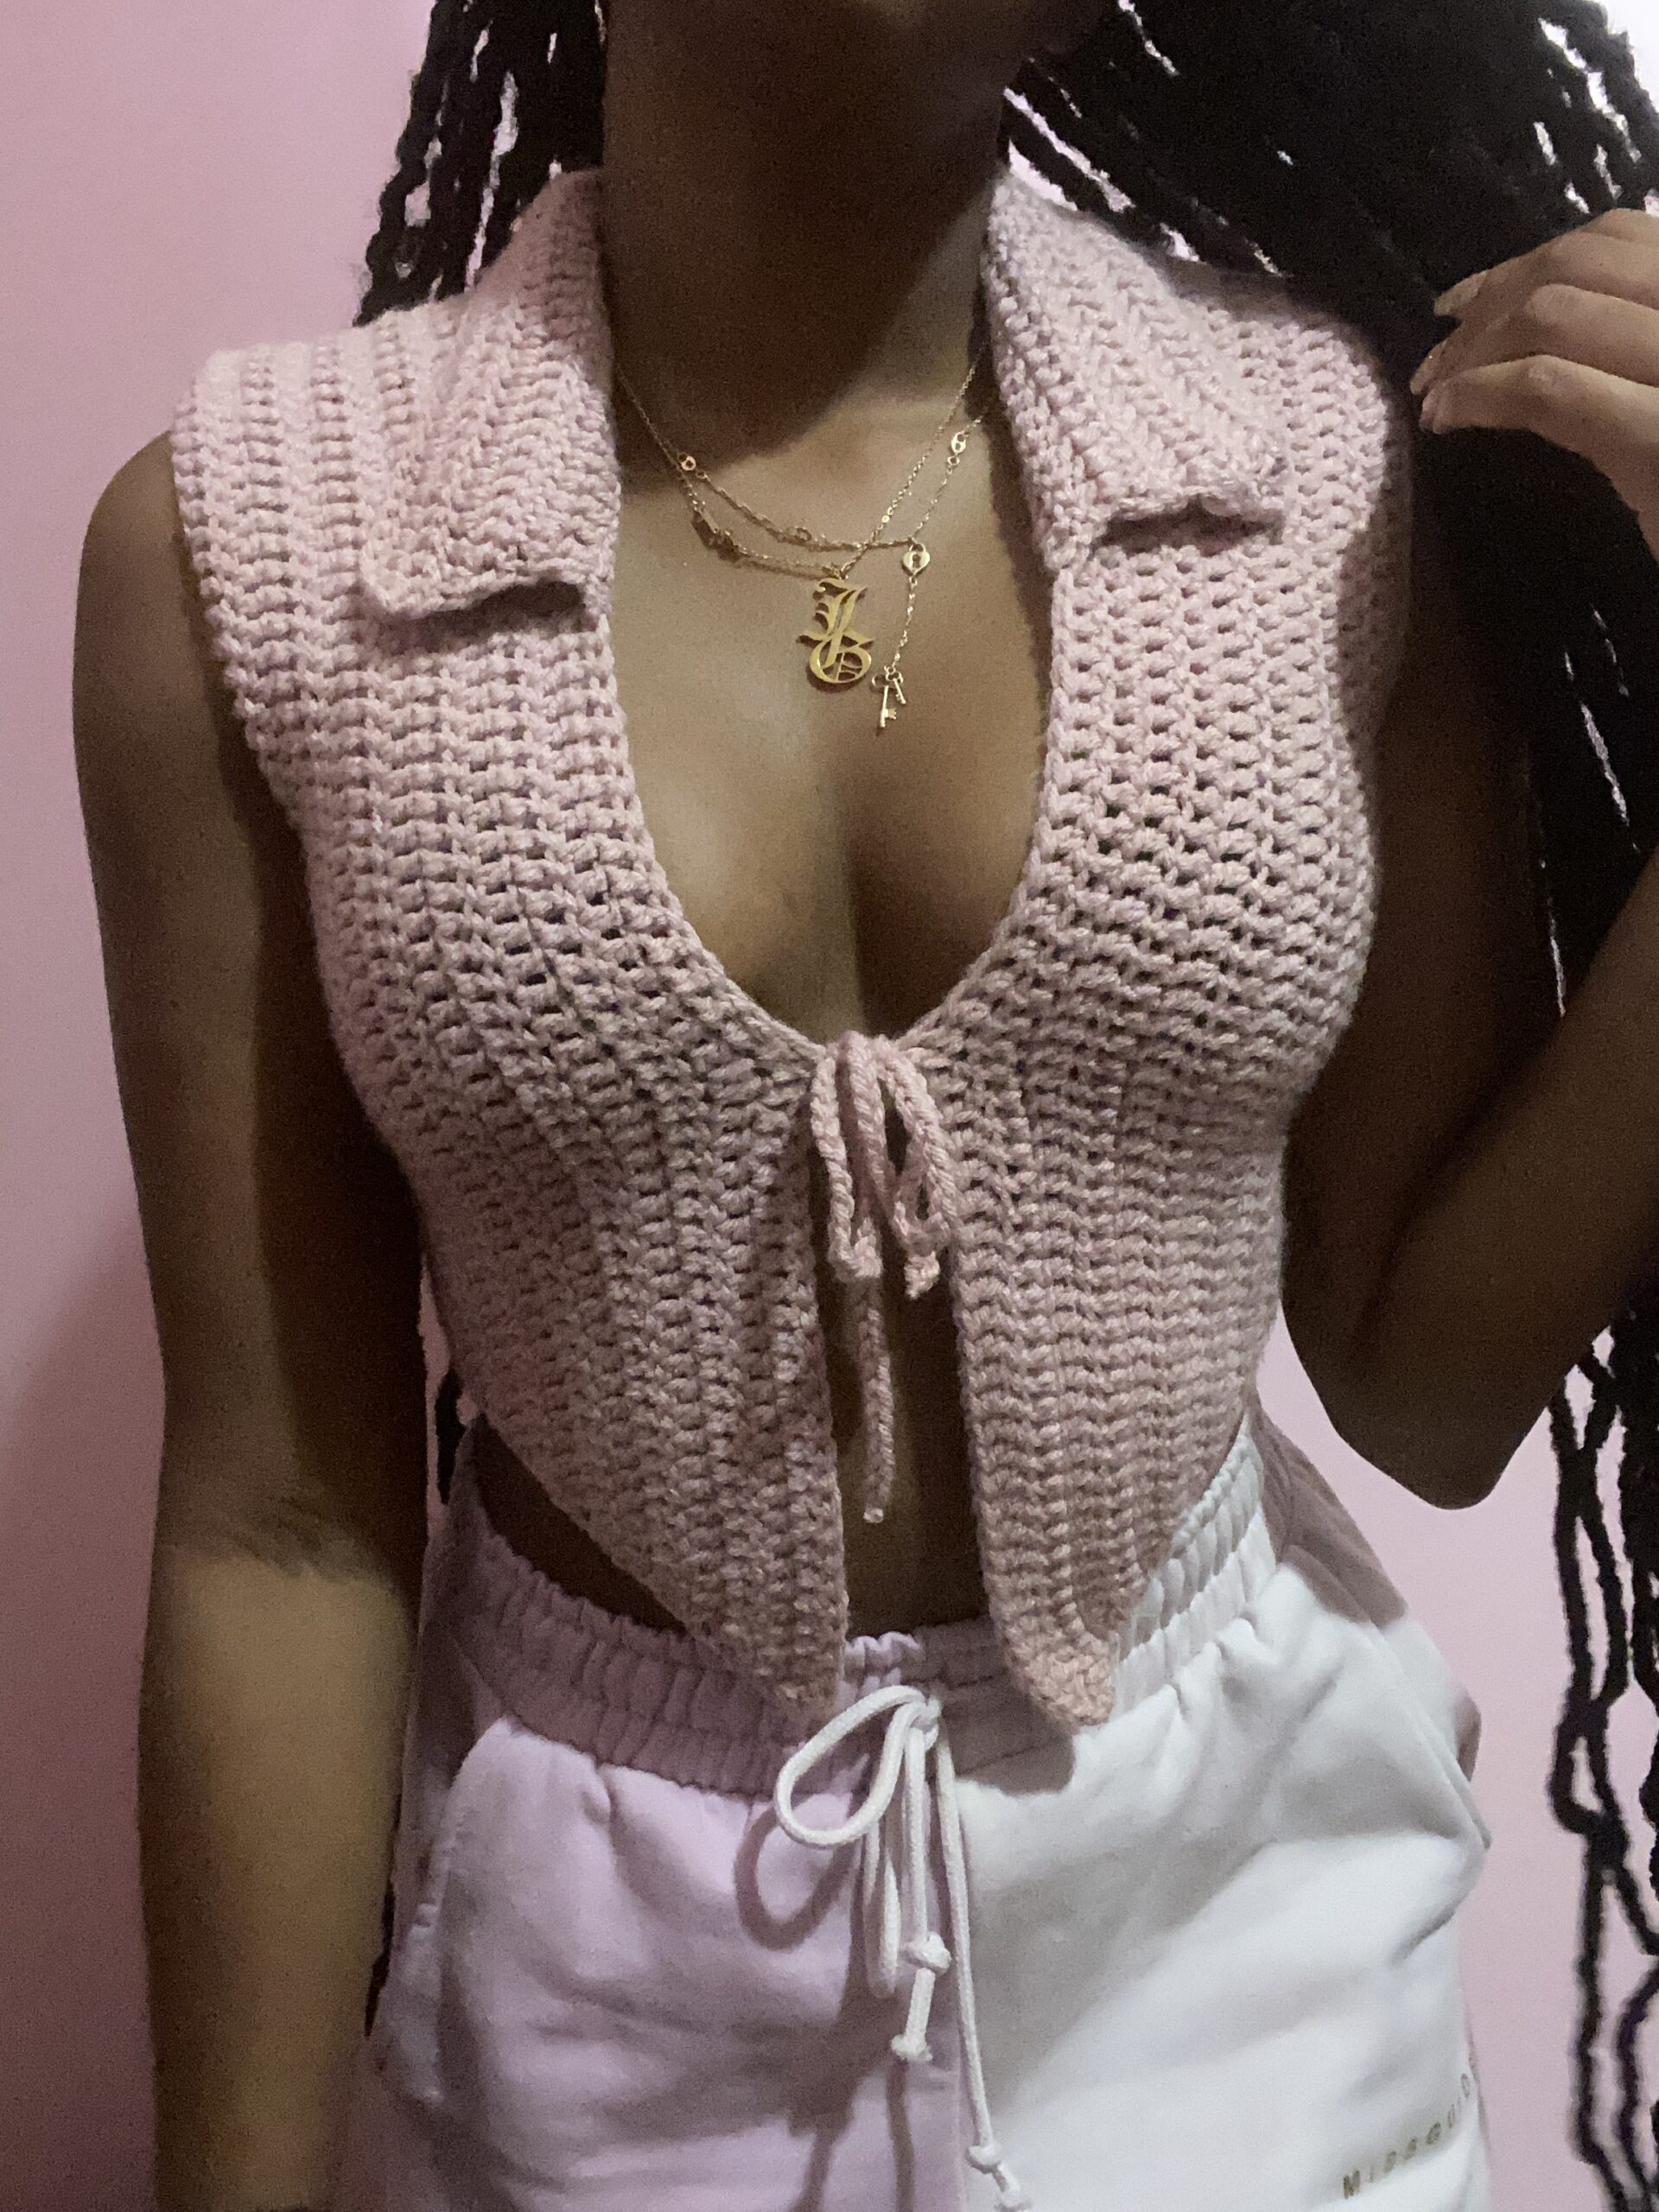
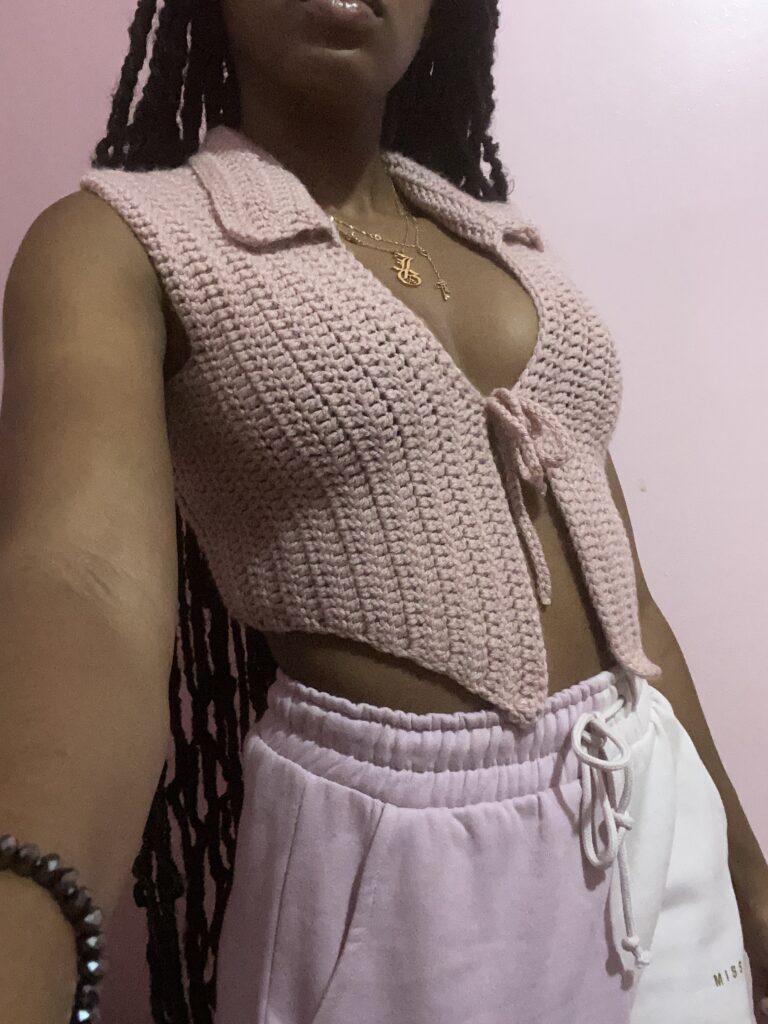
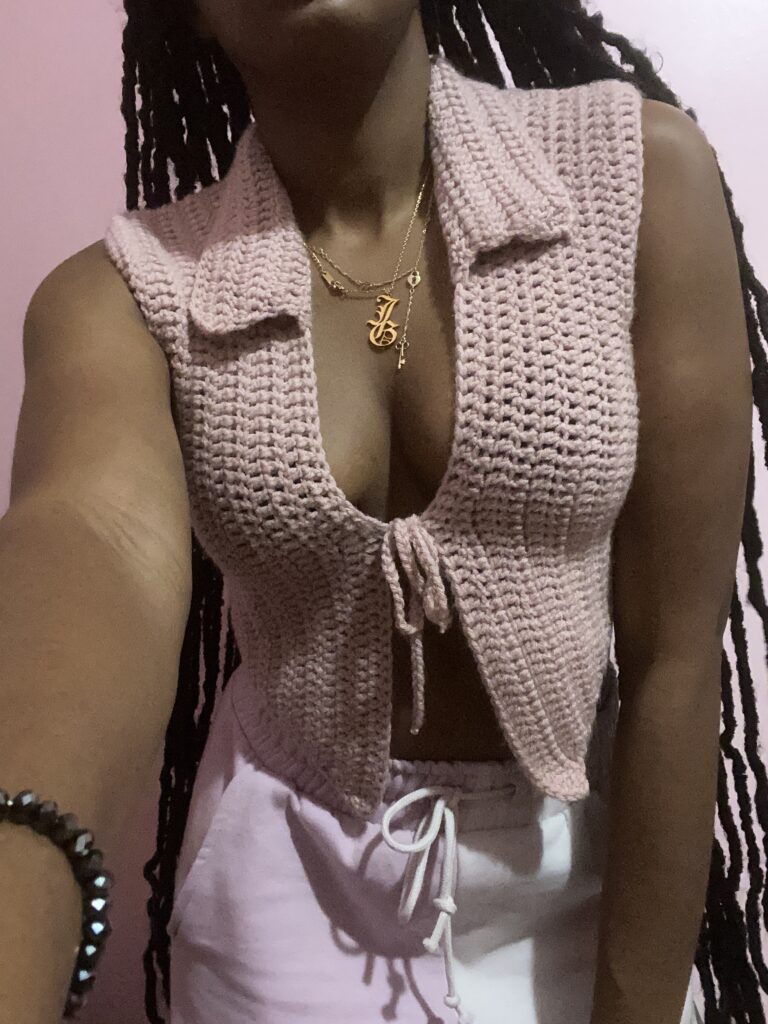
The Tie Me Up Top Crochet Pattern
Materials
Gather your supplies to create your stylish “Tie Me Up” sleeveless top. This pattern uses standard US crochet terms.
Yarn and Hook
- Hook Size: 4 mm crochet hook
- Yarn: Hobby Lobby “I Love This Yarn” brand (7 oz; 355 yds), 1 skein used.
- Yarn Substitutes: Yarn Bee Sugarwheel, Bernat Premium, Caron Simply Soft, Big Twist Soft
Other Notions
- Scissors
- Tapestry needle (for weaving in ends)
Abbreviations
Familiarize yourself with these standard US crochet terms before you begin your project:
- Ch: Chain
- Dc: Double crochet
- Sl St: Slip Stitch
- St(s): Stitch(es)
- Sk: Skip
Finished Size & Pattern Notes
This crochet pattern is designed for a medium-sized top with a C cup, as modeled on a 27″ waist and 35″ bust. Detailed instructions are provided for various sizes: XS, S, M, L, and XL.
Size-specific numbers are indicated in parentheses, such as “ch 145 (155, 170, 190)”. Here, ‘145’ is for size XS, ‘155’ for S, ‘170’ for M, and ‘190’ for L (XL sizes follow this pattern where provided). If only one number is listed, it applies to all sizes. To make following the pattern easier, we recommend highlighting or underlining all numbers pertaining to your chosen size before you start crocheting.
Important Note: The turning chain (Ch 3) at the beginning of a row counts as a stitch.
Crochet Instructions
This beginner-friendly pattern guides you through creating each section of your sleeveless top. Remember that a Ch 3 at the beginning of a row typically counts as a stitch.
Front Panels (Make 2)
You will create two identical front pieces for your top.
- Foundation: Ch 29 (21, 25, 33, 37)
- Row 1: Dc in the 4th ch from hook, then Dc all the way across. Ch 3 & turn.
- Row 2 – 6 (Work 4 rows for XS & S; 8 rows for L & XL): Dc into the 2nd st from the hook and all the way across. Ch 3 & turn. (For M, this section covers rows 2-6, totaling 5 rows.)
- Row 7 (This will be Row 5 for XS & S; Row 9 for L & XL): Dc into the 2nd st from the hook and all the way across. Ch 25 (22, 24, 28, 30) & turn. (For larger chested L, add +10 ch; for larger chested XL, add +15 ch.)
- Row 8: Dc in the 4th ch from hook, then Dc all the way across. In the last st, place 2 Dc (this creates an increase). Ch 3 & turn.
- Row 9: Place a Dc in the first St (this Dc + the beginning Ch is your increase). Dc all the way across. Ch 3 & turn.
- Row 10-18 (Continue until Row 16 for XS, Row 17 for S, Row 19 for L, Row 20 for XL): Repeat rows 8 & 9 alternatively. (For M, this covers rows 10-18. For larger chested L, add +3 rows; for larger chested XL, add +4 rows to these final row counts.)
Bind off after completing the final row for your size.
Back Panel
Next, you’ll create the main back section of your top.
- Foundation: Ch 52 (42, 48, 58, 66). (For larger chested L, add +10 ch; for larger chested XL, add +15 ch.)
- Row 1: Dc in the 4th ch from hook, then Dc all the way across. Ch 3 & turn.
- Row 2 – 10 (Work 8 rows for XS, 9 rows for S, 11 rows for L, 12 rows for XL): Dc into the 2nd st from the hook and all the way across. Ch 3 & turn. (For M, this section covers rows 2-10, totaling 9 rows. For larger chested L, add +3 rows; for larger chested XL, add +4 rows to these row counts.)
- Row 11 (This will be Row 9 for XS, Row 10 for S, Row 12 for L, Row 13 for XL): Dc into the 2nd st from the hook and all the way across.
Bind off at the end of this row.
Continue with the upper section of the back panel:
- Row 12: Sl St into the first St and Ch 3. Dc in the next 45 (35, 41, 51, 61) Sts. Ch 3 & Turn.
- Row 13 – 18: Dc into the 2nd st from the hook and all the way across. Ch 3 & turn. (You should maintain 45, 35, 41, 51, or 61 stitches depending on your size.)
- Row 19: Dc into the 2nd st from the hook and all the way across. Ch 7 & turn. (Stitch count remains the same as previous row.)
- Row 20: Dc in the 4th ch from hook, then Dc all the way across. Ch 3 & turn.
- Row 21 – 30 (Continue until Row 28 for XS, Row 29 for S, Row 31 for L, Row 32 for XL): Dc into the 2nd st from the hook and all the way across. Ch 3 & turn. (For M, this section covers rows 21-30. For larger chested L, add +3 rows; for larger chested XL, add +4 rows to these final row counts.)
- Row 31: Dc in the 2nd ch from hook and Dc all the way across.
Bind off after completing Row 31.
Collar
Add a neat collar to your top for a polished finish.
- Row 1: Sl St into the 20th St (from the top down) of the right side of the front panel. Dc in every st going toward the top of the front panel, Dc across the top of the back panel, then Dc to the 20th st of the left side of the front panel. Ch 3 & turn.
- Row 2: Dc into the 2nd st from the hook and all the way across. Ch 3 & turn.
- Row 3 – 6: Place a Dc in the first St (this Dc + the beginning Ch creates an increase). Dc all the way across. In the last st, place 2 Dc (this also creates an increase). Ch 3 & turn.
- Row 7: Dc into the 2nd st from the hook and all the way across.
Bind off after Row 7.
Strap
Create the front tie-up strap for your sleeveless top.
- For Sizes XS, S, & M: Ch 45.
- For Sizes L & XL: Ch 75.
- Sl St into every chain for the front tie strap.
Assembly and Finishing
Bringing all your crocheted pieces together is a straightforward process to complete your top.
- Sew the side edges of the front panels to the corresponding side edges of the back panel.
- Sew the top edges of the front panels to the top edge of the back panel.
- Weave in all loose ends securely using your tapestry needle for a clean and professional finish.
Tips for Beginners
As this is a beginner-friendly crochet pattern, here are a few extra tips to ensure your project goes smoothly and you enjoy the process:
- Read Through: Before starting, take a moment to read the entire pattern. Understanding the full flow of instructions can prevent mistakes and help you anticipate steps.
- Highlight Your Size: Use a highlighter or pen to mark all the numbers corresponding to your chosen size (XS, S, M, L, XL). This simple step can significantly reduce confusion and make following the pattern much easier.
- Stitch Markers are Your Friend: For rows with increases, decreases, or where you need to maintain a precise stitch count, consider using stitch markers. They can help you mark the first and last stitch of a row or important turning points.
- Practice Stitches: If you’re new to double crochet (Dc) or slip stitch (Sl St), practice these basic stitches on a small swatch of yarn first. This will help you get comfortable with the tension and movement before you start on your main project.
- Don’t Rush: Crochet is a craft that benefits from patience. Take your time, enjoy the rhythm of the stitches, and don’t be afraid to unravel a section if you spot a mistake. It’s all part of the learning process!
Enjoy making your “Tie Me Up” sleeveless top!