Kitty Bunny Doll: Free Crochet Pattern
Hello, sweet stitchers! 🌸
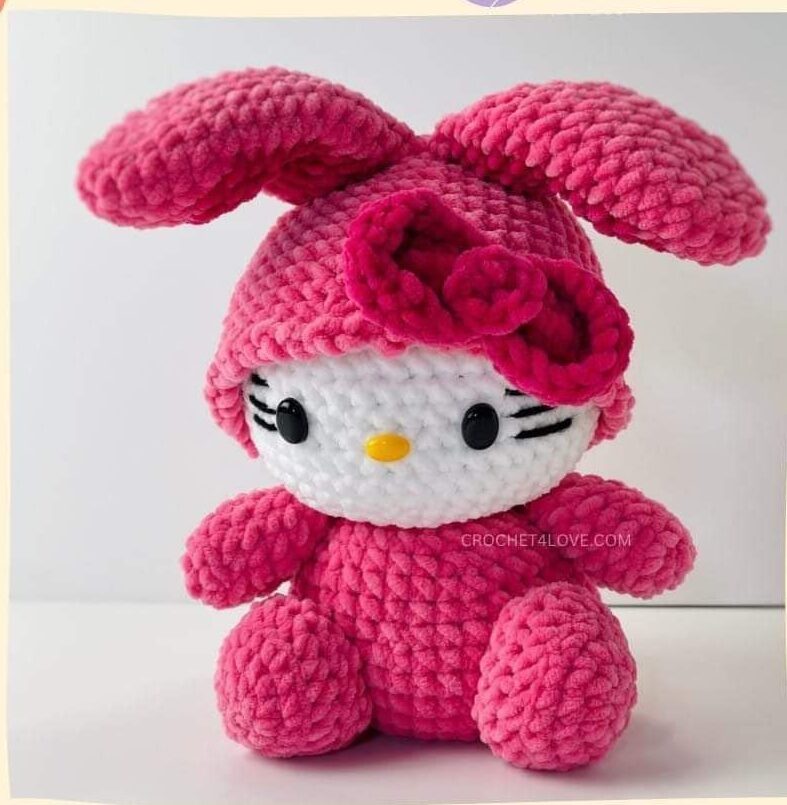
If you’re looking for a project that’s equal parts cute and cuddly, you’ve come to the right place! Today, I’m so excited to share this free Kitty Bunny Doll crochet pattern with you. Standing at 34cm tall, this adorable bunny combines the best of both worlds—kitty ears and a bunny’s charm—all wrapped up in a cozy hooded outfit.
With her pastel colors, sweet expression, and colorful Easter egg accessory, this doll is perfect for seasonal decorating, gift-giving, or simply as a cheerful companion. She’s worked in bulky yarn, which means she works up quickly and is extra huggable when finished!
This pattern is great for intermediate beginners who are comfortable with basic stitches and simple color changes. I’ve included clear instructions and helpful notes to guide you every step of the way.
Let’s pick up our hooks and create some bunny magic together
Materials You’ll Need
Yarn (Bulky Weight 5)
- White (head, hands)
- Light pink (body, hood, arms, legs, tail)
- Dark pink (ear accents, bow)
- Red (optional details)
- Dark blue, purple, beige (colorful egg)
Other Supplies
- 6.0mm crochet hook
- 12x16mm safety eyes
- 10x14mm nose
- Poly-fil stuffing
- Tapestry needle
- Fabric glue
- Scissors
Skill Level
Intermediate Beginner
Finished Size
Approximately 34cm (13.8 inches) from body to ears
Crochet Abbreviations
- MR = magic ring
- ch = chain
- sc = single crochet
- inc = increase (2 sc in one stitch)
- dec = decrease (sc two together)
- hdc = half double crochet
- dc = double crochet
- sl st = slip stitch
- BLO = back loop only
Pattern Instructions
Body (in light pink)
- R1: 8 sc in MR (8)
- R2: 8 inc (16)
- R3: (sc, inc) x 8 (24)
- R4: (3 sc, inc) x 6 (30)
- R5: (4 sc, inc) x 6 (36)
- R6: (5 sc, inc) x 6 (42)
- R7–R10: 42 sc
- R11: (5 sc, dec) x 6 (36)
- R12–R15: 36 sc
- Begin stuffing
- R16: (3 sc, dec) x 6 (24)
- R17: (2 sc, dec) x 6 (18)
- R18: 18 sc
Fasten off
Head (in white)
- R1: 8 sc in MR (8)
- R2: 8 inc (16)
- R3: (sc, inc) x 8 (24)
- R4: (3 sc, inc) x 6 (30)
- R5: (4 sc, inc) x 6 (36)
- R6: (5 sc, inc) x 6 (42)
- R7: (6 sc, inc) x 6 (48)
- R8–R15: 48 sc
- R16: (4 sc, dec) x 8 (40)
- R17: (3 sc, dec) x 8 (32)
- Begin stuffing
- R18: (2 sc, dec) x 8 (24)
- R19: (2 sc, dec) x 6 (18)
Fasten off, leaving a long tail for sewing.
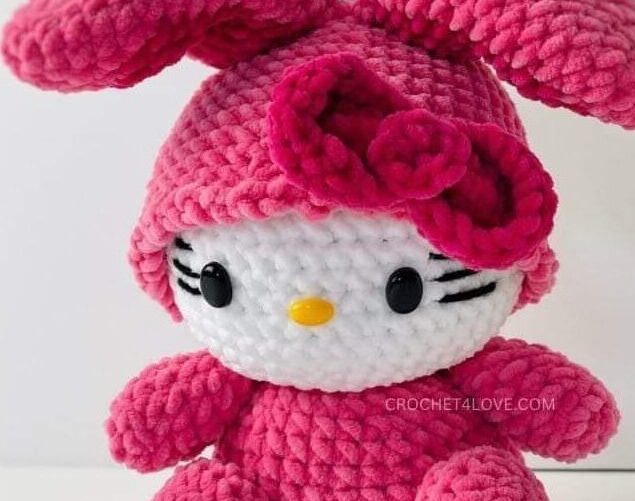
👁️ Attach eyes between Rounds 11 and 12, 7 stitches apart
Hood (in light pink)
- R1: 8 sc in MR (8)
- R2: 8 inc (16)
- R3: (sc, inc) x 8 (24)
- R4: (3 sc, inc) x 6 (30)
- R5: (4 sc, inc) x 6 (36)
- R6: (5 sc, inc) x 6 (42)
- R7: (6 sc, inc) x 6 (48)
- R8–R16: 48 sc
- R17: (6 sc, dec) x 6 (42)
- R18: (sl st, ch 1) x 42 (84)
Fasten off, leaving a long tail for sewing.
Ears (make 2)
Use light pink and dark pink
- R1: 6 sc in MR (6)
- R2: 6 inc (12)
- R3: 12 sc
- R4: (sc, inc) x 6 (18)
- R5: 7 sc (light pink), 4 sc (dark pink), 7 sc (light pink)
- R6–R13: 6 sc (light pink), 6 sc (dark pink), 6 sc (light pink)
- R14: (sc, dec) x 2 (light pink), sc, 2 dec, sc (dark pink), (dec, sc) x 2 (light pink)
- R15: 12 sc
Lightly stuff. Fasten off, leaving a long tail for sewing.
👂 Sew ears between Rounds 5 and 6 of the hood.
Arms (make 2, in light pink)
- R1: 6 sc in MR (6)
- R2: 6 inc (12)
- R3–R6: 12 sc
- R7: (2 sc, dec) x 3 (9)
- R8: 9 sc
- R9: (sc, dec) x 3 (6)
Lightly stuff. Fasten off, leaving a long tail for sewing.
🖐️ Sew arms between Rounds 17 and 18 of the body.
Legs (make 2, in light pink)
- R1: Ch 4, sc in 2nd ch from hook, 2 sc, 3 sc in last ch, work along other side: 1 sc, 1 inc (8)
- R2: inc, sc, 3 inc, sc, 2 inc (14)
- R3: sc, inc, sc, (sc, inc) x 3, sc, (sc, inc) x 2 (20)
- R4: BLO 20 sc
- R5: 20 sc
- R6: (2 sc, dec) x 5 (15)
Fasten off, leaving a long tail for sewing.
🦵 Sew legs between Rounds 7–11 of the body, about 5 stitches apart.
Tail (in light pink)
- R1: 6 sc in MR (6)
- R2: (2 sc, inc) x 2 (8)
- R3: (2 sc, dec) x 2 (6)
Fasten off, leaving a long tail for sewing.
🐇 Sew tail between Rounds 6 and 7 of the body.
Bow (in dark pink)
Part 1:
- Ch 9, sc in 2nd ch from hook, 7 sc, 3 sc in next ch, 6 sc, 2 sc in next ch (18)
- Inc in each st around with variations to shape (see pattern)
- Finish with 30 sc
Part 2:
- 8 sc in MR
Sew both parts together to form bow.
Colorful Egg
Use dark blue, purple, light pink, dark pink, beige
- R1: 6 sc in MR (6)
- R2: 6 inc (12)
- R3: (3 sc, inc) x 3 (15)
- R4: (2 sc, inc, 2 sc) x 3 (18)
- R5: (5 sc, inc) x 3 (21)
- R6: (3 sc, inc, 3 sc) x 3 (24)
- R7–R9: 24 sc
- R10–R12: 24 sc
- R13: (2 sc, dec) x 6 (18)
- R14: (sc, dec) x 6 (12)
- R15: 6 dec (6)
Fasten off and close.
Assembly Tips
- Sew head to body securely using the long yarn tail.
- Attach the hood over the head, positioning ears between Rounds 5–6.
- Embroider or glue the nose in place.
- Use fabric glue to secure the bow and egg if desired.
Your Bunny Doll is Complete!
Congratulations! You’ve just created the most charming Kitty Bunny Doll—a true handmade treasure! 🐰💖